Sketchup and Blender
-
@lobster said:
If detail is what you are after you can use a multires modifier and shrinkwrap on the retopology. shrinkwrap setting project positive and negative.
Regards.
I have just learned about retopology and when to use it, interesting stuff that. So much to learn....
So here I am thinking Z-Brush is the king at sculpting, and just discovered Blenders Dynotopo, WoW!!
Blender is awesome.
-
Blender sculpting methods are competitive to zbrush ones.
If this statement sounds like fanboyism you have to check it first.
http://wiki.blender.org/index.php/Dev:Ref/Release_Notes/2.66/Dynamic_Topology_Sculpting -
@michaliszissiou said:
Blender sculpting methods are competitive to zbrush ones.
If this statement sounds like fanboyism you have to check it first.
http://wiki.blender.org/index.php/Dev:Ref/Release_Notes/2.66/Dynamic_Topology_SculptingI have seen a lot of your sculptures on Blender, I'm very interested in the style you use, not sure if you are using some sort of displacement brush or new method, got a link to a tutorial? Those scifi looking things (do not know what to call them as they look like organic space ships)
-
Oh, those scifi looking things?
Well, here is the huge thing LOL
http://blenderartists.org/forum/showthread.php?273033-Sculpting-with-UVs-and-displacements
How to align UVs on a geometrical texture. This is all about it. -
Yep this Blender Artist thread is an antology one and a pleasure for the eyes!

Now more than 50 pages! And seems with no lilmit!
by Michalis


The one who start this style was Gutalin with Zbrush
 (who is not the same price than Blendy

-
Okay, I did some leg work and believe I found a work around, I am still exploring how it all works but so far so good.
Say you have an ugly mesh that you need to clean, simplify or turn to quads then use Z Brush or 3D Coat.
Save model as an obj, open in 3D coat and hit autopo. It will fix holes, clean mesh and turn it into quads ready for 3D printing or use in another app like Blender, 3D Max etc as there are applinks.
Image shows original ugly SU mesh and new fixed mesh (also reduced) when reimporting to SU it triangulates again but this time it's clean.
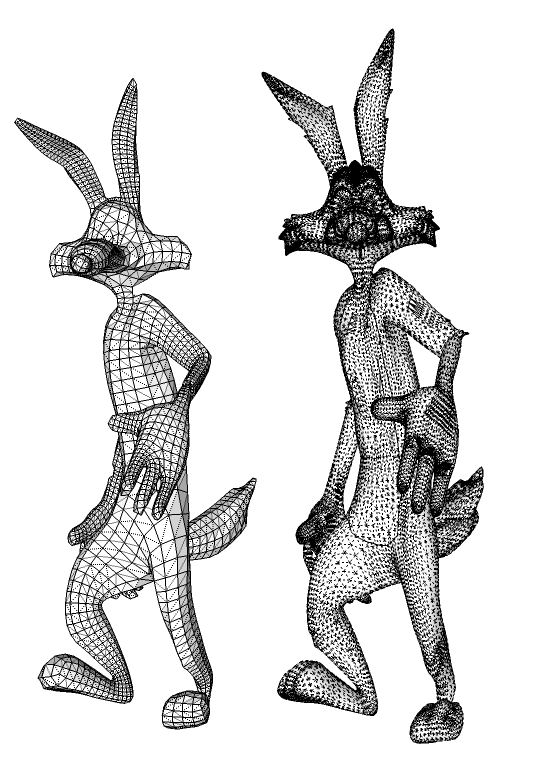
This is how the mesh is actually.
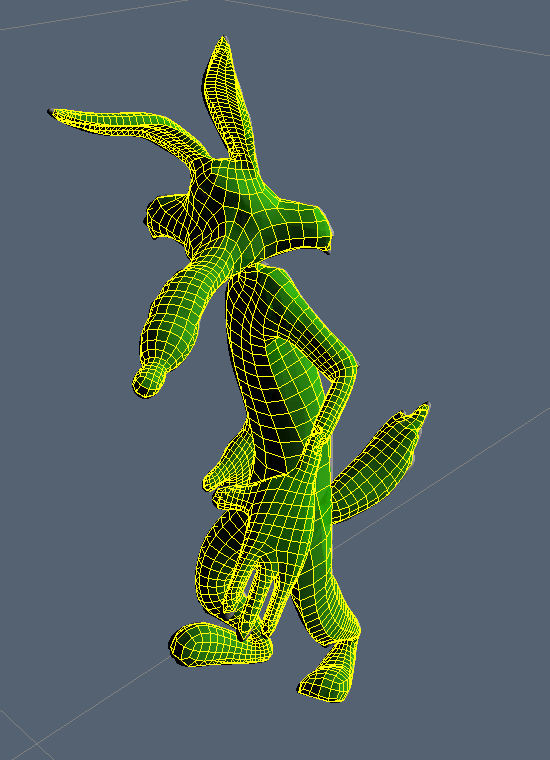
Result.
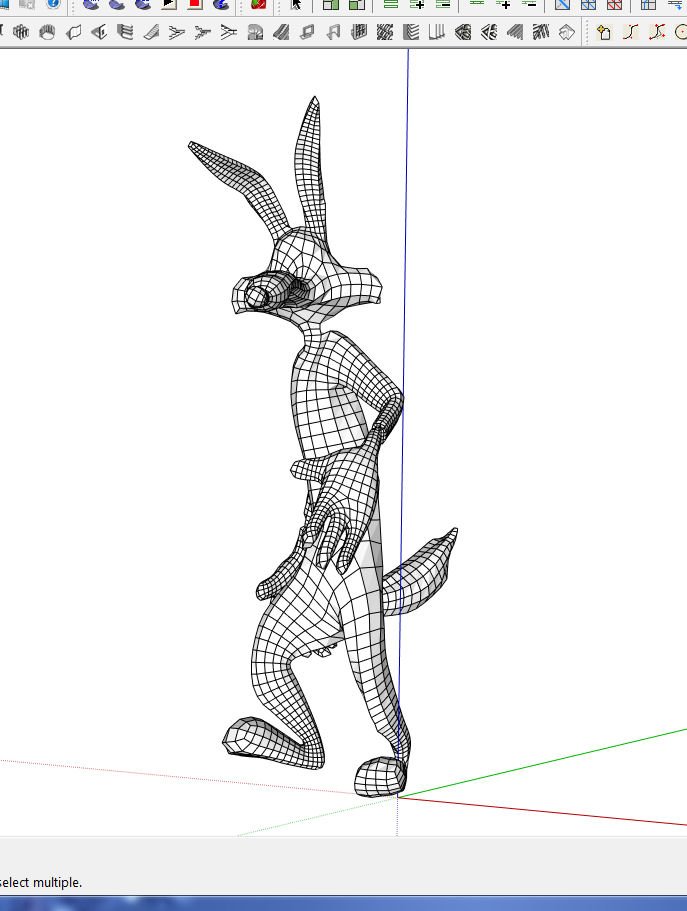
-
That's a good looking mesh. A question - was the 'ugly' mesh made in SketchUp / Artisan?
-
@arail1 said:
That's a good looking mesh. A question - was the 'ugly' mesh made in SketchUp / Artisan?
Yeah, Artisan is awesome but it leaves a miserable mesh in it's wake.
-
You have also Qremesher in Zbrush who makes automatic quadrangles!
Maybe the best tool at this day! -
@solo said:
I'm learning Blender arse about face, doing fluids, then particles and fabric.
I want to have fun learning.i think that's an ok approach.
the only real trick is sticking with it..you got it this time
-
Recent betas of 3dcoat! The implementation of a new auto-retopology algorithm. Still in beta but looks promising and already useable.
Z remesher is a little better in organic shapes. 3dcoat is more promising on hard surface cases.
Patience though, another auto retopo tool is coming soon. In blender this time. We'll try not to call it lke "b remesher" LOL
Auto retopology is a dream that is coming true.
Still, serious issues there. Auto retopo tools tend to create endless spiral loops around the mesh, in certain cases.
This is rather impossible to manually edit it.
Blender is great on manual retopology. It provides some excellent new tools. It suffers from ugly visualization issues. I got used to it but if you give a try you will understand what i'm talking about.- contours tool and 2. grid bridge in blender re topology are wonderful and result to very fast and really clean results.
@Pete
Artisan is a nice tool for those who are afraid to get involved in other apps, especially blender.
Because, artisan is basically a box modeling tool.
Blender is superb on box modeling - subd by any aspect. You don't have to retopo anything as a good topology means loops, auto retopology is basically a box modeling. (from a certain point of view)@Pilou
thanks,
Gutalin is a great concept artist, an inspiration and a good Z friend.
However "my" approach is reverse engineering somehow. My goal was to easily export all these as low poly objects to any external renderer or a game engine engine.
Gutalin's approach is very difficult to be exported. (without lose of details and quality)
BTW my artwork you posed above is box modeling - subd result and does not use displacements-UV workarounds.
Here an example of how a low poly (<30-40k faces) looks like. Using Tangent normal maps in cycles. Such scenes take less than 30 sec to render. Ideal as background assets.
And, allow me, my favorite recent experiment.

-
Michalis, is this a low poly subdivision modifier with a displacement texture?
-
Yeah,
well, the first one is a very low poly box modeling ~10k faces. Any detail comes form normal (tangent space) maps.
The second one is dubdivided a lot and displaced by displ maps. Basically a few cylinders with loops on them
Both normal or displacement maps have been baked- constructed by baking a relief modeling, on a single quad face.
You basically model a relief like panel, you place a second one quad object in front of it, you ask blender to bake displ or nor-maps to "active". (active is the last you select, if interested, I could post a workaround on this)
But in the end, you have this pre baked map, you just use the UV editor to align it to the existed topology.
Here comes the tricky part, the powerful UV editor of blender.
From a certain perspective, this is reverse engineering, the goal is to have a very low poly base with all the maps on it. Easy to export in any renderer. Or another application.
It is a game, a kind of a generator, a conceptual art. Still, it is real geometry. Alternatively, an inspiration for other constructions. It became an obsession LOL, a friend named it "loopinitis" decease. -
@michaliszissiou said:
Yeah,
well, the first one is a very low poly box modeling ~10k faces. Any detail comes form normal (tangent space) maps.
The second one is dubdivided a lot and displaced by displ maps. Basically a few cylinders with loops on them
Both normal or displacement maps have been baked- constructed by baking a relief modeling, on a single quad face.
You basically model a relief like panel, you place a second one quad object in front of it, you ask blender to bake displ or nor-maps to "active". (active is the last you select, if interested, I could post a workaround on this)
But in the end, you have this pre baked map, you just use the UV editor to align it to the existed topology.
Here comes the tricky part, the powerful UV editor of blender.
From a certain perspective, this is reverse engineering, the goal is to have a very low poly base with all the maps on it. Easy to export in any renderer. Or another application.
It is a game, a kind of a generator, a conceptual art. Still, it is real geometry. Alternatively, an inspiration for other constructions. It became an obsession LOL, a friend named it "loopinitis" decease.Is there a walk through some place or a video tutorial, I'd really like to learn this and another thing, say I have a shape created in meta modeling and convert it to regular mesh will this process work with it?
-
Michalis is the Gaudi of Blender!

-
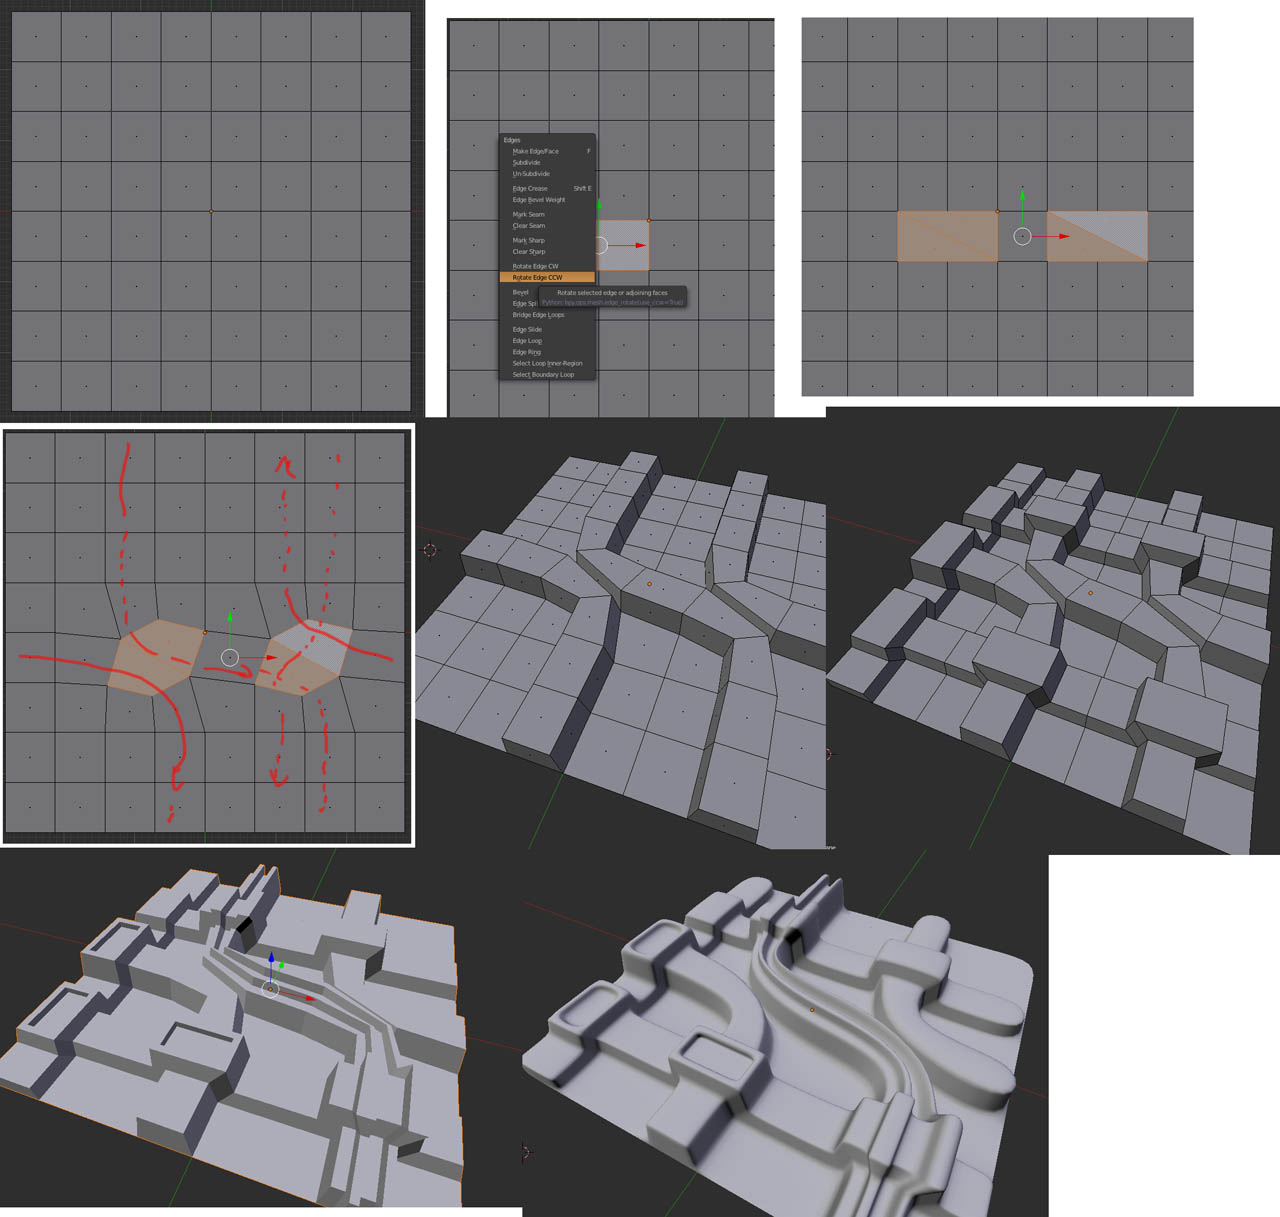
Simple ideas, working on a grid
Loops, extrudes (insets) and subdivisions.Alternatively, if these loops can follow a geometrical displacement panel-map, I mean, if the selected face loop can be unwrapped as an aliened quad row on a geometrical pattern…. such a displacement will follow the topology.
This is the basic idea. Too much work? Blender UV editor can do it automatically with 1-2 clicks.
-
@unknownuser said:
Is there a walk through some place or a video tutorial, I'd really like to learn this and another thing, say I have a shape created in meta modeling and convert it to regular mesh will this process work with it?
A video tut?
Oliver Villar did a tutorial based on this. It explains only the basics though. There is much more potential on this method.
http://www.youtube.com/watch?v=3wyzvsmfia0&feature=youtu.be -
I must admit i did not really go for tutorials when i first started learning blender.
Even if this modelling time lapse isn't what you want to model in Blender i think it says more about modelling, approaches to modelling and retopology (after the z brush bit) than quite a few of the tutorials i have subsequently watched.
If in doubt just start modelling a hand in mid air and end up with the right number of edges to join to the arm! Using the sculpt brushes to shape the low poly mesh e.t.c.
it was definitely, mind blowing.
Regards
-
Had some fun with Pete's model...
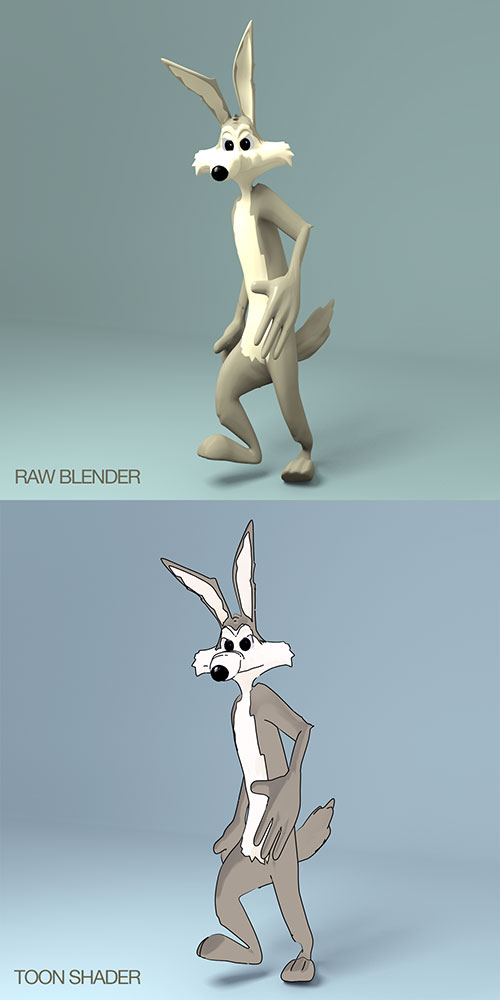
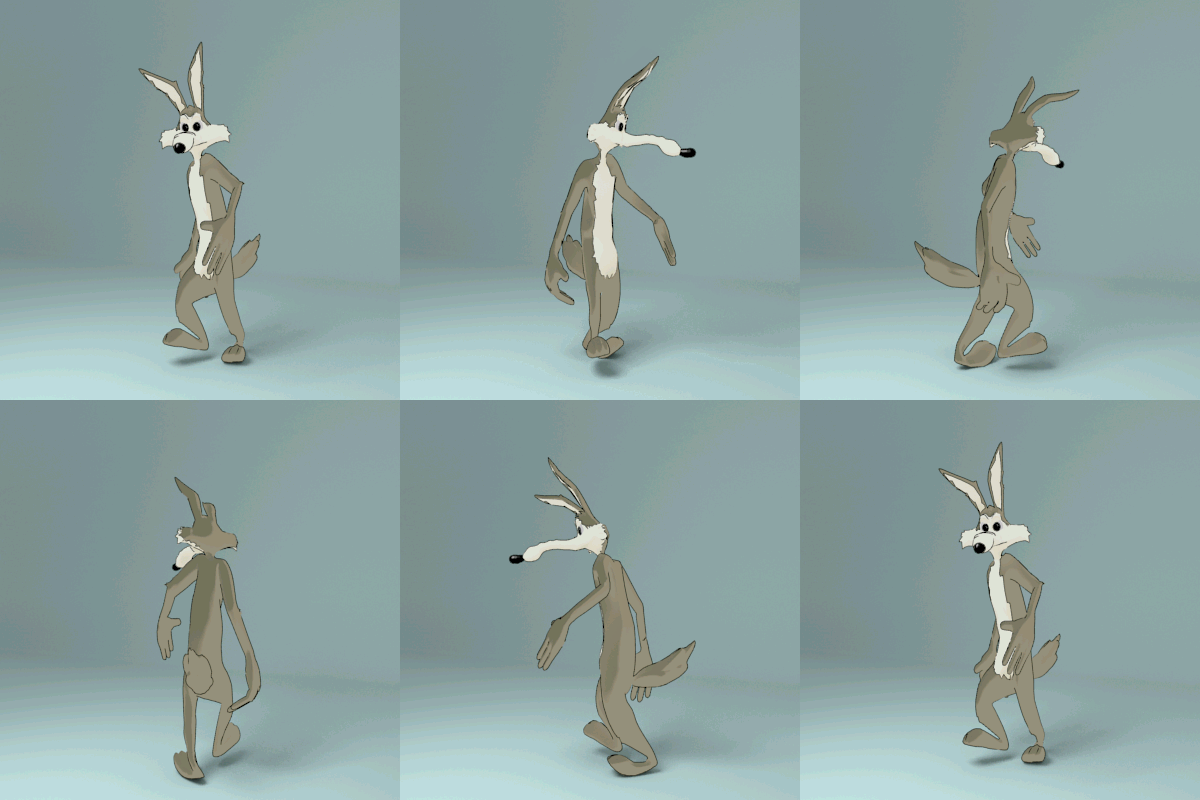
Properly meshed and rigged this will make for some fun loony tune time

-
Funny : a French Blender Guru is named CoyHot!

Site in English

Hello! It looks like you're interested in this conversation, but you don't have an account yet.
Getting fed up of having to scroll through the same posts each visit? When you register for an account, you'll always come back to exactly where you were before, and choose to be notified of new replies (either via email, or push notification). You'll also be able to save bookmarks and upvote posts to show your appreciation to other community members.
With your input, this post could be even better 💗
Register LoginAdvertisement


