[REQ] Edge 2 Groove
-
As sdmitch has found, doing it programmatically is fraught with challenges...
-
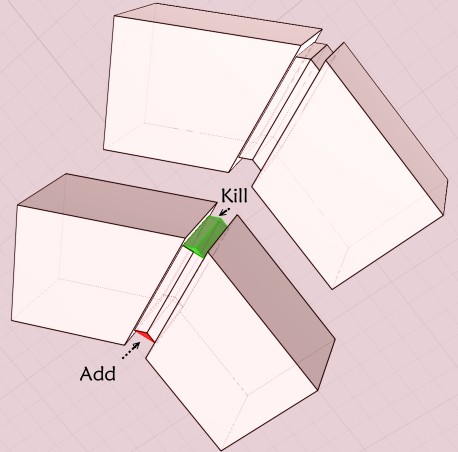
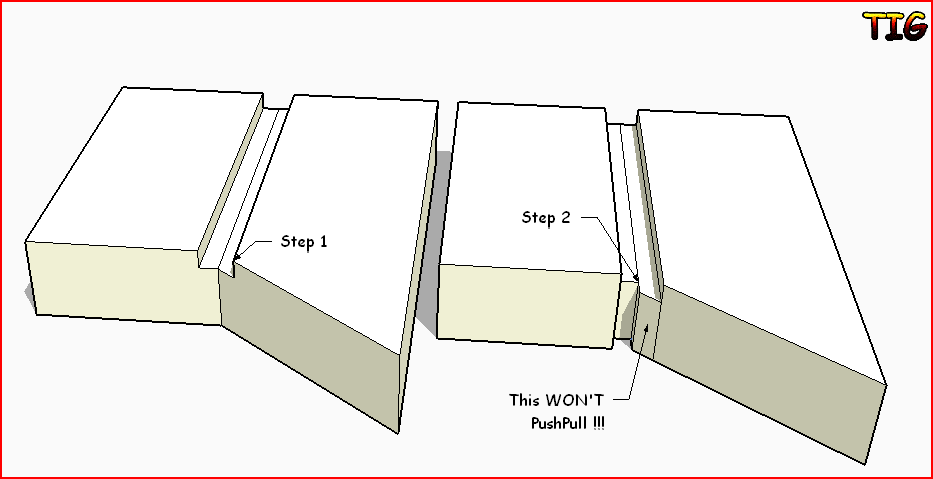
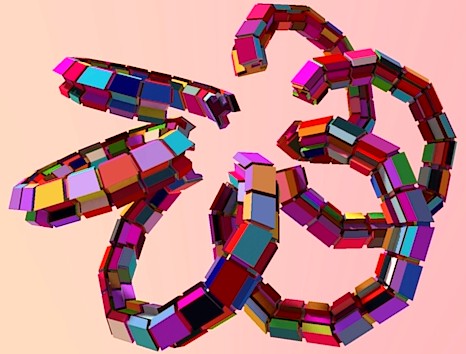
like this

Red and Green prism volumes are equal
Groove is constant
Click for all image
-
That only works for parallel faced boxes - it won't work if it has non-parallel facets or only some faces are to be grooved...

-
That is the case of the EartMover example asked
Just angle change between elements so the prism will be not always the same -
@unknownuser said:
@ EarthMover
Why your model has no bottom faces?
That will not solids! So possibilitiy to use boolean operation will be forbidden!Sorry Pilou, I forgot I deleted the bottom faces while playing with Profile Builder. Forgot to add them back. If you close the bottom face, you can add the edges back using "Split Sausage".
The shape was made by drawing 2 curves, then using BZ Convert to Polyline Divider to regulate the segments. (Or SDMitch's EqSegCurve would work) I think I then used Extrude Edges by Vector in the Z direction and JPP to add volume. (Or you could go Extrude Edges by Offset, JPP) Thus maintaining the segments throughout the process.
Not sure why select edges by length doesn't work for you. Quad Face tools, select loops and rings should work fine as it's all quads. Also , with Selection Toys > Selected Quad Face Loops to select the faces in loop. Also easy to drag select all and Selection Toys > Select only edges or faces.
-
@tig said:
As sdmitch has found, doing it programmatically is fraught with challenges...
I see. The distance changes between the perpendicular offsets. I guess ideally would be to move the offset edges via their verticies, essentially moving four verts and connecting them, instead of four edges and trying to align them. Of course I have no idea if this is possible, just thinking out loud!
What if the top and sides were run with separate operations? Or if corners were restricted to only 90 degrees? My example is a bit extreme for most users who would need a tool like this. Things like furniture, buildings and other wood structures are typically square. I do a lot curved step treads, curved knee walls, pool copings, brick banding, arches, etc. However, what I do might be too generalized for what would benefit the masses. I just don't want to put my needs ahead of others.
-
@unknownuser said:
What is the "Split Sausage" function
http://forums.sketchucation.com/viewtopic.php?p=386610#p386610
-
Many thanks : An another one that I had missed when i was absent

-
What is the "Split Sausage" function and where i can find it ?
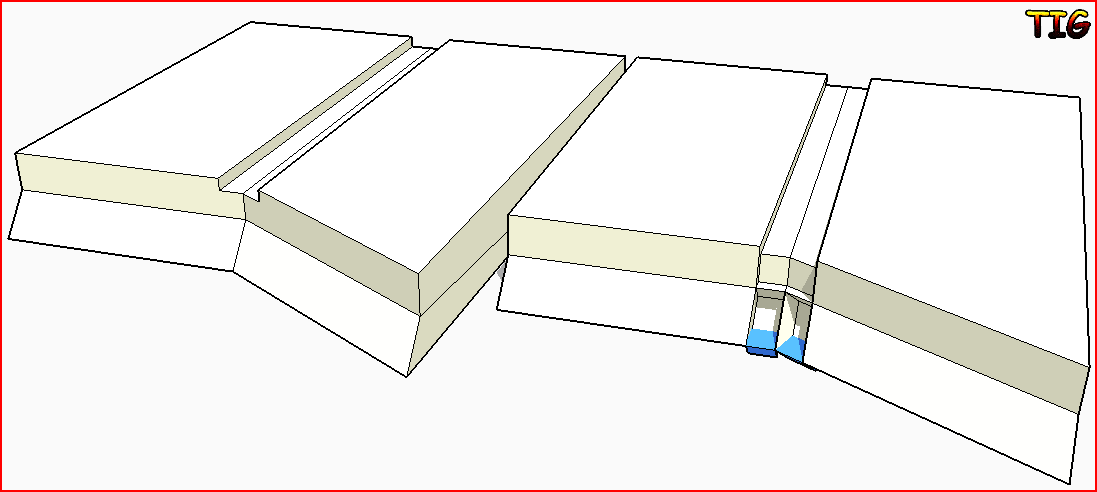
No problem for push the top and botton face with normal PushPull
Joint Push Pull don't make these vertical faces Pushed
The Smart Puspull make the good internal Push face alas it don't make the erasing!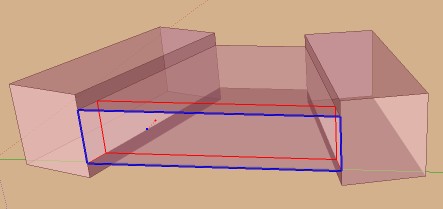
-
Seems easy

Just code the repeat process
-
Pilou... you faked the image !
Tinker!
-
I think Pilou is suggesting first and second push both on the Z. The second push requiring another offset first.
-
@earthmover said:
I think Pilou is suggesting first and second push both on the Z. The second push requiring another offset first.
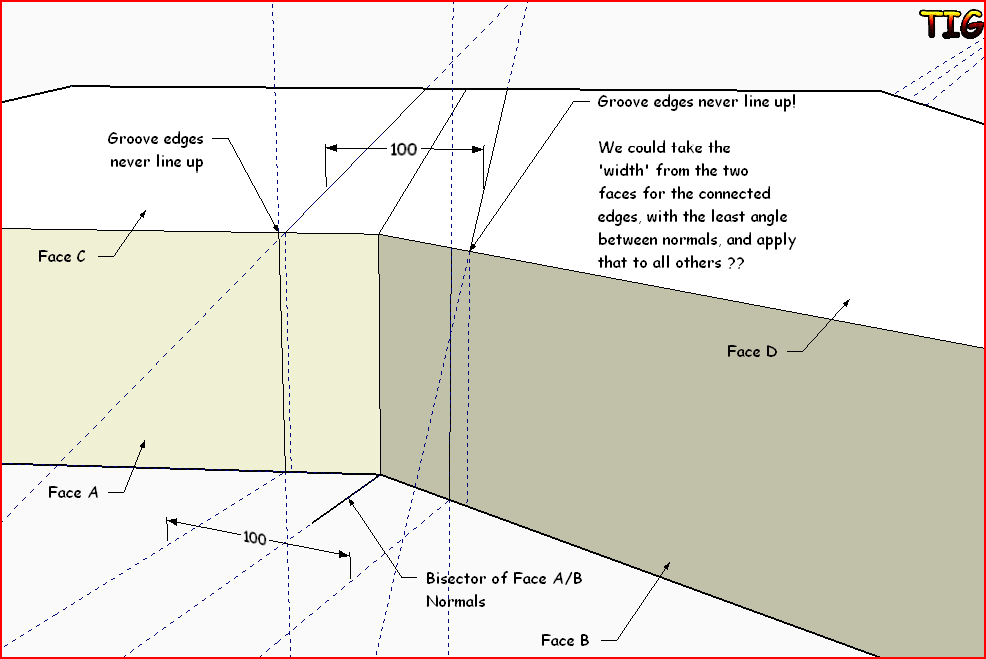
All PushPulls are made perpendicular to their the face... BUT if the original faces of the edge defining the second groove are non-coplanar then PushPull will be square to each of them NOT align with the 'vertical' sides of the first groove we've made, so that PushPull is blocked by the impending geometry clash; if we were to 'force' it in code then the perpendicular sides of the different grooves would not be guaranteed to align where they meet, and we then need either 'mitered' angles at their junctions, or awkward 'ledges'...
I see that Pilou is PushPulling the second groove in the length not the depth, BUT if the base of the groove is not parallel with the top then it won't form a clean hole either
It needs more of a JPP solution... -
But as I closed... That's fine only if the second groove's faces have no further faces at their end OR the further faces are in the same plane as the base of the first groove. These are special cases.
The general case where there are other face angles etc will NOT PushPull cleanly and fail to end the groove neatly...
-
It's relatively easy to make the special case orthogonal grooves but the general case is more tricky...
-
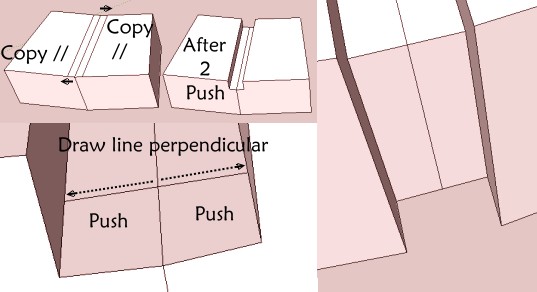
@unknownuser said:
first and second push both on the Z
Yes
Line of the left element is an offset or a copy move along the side of left element
Line of the right element is an offset or a copy move along the side of left elementthen you can push down on Z
@unknownuser said:
It needs more of a JPP
the jpp don't make negative push

Smart PushPull yes as shown above but don't erase the inside ! -
@unknownuser said:
BUT if the original faces of the edge defining the second groove are non-coplanar
That is not the case of the EarthMover example
But i believe that will be the same in the no coplanar face of elements
I come back with an example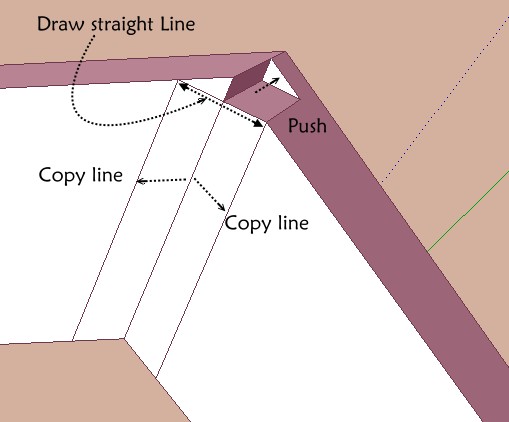
And no problem for make the groove with normal pushPs Crossing posts
your example is a double non coplanar face element
but I believe that another will be the same
I come back with your vicious example -
In fact that is more easy than all previus!


Must have internal faces for make the Offset Pulling and close faces!
And must work in any cases not too vicious
There is an optic effect on the result on this image : groove and section seem sometime slaloming!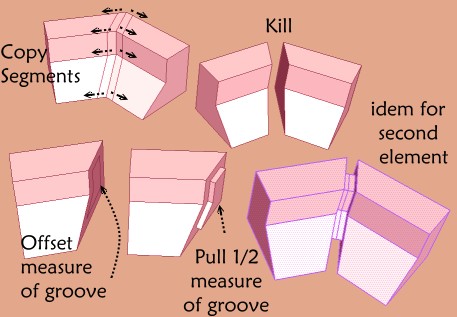

-
A clever solution... IF grooves are wanted on all faces [but it could even be adapted with coding a custom offset on selected edges only]...
IF the object is a solid group then you could simply made a sacrificial over-sized block group that is the groove thickness wide and aligned on the edges' plane, and then in pro use the solid tools to subtract it from the original form, leaving the full slot; then we'd apply the offset around the newly through cut face and pushpull it by the groove width [no mid-line is needed] to fill the gap - erasing the extra inner face left behind to maintain 'solidity' for the next groove set to work...
BUT again this only works if the selected edges are all coplanar; 'skewed' grooves will not work. -
If it is a "Solid" object, the offset seems like an unnecessary step. Could you just isolate the edge itself and take a box the size of the desired groove and "follow me" it around the edge to create the cutting (Subtracting) component, thus only taking away what was necessary for the groove? Similar to Jeff's technique in this thread - http://forums.sketchucation.com/viewtopic.php?f=15&t=41095&p=365238&hilit=groove#p364287
I would be okay if the tool only worked on solid objects.
Hello! It looks like you're interested in this conversation, but you don't have an account yet.
Getting fed up of having to scroll through the same posts each visit? When you register for an account, you'll always come back to exactly where you were before, and choose to be notified of new replies (either via email, or push notification). You'll also be able to save bookmarks and upvote posts to show your appreciation to other community members.
With your input, this post could be even better 💗
Register Login


Advertisement