To much faces!!
-
You can reduce the number of small faces but that will make the surface less smooth because with fewer faces, each face will need to be larger. SketchUp only approximates curved surfaces by using small flat faces. You can use various methods of applying textures such as Projection of ThomThom's UV Tools which can make the texture look better but it'll always be small faces.
-
It looks flat painted, not textured... maybe he has hidden geometry turned on? Or edges not smoothed?
-
Hard to tell unless he posts a useful image or better, the model.
-
Hi Dereeei,
I joint pictures of the object.
On is the profile of the curve and we can see that the bottom corner are made with the tool arc and attached to a circle modified with the tool scale.I don't know the difference btw paint and textured. I just go to the colors palettes and then textures and apply a texture I upload in my list.
I smooth the edges to, till 19 and the black line disappear.
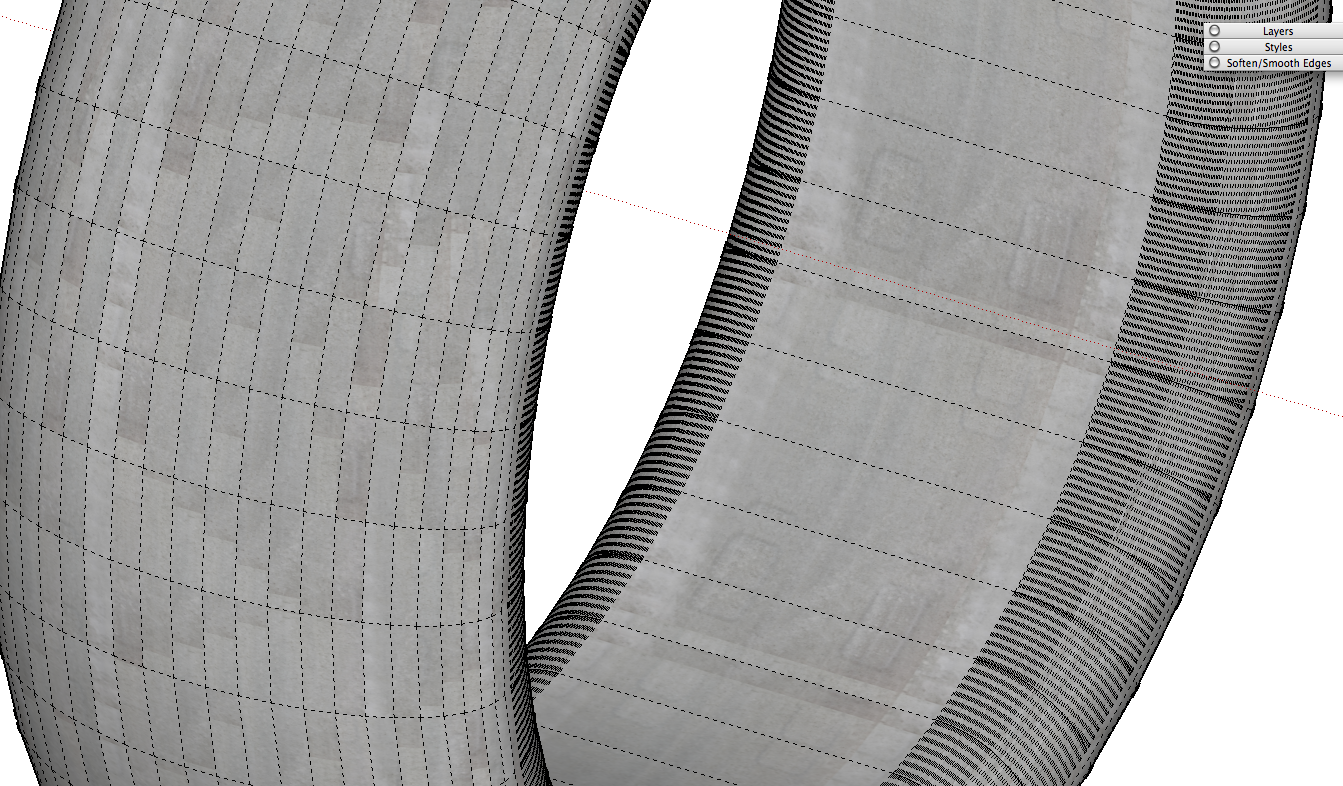
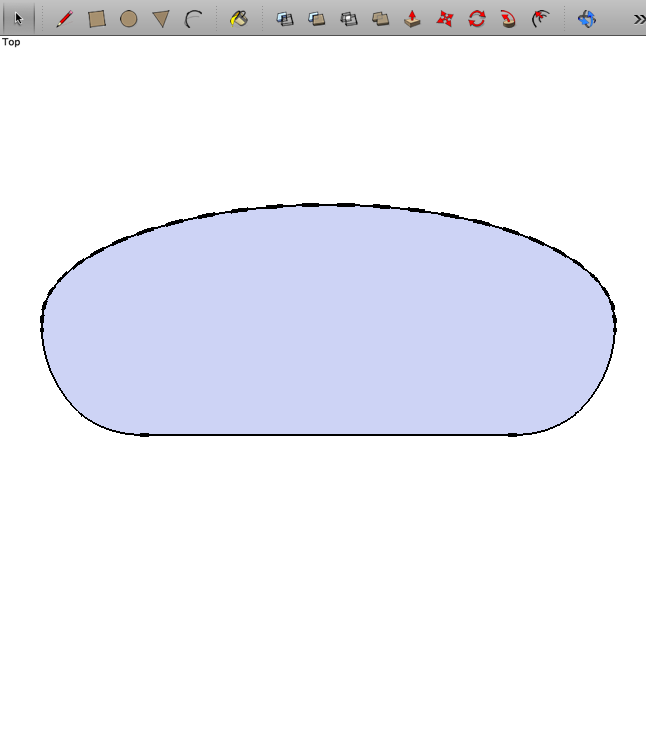
-
Did you apply the material before smoothing the edges?
How about posting the SKP file for us?
-
There's no model in your post.
-
Here we go with the model.
So, in the profile pic, I think the problem is from the points on top of the shape the curve part.
I've try to DL the files with the upload attachment option, but didn't work.
So you can dl it form here http://speedy.sh/UvJJE/Ring-a.skp -
Yes, it didn't work right away so I edit my post and upload the file from speedy share.
So he must work now. -
Why don't you just upload it in the forum?
-
@dave r said:
Why don't you just upload it in the forum?
I've tried again but it didn't work or I don't do it correctly.
-
-
@unknownuser said:
@dave r said:
Why don't you just upload it in the forum?
it's over 4MB.
Yes, it's just a bit to big 4,7 Mo..
So I understand now -
So what exactly is the issue with it? That the material is broken into small pieces? You can use some UV mapping plugin like this one for instance (although this material is not ideal in any sense)
http://forums.sketchucation.com/viewtopic.php?t=10404(Otherwise the geometry has no problems, no inner faces or gaps and is reported as solid when I group it).
It is extremely high poly though.
-
Hey Gaieus,
The problem is, when I apply the material to the object I don't see one large surface corresponding to the image I apply it to, to look like the material I choose (concrete).
As you can see in one of the picture up in post I have strap but not a large surface..I don't know where is my mistake here?
What you mean by it's high poly, to many surface?
If so, I want a smooth object so I increase the nub of side for the circle, I found that I always had this facetting problem in my final render. And it's not very nice when you want a clean round surface. -
A few things...
You have modeled it 'inside out' we see the back-faces of the surfaces - easily reversed.
Also a textured material [as opposed to a plain one] exaggerates the inevitable faceted-ness of a SKP's curved surfaces - unless you use some 'mapping' tools.
You have also made it far too details unless you are going to view it close up all of the time.
4Mb+ for one tyre is excessive.
Your Style has 'endpoints' which exaggerate visible edges - here's examples with no endpoints then no edges... -
Yes, that's true but on the narrower sides, those two (unexploded) arcs are really heavy. Well, anyway, your model...

As for the texturing: use that plugin I suggested and apply cylindrical mapping (spherical would also work I guess). But your material is a rather repeating one in any case so I would use something better.
With reversed faces (see TIG's comment) and a texture that shows UV mapping better (and spherical mapping applied) it would look something like this (you need to "lay it down" for the plugin to work properly)
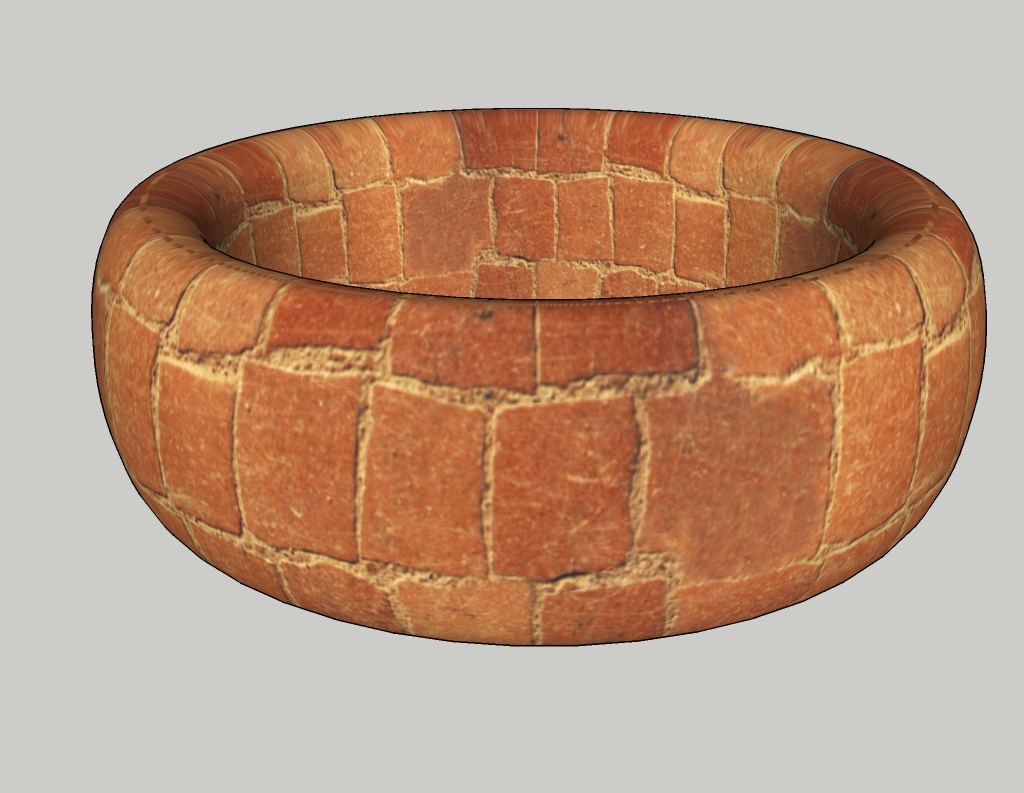
-
You see it can be resolved...
That must be one of those 'brick-tyres' that Gaieus digs up now and again

-
@tig said:
That must be one of those 'brick-tyres' that Gaieus digs up now and again

Ah yes, that's the so called "Brick Age" (right after the Stone Age)

OK, I can see the image now. There are two problems there:
- One is indeed bad texture co-ordinates. This should be done in SU as per above
- The other thing is that it does not render it smooth - no matter you have zillions of factes. I do not use Keyshot but when there is an issue like this in Twilight, I usually need to group the object and it renders it smooth. The Twilight folks say it's a SU issue actually so maybe you should do the same for Keyshot, too.
-
Hi TIG,
Yes it will be a small object.
So small detail are important to me.
I use keyshot to render my objects and I see so many little faces that I don't know how to do.
As I want to make a realistic rendering.
And when I want to apply a texture it's like in SU, not anymore smooth. Texture is not applied on the object but on every faces of the object which is a pain to understand where the problem is to be able to solve it...
Image is from Keyshot.
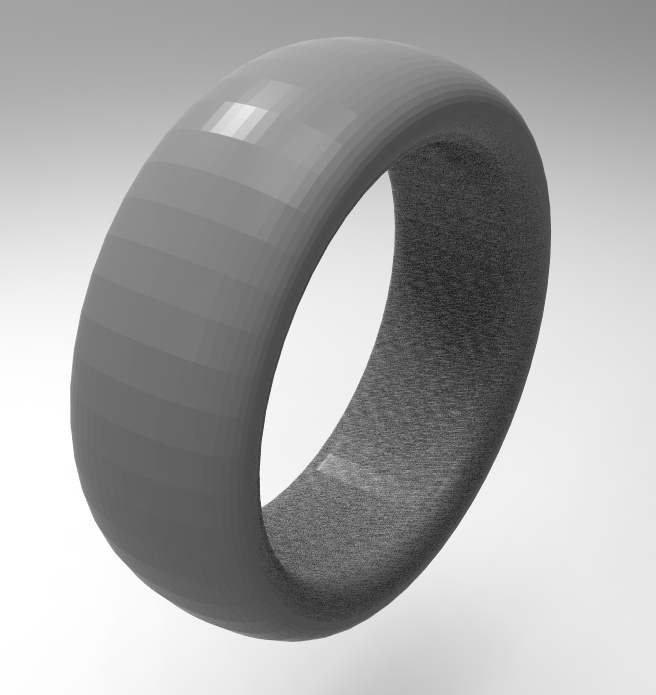
-
@gaieus said:
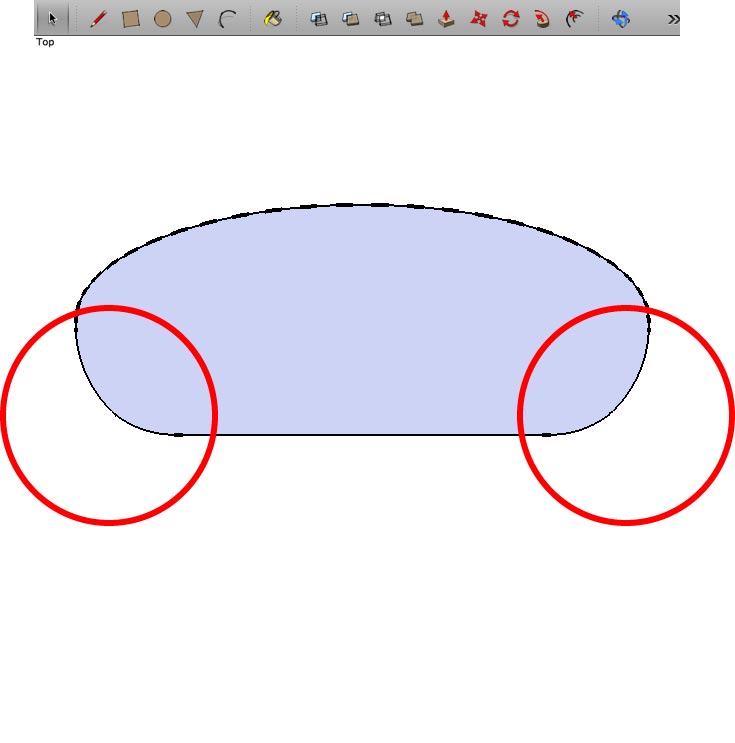
Yes, that's true but on the narrower sides, those two (unexploded) arcs are really heavy. Well, anyway, your model...

As for the texturing: use that plugin I suggested and apply cylindrical mapping (spherical would also work I guess). But your material is a rather repeating one in any case so I would use something better.
With reversed faces (see TIG's comment) and a texture that shows UV mapping better (and spherical mapping applied) it would look something like this (you need to "lay it down" for the plugin to work properly)
Are you talking about this 2 (see pic) sides, Should I explode them in order to make my model lighter and easier to manipulate?
Hello! It looks like you're interested in this conversation, but you don't have an account yet.
Getting fed up of having to scroll through the same posts each visit? When you register for an account, you'll always come back to exactly where you were before, and choose to be notified of new replies (either via email, or push notification). You'll also be able to save bookmarks and upvote posts to show your appreciation to other community members.
With your input, this post could be even better 💗
Register LoginAdvertisement


