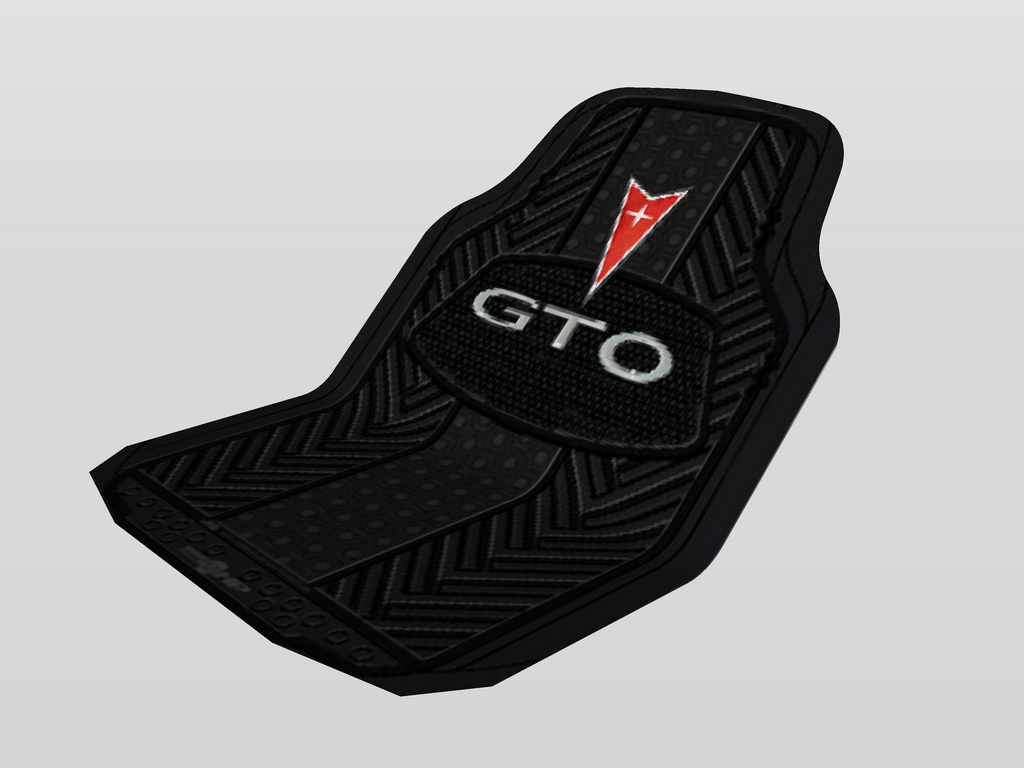
Bending a textured face
-
Yeah it did. Unfortunately
 I only used the logo as a reference, as you can see, everything moved.
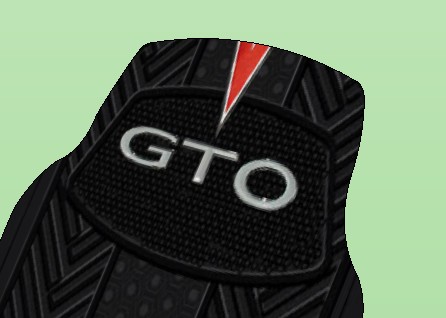
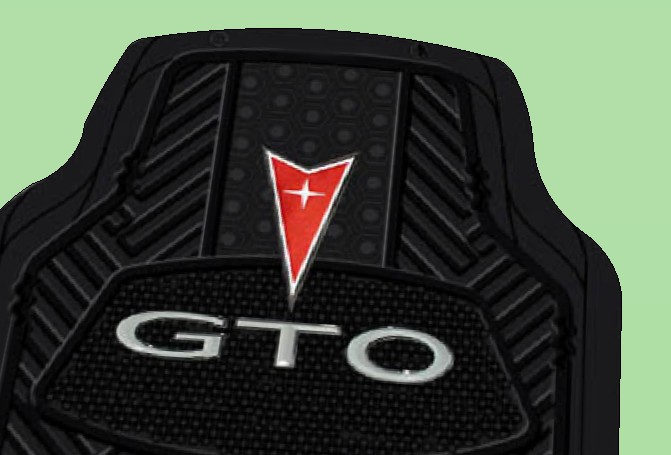
-
Well, then it shouldn´t be "bending a textured face", but the other way around

-
It actually did cut a bunch off of the top. I did it this morning around 4 am before my coffee had kicked in so I didn't notice it. I measured out the line with the bend in it so it is the same length as the flat mat. I suppose the material is the projected length.
As Csaba says, there's probably nothing that can be done about it with the way SU currently handles materials. Perhaps if things like this are really important, it would make sense to look at some other application either for applying the materials or possibly for doing the whole drawing. Although all sorts of folks are using SketchUp for things for which it wasn't originally designed, including myself, and making it work quite well, I am sure there are some jobs that are still better left to other programs.
-
If this object is bending only one direction, you should not use projected material on it but simply wrap it around the curve.
-
Any chance of a plugin for this?
-
Something to glue the texture to the face or object so that it is affected the same way. Or maybe turn the texture into a face. As you can see, I know not of what I speak

You could call it "Texture Superglue"

-
Thomthom is working on some kind of UV plugin. Maybe that will be able to do it. Also, I have seen sneak previews of Whaat's new Subdivide and smooth plugin.
-
If you made the texture unique on each face of the mat, it might work then?
Chris
-
@chris fullmer said:
If you made the texture unique on each face of the mat, it might work then?
Chris
The mat only has one face. If you're talking about dividing it into parts before bending it and making each of them unique, I thought of that, but wouldn't that increase the number of textures? I don't know enuf about this stuff to even be saying anything, but I am trying to keep my textures to a minimum to keep my file size down.
Probably not what you meant anyhow.
I'll shut up now and go away

-
That is exactly what I meant. It might be the only way to do it? I don't know. Where's Thom?
-
@chris fullmer said:
If you made the texture unique on each face of the mat, it might work then?
Hi Chris, that shouldn't be necessary in the way that you get multiple textures.
Only one should do.
If you do this manually it's an easy proces towards the result. See attached file.
(Although I don't suppose hellnbak is looking for laborious modelling).I don't know enough about your plugin but when done manually the texture I used is fixed to the original flat mat geometry. Once you split up the mat and rotate mat "segments" successively, the texture stays as it should. This could be done the same way in a script can't it?
-
-
@hellnbak said:
Is anybody?
Even if I am not deliberately looking for it, I do not mind doing it when I know I cannot achieve it otherwise and the result is worth the laborious way. Wrapping a texture around a curved face should not take longer (even if you go facet by facet) than writing a forum post.
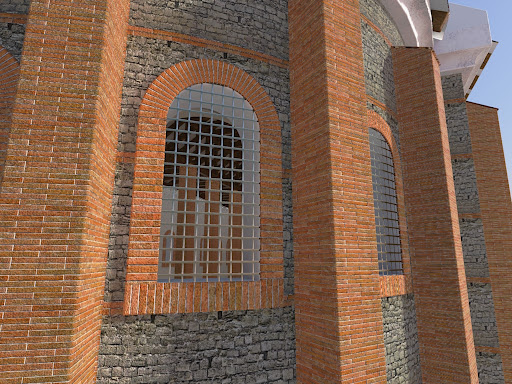
This window below is on a curved wall (a basilica apse), arched and all the edges are rounded. So there was no other way than manually doing it.
(By the way, in this model, all the edges are rounded everywhere as you can see from the buttress, too, so when I made the textures, I even counted the pixels how they would wrap around to make a seamless tiling when they reach around pillars and such - tell me about labour!
 )
)
-
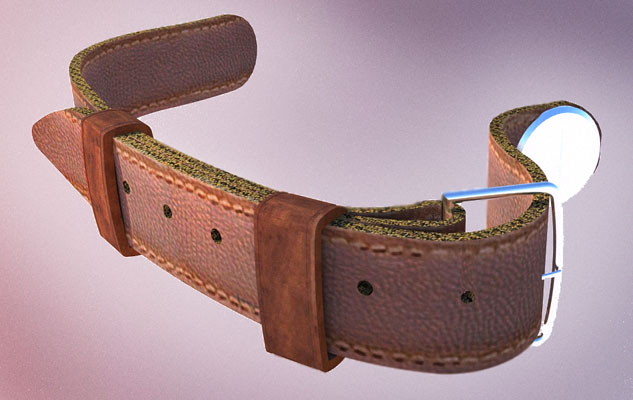
The leather textures were applied to the curved shape with hidden geometry showing and clicking the paint texture tool at each change of plane. Rendered in Twilight Render using Metropolis Light Transport with Bidirectional Path Tracing. This is one small part of my project without end.
-
@gaieus said:
If this object is bending only one direction, you should not use projected material on it but simply wrap it around the curve.
Could you please elaborate? I've tried so many things with this I'm not sure if this is one of them.
-
Where's that model?
-
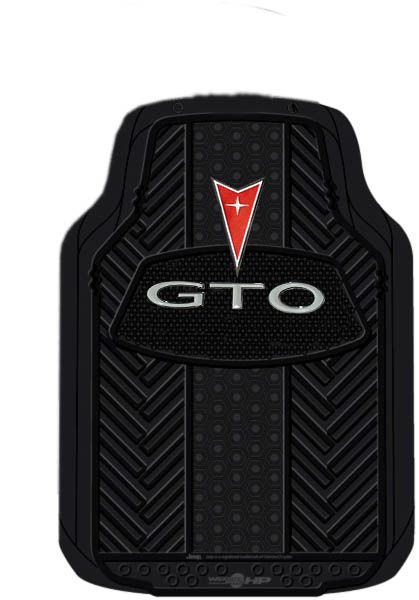
If you mean the jpg for the mat, here it is
-
-
Great! Now, could you please explain the process of what you did?
-
Some pictures. After sampling / painting in picture 5, repeat the steps for the rest of the facets. It takes less than a minute. The point is that now you are not projecting but wrapping the material around that curve by positioning it.
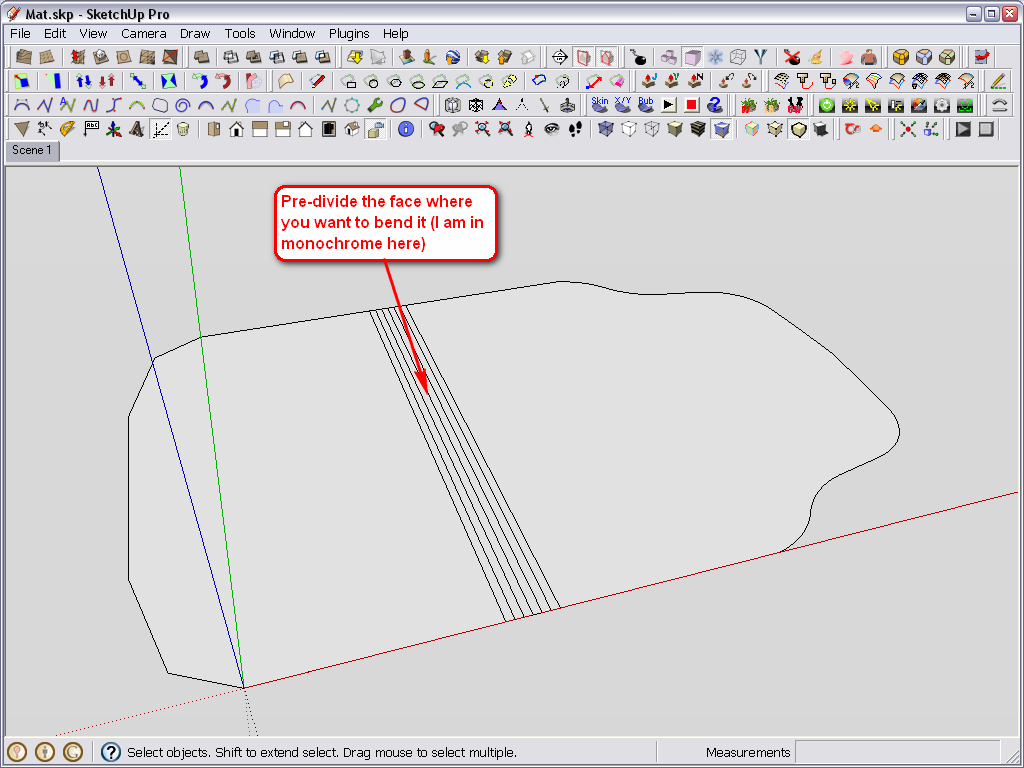
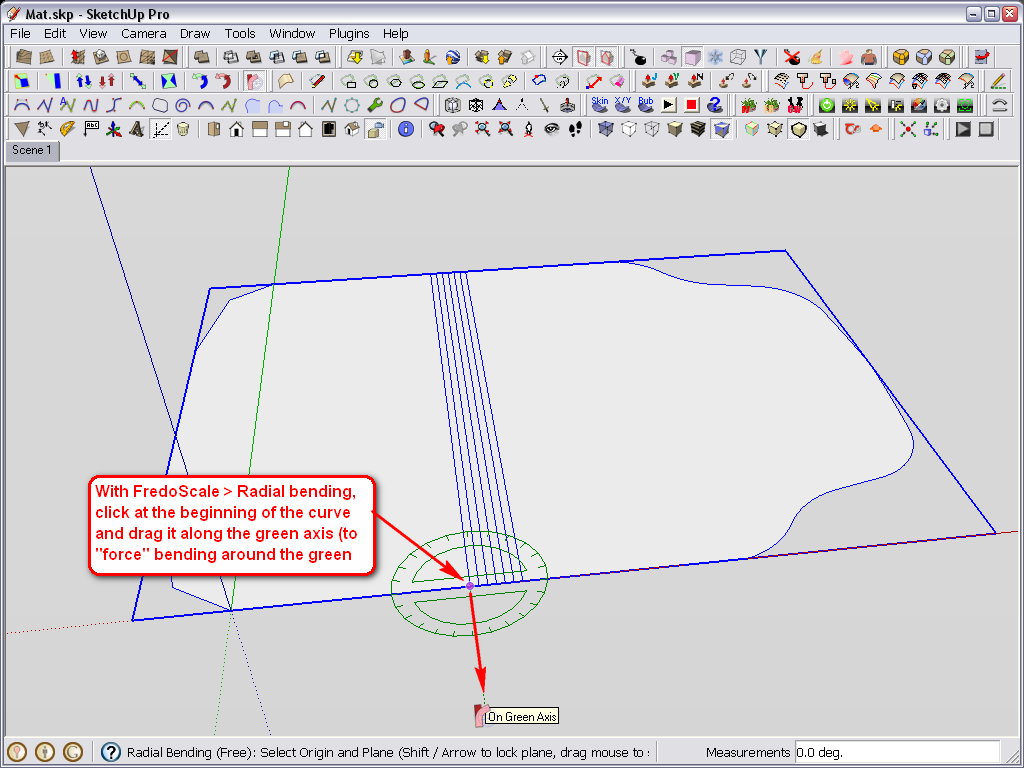
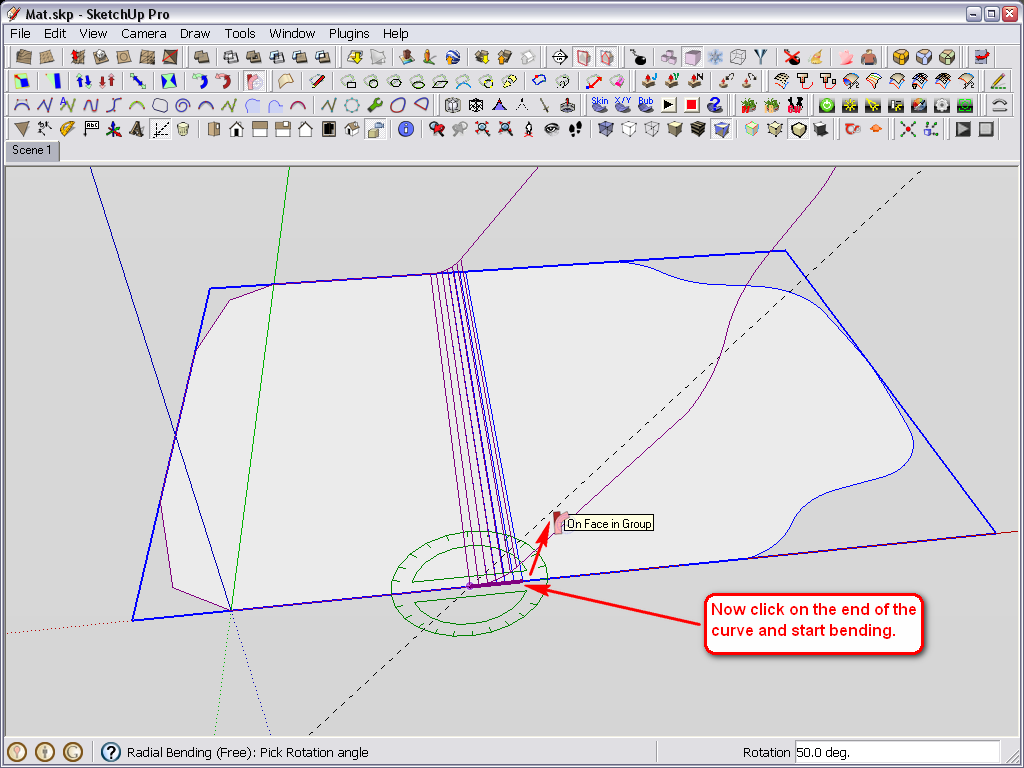
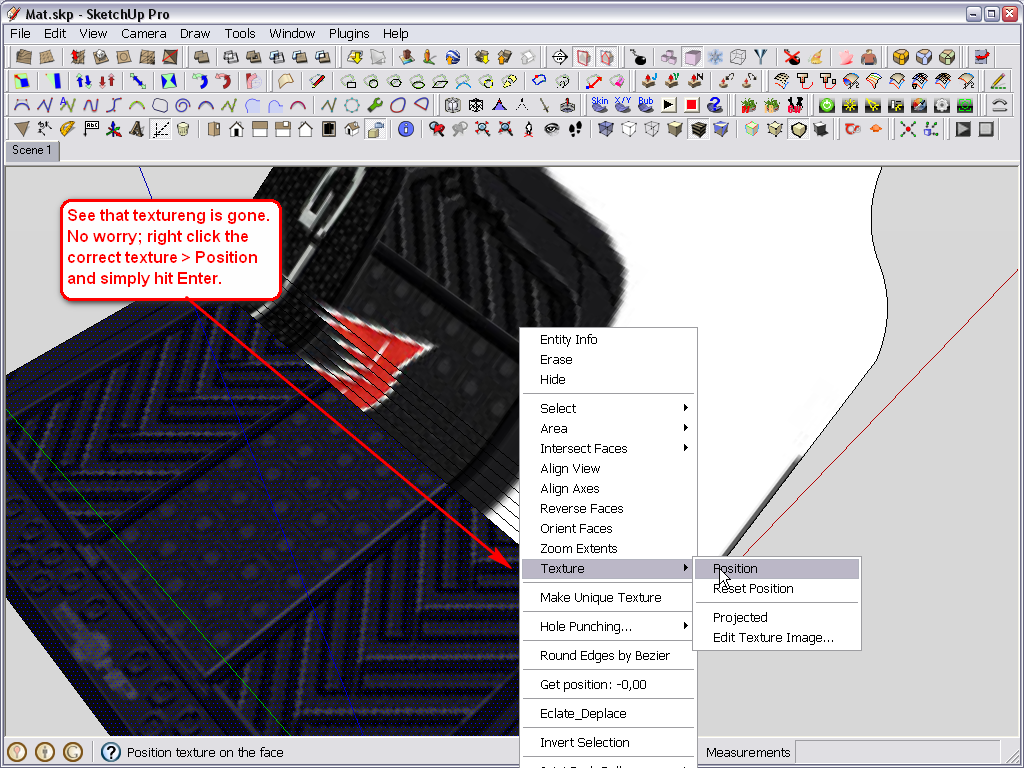
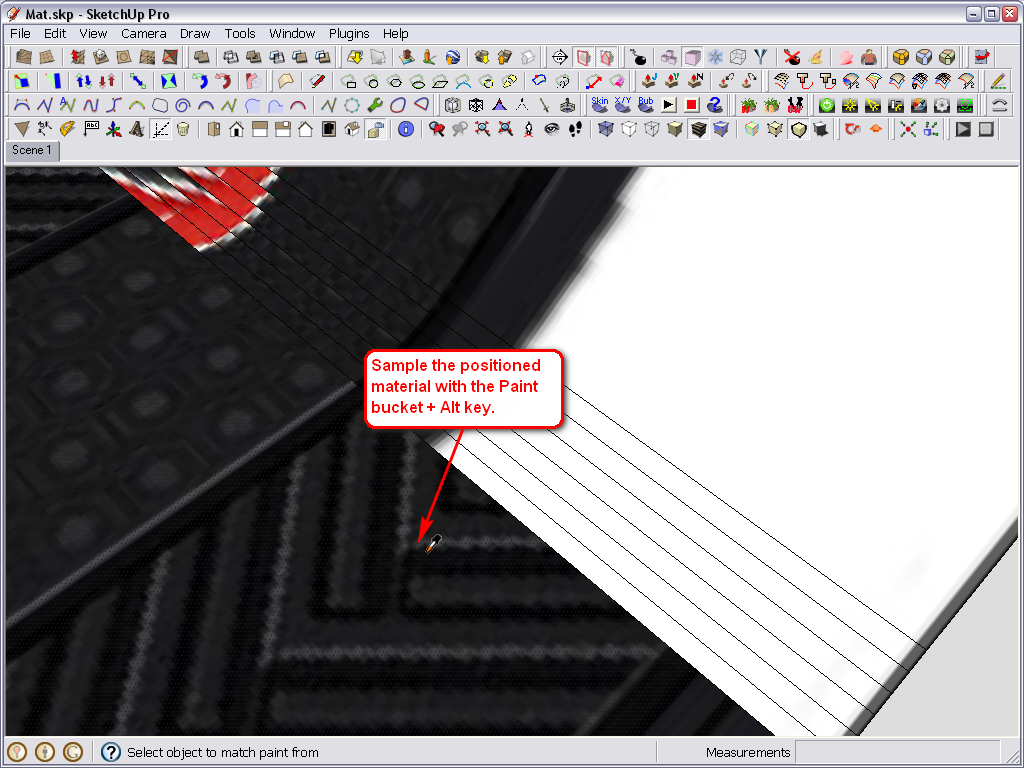
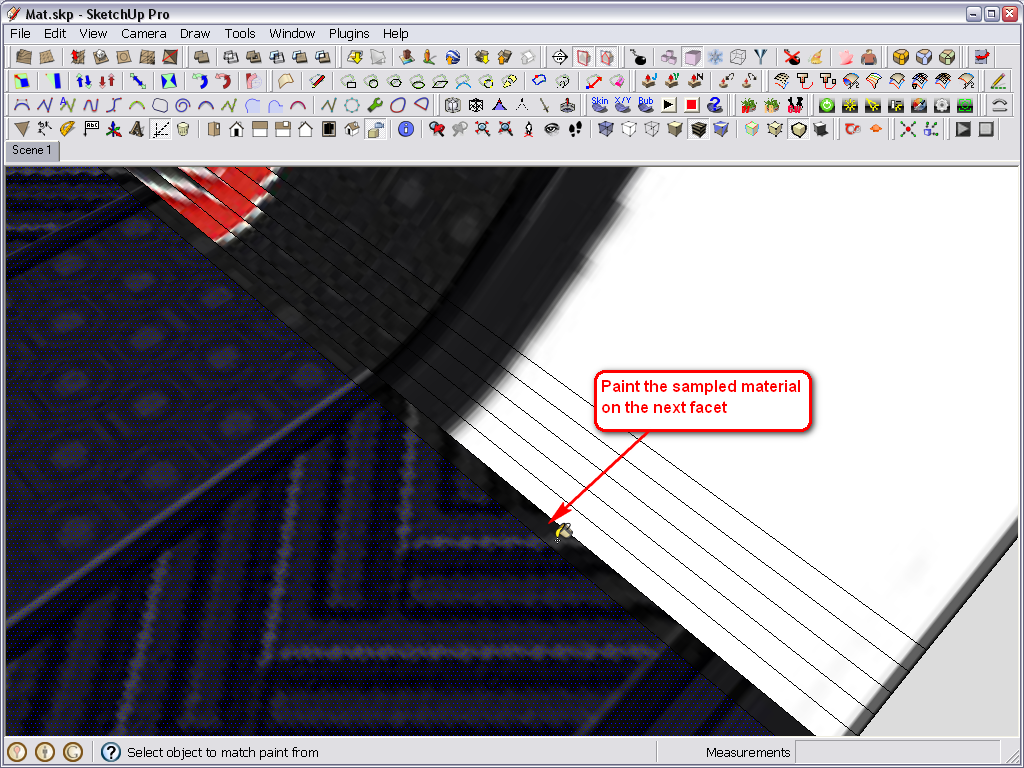
(Sorry, previously I attached a wrong screenshot)
Advertisement
