[Plugin][$] Curviloft 2.0a - 31 Mar 24 (Loft & Skinning)
-
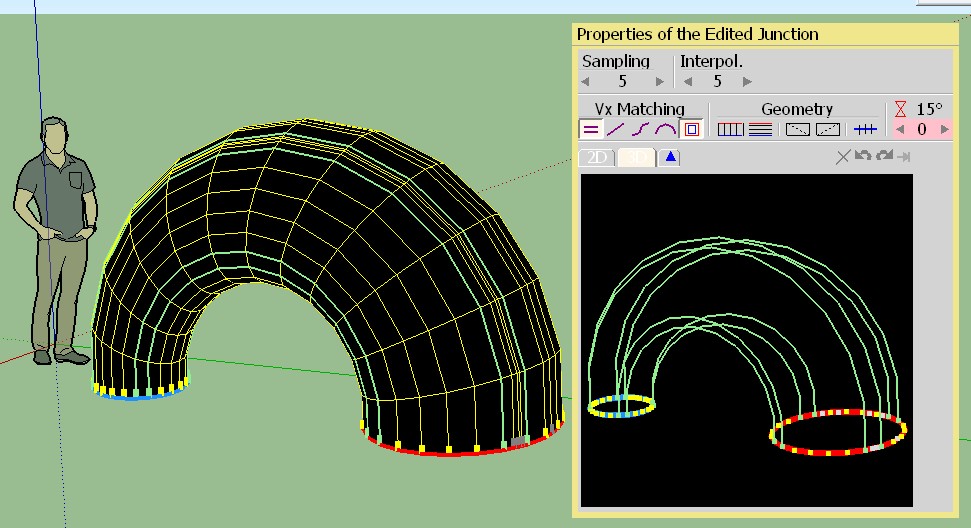
Thanks for putting together such a great tool. For the life of me, I couldn't generate a smooth curve to intergrate a jet engine intake into an aircraft fuselage. In a few seconds, your tool generated exactly the shape I wanted. I can't wait to experiment some more with it.
-
hi Fredo,
so i had a chance to do some more experimenting and i've definitely found a way to accurately draw some of the things i've been trying for a couple of years now. (well, i haven't yet found the exact parameters etc. that will best work for my application but i have found a way to insure tangency throughout the blends.. what degree of continuity i'm not sure but i'll be taking some of this SU data into rhino for further info on that.. i do believe however that you could roll through these blends with some 55mm wheels and be just fine )
the process involves a lot of manual drawing but i don't mind. my main concern has always been being able to draw it in the first place. i'll probably find some shortcuts as i further refine this method but there might be something of interest for you in your development of tangential control of splines or even your nurbs idea i've seen you mention a few times..
i've made a 4x speed video showing the process i used for drawing the splines to generate the surface and then for editing the surface created by said splines. just in case it's not clear what i'm doing in the video, here's a quick rundown..
basically, i create extensions from the surfaces i'd like to join then use those extensions to set the B-spline control points.. apparently, the Bspline is in fact tangent at the tip of the extension.
i then create the surface with curviloft using these B-splines.. in the example, i then further extend my guides then edit the splines which changes curvature but maintains tangency.. this is very nurbs like behavior (well, at least to me it is ).. i couldn't figure out a way to edit multiple spline's control points at once but if that ability exists, please let me know..
here's the skp from the video which still uses the same shape as the one i originally posted here -- though i have edited to curves to share the same amount of segments (loving the polyline segmentor for this !!)
[flash=660,405:35qw1lfi]http://www.youtube.com/v/8B0RXSW66no?fs=1&hl=en_US&rel=0&color1=0x2b405b&color2=0x6b8ab6&border=1[/flash:35qw1lfi]
i also tried a similar technique on a 3 tube blend with surprising success.. the sides came out sweet and the tops (which i basically freehanded with F-splines) are almost there.. one more go at it and i'd have it.
anyway, maybe there's something that might trigger a method in you but if not, don't sweat it.. i'm super hyped on these tools as is.. Thanks so much for writing these!
-
Jeff,
Looking at your video, I could suggest an alternate method which is already available in the current version of Curviloft.
I am not sure this would produce your desired surface, but it allows adjusting the shape of the S-curves, while remaining tangential at the boundaries.
This is illustrated in the video below.
[flash=640,480:3gv84l7f]http://www.youtube.com/v/jVjwn8xzULI&hl[/flash:3gv84l7f]
Here is the file where I applied the Bezier method
JH_curviloft3 - Fredo.skp
Fredo -
[disclaimer- longwinded post coming up.. hope you all don't mind ]
hey Fredo,
i previously hoped the tension adjustments would do the trick but unfortunately, no.
from the model you posted:
you can see one of the kinks created in that picture.. i should also add that i don't think lofting is really what i'm after.. especially when considering the example skp i've been posting is simplified in that the adjacent surfaces are flat when in actuality, they're often curved as well. i think it's more of a skinning feature i'm into.
i should add though, from your video, all is looking good from the view you're showing until you click on the left section and make it one segment.. that's when the kink happens but for my purposes, i would have to have the ability to make that wall flat as you've done.. further in this post, i get more in to it but it seems like when that wall flattens, the adjacent one should adjust accordingly
in the picture, notice the 'flatwall' and 'waterfall' labels.. the problem (well, not the problem with your plugin or anyone else's) i have with all the available surfacing plugins is that they do not consider what's happening with the adjacent surfaces.. they only pay attention to the outer rails/profiles of the 'patch'.. what i'm trying to do is fill in the waterfall section with a surface that maintains tangency to the flatwall throughout the blend (ie- every spline used throughout the blend is tangent to it's corresponding blend point).. i think one problem i have when discussing this is that i view the sketchup model as guidelines to a hidden structure.. here's the basic looking framing i do and it's this i see when looking at these models.. as in, i actually see each individual spline as these curved 2bys
in those pictures, every row of ribs maintains tangency/curvature continuity throughout.. thing is, all the blends are radius based and i've been doing radii for 20 years .. sort of getting bored with them not to mention they're somewhat limiting design wise..
i'd like to get into more complex surfacing and that's the reason i've been learning rhino but when it comes down to it, i love sketchup and prefer it for a number of reasons over rhino.. what i can't really understand though is that seemingly most of rhino's horsepower is based around making these types of blends possible and accurate, but, nobody in the sketchup community that i've seen (and i mean nobody ) has ever voiced a desire to make these things happen within sketchup.. i often see people wishing for nurbsketchup but i haven't really figured out why because this is the type of stuff nurbs is good for..
[but more likely than not, people do want this stuff in sketchup but i'm just bad at describing things so no one is ever like 'oh yeah, that would be sweet!" ]i made a couple of videos which i think are simplified to the point of me being able to describe this stuff visually instead of trying to type it into words..
in the videos, the adjacent surfaces are flat planes and all of the curves are arcs.. the white surface represents the blend and the blue are the adjacent surfaces. (i'm using arcs and flat planes for this example because i think they're much easier to wrap your head around the geometry as opposed to the bezier curves into round walls that i'm hoping to represent)
the first video is supposed to represent the actions of current sketchup surfacing capabilities. the 'patch' will be thrown in there regardless of what the blue surfaces' orientation is.. if the radius of the arc changes, it will bulge out or fold in regardless of if it maintains tangency or not..
[flash=500,405:3opcdp0n]http://www.youtube.com/v/KqJ7EMkwCSk?fs=1&hl=en_US&rel=0&color1=0x2b405b&color2=0x6b8ab6&border=1[/flash:3opcdp0n]
the second video shows the patch respecting the adjacent surfaces and always maintaining tangency regardless of the arc's radius.. tangency wise, this is more of the behavior i'm after..
[flash=500,405:3opcdp0n]http://www.youtube.com/v/q4KCZWx9W5g?fs=1&hl=en_US&rel=0&color1=0x2b405b&color2=0x6b8ab6&border=1[/flash:3opcdp0n]
since the examples are arcs and tangency is being maintained throughout, the flat planes must adjust in width in order to allow continuity.. basically, what i'm trying to accomplish, is to not allow the blue surface to change and place them in less accommodating positions.. positions where arcs no longer work and require a complex curve to create the blend while maintaining smoothness throughout the entire structure..
with the example i gave in my previous post, that's pretty much what i've accomplished by drawing templates for the splines' control points using the adjacent surfaces.. those templates ensure the whole surface acts as one instead of dividing it up into multiple parts and each section freely moves with no restraint to the other sections..
but hey, like i said in my previous post, I'm hyped!.. your bezier spline plugin makes it possible to do what i'm talking about here.. albeit, sort of a tedious process but that's a process that forces me to get into the meat of what i'm drawing and hopefully i'll learn a lot about the math behind those curves by drawing these types of blends curve by curve.. if i'm hoping for anything here, it's that i'll learn a lot about these types of blends at the root level and then, after a year or two of doing that, a plugin will be developed that automates much of it for me..
-
Jeff,
Thanks for this comprehensive explanation.
Actually, I did cover the case in the initial version of Curviloft where I had 2 Bezier methods. The Method 2 was for using the contour planes to detremine tangency at boundaries of junction. I dropped it when introducing the Orthogonal methods.
I will reinstate the method 2 in a next release. I should also try to make the orthogonal methods work properly in case of S-Curves.
In the mean time here is the result of this Bezier method 2
JH_curviloft3 - Fredo - Bezier method 2.skpFredo
PS: I can't make a new release of Curviloft immediately, as I am working on the Loft Along module. If you wish to test in the meanwhile, you can drop the two attached files in the CURVILOFT_Dir_10 folder
CurviloftPalette.rb
CurviloftSpline.rb -
-
@charly2008 said:
Hi Fredo,
I have found one small error. If I use a single edge, the ends are twisted. At the same profile as a face all is right.
Charly
Charly,
There are plenty of errors in Loft. I am currently trying to consolidate fixes for a next release. This one will be fixed, I hope.
Can you post the model.
Fredo
-
Hi Fredo,
I know that it is impossible to find any errors, but still it is a great tool. I admire you, which you can write so wonderful Ruby Scripts.
Charly
Image below: Curviloft and Shape Bender.
-
@charly2008 said:
Hi Fredo,
I know that it is impossible to find any errors, ...I guess you mean "impossible not to find any errors"
-
Hi Mariocha,
I think both expressions are right. Now it's a mathematical Question. Theoretically, all bugs can be found. This would require all possible geometric cases are tried with the tool. The problem is to find all the possibilities and the time needed for it. Therefore, it is impossible not to find a bug. This problem is found with any software.
Charly
-
wow Fredo, the method2 drawing looks excellent!
i'll give it a try myself a little later in the day. -
Mighty impressive stuff Fredo.
I hope you get some donations for this! -
@thomthom said:
Mighty impressive stuff Fredo.
I hope you get some donations for this!agree!
Tools-> Fredo6 Collection-> Curviloft-> Donation...hit it up boys and girls
-
@charly2008 said:
Hi Fredo,
I know that it is impossible to find any errors, but still it is a great tool. I admire you, which you can write so wonderful Ruby Scripts.
Charly
Image below: Curviloft and Shape Bender.
Thanks the model. Actually, I had fixed the error already in my own version.
Let me also tell you that your golden frises are quite nice looking. I am not sure I would be able to do the same myself with Curviloft!
Finally, I think it is in practiceimpossible to find all errors, but more surely, it impossible to fix them all.
Fredo
-
Fredo, i have to admit.. i'm beyond excited!!
bezier method 2 is exactly what i was talking about.. very impressive! [which has me wondering.. how many other little ruby experiments do you have laying around on your hard drives ]
please include that method in subsequent curviloft releases. -
@unknownuser said:
J... If you wish to test in the meanwhile, you can drop the two attached files in the CURVILOFT_Dir_10 folder
[attachment=1:35q6ko6g]<!-- ia1 -->CurviloftPalette.rb<!-- ia1 -->[/attachment:35q6ko6g]
[attachment=0:35q6ko6g]<!-- ia0 -->CurviloftSpline.rb<!-- ia0 -->[/attachment:35q6ko6g]Some feedback; the "new" CurviLoftSpline.rb seems to go in an endless loop here. No result.
Tried the previous one, works ok. -
@mariocha said:
Some feedback; the "new" CurviLoftSpline.rb seems to go in an endless loop here. No result.
Tried the previous one, works ok.the newly added method is the one with the arrow pointing to it in this screenshot.. i dunno, i'm not experiencing any looping with it.. maybe upload a .skp showing the problem?
-
Jeff, how do you dock Ruby toolbar buttons to the main toolbar in OSX SU? When I looked at it on my Mac I thought I only had the native buttons available...
-
@thomthom said:
Jeff, how do you dock Ruby toolbar buttons to the main toolbar in OSX SU? When I looked at it on my Mac I thought I only had the native buttons available...
right click on an empty space of the toolbar then choose 'customize toolbar'.. all of your icons will be available and can be placed up there individually.. (this goes for all osx apps btw)
one thing to note when doing this in sketchup:
when you quit sketchup, your custom toolbar will be saved however, when you relaunch, only the native google icons will be up there.. βN (File-> New) will give you a new window and your custom layout with 3rd party plugin icons will appear..
i think it's something to do with when the icons are initialized.. the google ones happen during launch prior to the window being shown whereas the plugins folder is accessed later during launch ?[edit - i should note as well that google's sandbox tools exhibit the same behavior at the 3rd party plugins so it's not as if they have a certain snip of code allowing them to be accessed earlier.. it's the standard google toolset, views, render style etc.. that will remain upon a fresh launch..
also, if you want to remove icons from the toolbar during customization, just drag them off the toolbar and drop them anywhere else on screen.. they'll poof]
edit2 - oh, here's a post from last year where i made a video showing the customization process:
http://forums.sketchucation.com/viewtopic.php?p=162762#p162762 -
And Jeff, deserve a THANKS.
Advertisement