The "Duh!" thread (aka the Doh! thread)
-
Okay. serious gob-smacking d'oh here. I got it to work.
Thanks. Although. . I thought I did all this stuff. But whatever. .it works now.

-
@boofredlay said:
One for me was when Gaieus was from Gaieus' talk at the Basecamp (I saw the video) and using the rotate tool.
When you click the rotate tool and click the rotation point, don't let go of the mouse button... drag it out to either red or green (or any other snap point you set up) then click to start. This relieves any need for a vertical plane to get your rotation set up.
See image for example.
[attachment=0:1ay9p7c2]<!-- ia0 -->ClickHold.jpg<!-- ia0 -->[/attachment:1ay9p7c2]
I have been using SU since V2 and never knew that until last year.
- F##king 2009! I've been modelling with SU since 2006 and didn't know about this feature until today

- F##king 2009! I've been modelling with SU since 2006 and didn't know about this feature until today
-
Recent duh-moments in my modelling - watching Box's doodles to find out I've been using SU the wrong way for quite long. Again and again

-
Modelling small parts
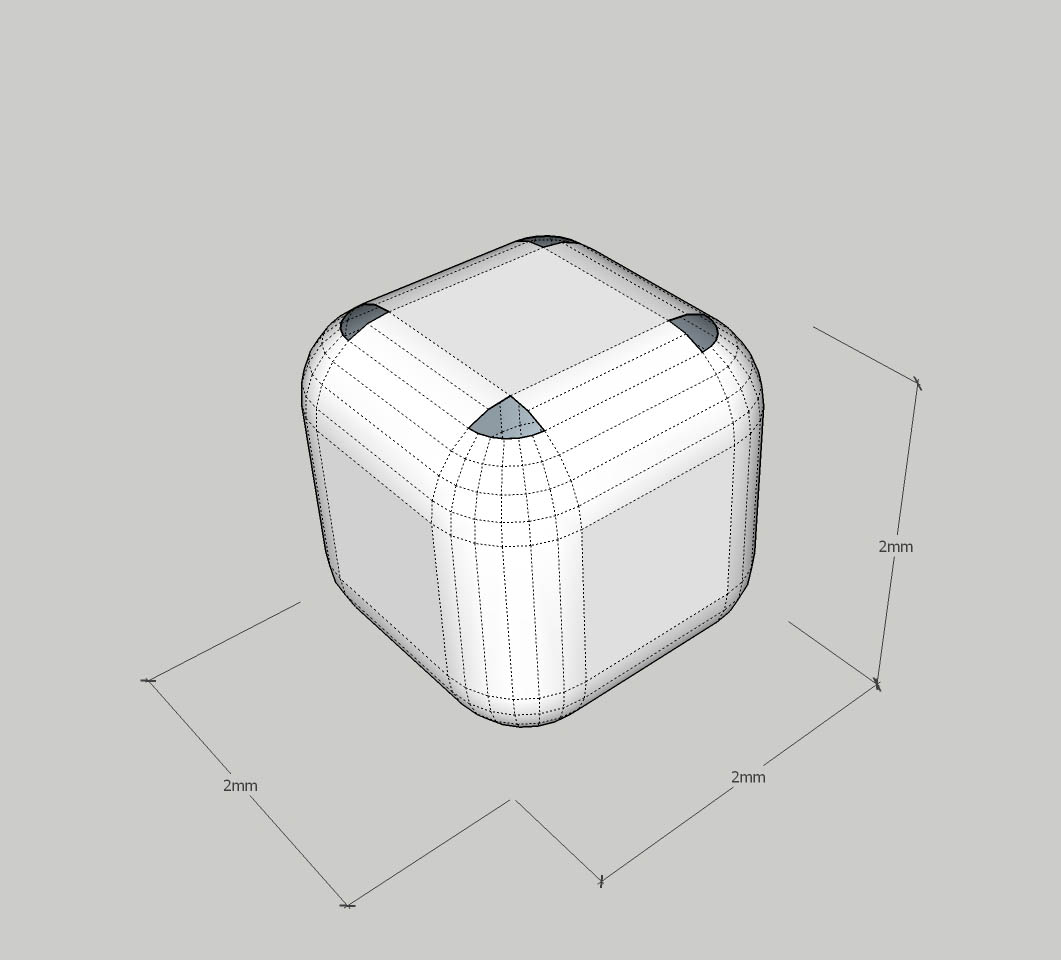
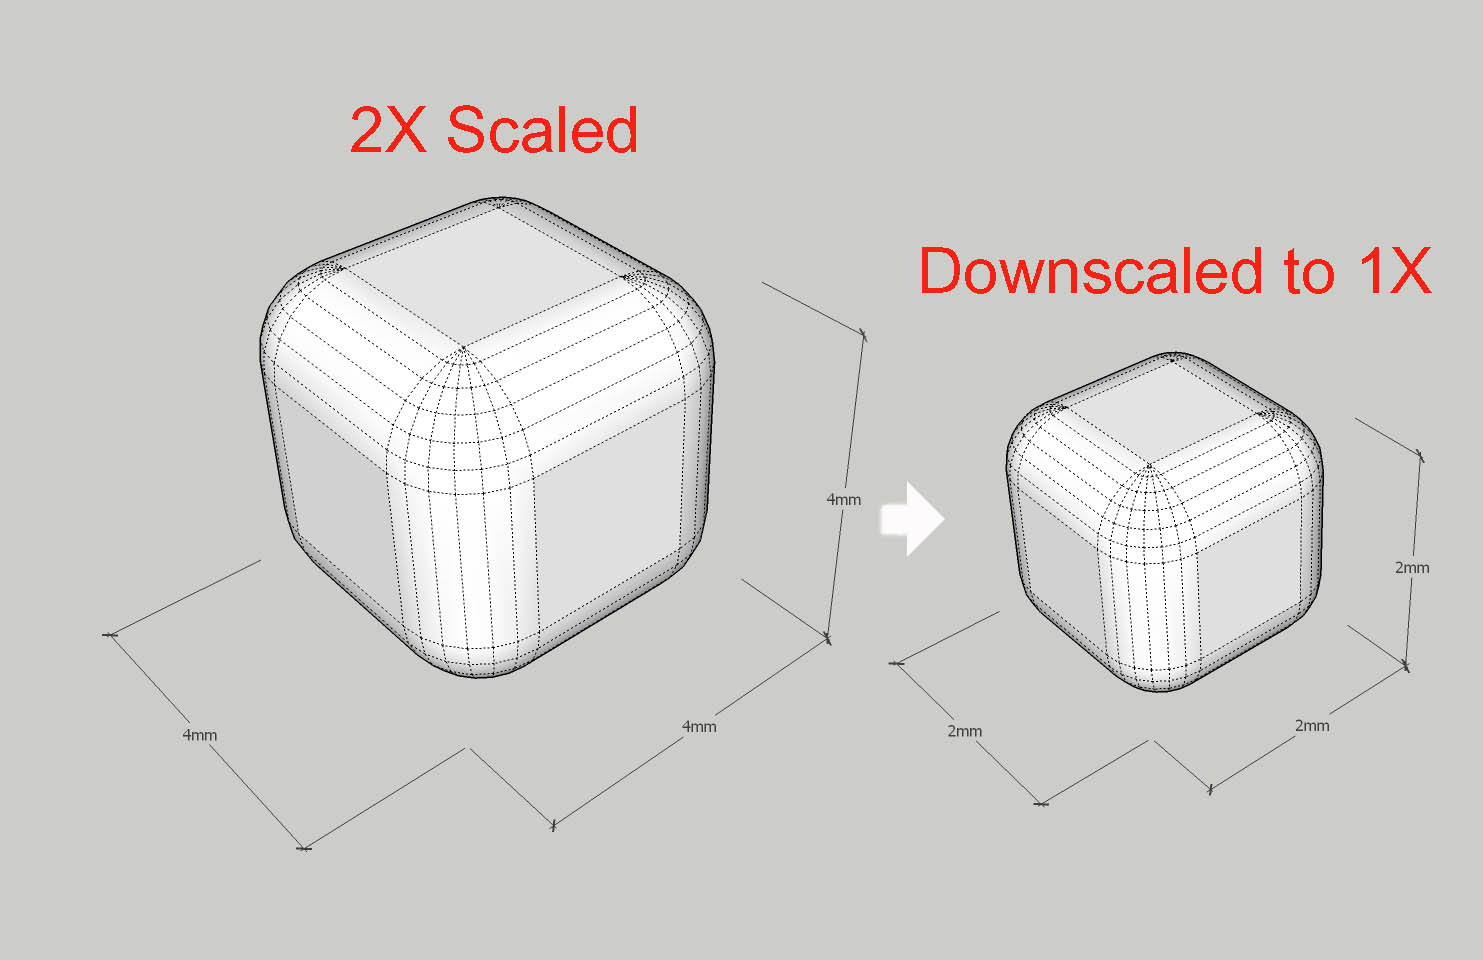
I´ve had som problems with curves when modelling small parts. Rounded edges/corners will not close. I found a workaround that works: Scale the model two times or more, do the rounding with double radius, -then scale down 0,5 to normal size.
-
@unknownuser said:
Modelling small parts
I´ve had som problems with curves when modelling small parts. Rounded edges/corners will not close. I found a workaround that works: Scale the model two times or more, do the rounding with double radius, -then scale down 0,5 to normal size.
 Yep. That's a standard recommended procedure for drawing small items in SketchUp. I use a slightly different procedure that works better for me but yours is the method most people seem to use.
 -
@dave r said:
 Yep. That's a standard recommended procedure for drawing small items in SketchUp. I use a slightly different procedure that works better for me but yours is the method most people seem to use.
I bet that method evolves making turning your geometry into a component (wich is default work for you) copy the component to the side and scale it up, work on the scaled up version and the correctly scaled version will update simultaneously.
Repeat the process as needed!
Right?
That's what I do too, even if I have to turn my groups into components. (Sorry Dave, but I simply love the components vs groups discussion!)
-
you should have a group hug
-

-
why thank you Box
-
-
no, if components hug you get a scaling issue
-
Groups, components or unique's doesn't matter! If you lot get close enough to be hugging there will be dubious 'plugin' accusations. As Rich says, there is a front door and a back passage...........
-
Everyone know that deep down, groups and components are the same.
-



-
So... are we starting chapter 2? Will it be a trilogy?
-
@jql said:
So... are we starting chapter 2? Will it be a trilogy?
It's been a love/hate project I've tackled on and off when I had time.
So to finally draw a line under it is great.
Now to see what happens next....

-

-
Are you bringing these to the Basecamp?

-
-
Nobody, I'm just wondering
Hello! It looks like you're interested in this conversation, but you don't have an account yet.
Getting fed up of having to scroll through the same posts each visit? When you register for an account, you'll always come back to exactly where you were before, and choose to be notified of new replies (either via email, or push notification). You'll also be able to save bookmarks and upvote posts to show your appreciation to other community members.
With your input, this post could be even better 💗
Register LoginAdvertisement
