[Plugin] UVTools v0.1
-
@alan fraser said:
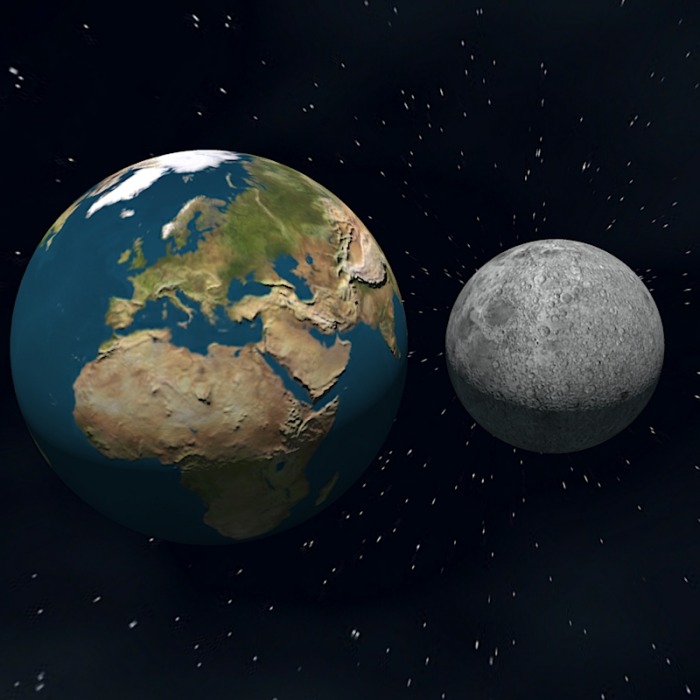
I then resized the sphere to exactly 10' diameter...it's a tad larger than that by default.
I imported the image and exploded it, then edited its height in the Material Editor to match the sphere's diameter.Resizing the image before using the plugin is an unecessary step. The plugin will always map the image the full height of the sphere and wrap it exactly once around the sphere.
-
Thanks Dale. I should have figured that with no adjustment controls, it would be set to fit. I've only just taken a look now at the code.
-
Dear Alan,
Many thanks for the detailed explanation. As I wrote somewhere else, I tend not to texture my models, being content with the default shades, and so I haven't built up any skill in this area.
Thanks again, and thanks to Dale for another useful script. The model of the globe is really very impressive. I must have a go at Mars.
Kind regards,
Bob -
Bob,
You'll find some decent planet maps here.
http://planetpixelemporium.com/planets.html
The individual planets are linked at the bottom of the page.The maps are distorted because in order to fit a sphere the entire top and bottom edges need to come to a single point at either pole, so you'll appreciate that things get progressively stretched as you move away from the equator.
You don't need to start from scratch. You can merely open the Earth globe skp, go to the Material browser...In Model, select the Earth texture then in edit mode replace the earth.jpg with one of the planetary ones you download from the above site. It will map automatically.
-
Thanks for both the tut' and the link to the planet texture maps, Alan..!!

Much appreciated..!!
-
Dear Alan,
Many thanks for taking the time to post the link. I will have a go at that when I have a moment. I would also to create a background/sky dome simulation of Mars too. The reason for that is we have a couple of projects which involve instruments for Martian atmosphere monitoring, and it would be rather nice to see the lander in a Martian setting. Alternatively, I could get on with some real work.
Kind regards,
Bob -
i had a play with the plguin and found if i reduced the texture scale just a bit the mapping at the poles tended to clear.
Also exported to Maxwell with no issues!!!
Whaat again you do some absolutely amazing stuff mate!
-
Thank you, Whaat!

-
hi there.

Is it not possible to re write the plugin to see the mapping box,a way to scale the box or edit and maybe include a box mapping too. Similar to what max is doing.But from me to you...congrats..its super so far. -
i tried the ruby , but there is a problem when exporting to Kerkythea ..... it converts the shape to lots of faces whit lots of textures!!!!!!!!!!!!!! would be it reviewed to solve this problem?
yours majid -
Majid,
Whaat have already provided an answer to this...

@whaat said:
This seems to be an issue with non-triangular faces. If you can somehow triangulate the geometry prior to exporting, then the UVs should still be correct.
My 'Polyreducer' script triangulates all of the faces of a mesh. However, it will also reduce some polys. (The minimum is 10%). Once I triangulated your spheres, I reapplied the spherical mapping and then exported to Indigo. It worked perfect! I expect it to work with other rendering engines as well.
Another script that will triangulate faces is my 'SubD and Smooth' script (but it's not free)
Below is made using the SubD and Smooth script and exported using SU2KT...

Works like a charm...!!

-
indeed, just 5 mins using it and i got this result, works great
and its so easy to use! congratulations.
-

 thank you!!! good!!!
 -
Just catching up with all the news here...
Great plugin, thanks a lot!
I discovered however that if you want to UV map something on a reversed face, it gives a bugsplat. No worry about this at all though - at least it will teach everyone the lesson; "always orient your faces correctly"!

-
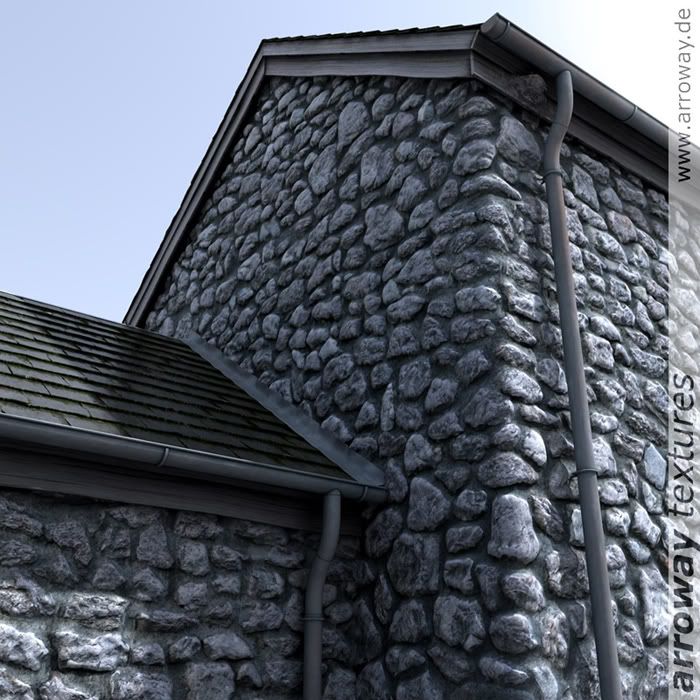
I would love to be able to UV-map textures like in this example, to go around (smooth)corners:
(Do mind that a displacement map was added.)
'wrap around' mapping?:
-
That lead flashing must have been rather tricky to fit!!
-
@kwistenbiebel said:
I would love to be able to UV-map textures like in this example, to go around (smooth)corners:
(Do mind that a displacement map was added.)
'wrap around' mapping?:You can already do this to a limited degree in SU by positioning a texture using the right-click context menu. Then, sample that texture with the ink-dropper prior to painting on an adjacent face. The UV mapping will then be continuous around the edge.
The sample image you posted can already be done in SU. I am sure of it. I will try to recreate a similar scene using displacement mapping with only SU and Indigo to test my theory.
-
Oh cool!
You weren't referring to the projected method are you?
...but to the method to texture a cilinder, right? (as in the video tuorials that once were on the official SU site). -
Like, turning on "hidden geometry", then sample the texture, and paint it on the faces that have appeared due to turning on "hidden geo"?

-
If you smooth the corners (bevel) and apply that awesome arroway texture, would it not work?
Hello! It looks like you're interested in this conversation, but you don't have an account yet.
Getting fed up of having to scroll through the same posts each visit? When you register for an account, you'll always come back to exactly where you were before, and choose to be notified of new replies (either via email, or push notification). You'll also be able to save bookmarks and upvote posts to show your appreciation to other community members.
With your input, this post could be even better 💗
Register LoginAdvertisement


