Julia Eneroth's Viewport Resizer / SketchUp 2023
-
@HornOxx The reason I ask is because I use a AutoHotkey Window Resizer to resize SketchUp so the my viewport is a particular ratio. It takes a little bit of setup but saves me from guesswork.
As an example if I hit CTRL+F10 it resizes SketchUp so its viewport is 600px x 600px. Now I can export 1:1 image ratio at whatever resolution I need.
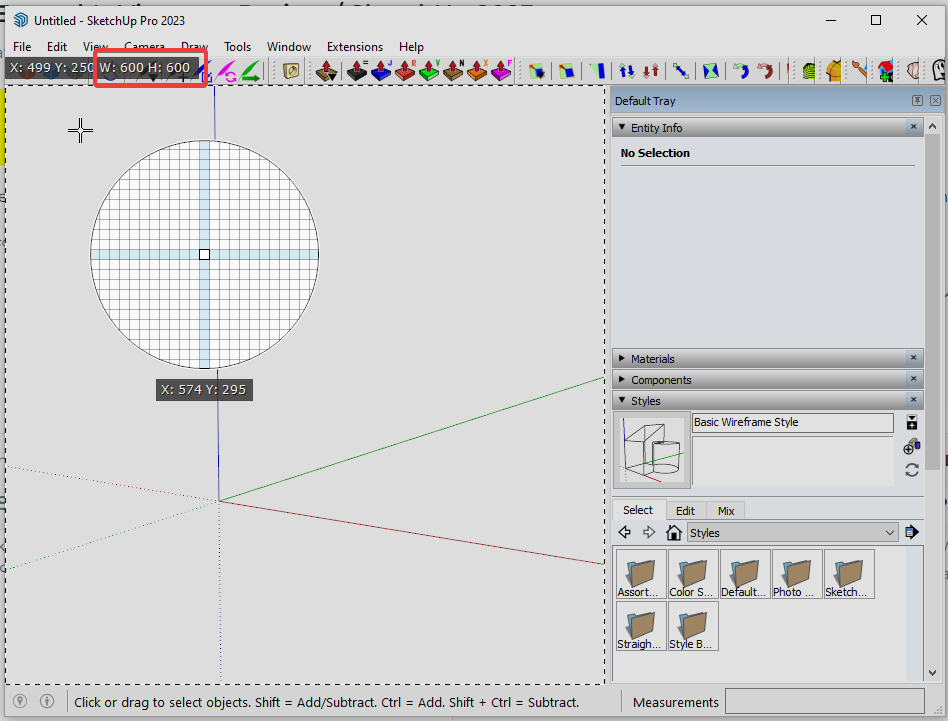
Its a bit hacky but I've used it for years.
-
Great Rich !!!


Yes, the principle you are showing here is exactly what I urgently need and which has since been guaranteed by Eneroth's ingenious plugin.
And even if I have no idea at the moment how I could create such a script, I understand your message correctly: with this method a viewport adjustment e.g. to a desired HD aspect ratio like 960px x 540px could as well be achievable? -
I use AutoHotkey for many things and it's easy enough to customize once you come to grips with its foibles...
I don't auto-resize viewports, but Rich knows how, and perhaps he can share his example script, or point you/us to someone else's ? -
@TIG said
but Rich knows how, and perhaps he can share his example script, or point you/us to someone else's ?
To be clear, my AHK script, is cobbled together from other scripts and is dependent on a particular UI setup in SketchUp. This is a complete hack with a very blunt axe but it works for me.
- Windows only
- SketchUp 2023 (but you can customize for earlier releases)
- Single horizontal Toolbar stack
- Tray on but sized to narrowest width
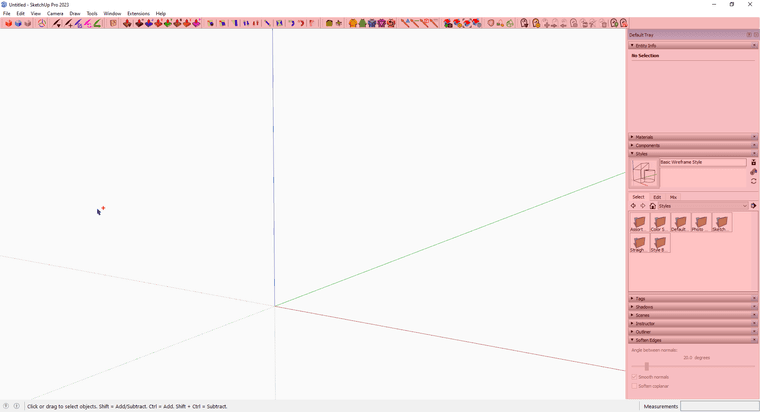
NOTE: This works on any active window its not limited to SketchUp
Download and install AutoHotkey
Download and unzip this into a folder wherever you want on your system
 Resizer.zip

If you double click the ResizeWindows.ahk it will add an icon to your tray so you know when you have it active for use.

The shortcuts keys I've set are:
- Ctrl+F10 1:1 @600px x 600px
- Ctrl+F9 4:3 @800px x 600px
- Ctrl+F8 16:9 @800px x 450px
- Ctrl+F7 21:9 @945px x 405px
- Windows Key + LMB will hide the title bar of active window (Utility)
- Windows Key + RMB will show the title bar of active window (Utility)
- CTRL+ALT+LMB to toggle always on top (Utility)
- CTRL+SHIFT+F8 display a popup with the Width/Height of active window (Utility)
If you open the ResizeWindows.ahk with a text editor you will see the following:
#NoEnv
#SingleInstance, force
#Persistent
SendMode Input
SetWorkingDir %A_ScriptDir%
Menu, Tray, Icon, %A_WorkingDir%\icons\resize.png ,, 1 ; icon

#installKeybdHook
TrayTip, %A_ScriptName%, Started, 1

^+F8:: ; Get window stats to create more presets below
WinGetActiveStats, winT, winW, winH, winX, winY
WinGetClass, class, A
MsgBox,
(
- TITLE
%winT%

- DIMENSIONS
%winW%  x  %winH%
)
return

^F10::ResizeWin(956,719) ; Ctrl+F10 1:1 @600px x 600px
^F9::ResizeWin(1156,719) ; Ctrl+F9 4:3 @800px x 600px
^F8::ResizeWin(1156,569) ; Ctrl+F8 16:9 @800px x 450px
^F7::ResizeWin(1301,524) ; Ctrl+F7 21:9 @945px x 405px

^!Lbutton:: ; Ctrl+Alt+Lbutton to toggle always on top
WinGet, currentWindow, ID, A
WinGet, ExStyle, ExStyle, ahk_id %currentWindow%
if (ExStyle & 0x8)  ; 0x8 is WS_EX_TOPMOST.
{
   Winset, AlwaysOnTop, off, ahk_id %currentWindow%
}
else
{
   WinSet, AlwaysOnTop, on, ahk_id %currentWindow%
}
return

ResizeWin(Width = 0,Height = 0)
{
  WinGetPos,X,Y,W,H,A
  If %Width% = 0
    Width := W
  If %Height% = 0
    Height := H
  WinMove,A,,%X%,%Y%,%Width%,%Height%
}

;-----------------------------
;Collapse titlebar
LWIN & LButton::
WinSet, Style, -0xC00000, A
return

;Uncollapse titlebar
LWIN & RButton::
WinSet, Style, +0xC00000, A
return
;-----------------------------


Gui, +ToolWindow +AlwaysOnTop -SysMenu -Caption +Border
Gui, Color, cCCCCCC
SetTimer, Draw, 100

Draw:
MouseGetPos, MouseX, MouseY, MouseWin ; get mouse coords/window
WinActivate, %MouseWin%

WinGetActiveStats, Title, WinW, WinH, WinX, WinY ; get the stats of the active window

; variables
DrawW := (WinW)
DrawH := (WinH)
DrawX := (WinX - 1)
DrawY := (WinY - 1)

; show the gui
Gui, Show, NoActivate w%DrawW% h%DrawH% x%DrawX% y%DrawY%, Draw
WinSet, TransColor, CCCCCC, Draw
return
It is lines 24 to 27 that handle the resizing of the SketchUp window. These you may need to tweak to get the result you want. For me it does what I want. I could go into more details but look at this filthy hack length already.
-
 many thanks Rich for all the input and also to you
  Tig! for your encouragement!
I have installed everything, learnt that I need the older HotKey version 1 instead of 2, finally installed an editor with line display because of "...It is lines 24 to 27 that..." and of course I immediately realised what potential lies in this systematic approach - wonderful!
(I originally hoped that this topic could still be dealt with via ruby - I can't do that either (LOL) but it still reads somehow more logically in my opinion)
And Rich, your script runs wonderfully, but of course doesn't lead to the desired result on the basis of my SkUp setup - but never mind, still great!
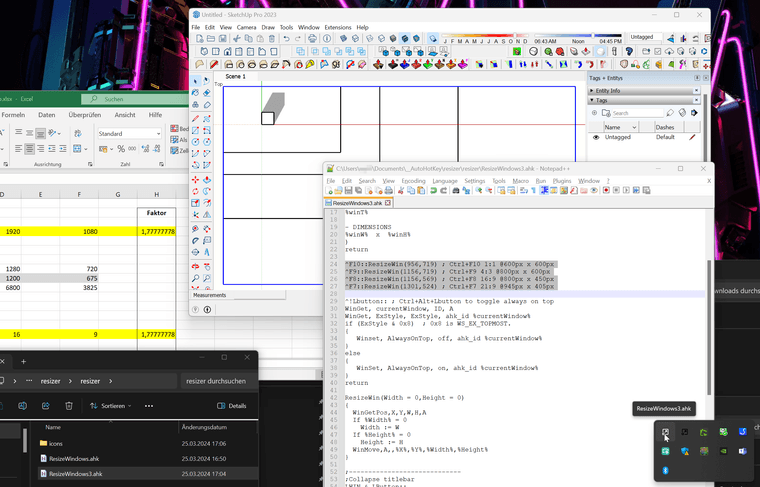
Now I have to get to grips with the script parameters and variables which take into account my typical SkUp setup whichcan be guessed by the screenshot below...
-
If that helps: a plugin for easily exporting SketchUp images, as shown in the viewport but with free input of height, width, format and compression.
Originally modified for a smooth scene animation to coincide with the Skindigo AnimationExport (Indigo Render Animation).
Here reduced to a SketchUp single image output with input of image parameters.
Transfer the code to an rb file called Single_Image_Export.rb and copy it to the plugin folder of the respective SUp version (tested up to SUp2022).
Restart SketchUp ....# Formerly Created by Dale Martens AKA 'Whaat' as "Smoothstep Animation" # Released 6 Oct 2008 As-is and without warranty of any kind. # Originally modified by faust07 for a smooth scene animation to coincide with the Skindigo AnimationExport (Indigo Render Animation). # Here reduced to a SketchUp single image export with input of image parameters. # Modified by faust07 (AT) 2024-03-25 require 'sketchup.rb' if( not file_loaded?("Single_Image_Export.rb") ) menu=UI.menu("Plugins") menu.add_separator menu.add_item("Export Single Image") {(SingleImageExport.new(true))} end file_loaded("Single_Image_Export.rb") class SingleImageExport def initialize(export) # export should be true or false if export # Inputs prompts = ["Width","Height","Format","Compression"] values = ["1920","1080","JPG","1.0"] format_choices = "JPG|PNG" enums = [nil,nil,format_choices,nil] results = UI.inputbox(prompts,values,enums,"Export Options") if results @width = results[0].to_i @height = results[1].to_i @format = results[2] @comp = results[3].to_f if @comp < 0.1 or @comp > 1.0 UI.messagebox("Compression must be between 0.1 and 1.0") @export = false return end def_filename = "SU."+@format.downcase path = UI.savepanel "Export Frame","",def_filename if path @export_path = File.dirname(path) @filename = File.basename(path,".*") # remove the file extension end end end # single image export @image_path = File.join(@export_path,@filename + ".#{@format.downcase}") Sketchup.set_status_text("Exporting Frame to #{@image_path}") Sketchup.active_model.active_view.write_image(@image_path, @width, @height, true, @comp) end # end def initialize(export) end # class -
@HornOxx said in Julia Eneroth's Viewport Resizer / SketchUp 2023:
of course doesn't lead to the desired result on the basis of my SkUp setup
You can just press CTRL+F10 to set it to 'My Square' and then use File > Export >2D Graphic. In the option box if you click Use View Size you will see what the image dimension is for you.
Then adjust line 24 values accordingly to get you to 600px. Not the most elegant approach.
I think the better approach would be to ask Fredo if his Screenshot tool in Fredo Portrait could be extended to handle this. It already has ratio based selecting.
-
...Rich, I will definitely try your approach (first) to get a better understanding of what is going on between your script and the result "in front" since all that is pretty new to me and then continue by trying to tweak the script here and there to find out which are the right "lines" and values which are necessary - what an exciting thing and refreshing to learn always on top of that.
1000 times thanks for guiding me this far. And if Tig contributes from his almost inexhaustible fundus of knowledge, this is always and everywhere welcome in any case!!!!! ️
️@Faust07
Hi and as always I am very happy to hear from You and when I look around in this fantastic group of people here I ask myself "where on earth did I go to school and was it worth it all these years"


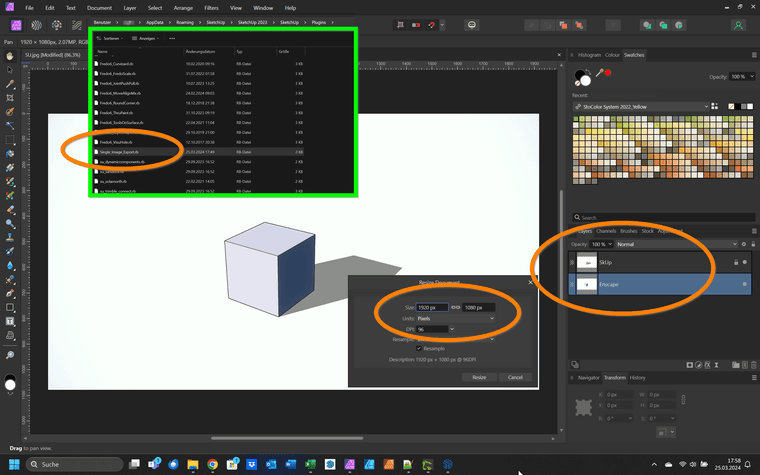
Yor Script worked out of the Box and and delivered the result I need for my/our workflow.
I rendered a hiddenline (1920 x 1080) from SketchUp and did the same with the view synchronised Enscape, also in 1920 x 1080. Both graphic components fit together exactly. This means that I can also use the functional renderings from Enscape, such as Material-ID or Depth-mask etc. without any time-consuming fiddling in Photoshop and it also means that every other machine in my team reproduces exactly the same "picture"-result.
So, thank you too for dealing with my topic and for providing a working script on top of that! ️
️
(
 Which schools did you all attend?)
 -
I'm glad this helps.
I find it a shame that the SkerchUp programmers have not yet considered it necessary to implement a precisely definable image export, even though the basic functions are available in Rubi.
Regarding school: "Hochschule für Architektur- und Bauwesen Weimar" today "Bauhaus Universität" - we punched out punched cards and handed them over to the computer center (short time after Konrad Zuse...)
I learned most of Rubi from AntonS for scripting in MSPhysics and from customizing simple plugins for my own purposes. It's enough for small things... -
TH Darmstadt / Architektur, and a completely digital-free education back then (not even Zuse)
 This (CAD) topic then came over me very intensively in my first year of work, but thankfully in a company that provided very good training...
Yes, I agree with you that this issue discussed here has been a flaw since the beginning and yes, it also annoys me that Sketchup never fixed this flaw.
Again to your script and for information for everyone participating here - in the meantime I played through at least 10 scenarios (a: because this topic is so important to me and b: because I have to simulate the output of my many colleagues and our cross-workplace collaboration) and in all these scenarios your script consistently delivered the same and good output results! Prima! I even included the downstream render output in this test, with excellent results as well.
Again, Thanks! to All!!I'm definitely going to deal with the scripting topic - because that's the only key to solving problems like this!
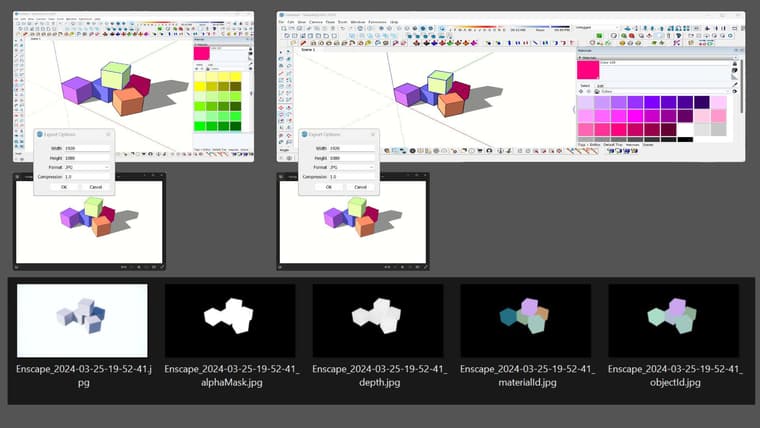
-
 R Rich O Brien has marked this topic as solved on
-
Hi all - apparently there is a solution to my (for you surely annoying) viewport export dilemma, and that is by using Sketchup's own onboard tools:
Instead of using the classic 2D export you can use the animation export instead. There you do not export a video file but individual frames, for example as png or jpg with the setting 1 frame per second.
There you can set a viewport-independent export resolution. I have tested this under all possible settings and various viewport modifications, I always get identical export image results, and these even fit together with a downstream renderer (e.g. Enscape) provided the renderer is set to Sketup's viewport synchronisation.
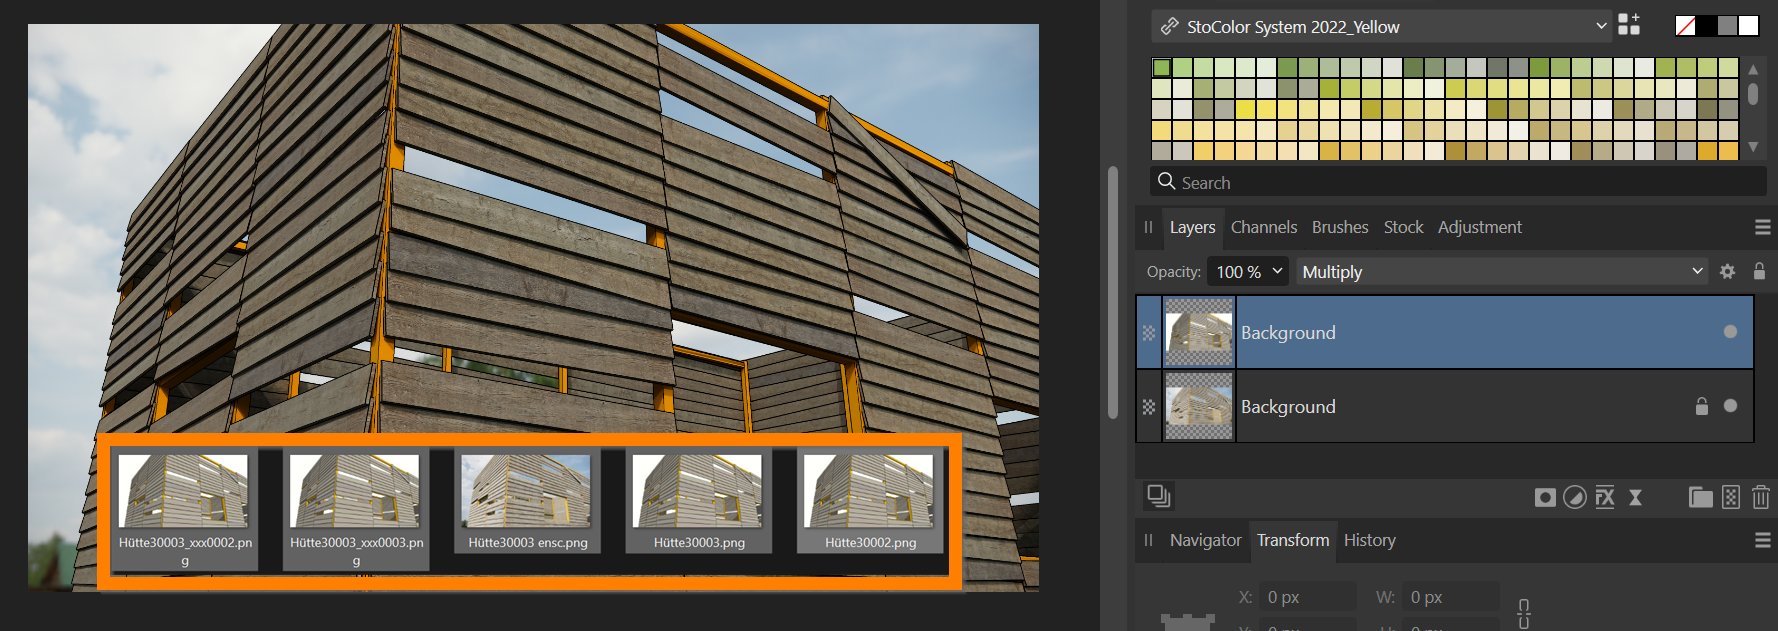
I wouldn't have come up with this obvious solution if Eric M Sargeant hadn't posted his video Batch Exporting Scenes and Styles
Batch Exporting Scenes and Styles
So thanks to Eric M Sergeant and all of you here
-
@Rich-O-Brien Hi sir. Really appreciate your help. Can I know how to get window stats to create more preset? I see in the script it state "+F8" and when I press those keys, nothing happen. Sorry Im a bit noob in this script-things.
-
@Firdaus_KL said in Julia Eneroth's Viewport Resizer / SketchUp 2023:
Can I know how to get window stats to create more preset?
Windows Stats is to report the current dimensions of the active window. Pressing CTRL+SHIFT+F8 will open a dialog with the dimensions of the window.
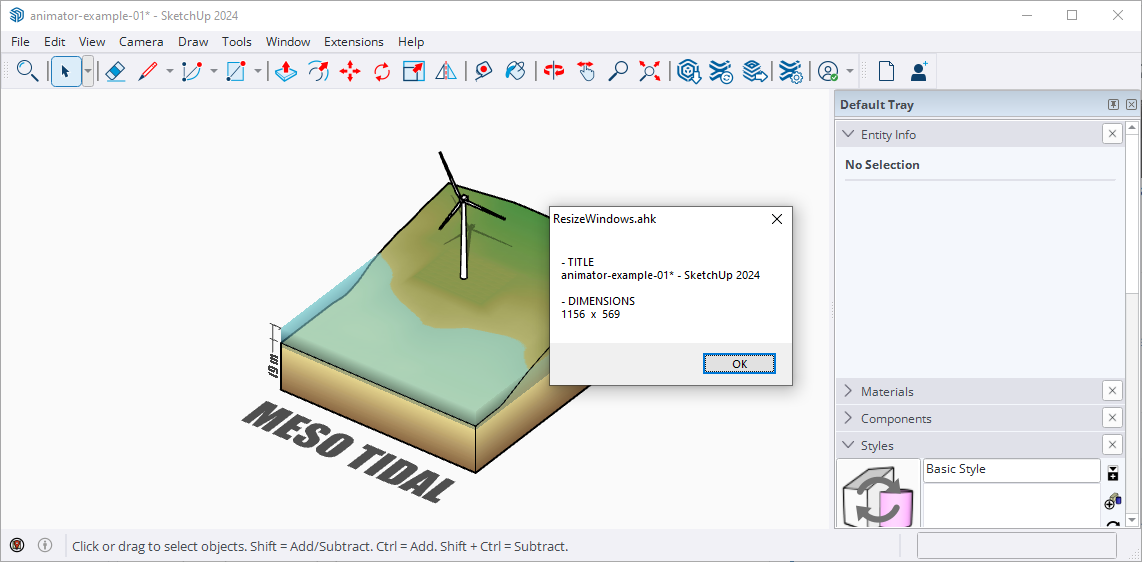
To create a new preset you would need to add a line with your preferred dimensions after line 27
^F6::ResizeWin(1301,524) ; Ctrl+F6 -
MC Vie Size still works, tested and use it every day in SU23 and 24, the catch is it has a difference in pixels (which is constant) that you have to remember, for example in SU23 you have to type minus 2 pixels for horizontal and minus 32 pixels for vertical, and after that you will see the correct and intended dimensions of viewport in the measurements field.
Eneroth is the same, but I don't remember why, I concluded that MC View Size is better... -
Anyway, the best export tool I've found so far is S4U export Scene with complete control over everything - resolution, select the scenes as you please, auto transfer the names of the scenes...
-
Advertisement


