Foundation Plugin
-
The cosmetic threads actually render quite nicely as does my rebar material/texture. I just realized I have not added any custom materials into the foundation plugin.
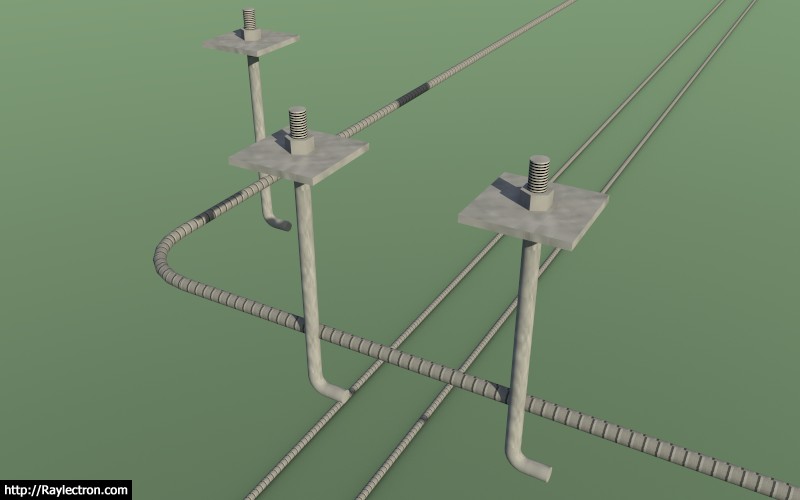
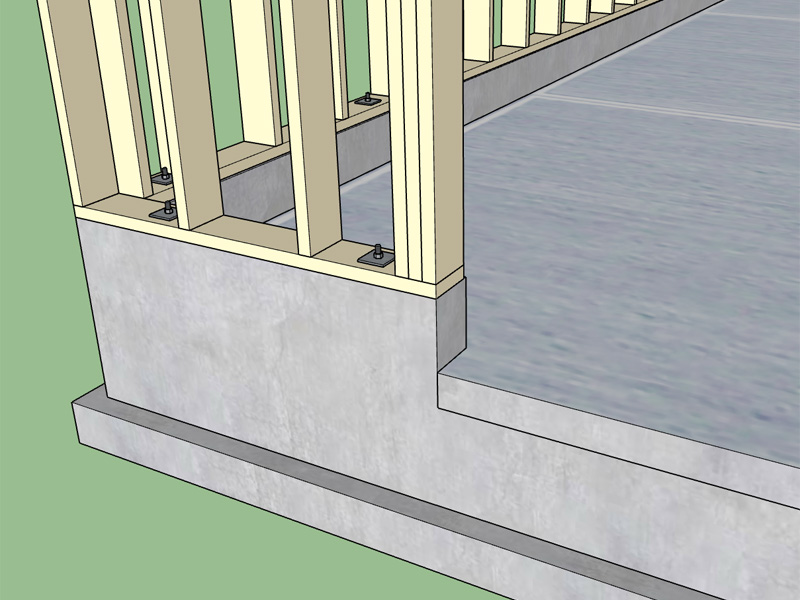
As you can see from the image the orientation of the J-bolts is the same regardless of the wall, however it would not be a couple more lines of code to orient them all facing in or facing out or some other combination. Curious how the contractors actually install these, is the orientation important?
I tried to put the 25 degree incline on the rebar grooves but there are some difficulties with extruded circular shapes and materials so the best I can do is the concentric rings as shown.
-
Orientation of J-bolts
I would think parallel to the wall to give maximum concrete cover
surrounding the J-bolt ends. -
I've been talking to a few other contractors out there and most of them don't pay alot of attention to the orientation of the J-bolts into the concrete, they let the concrete set up a bit and then stab them in.
I'm adding in the custom materials, stemwall foundation below is an example:
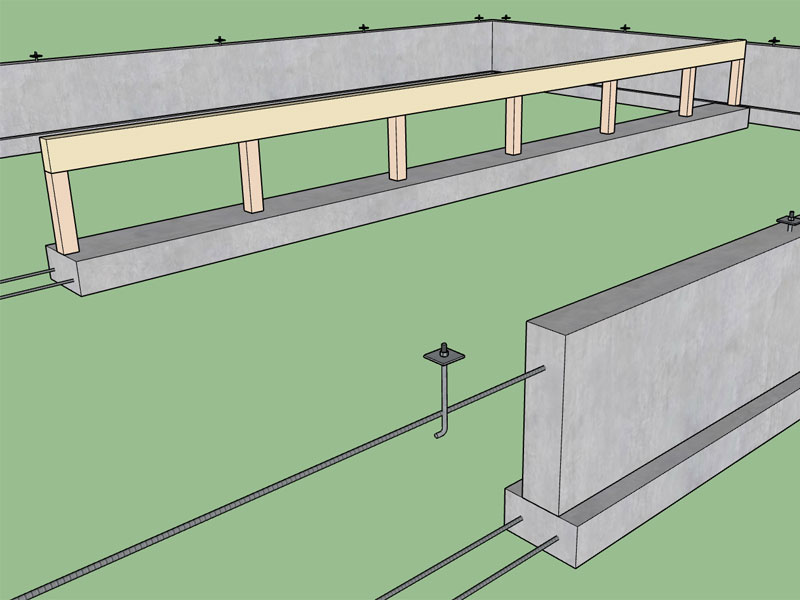
I will need to roll another revision probably tomorrow to get this update out there.
I was wondering about adding in the option for vents in the stemwall, for foundations with crawlspaces. Any thoughts on this and what is standard construction in your locale as well as what type/brand of foundation vents/inserts are used.
-
The ICC codes call out a minimum of a one vent within 3 feet of each corner. It shouldn't be to much trouble to create the openings in the stemwall and place some vents:
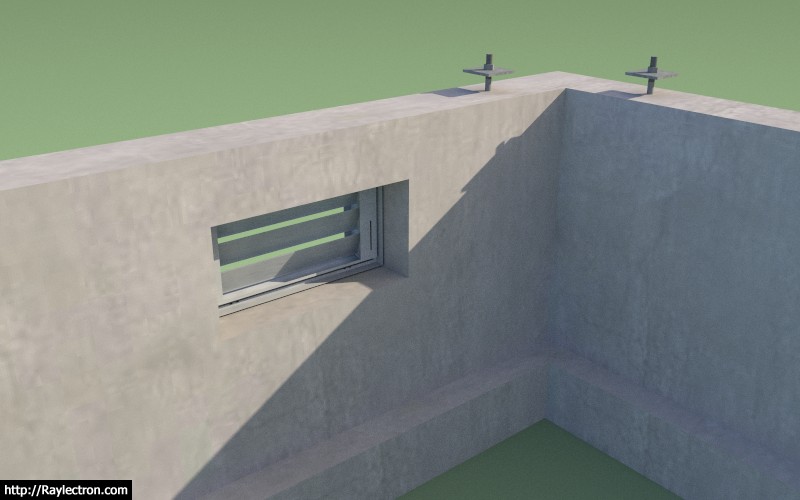
For a rectangular building (4 sides) should I place 4 vents or 8 vents? Provide only the openings or also provide a generic foundation vent (lightweight geometry?)
Moving an opening is actually very easy within SketchUp, when it comes to a solid wall like this.
What is the typical header thickness between the top of the vent hole and the top of foundation?
Vent size seems to be 16"x8" for most vents I've seen.
With regards to vents there are the cheap plastic ones you can get a Home Depot or Lowes and and then there are a whole ton of more expensive louvered metal manufacturers of vents and flood vents.
-
I've been slowly plugging away at the polygon stemwall tool, but as I was driving to work this morning I realized it would also be useful to have a simple linear or line tool as well for creating straight segments.
-
@medeek said:
What is the typical header thickness between the top of the vent hole and the top of foundation?
What I usually do is provide a solid wood header within the floor framing and suck the vents up tight to the top of the stem wall.
As to size, it will vary depending on the topography of the site, total size of the underfloor area, etc. Also, here in California if you are in the "SRA" (State Responsibility Area, which is where fire protection is provided by state forces such as Cal Fire) you have to use approved ember-resistant vents which are further limiting.
-
I've seen them dropped down and some installed at the top of the wall. I guess I will just need to add another input which allows the user to adjust the location vertically.
-
The options for the crawlspace vents (if this option enabled) will be:
1.) Width (in.)
2.) Height (in.)
3.) Corner Distance (ft.)
4.) Top Fnd. Distance (in.)
5.) Max. Spacing (ft.)
6.) Location: All Walls|Left/Right Walls|Front/Back Walls
7.) Vent Insert: NONE|PLASTIC|METALThe Max. spacing variable will determine whether to insert intermediate vents along the wall line. The module will always place two vents per wall (if wall line selected), one at each corner and then equally space vents along wall line based on the Max. spacing variable.
-
The vent module seems to be working fairly well:
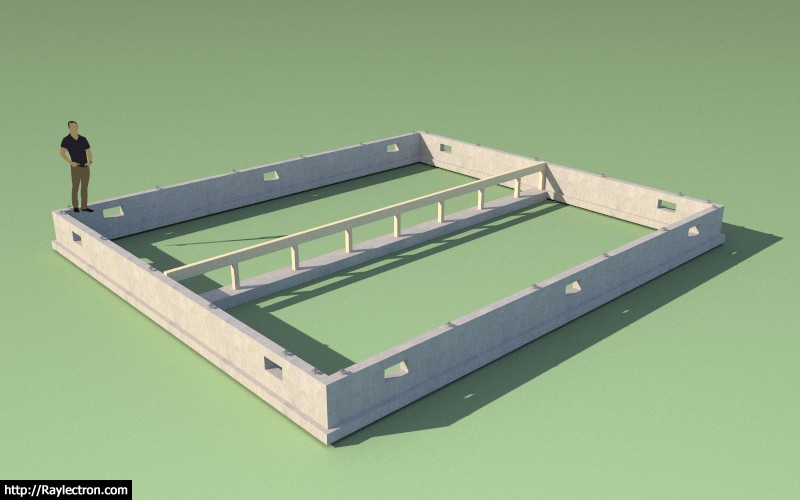
If you set the top distance to zero the vents are right up to the sill plate:
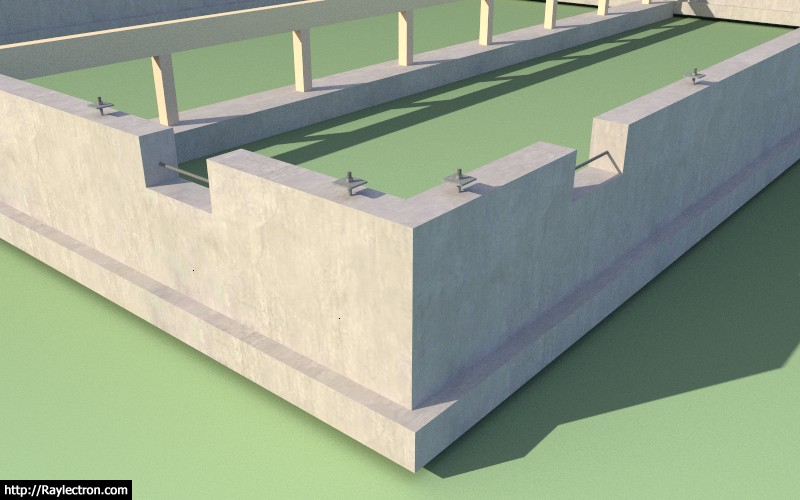
Notice the top bar is clashing with the vent cutouts.
-
Version 1.0.8 - 03.23.2017
- Added crawlspace vent option to stemwall foundations.
- Added a "Materials" tab within the global settings; Auto material assigment (colors and textures) is now an option.
- Enabled materials for all foundation types.
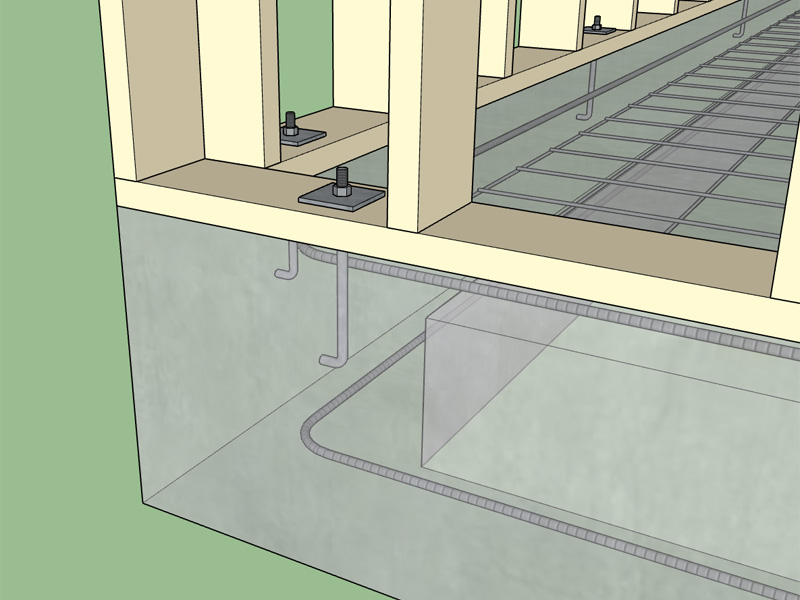
-
I have not used this extension in a while (and not on any modeling thus), updated again (as I always do when new versions come along) today from the Medeek site, version 1.0.8.
Strange, I can't seem to get any of the functions to work. The "slab" and "slab on grade" functions are probably the main reasons I got this extension and dev is standing still on "slab", licence update/renewal due within a few months, not a killer amount though but I was hoping these functions would receive some love.
Another long time problem is under settings, the "trial version" indication does not go away even when I enter my licence information.
Any ideas?
-
What is the error you are getting in the Ruby console? Please also send me your OS and SU version.
I will get to work on the slab tool next. I've been concentrating on the Truss and Wall Plugins and just got back to this one after a hiatus.
-
@medeek said:
What is the error you are getting in the Ruby console? Please also send me your OS and SU version.
I will get to work on the slab tool next. I've been concentrating on the Truss and Wall Plugins and just got back to this one after a hiatus.
Sending via PM
-
Also be sure to let me know if you are using a metric or imperial template.
-
I think I've fixed the bug, download version 1.0.8 again and reinstall, the previous version is broken.
-
Suggested Template for reporting issues/anomalies
via PM to Medeek. (private Message - refer pic attached)Anomalies Report - Medeek Foundation
01 SketchUp Version (Skp_ _ _ _ _ )
02 Operating System (OS_ _ _ _ _ _ ) W10 for example
03 Are you are using a metric or imperial template?
04 Ruby console report
(locate on Skp horizontal drop down functions: Window > Ruby console)
** Note open Ruby console BEFORE running plugin.05 Screen capture (if appropriate or helpful in explaining issue)

-
Medeek Foundation Plugin - v 1.0.8 Mar 25, 2017 11:45 am
Working Okay!
Thank you for your effort.01 SketchUp Version (Skp 2016)
02 Operating System (W10 32 bit)
03 Using a metric template?
-
Version 1.0.8 - 03.23.2017
- Added crawlspace vent option to stemwall foundations.
- Added a "Materials" tab within the global settings; Auto material assigment (colors and textures) is now an option.
- Enabled materials for all foundation types.
- Added a joist pocket option for stemwall foundations.
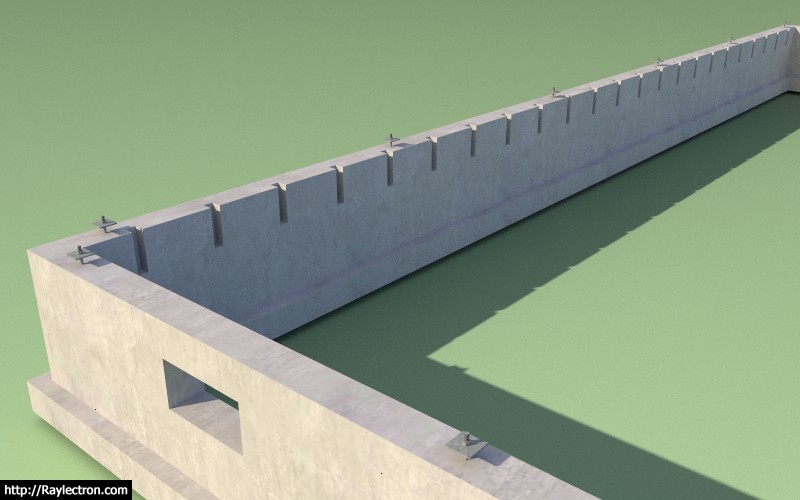
I've been putting off the joist pocket feature for a while but figured I could spend my Friday night and knock it out. I doubt it will get much use except for certain builders in the State of Oregon.
The options for the joist pocket option are:
1.) Pocket Width
2.) Pocket Height
3.) Pocket Depth (into the stemwall)
4.) Pocket Spacing (default is 16" o/c, but can be set to any value)If you use joist pockets with either the brick ledge feature or the crawlspace vents you need to realize that the geometry must be such that the various item don't clash. For example the stemwall must be thick enough for a brick ledge and the typical 2.25" depth of the joist pocket.
With vents and pocket joists there must be enough vertical clearance between the two otherwise the header will be too thin for the overlying floor joist. One solution to this problem is to have the vents only on the front and back walls while the joist pockets are on the left and right walls.
The number of options and inputs is now a bit mind boggling and the code is also at a new level of complexity. Taking all of this to a polygon shaped foundation will be a challenge but that is where it needs to go next.
-
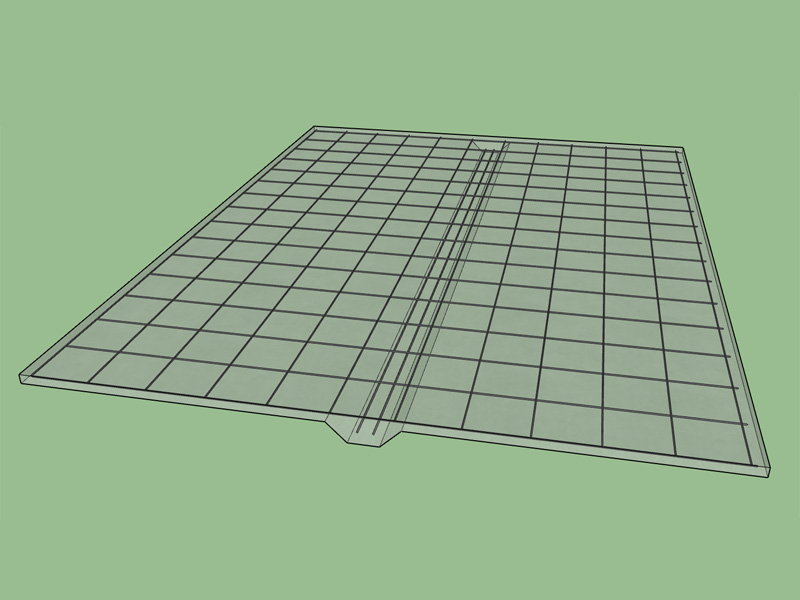
Version 1.0.9 - 03.25.2017
- Added slab foundation type (rectangular outline only).
- Enabled full and partial width interior thickened slab footings.
View model here:
3D Warehouse
3D Warehouse is a website of searchable, pre-made 3D models that works seamlessly with SketchUp.
(3dwarehouse.sketchup.com)
-
The push/pull feature of SketchUp makes things like popping holes and creating extrusions really easy. The garage door shown below is a good example of this. I've boxed out a section in the stemwall for the door and also extruded a piece of the slab out over top of the stemwall.
The problem arises when the top rebar runs through the door opening. Basically I need to create an opening tool that will remove the rebar as well as the concrete. A virtual concrete saw cutting tool, too bad the boolean operations are not standard with SketchUp Make, this would make my life easier.
Advertisement


