Map a texture to a kerb
-
After many year of coping with poor terrain i have decided it time to start doing it all properly ish..
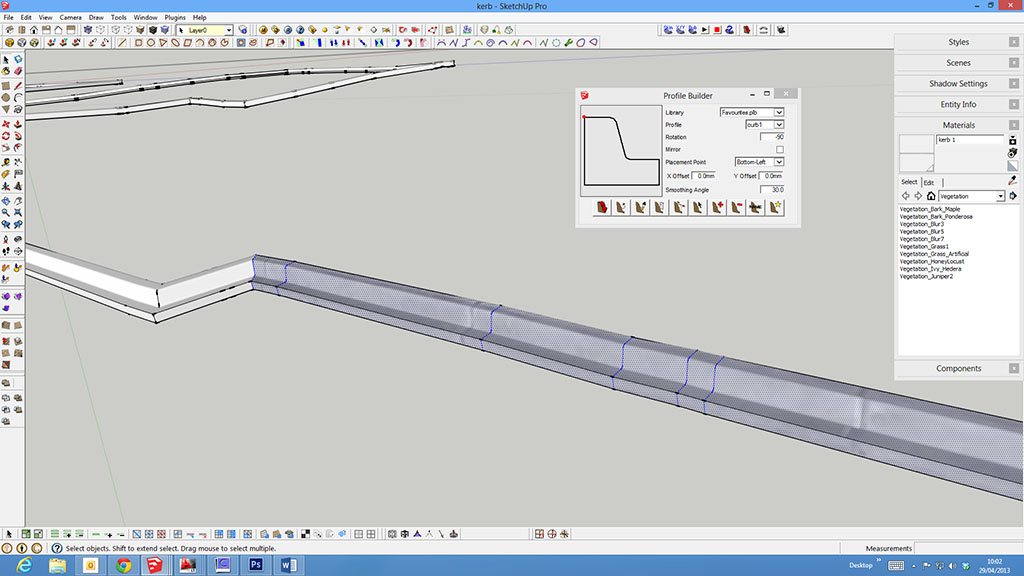
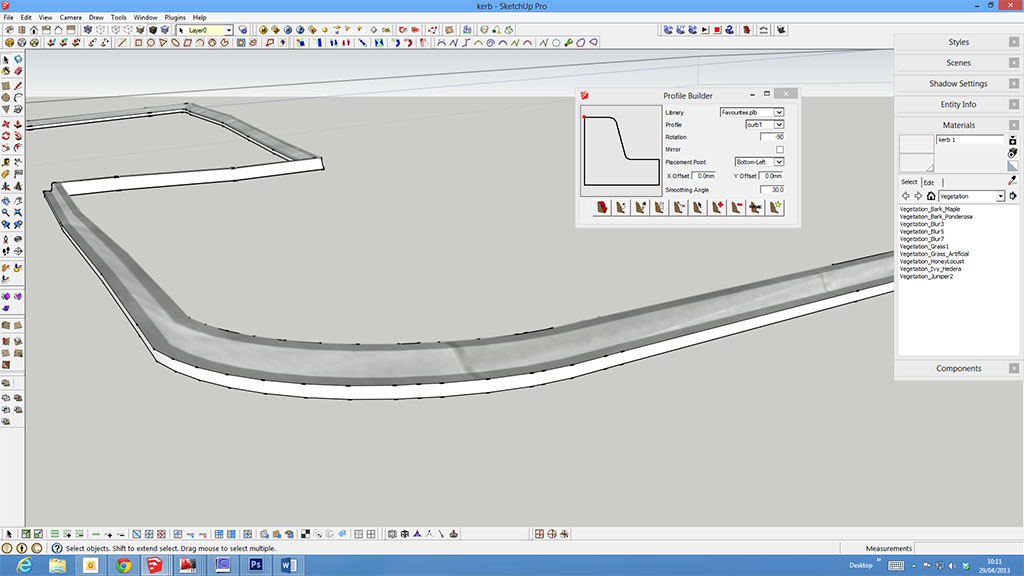
My problem is i create a kerb with dale martins profile builder but when i try and map a texture to it using thom thom's quad face tools, it either only partially creates rings of edges based on selection or not at all. (image enclosed)
i used to just used projected textures but there is always an area when it does not map properly.


-
Unless you use uv mapping--that is if you want to use projection-- try separating the surface of the corner curve and project that separately using an angled projection (Normal to the center section of the curve).
-
I use SketchUV for this sort of thing and it works perfectly. Just use Tube Mapping and it maps it really well on the rounded edge as well as along curves.
http://sketchucation.com/forums/viewtopic.php?t=44501
I believe is a pay script but well worth it for this sort of work. Even more than tube mapping though is the little Path Selection tool that comes with it. It's basically like a "loop" selection tool in 3ds Max and can save tons of time. I probably use that one every day.
-Brodie
-
Cheers all for the info.
Brodie thanks for the link, will get it bought and have a look.
-
-
That mesh isn't all quads to begin with.
Use Fredo's ThruPaint and you'll see where it fails to paint. Those areas are where your gonna run into problems.
Fix them and it'll map easily.
-
i would use a combination of split donuts/sausages, quadface tools and tru paint for this.. with theese tools.. it's quite easy.
-
Used thru paint and it worked great, love quad face tools my only problem is i think i need some lessons on quad faces and how to create, as most of my time i create in sandbox and it gets worse from that point onwards.

-
modeling in quads takes other advantages, not only texture mapping, also you got a cleaner well subdivided mesh, handling the mesh is more effective, because you can quickly select/grow/shrink loops and rings it is also very fast to create/add/remove them and get more control over the mesh density.. if you give a look to the pages thomthom linked in the first post of quadface tools, you will find them very useful.. in particular the link to that blender forums..
anyway did you try "convert sandbox quads to quadface quads"?
-
@thirty6 said:
how to create, as most of my time i create in sandbox and it gets worse from that point onwards.

what and how does it get worse?
-
If you don't have too much to do and are inclined to use basic techniques rather than plugins then paint one section of your curb, adjust the texture placement as needed, and then use alt-paint to sample the placed texture from one poly. Paint the rest of the row manually. All of the individual polys you paint will replicate the appearance of the poly you sampled. Repeat as needed if the kerb has several rows of polys, top to bottom.
-
I don't understand why this should be happening
If, for example, you simply drew your profile and then used the 'Follow Me' tool instead of the 'Profile Builder', does the same thing occur ?
-
@genma saotome said:
If you don't have too much to do and are inclined to use basic techniques rather than plugins then paint one section of your curb, adjust the texture placement as needed, and then use alt-paint to sample the placed texture from one poly. Paint the rest of the row manually. All of the individual polys you paint will replicate the appearance of the poly you sampled. Repeat as needed if the kerb has several rows of polys, top to bottom.
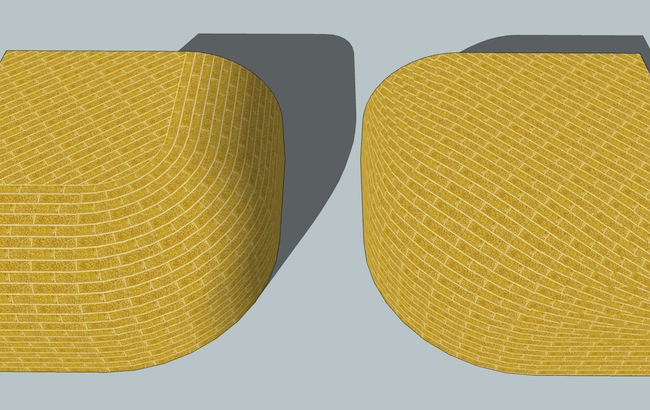
fwiw, you can use ThruPaint to do that automatically as well.. it has quadmeshUV, naturalUV (which is what you're talking about), then projectedUV
that said, the technique you're describing will not properly texture many situations.. to properly map these quads, you'd have to make a gazillion individual textures and scale/rotate/skew each on etc.. ie- huge nightmare that i bet nobody has actually done manually before..
[quadmeshUV on the left -- naturalUV (ie- the technique you're describing) on the right]

-
Sorry for the delay been on holiday
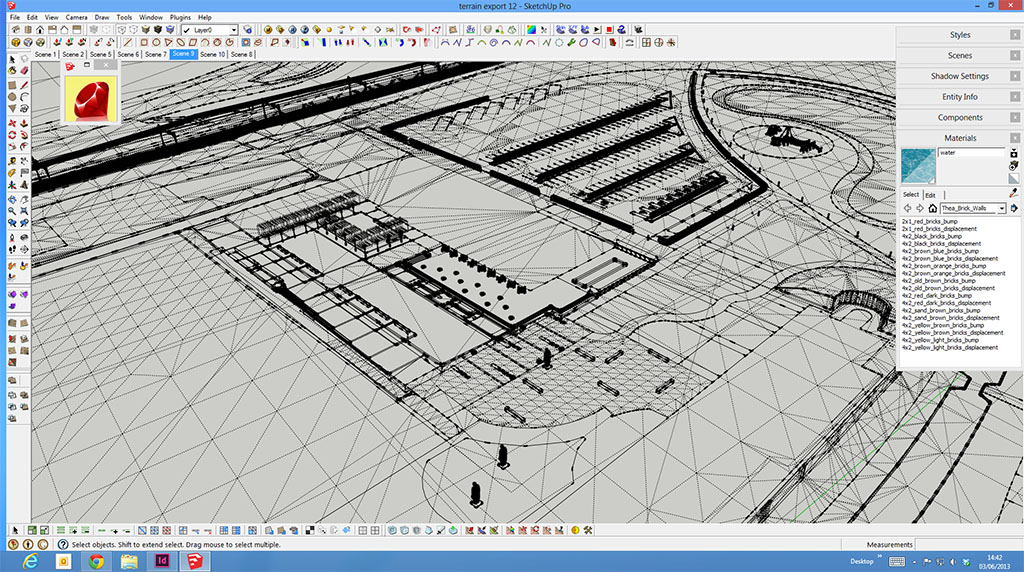
Thanks everybody for the comments, Thom Thom; example build a terrain then the clients wants me to add some steps, then next day wants them taking out and a ramp adding. I end up with a mesh with patches added and over a period of alterations it gets messy and hard to use. I notice the expert users always display clean equally proportioned meshes so either i need some training in sandbox / quads or there must be a way of re forming a mesh once i have made the alterations.
I have enclosed a screen shot of an example, this site has been regularly altered over a 12 month period.

-
Intense scene.
I hear you. I don't think working a terrain with hardscape will ever be like modeling a car. We have to work out modeling methods that have some logic with the content (including components and patterns that somehow interrelate to the terrain mesh) and a terrain that has existing and proposed grading, not to mention roadways and paths that follow grades, as precise as we can manage.
I find I must cut pieces of the terrain out, but often the edges must meet up with another piece. Other times the terrain can simply butt against a wall or other vertical form. For some jobs, I just let the forms intersect and who would be the wiser that the terrain is hidden by a building or new embankment in a rendering or site model CD view?
The technique is a work in process for just about everyone as far I can see. I haven't seen a concise approach yet. Maintaining "good" or "good enough" mesh is difficult for a site design project with all its phases(and "good" is relative, especially compared to expert organic modeling).
I think you will want to move beyond Sandbox and use some of the organic modeling tools, particularly Artisan, Vertex Tools, Toposhaper, Instant terrain, and Extrude tools.
-
pbacot
thanks for the reply, i have found that results are better when starting from scratch with sandbox, but most of the time i use google earth import or i am supplied contour data. I have artisan and all of thom thom's plugins just need more time and a little guidance on how to use them.
Just waiting for the job to go into planning then i will share the visuals, i have removed all the buildings in the screen grab and its quite a large development. Just buying lumion so should be a flythough as well.
-
As promised enclosed is the fly through of Wedgwood, first time using Lumion so improvements can be made including adding music transitions and how to use adobe premiere!!
Thanks for everyones help and advise,now off to play with Thea.
Advertisement


