Guitar String Bump Mapping Attempt
-
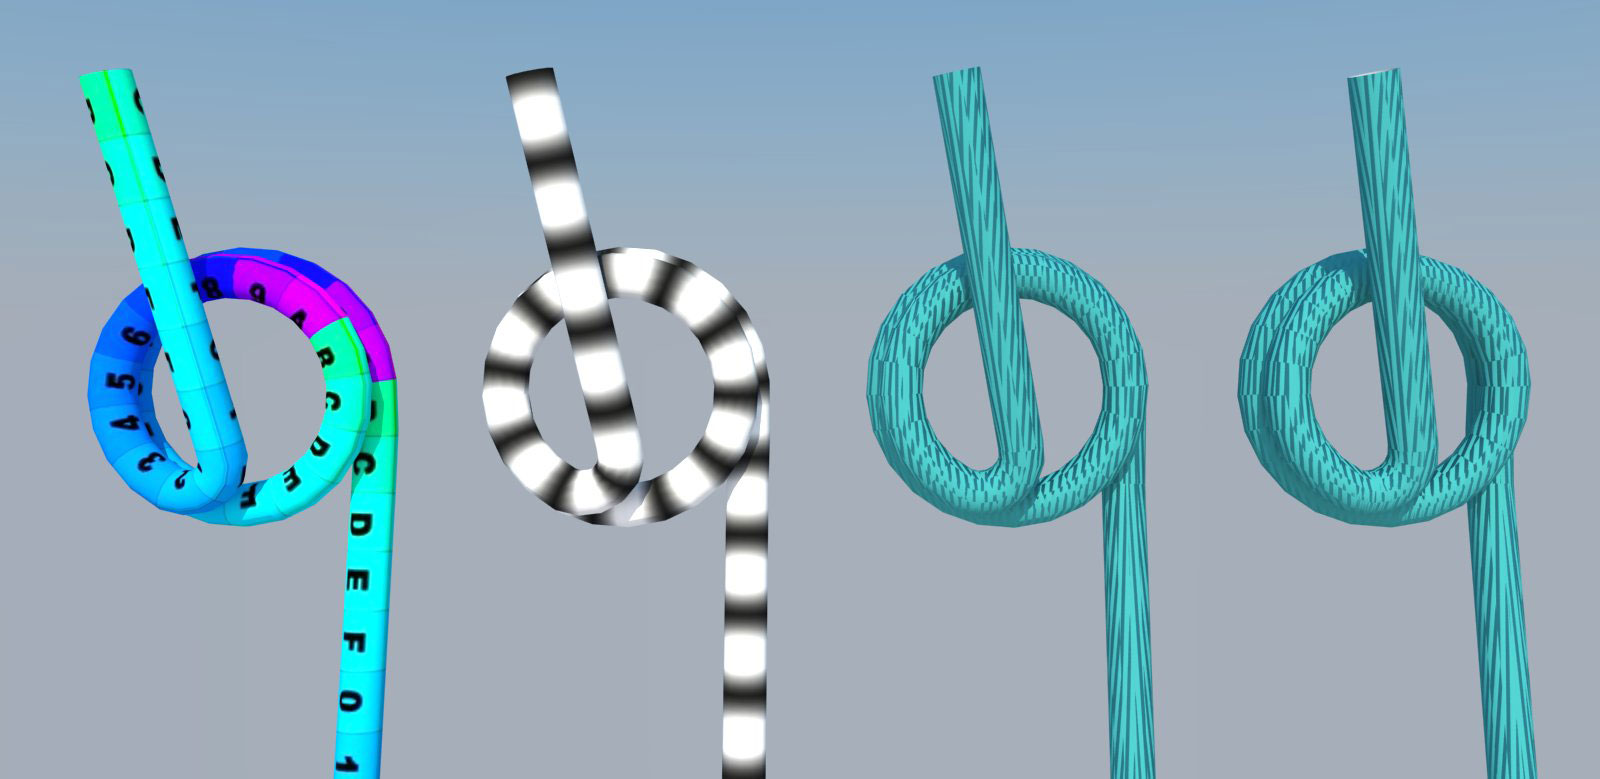
Probably ahead of my learning curve for Vray here but I'm trying the demo out and wanted to test it on my Stratoaster model.
Starting from the left I tube map the string with SketchUV. I test the bump map on the second one. Everything looks good so far. Then I add a bump map using default mapping values and the bump map does not align with the SketchUV mapping. Further to the right I try triangulating the face to no avail.
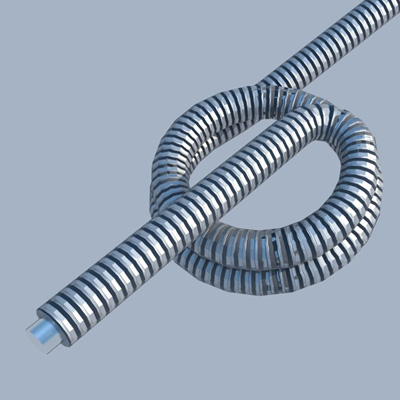
Below is the end result, from Kerkythea, that I'm aiming for which is done by bringing in the SketchUV textures into KT (each with the name of E, A, D for wound strings) and then applying a metal material and then adding the bump map.
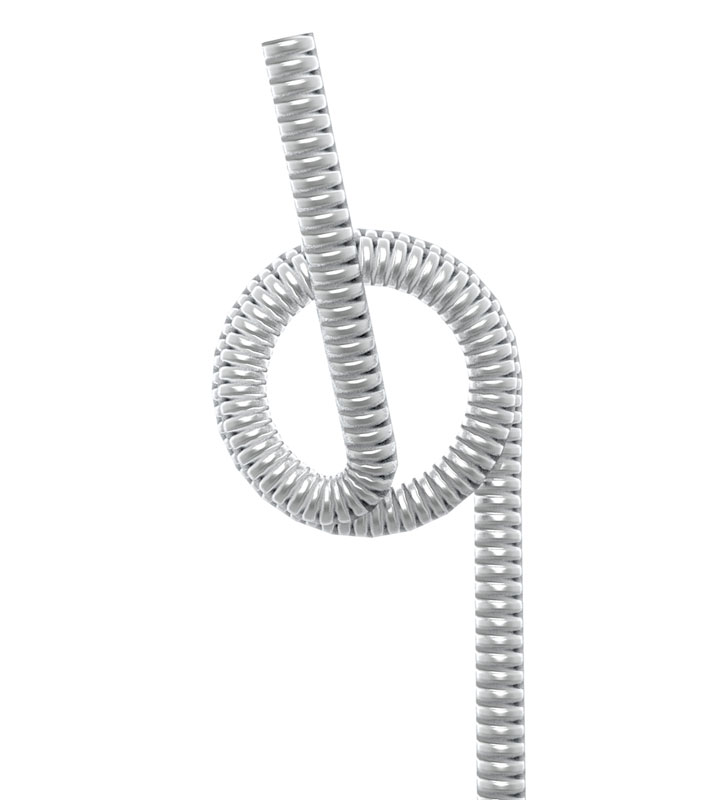
This is the bump map.

Here's the SU file for the Low E string if you want to give it a shot.
Tried everything I know so far but no luck. I know I'm missing a switch or two here.
-
Mak sure you keep a bitmap in the diffuse slot, otherwise you'll lose the UV mapping.
A bitmap with the same gray color you want, but with the same size as your bump map. -
Here is my try at it.

Here is the SKP file
What I did was add a second diffused layer with a copy of the Bump map to allow you to see the direction/scale of the bumps. On that same diffused layer I added a TexAColor of pure white to the transparency slot so it would show up in sketchup but not be rendered. I then was able to use the UV Map that you had to map the string material properly. I then used the Sketchup texture editor to adjust the scale of the string texture to look better.
Let me know what you think.
Rob
-
Very nice use of SketchUV! I had a similar task with adding ribs to a hose and SketchUV did the trick.
-
@jiminy-billy-bob said:
Mak sure you keep a bitmap in the diffuse slot, otherwise you'll lose the UV mapping.
A bitmap with the same gray color you want, but with the same size as your bump map.Thanks, was considering this might be a possible solution last night.
-
@rspierenburg said:
Here is my try at it.
[attachment=1:13j7bmps]<!-- ia1 -->Low E Wound String.jpg<!-- ia1 -->[/attachment:13j7bmps]
Here is the SKP file
[attachment=0:13j7bmps]<!-- ia0 -->Low E Wound String.skp<!-- ia0 -->[/attachment:13j7bmps]
What I did was add a second diffused layer with a copy of the Bump map to allow you to see the direction/scale of the bumps. On that same diffused layer I added a TexAColor of pure white to the transparency slot so it would show up in sketchup but not be rendered. I then was able to use the UV Map that you had to map the string material properly. I then used the Sketchup texture editor to adjust the scale of the string texture to look better.
Let me know what you think.
Rob
Thanks Rob. Tried what you described but I can't get the required results. Would it be possible for you to upload the vismat file for the material?
-
@rspierenburg said:
Here is my try at it.
[attachment=2:18jtul6j]<!-- ia2 -->Low E Wound String.jpg<!-- ia2 -->[/attachment:18jtul6j]
Here is the SKP file
[attachment=1:18jtul6j]<!-- ia1 -->Low E Wound String.skp<!-- ia1 -->[/attachment:18jtul6j]
What I did was add a second diffused layer with a copy of the Bump map to allow you to see the direction/scale of the bumps. On that same diffused layer I added a TexAColor of pure white to the transparency slot so it would show up in sketchup but not be rendered. I then was able to use the UV Map that you had to map the string material properly. I then used the Sketchup texture editor to adjust the scale of the string texture to look better.
Let me know what you think.
Rob
OK, I got it now. The second diffuse layer goes over the original defuse layer. This I learned from Nomeradona's tutorial, Basic VRAY SketchUp Tutorial Series.
[attachment=0:18jtul6j]<!-- ia0 -->Vray Low E String.jpg<!-- ia0 -->[/attachment:18jtul6j]
Summarized:
- Imported silver_matte.vismat to the string.
- Attached the bump jpg to maps layer using TexBitmap.
- Created a second defuse layer and dragged it over the main defuse layer.
- Attached same bump jpg to second defuse layer using TexBitmap.
- Added white to TexAColor for the transparency.
- Adjust texture mapping.
Thanks Rob.
-
One thing I did notice on your original model is that you had your bump and displacement set to 1.5, keep in mind this is inches, I reduced mine down to .1 to avoid the black lines you see in yours. Just try it and see.
-
@rspierenburg said:
One thing I did notice on your original model is that you had your bump and displacement set to 1.5, keep in mind this is inches, I reduced mine down to .1 to avoid the black lines you see in yours. Just try it and see.
That seems to be the key. Wasn't happy with the black lines. I removed all white from the bump map and dropped the bump down to 0.1. Some of the other bump maps on this rendering are well below 1. The model I'm working on is 10x scale.

The new bump map I worked with.

-
thats awesome

-
Nice ! Can't wait to see the whole guitar

Hello! It looks like you're interested in this conversation, but you don't have an account yet.
Getting fed up of having to scroll through the same posts each visit? When you register for an account, you'll always come back to exactly where you were before, and choose to be notified of new replies (either via email, or push notification). You'll also be able to save bookmarks and upvote posts to show your appreciation to other community members.
With your input, this post could be even better 💗
Register Login


Advertisement