Large circular lattice work
-
@unknownuser said:
you are a dinosaur
Yes

But I never understood why people don't save all their files posted in V6
Like this all can reload them (v6v7v8)(except when it's Dynamics components (1%) so V7
-
@unknownuser said:
Like this all can reload them (v6v7v8)(except when it's Dynamics components (1%) so V7

Who is this "all" you talk about. You're the only one left using V6.


-
I just replicated this without a Helix tool at all...
All done using native-tools [from a plugins-meister ]...
]...Make a cylinder the size of the yurt's perimeter wall.
Center its base-circle on the origin for easy use later
I used 24s [the default for a circle] giving 15 degrees per repeat.
Modify the cylinder with the Smooth tool so all of its edges show - now you have a set of rectangular 'panels'.
Group the geometry - we want to draw over it without our new geometry sticking to it.
Draw a short horizontal line along the cylinder's base-edge, the length of a slat-width [50mm?], repeat at the top join the ends to make a 2d outline of an angled slat.
PushPull the slat to the required thickness [25mm?].
If needed orient the faces so they are all facing 'out' [i.e. no blue showing].
Select all of its geometry [treble-click] and make a component of it called 'slat' or similar.
Replacing the original geometry with the component-instance.
Now make a Rotated copy [Rotate+Ctrl] of that slat about the center of the top edge of cylinder's panel on which slat was formed, locked to the blue-axis.
The copy will now cross the original in the opposite direction, with them just touching.
Erase the cylinder - we now longer need it.
Select the two slats ans use Rotate+Ctrl to make the radial array.
Center it on the origin locked on the blue-axis.
Pick any point and start the rotation of the copy.
Type in the repeat - it needs to be a multiple/division of 15 degrees [360/24] used in setting out the cylinder's panels, I chose 3.75 so there are 4 slats at an angle in each 15 degree 'panel'.
Type that in and the copies appear rotated by that angle.
Now immediately type in the number of copies needed for a full circle - in this case (360/3.75)-1 = 95 since the original '1' is already there!
All of the slats are formed around the shape with proper lapping. -
@Dave
Don't think that, we are more numerous that you think!
-
@ Dave, I might have been using SU for about 2 years now, but I still have a lot to learn. I just learned about plug-in 2+weeks ago and as you can see, I'm new to the forum. But I didn't know where to look to see that
 yes it's loaded into SU. So after I finish my next attempt at a slat, I'll start working on that plug-in and figure it out. I think I've figured out a way to do a slat with all native tools.
@ Pilou, Sorry I thought it would work and if I had tried this 3 weeks earlier, it would still be in Ver 6. I just upgraded to Ver 8. Great picture of the yak. I know how Dave feels about camping. I feel the same at times.
@ Gaieus, nice to see you again.
@ Tig, love your forum name, my favorite way to weld. I just saw a vid on Utube from a guy in Japan doing a spring. Which gave me some good ideas to try. Which I'm about half way through now. I came back to double check how Dave did his ends and 'olly zhit I got tagged. I'll be going back over your post, hopefully after my current attempt pays off and not to bale me out of trouble.
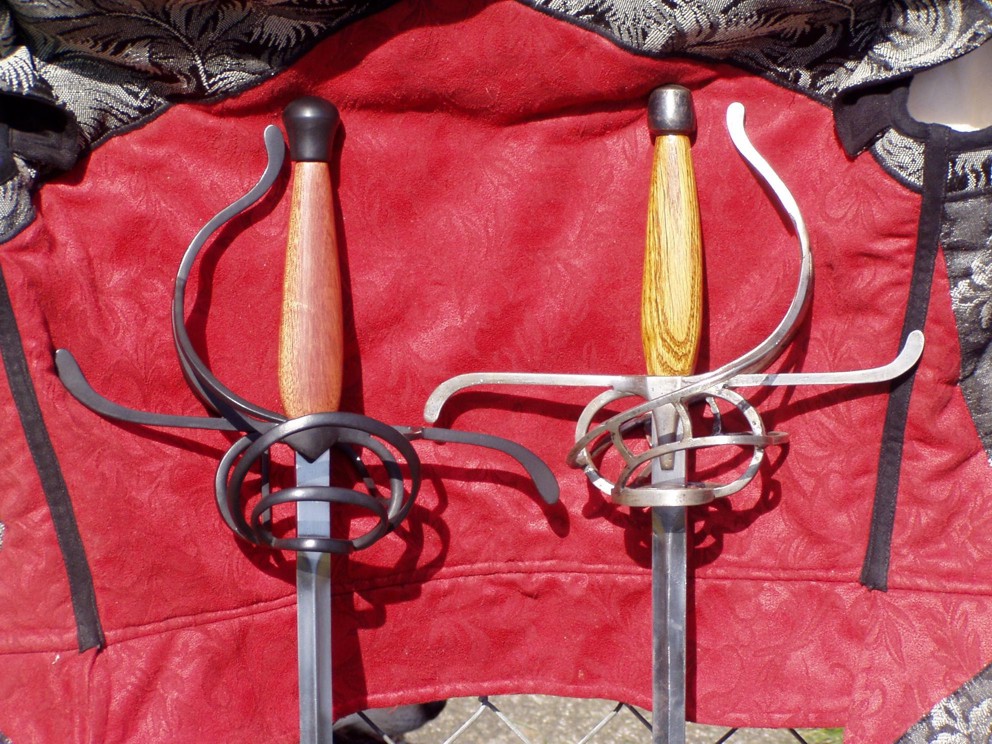
I want to thank all you guys for your help. It's really help to cut down my learning curve. I hope you all stick around for the next project, A rapier hilt. I've attached a pic of 2 that are important to me. The one on the right is the 1st hilt I did that balanced out right and taught me how balancing works. The one on the left, I did well going through postate cancer treatment. It gave me something positive to focus on.

-
For Save in V6 from V8
Menu "Save as" / and click on the little black triangle at the end's line and choose the number of the export version
-
Well my attempt didn't pan out. I got the lines drawn, but couldn't get a face on the drawing. I got Tig's to work, but I had a few problems there as well. With the small radius used in this yurt size, the slats do bend and I couldn't figure out a way to get the spacing right. After learning where to find draw helix, I figured out the correct inputs and got to step 4 without any problems. On step 5, Dave talks about "dividing those lines into three segments", not sure which lines that means. I thought it was the helix lines, but that didn't work. Tried the short line (didn't make sense,but what the 'ell), the only way I could get a face was to "stitch" I think you guys call it. Drawing smaller triangles to form a face. Did I do something wrong?
-
@Pilou, That's what I thought I did. But I could have screwed up something that easy considering. So let's try it 1 more time.
-
This time that's perfect for the file

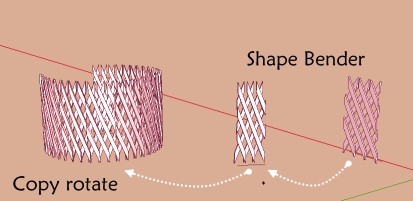
but not for the shape Bender in a reasonnable time!
I stop the process fefore the end
I will see if replace the numerous same groups by a component will be more easy...
No same result
-
Sorry for the delay in responding. I was teaching anesthesia machine nuts and bolts.
@lyconthrous said:
On step 5, Dave talks about "dividing those lines into three segments", not sure which lines that means.
I was referring to dividing the short lines drawn across the ends. Right click on them and choose Divide. I divided the lines into 3 segments. Then it is important to use Weld.rb to weld the lines back together.
-
As your previous file has a very too big complex module
Maybe more something like this on 2 segments of an arc circle but
the curvated module result of the shape Bender has some no coplanar faces
(erased here with the Erase tool + Shift : so a little cheating!
So no good for a project, sufficient for an image
better with it to take some textures like my previous post if you don't want volumes

-
@ Dave : have you thought of all users of the V6 Pro who have not made the upgrades ?

-
To be honest, no. You're the only one here who ever asks for files to be posted in V6.

-
Others are too shy!

I have found another one here!
-
One?

-
I have not made a deepth research!

Ps Have you seen that at 3Dwarehouse quasi all objects are proposed with different version files ? and V6 of course

That will be a cool thing that files posted at Sketchucation are automatically transformed in some basic versions!

-
@ Pilou, I have been having the worst luck with Shape Bender. I've gotten a single slat to bend, but not much more. And I don't mind post a different version of file if it helps people to learn. But something tells me the guys (your friends) are not going to stop kidding you about it.
@ Dave, besides felling like an idiot, I'm still having problems. But I'm not giving up yet. I'm figuring out extrude edge by rail. Found a few pages that help explain it. Which help explain what I messed up before. If I can get it tonight, then I'll ask more questions.
-
@ Dave, OK I got something right and I'm stooping till I know what I should do. I got the extrude to work.
But it has the stitch pattern that yours does not. Do I need to smooth or did I do something wrong?Here's the file for the door. The only difference between the 12, 14, or 16' yurts is the door wings. Some of the eye bolts are off size, which I'm planning on fixing later. But as you can see, the door is the most complicated part of the build. The khana or wall are just time consuming. And Pilou if you want a V6, let me know.
-
Is it possible the "stitch pattern" is because you chose the "No" option for softening edges when running TIG's plugin? Or do you have Hidden Geometry turned on (View menu)?
As to the door, before you go on with it, we need to talk. For now, a couple of things will probably help you with your drawing. first, work with a style that does not have endpoints turned on. Second, work in monochrome face style and keep the back faces under control as you go. You could simplify your work if you would make components instead of groups and don't get all crazy creating nests of components (or groups). Check out the Outliner for this file. Click on the '+' icons where you see them in Outliner and notice all the groups and nested groups. That makes for a difficult model to edit and correct.
-
@ Dave, I think I did say no to softening edges and I might have hidden on. I remember turning it on for something and might need to turn it off again. Plus after posting I noticed the back is open. So I'll be trying to do it different ways till I figure out what it does.
On the door, so I forgot to save after recoloring,
 That was taken from a file I did a complete build up with over 50 different steps and color ideas. I started with the basic frame and grouped, add more parts and group. So on and so on. It kind of look like a tutorial in a way. An OLD habit for working out ideas. I normally do work in monochrome, and I'm not sure you mean by "work with a style that does not have endpoints turned on" but I will look into that. I had no idea that grouping like that make editing and correcting more difficult. It's just easier for me when I'm roughing out ideas. Guess I need to start using components more. Thanks again.
Advertisement


