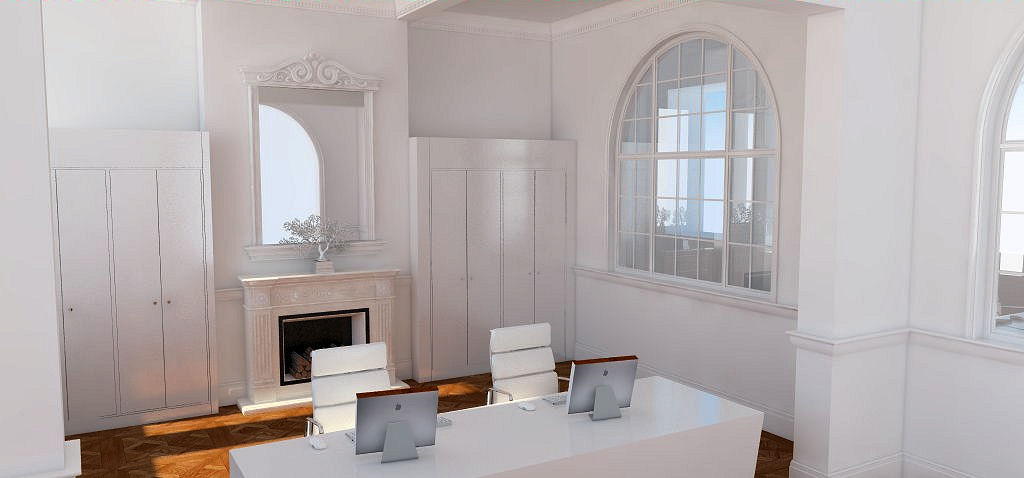
I agree. If you do lessen the reflection it will look less like glass. I think it would actually benefit from more reflection i.e. clouds etc.
David
I agree. If you do lessen the reflection it will look less like glass. I think it would actually benefit from more reflection i.e. clouds etc.
David
As you have the billboard image, I would edit that image. Possibly lighten it so that it merges more with the background.
I gave the 'universal settings' a go, and they took 2hrs 45mins to render my test scene as compared to the new internal 'presets', which when on the highest setting (v.high) only took 26mins.
here is the link
http://forums.chaosgroup.com/showthread.php?74814-test-of-interior-pre-sets
David
You don't say where these came from, but I googled them and I see they came from here:
http://help.chaosgroup.com/vray/help/150SP1/tutorials_unisettings.htm
I'll give them a try with my test scene and see what comes out!
(My guess is that these are superseded by the pre-sets - but we'll see!)
(mmmm - looks like a long job - will render overnight to test the time - but I can see now that this is not for me!)
David
I have posted a series of 'internal' renders on the Chaos site, to compare the 'internal' render presets offered in Vray. The differences in quality are maybe not as great as you might expect, but the render times sure are.
here is the link
http://forums.chaosgroup.com/showthread.php?74814-test-of-interior-pre-sets
David
OK, I'll take the bait! What is the 'universal method'?
All I can see in the Vray presets is - 'test quality, low, medium, high and very high quality'
David
Yes, looking much much better.
You might want to increase the hsph and samples (in LC) to get a cleaner render - but render times will increase so take it easy.
David
For me, the lighting is way too even, and I don't think domelights or hdri will make any difference. If you look at examples of archviz images the best ones have drama and interest, but I guess it depends what you are trying to achieve, realism or an interesting image.
I would definitely use the light from the window - it adds interest. You could also add glazing bars in the window to create a more interesting play of light. I would also experiment with adjusting the height and angle of the external light source (the sun) to see what play of light gives the most interesting effect.
There is obviously other light coming into the space - it may help to block some of these light sources to increase the play of light and shade.
(interesting different approach by me and valerostudio!!)
Good luck!
David
Agentorange
Looking a bit better.
With an all white interior, and plenty of sunlight coming through the window, I wouldn't use any internal lighting (personal preference). However I would adjust the camera setting to darken the image so it does not look bleached out. (or adjust it with an image editor)
David

Superb!
Great renders and great attention to detail. The lighting is perfect.
(I really do need to raise my game!)
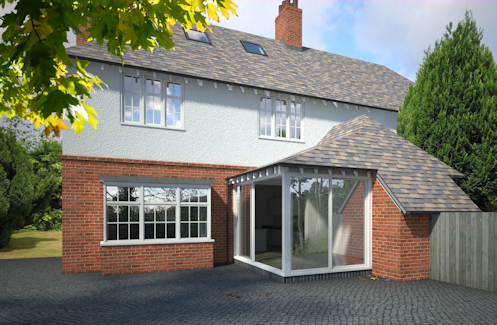
Scheme to replace an existing, ageing, conservatory with a new dining room extension in this conservation area. (renders in about 6 minutes!)
Sketchup 2013 (vray 1.60.23)

Neat work. Thanks for sharing - I'll store it away in case I need it.
(can't get to St Albans though, good luck with the production.
Its a little difficult to tell from the image just whats going on, but one thing to check is if there are duplicate groups or components, which can create co-planar materials, which can cause the effect you show.
David
In a nutshell, you apply materials as you normally would using SU, and vray will use these to render.
However, as you are a beginner, I would strongly recommend that you view the video tutorials available on the Chaos site (under 'support' - V-Ray for SketchUp Tutorials) and start off with simple renders until you build up your skill level.
David
Ooops! my misreading of the question. Vray only shows the time it has taken to render, and not how long it is going to take.
When you have rendered your model, in the render window, in the bottom right hand side there is a sort of down 'chevron'. Click on this and you have some options, one of which is 'apply stamp' select this, and next to it there is a % symbol. If you select this you can add various fields to the stamp such as time to render, version number etc.
David
To me this looks like jpg artifacts. Outputting as a png file should see that 'rainbow' shading disappear.
David
Boy, if I had a £ for each time this has been asked!
As Rich is implying, you pays your money and takes your choice.
Often more money does mean more complexity, and thus a steeper learning curve.
I'm with vray and have been for a long time. Its fast and effective, and now, at last has some presets (the equivalent of the 'Auto' button on a camera).
There are as many opinions on what is best as there are products to choose from.
What would be interesting is a scientific approach to assessing which is best, using some sort of assessment matrix - maybe someone has already done one?
David
I don't think there is anything wrong with the bump map. However, when you open the file and, using the SU materials editor you will see that the material is simply a colour (not a texture image). Because it is just a colour it has no dimensions and so Vray has nothing to go on when sizing the bump texture (I think it therefore uses a default size which is small).
I tried substituting the colour with the bump file (as a diffuse texture) and discovered that it measure 8" x 1', and therefore its scale relative to the size of the surface it is applied to is tiny, - so any bump would be imperceptible.
So, I agree with Volerostudio, - start again, and this time create a texture in SU using an image, then apply that textures bump map in Vray.
I would still say however that to properly see the bump, you will need a directional light - not a huge rectangular one, as the rectangular one will give you very diffuse lighting.
Cheers
David