Medeek Electrical
-
I am starting this new discussion thread as a fork from the Medeek Wall Plugin thread since the Medeek Electrical extension will now become a stand alone extension/plugin.
Its logo will be:

I've created a series of basic default outlets and switches which will form the basis of the plugins pre-assembled components. There will be many to add in later but this should be enough to allow me to setup the tools for inserting switches and outlets.

3D Warehouse
3D Warehouse is a website of searchable, pre-made 3D models that works seamlessly with SketchUp.
(3dwarehouse.sketchup.com)
This extension or plugin is designed from the outset to work directly with the Medeek Wall extension however in the future I may extend it so that it can be employed with any wall geometry. The details on all of that are yet to be determined.
-
The internal details of the actual switch or receptacle are irrelevant and as you can see in my low poly models they are eliminated. Only the exterior geometry of the electrical components are represented.
I am creating the switches and outlets so that their material/color can be modified independent of the face plates. The plugin will allow the user to customize both the face plate material and the actual switch/outlet material. The electrical box will be set to the standard Carlon blue however the user can always edit this material in SU and change it to whatever they desire.
You will also notice with these models that there are two layers: electrical_rough and electrical_finish. This allows the user to quickly toggle off the finish electrical components so the rough installation can be easily inspected.
Another interesting aspect of this new plugin is the way I'm going to set it up within the wall panels of the wall plugin. When a wall panel is regenerated the electrical components (groups) will be retained, similar to the way I already retain custom geometry. What this allows is custom editing by the user of any of these electrical components within the wall once they are installed/inserted. For instance let's say you want to change the material of one of the duplex receptacles to red in a 4-gang box but leave all the rest the default material specified by the plugin, you will be able to do this.
When you edit a switch or receptacle and don't change out its "style", but only its vertical position in the wall or the material of the face plate or switch/outlet then the group/component is not redraw but only modified. Again this will allow the retention of custom mods.
The location horizontally within the wall panel is originally set when the electrical component is placed. To modify its location the user can just jump into the wall panel group and uses SketchUp's built in move tool to alter its position.
I will probably include a delete tool for convenience however as with moving this tool is not really needed since the user can just as easily delete the components within the wall panel group.
I'm still thinking through all of the dynamics and parameters that will be required by the plugin, feel free to leave your suggestions or thoughts.
-
The default height will be set in the global settings along with color/materials for face plates and switches and outlets as well as the style (standard, decora etc...).
When you go to enter/install an electrical component an html menu will pop up which will allow the user to customize any of these settings or leave them as the defaults (very similar to the wall or beam menus in the Wall plugin).
Under each component at the floor level a 2D symbol will be shown. The electrical draw menu will allow the user to select from a drop down box what symbol to use for example for a 1-gang switch one could possibly select:
- single pole switch
- double pole switch (2)
- 3-way switch (3)
- 4-way switch (4)
- weather proof switch (WP)
- fan switch (F)
- switch /w pilot light ( P )
In the global settings one will be able to toggle the 2D symbols on and off. Additionally they will be assigned to a specific "2D" layer so they can also be toggled on an off via layers as well.
When a multi-gang switch is chosen a drop down box will be shown for each switch slot with the left most switch assigned to the first position. For example a 3-gang switch may have a single pole switch, a 3-way switch and a fan switch or any combination for that matter.
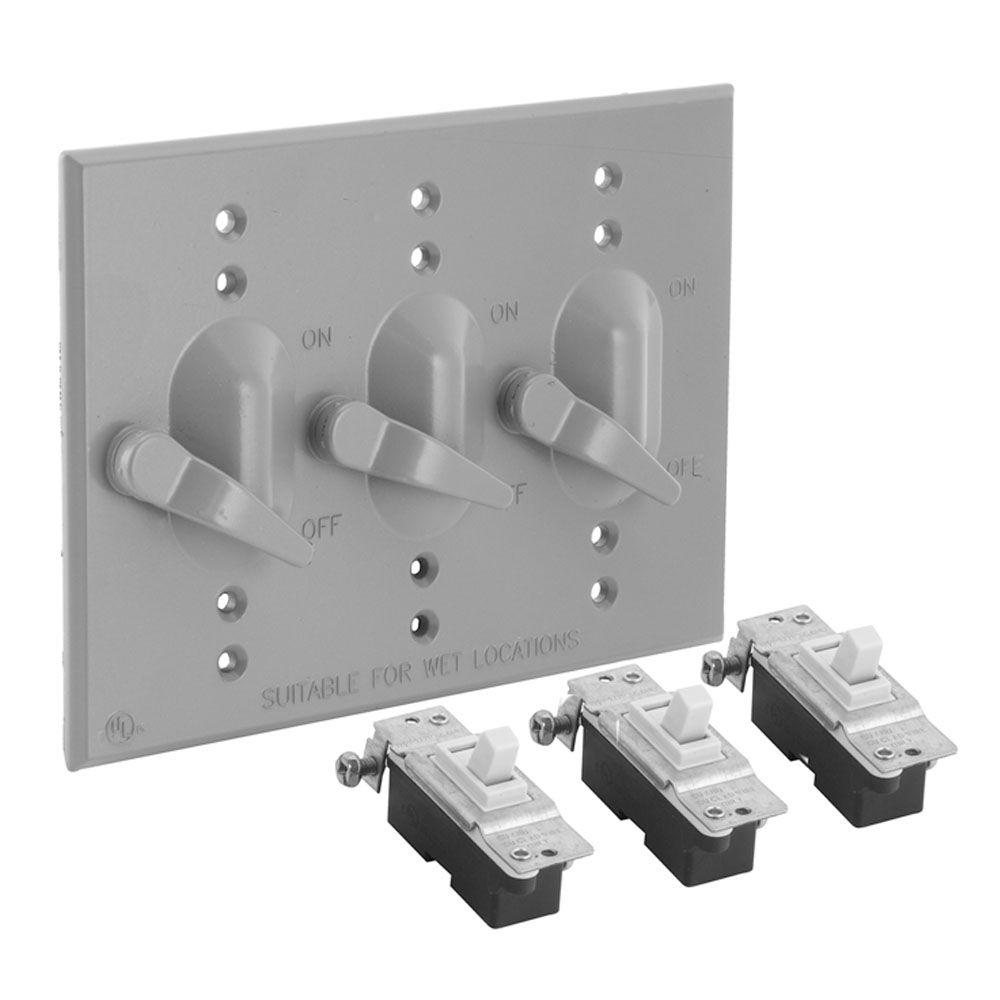
However with weatherproof switches if one of the switches is weatherproof then typically of the switches in the gang will be weatherproof:
-
OOB ELECTRICAL has a setting that you select to toggle between the various standards used throughout the world.
-
When you go to place a switch or outlet the draw tool will sense which side of the wall you are facing and place the component on the side of the wall facing you (the camera). To place components on the other side of the wall, just spin the wall around and face the side that you want to place your electrical components.
I think this is much more intuitive than having a hotkey which toggles which side of the wall to place the component.
In the global settings I will have a parameter which allows the user to select which electrical standards to use, I will begin with the North American standard (NEMA).
-
The prototype toolbar:

I may also add in a (horizontal) move tool/icon, which may be easier than manually moving the electrical components.
-
First look at the draw switch menu:
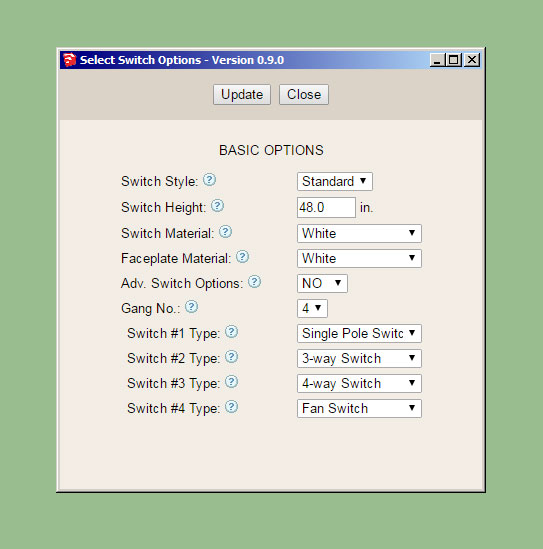
Currently there are no advanced options but I am including that parameter since I am almost 95% sure that something will come along that will dictate the use of this parameter.
This plugin seems fairly basic when compared with the other plugins but I may be missing some additional parameters here.
-
You've probably got this covered at the "?" icon, but you need to clarify if the height refers to the centreline, the top or the bottom. I normally work to the centreline.
-
Yes, vertical distance between center of switch to the floor. The tooltip will cover this detail.
-
The draw tool is now working and able to insert switches on both sides of the walls:
Click on image to see animation
Now I just need to work on the edit menu and global settings.
The outlet module will be almost identical to the switch module so once I have the switch module done it is just a matter of copying and pasting and making some minor edits.
The Wall Plugin will require a minor edit to retain the electrical groups, this means that previous versions of the Wall Plugin will not work with the new Electrical Plugin.
-
What do we want these electrical symbols to look like?
Simple lines or filled in faces?
Any input would be greatly appreciated.
Size of symbols?
-
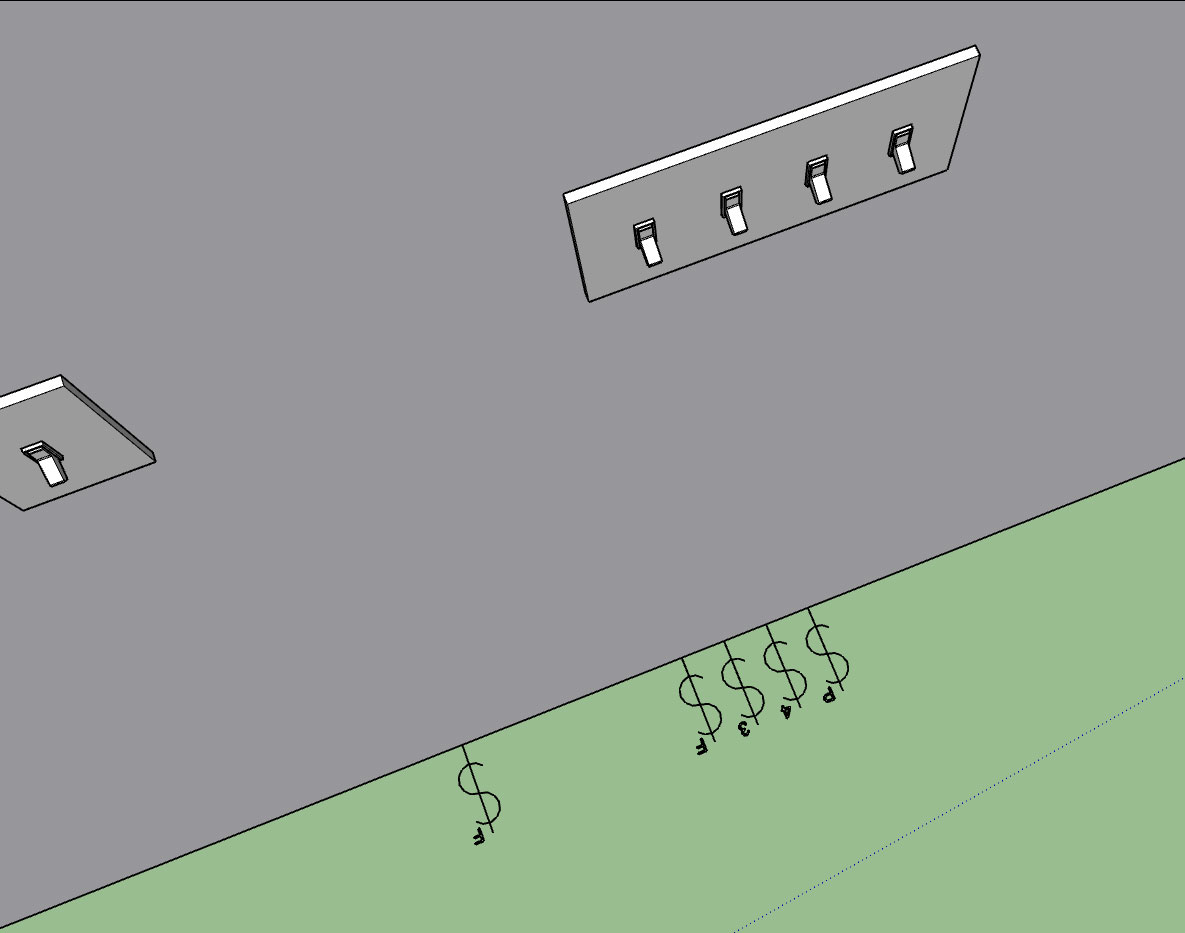
Here is a first look at the switch symbols, I've shown them drawn at 4.5" in height but I've set it up so that the symbol height can be determined by the user in the global settings and everything (symbol spacing etc...) should scale appropriately.
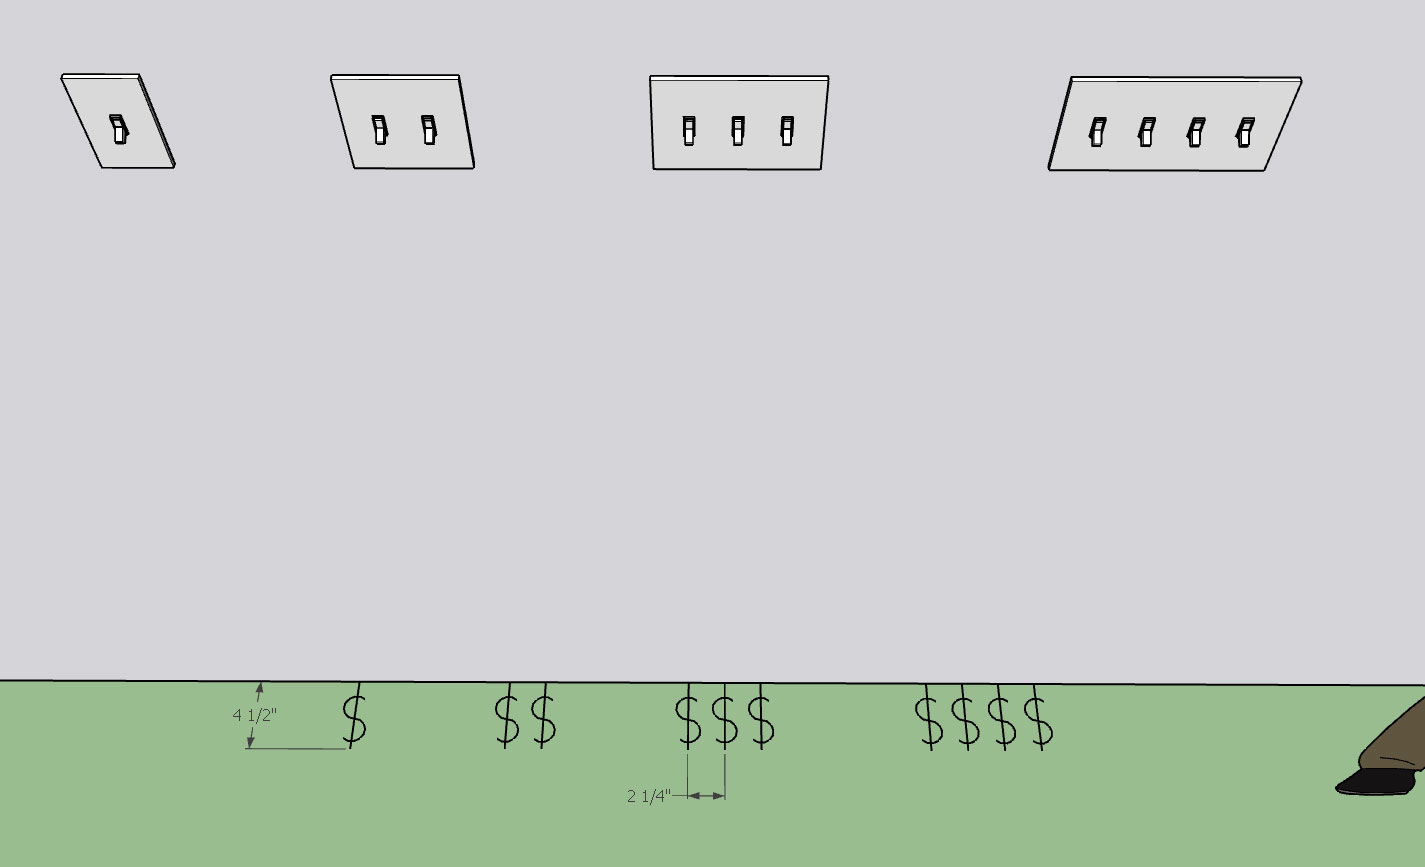
Also note that the symbols are with the switch group so when you move the switch in the wall the symbols move with the switch.
The symbols are also placed on the electrical_2d_layer by default (again user definable in the global settings) so they can easily be toggled on or off.
-
I'll probably need to add a few more icons in the toolbar. Off the top of my head I'm thinking about:
1.) Service Panels: These are typically 14.5" in width and fit nicely between 16" on center studs
2.) Exterior Service and Meter
3.) Additional Faceplates/Media Outlets: CAT5/6, Coax, Telephone, etc...Another can of worms would be light fixtures. I'm not quite sure I'm ready to jump into that one just yet. There are so many variations on light fixtures that I would certainly need to make it so the user can create their own light fixture components that then can be used by the plugin.
Hit me up with any suggestions while my focus is on this plugin. In about a week I'm back onto the Wall Plugin and its massive todo list.
-
As can be seen in the image below a gang of switches can all be different types:
In the image below I've turned on the "Labels" for the switch boxes. The Switch (box) name can be edited in the switch edit menu for each switch:
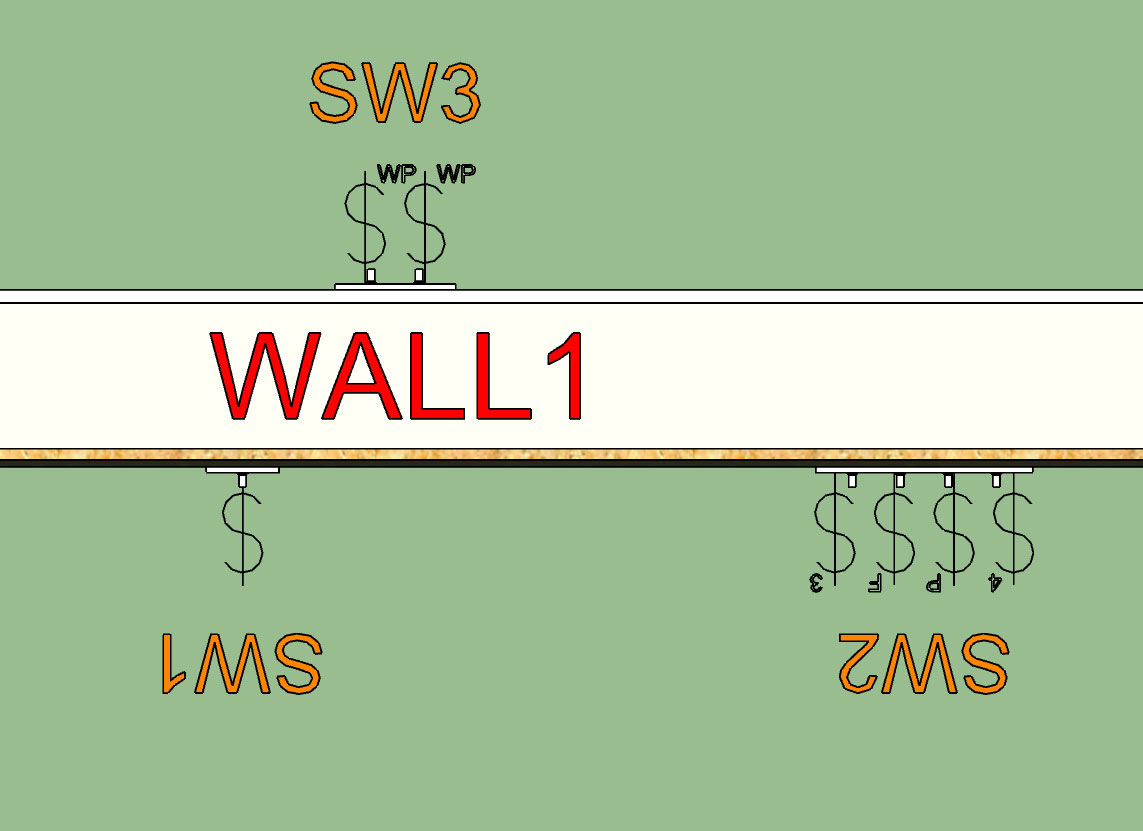
With weatherproof switches I will need to have a different faceplate but for now it will default to the generic toggle switch.
Tomorrow I will spend a few minutes and model up a low poly version of the Leviton Decora switch and outlet series and then we will have at least two options for switch and outlet styles.
Similar to the Wall Plugin the labels are assigned by default to the Dim3 layer and can be toggled separately from the symbols, or be turned off completely in the global settings.
-
Please tell me that you're scripting this so we can pre-assign layers to the 3D components (separately per type, if possible) and the 2D part thereof on another single layer.
Crazy idea, I know...
-
@juju said:
Please tell me that you're scripting this so we can pre-assign layers to the 3D components (separately per type, if possible) and the 2D part thereof on another single layer.
Crazy idea, I know...
I'm basically using four layers right now:
1.) electrical_rough (electric boxes)
2.) electrical_finish (faceplates, outlets, switches)
3.) electrical_2d (symbols and annotations)
4.) electrical_dim3 (for the box labels) -
I'm not an electrician so bear with me, I'll probably get a few things wrong initially.
When you gang together switches you typically see the symbols ganged together as well. However with outlets is the same symbology used or do you just put a subscript next to the outlet symbol indicating the number of outlets and just show one outlet symbol?
-
After reviewing a few more electrical plans online it looks like the convention is to show the ganged outlets similar to ganged switches.
I've added Decora switches (and outlets) as well as the option for a simple blank face plate, which I am labeling as a junction (box):
For junction boxes or blank face plates I am following the same convention as I am for outlets and switches and showing a symbol for each location.
I will eventually add another icon in the toolbar for Combo Outlets (ie. switch, blank, outlet combinations), however I probably won't get to this until later.
-
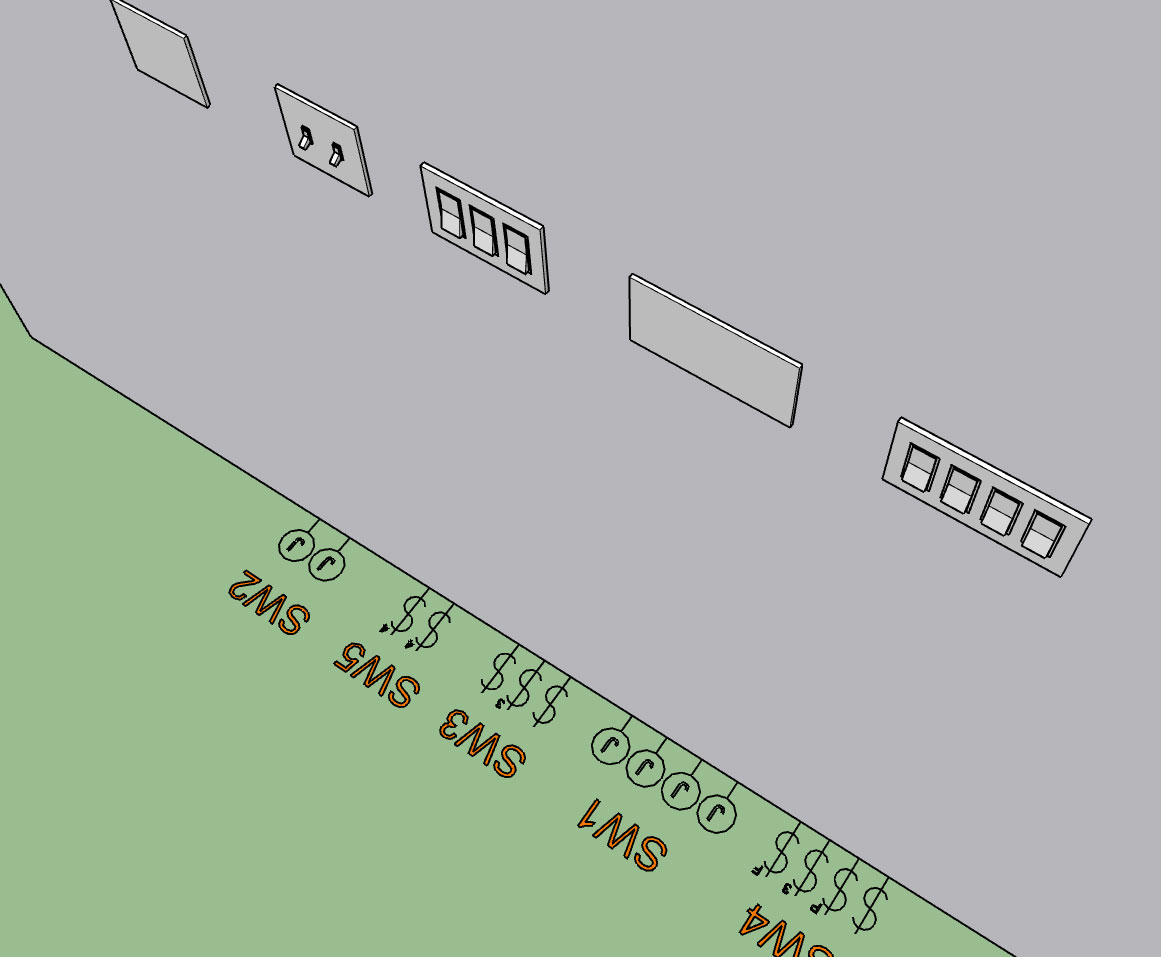
First look at some outlets with switches:
I now need to look at all of the various outlet types and add in those annotations.
-
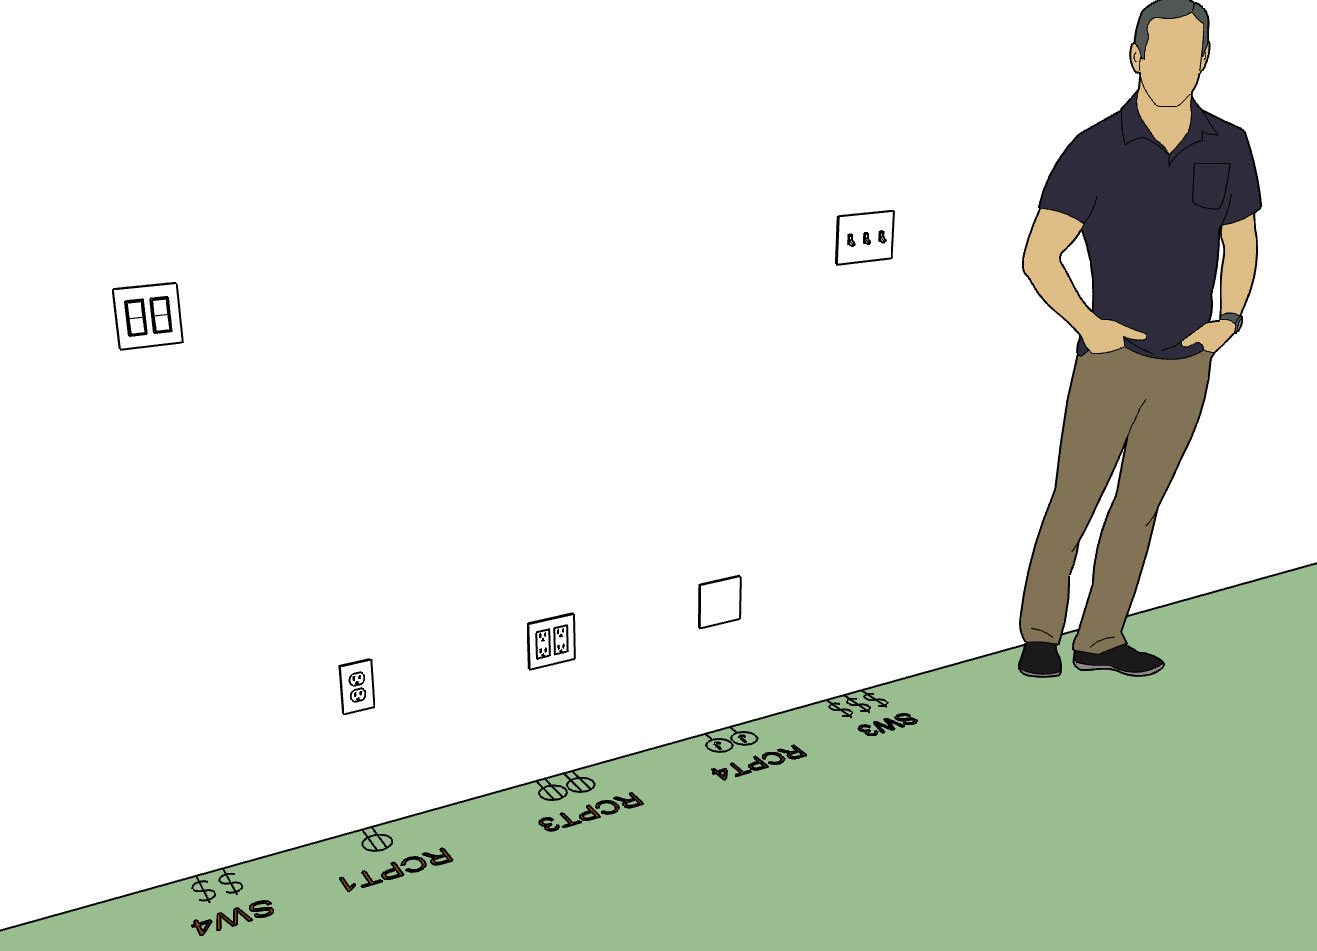
Here are all of the various outlet/receptacle options currently available:
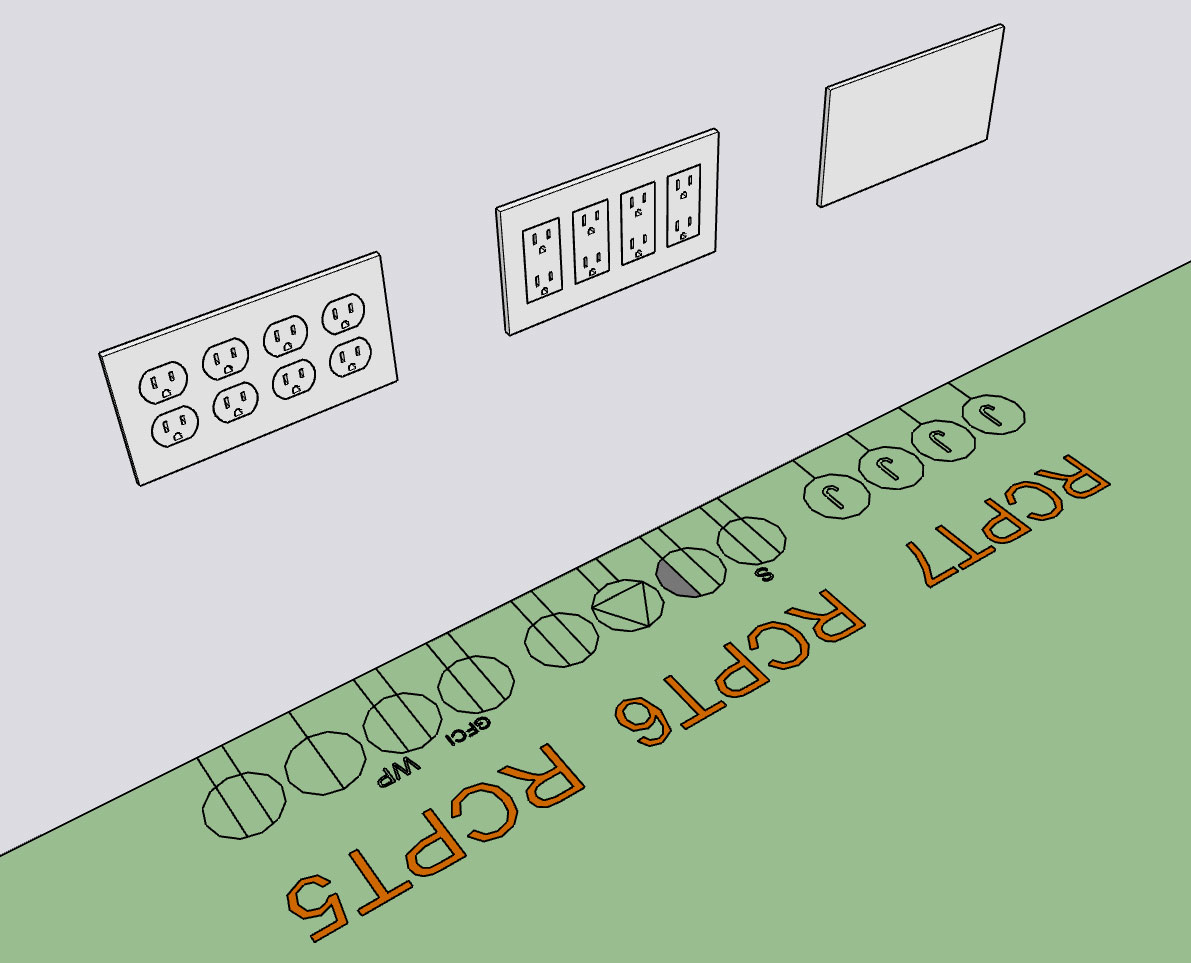
I still need to put some logic in for the single, weatherproof and GFCI receptacles so that they display the proper outlet and corresponding face plate.


Advertisement