sketchucation logo sketchucation
    • 登入
    ℹ️ Licensed Extensions | FredoBatch, ElevationProfile, FredoSketch, LayOps, MatSim and Pic2Shape will require license from Sept 1st More Info

    Medeek Wall Plugin

    已排程 已置頂 已鎖定 已移動 Plugins
    1.5k 貼文 27 Posters 991.0k 瀏覽 26 Watching
    正在載入更多貼文
    • 從舊到新
    • 從新到舊
    • 最多點贊
    回覆
    • 在新貼文中回覆
    登入後回覆
    此主題已被刪除。只有擁有主題管理權限的使用者可以查看。
    • medeekM 離線
      medeek
      最後由 編輯

      Version 1.4.1 - 05.12.2020

      • Enabled a tapered wrap for a free standing columns.
      • Added a HardiPlank Colonial (Rough Sawn) built-in material into the material library.

      http://design.medeek.com/resources/wallplugin/images/wall_su354_800.jpg

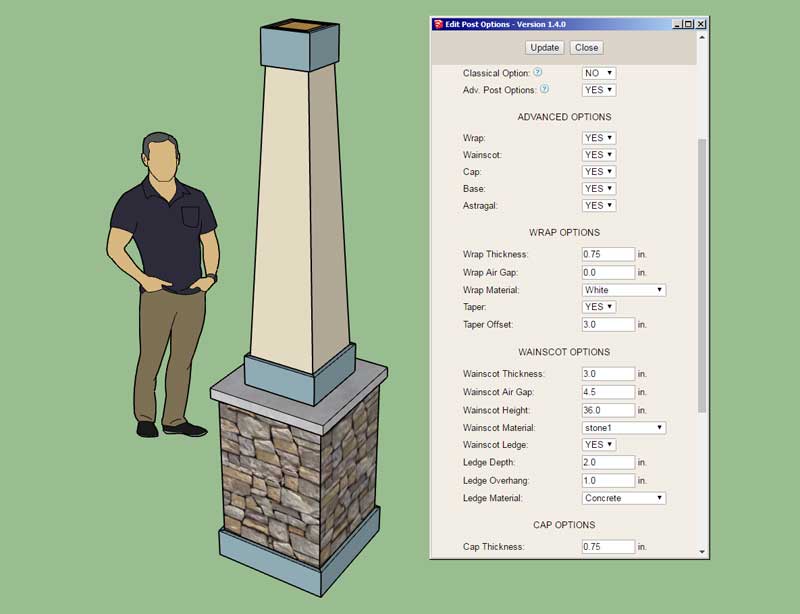
      Two new parameters: Taper and Taper Offset

      View model here:

      Link Preview Image
      3D Warehouse

      3D Warehouse is a website of searchable, pre-made 3D models that works seamlessly with SketchUp.

      favicon

      (3dwarehouse.sketchup.com)

      Nathaniel P. Wilkerson PE
      Medeek Engineering Inc
      design.medeek.com

      1 條回覆 最後回覆 回覆 引用 0
      • medeekM 離線
        medeek
        最後由 編輯

        Version 1.4.1b - 05.13.2020

        • Added a "Style2" hardware option (Lever & Lock) to the garage door module.

        http://design.medeek.com/resources/wallplugin/images/wall_su355_800.jpg

        This additional hardware option added per customer request.

        Nathaniel P. Wilkerson PE
        Medeek Engineering Inc
        design.medeek.com

        1 條回覆 最後回覆 回覆 引用 0
        • medeekM 離線
          medeek
          最後由 編輯

          Version 1.4.2 - 05.14.2020

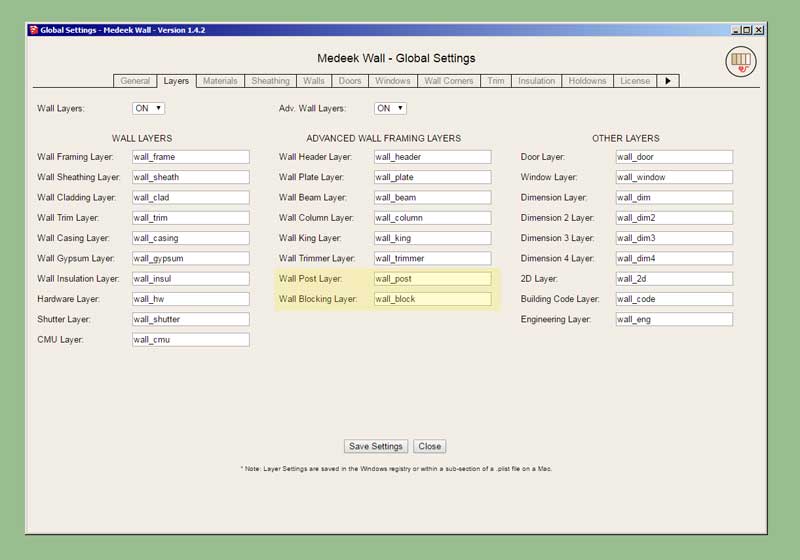
          • Added a layer for posts to the advanced layer options (Layer tab of the global settings).
          • Added a layer for blocking to the advanced layer options (Layer tab of the global settings).

          http://design.medeek.com/resources/wallplugin/images/wall_su356_800.jpg

          Nathaniel P. Wilkerson PE
          Medeek Engineering Inc
          design.medeek.com

          1 條回覆 最後回覆 回覆 引用 0
          • medeekM 離線
            medeek
            最後由 編輯

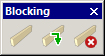
            First look at the blocking toolbar:

            wall_blocking_su_menu_active.jpg

            I will also be removing the Fixtures toolbar from the Wall plugin, this toolbar will become part of the upcoming Medeek Interior plugin.

            wall_fixtures_su_menu_active.jpg

            Nathaniel P. Wilkerson PE
            Medeek Engineering Inc
            design.medeek.com

            1 條回覆 最後回覆 回覆 引用 0
            • medeekM 離線
              medeek
              最後由 編輯

              My intent is to have the blocking tool place the blocks within the wall panel assembly/group. However would there be a case where the user would want to create the blocks as stand alone entities outside of any wall, roof or floor assembly?

              Nathaniel P. Wilkerson PE
              Medeek Engineering Inc
              design.medeek.com

              1 條回覆 最後回覆 回覆 引用 0
              • jujuJ 離線
                juju
                最後由 編輯

                @medeek said:

                My intent is to have the blocking tool place the blocks within the wall panel assembly/group. However would there be a case where the user would want to create the blocks as stand alone entities outside of any wall, roof or floor assembly?

                Probably only if you're adding an additional low level wall with some ledge or similar, which wouldn't normally form part of the usual wall.

                Save the Earth, it's the only planet with chocolate.

                1 條回覆 最後回覆 回覆 引用 0
                • medeekM 離線
                  medeek
                  最後由 編輯

                  Version 1.4.3 - 05.17.2020

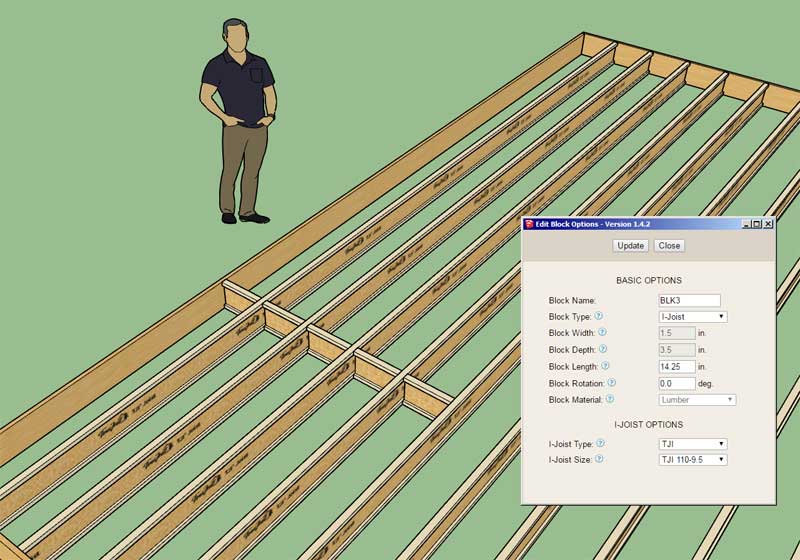
                  • Added a blocking tool/module for inserting custom blocks into Medeek walls, roofs, floors or generic groups.
                  • Added the Blocking toolbar and icons.
                  • Removed the Fixtures toolbar and icons.

                  http://design.medeek.com/resources/wallplugin/images/wall_su357_800.jpg

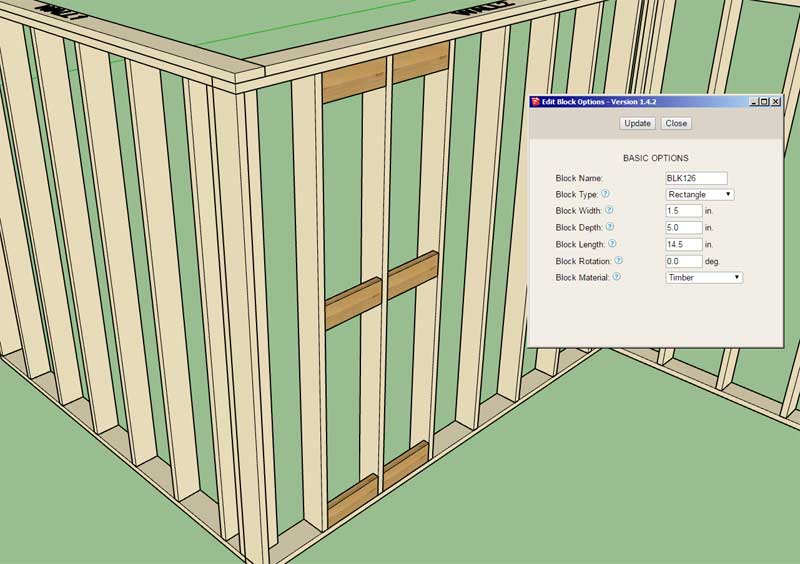
                  Note, that the blocking is automatically retained within the wall, roof or floor assembly after a regen or edit of the primary assembly.

                  After selecting the first point one can toggle the positioning of the blocking with the "Ctrl" key. There are nine possible positions the block can be inserted at.

                  The blocking is placed on the framing layer unless the advanced layers are turned on, in which it is placed on a specific blocking layer.

                  I will be releasing a tutorial video shortly on this new tool.

                  Nathaniel P. Wilkerson PE
                  Medeek Engineering Inc
                  design.medeek.com

                  1 條回覆 最後回覆 回覆 引用 0
                  • medeekM 離線
                    medeek
                    最後由 編輯

                    After putting this new tool through its paces for a few more minutes it immediately jumps out at me that it would be really nice to have a hot key for toggling the rotation (zero or ninety). For other custom rotations the user can simply key in the desire rotation in the menu.

                    What key should I use to toggle the rotation? I’m already using the Ctrl key to toggle placement location.

                    Nathaniel P. Wilkerson PE
                    Medeek Engineering Inc
                    design.medeek.com

                    1 條回覆 最後回覆 回覆 引用 0
                    • TIGT 離線
                      TIG Moderator
                      最後由 編輯

                      TAB ?
                      But remember that you need to spot it using onKeyUp, because onKeyDown with TAB fails on MACs...

                      TIG

                      1 條回覆 最後回覆 回覆 引用 0
                      • medeekM 離線
                        medeek
                        最後由 編輯

                        Version 1.4.3b - 05.17.2020

                        • Added the "Shift" hotkey to the blocking draw tool in order to toggle the block rotation between zero and ninety degrees.

                        Nathaniel P. Wilkerson PE
                        Medeek Engineering Inc
                        design.medeek.com

                        1 條回覆 最後回覆 回覆 引用 0
                        • medeekM 離線
                          medeek
                          最後由 編輯

                          Tutorial 12 - Blocking (12:42 min.)

                          Nathaniel P. Wilkerson PE
                          Medeek Engineering Inc
                          design.medeek.com

                          1 條回覆 最後回覆 回覆 引用 0
                          • medeekM 離線
                            medeek
                            最後由 編輯

                            Version 1.4.4 - 05.24.2020

                            • Added I-Joist blocks to the the blocking module: TJI, BCI, LPI, Red-I, PKI.

                            http://design.medeek.com/resources/wallplugin/images/wall_su358_800.jpg

                            Nathaniel P. Wilkerson PE
                            Medeek Engineering Inc
                            design.medeek.com

                            1 條回覆 最後回覆 回覆 引用 0
                            • medeekM 離線
                              medeek
                              最後由 編輯

                              Version 1.4.5 - 05.29.2020

                              • Fixed a number of minor issues with the ladder blocking option for tee intersections.
                              • Tee intersection blocking is now assigned to the blocking layer if the advanced layer option is turned on.

                              If you are using ladder blocking for your tee intersections then I consider this to be a critical update.

                              Nathaniel P. Wilkerson PE
                              Medeek Engineering Inc
                              design.medeek.com

                              1 條回覆 最後回覆 回覆 引用 0
                              • pbacotP 離線
                                pbacot
                                最後由 編輯

                                I'd love to know how you organize your work. There must be some times when you circle back to fix stuff but it sure seems like you take on a task and work at it very efficiently until done! Good job all around!

                                MacOSX MojaveSketchUp Pro v19 Twilight v2 Thea v3 PowerCADD

                                1 條回覆 最後回覆 回覆 引用 0
                                • medeekM 離線
                                  medeek
                                  最後由 編輯

                                  @pbacot said:

                                  I'd love to know how you organize your work. There must be some times when you circle back to fix stuff but it sure seems like you take on a task and work at it very efficiently until done! Good job all around!

                                  With coding its fairly simple, you decide on a task or project and then you do your best to complete it in one go. The problem with jumping around between tasks is that a lot of what I do requires some very deep levels of concentration, some of the code can get very complex and it is hard to really understand it unless you are completely absorbed and focused.

                                  In fact, some of it is so complex (even though I do my best to document it liberally) that after leaving that piece of code for couple of months it is hard to come back to it and understand what exactly I did. In some cases it requires me to essentially re-learn portions of my code. That is the reason why once I get started on a module I pound on it hard for a few days. It is very inefficient to have to come back to partially finished code and essentially restart (sometimes it's unavoidable).

                                  What I choose to work on is largely dictated by the users of the plugins. Currently bug fixes are taking priority, however once I start on a major upgrade I usually cease to work on any bug fixes until that module or upgrade is complete. Even after I move on to another project if an additional feature becomes necessary or is requested for a recently completed module I will usually immediately return to that chunk of code and implement that feature. Again, the reason for this is because the code is still fresh in my mind so it is the path of least resistance.

                                  As they say the squeaky wheel gets the grease. If I get enough requests for a specific feature and it appears to make sense within the scope of the plugin(s) then I will usually push that item to the top of the list and do my best to complete it as soon as possible.

                                  Nathaniel P. Wilkerson PE
                                  Medeek Engineering Inc
                                  design.medeek.com

                                  1 條回覆 最後回覆 回覆 引用 0
                                  • pbacotP 離線
                                    pbacot
                                    最後由 編輯

                                    Thank you! Nice explanation!

                                    MacOSX MojaveSketchUp Pro v19 Twilight v2 Thea v3 PowerCADD

                                    1 條回覆 最後回覆 回覆 引用 0
                                    • medeekM 離線
                                      medeek
                                      最後由 編輯

                                      Version 1.4.6 - 05.30.2020

                                      • Enabled the "Wall Stretch" tool within the Medeek Wall Tools toolbar.

                                      http://design.medeek.com/resources/wallplugin/images/wall_su359_800.jpg

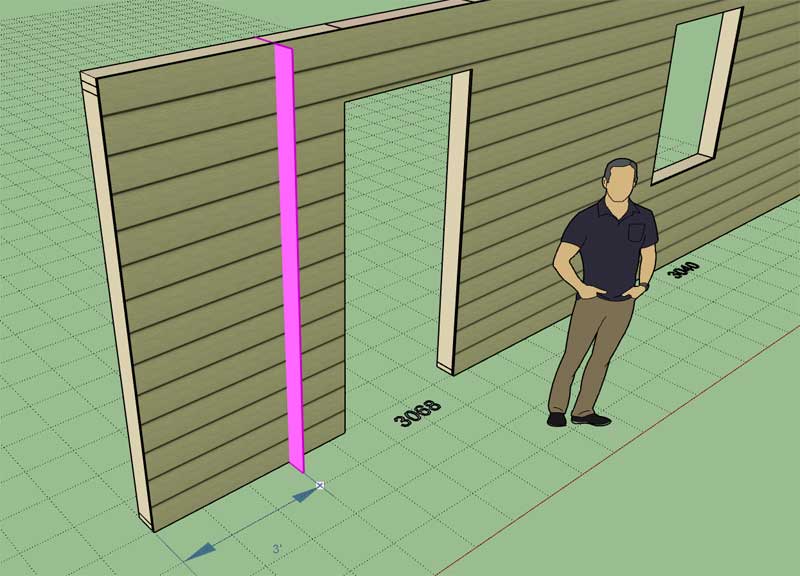
                                      Note that this tool can be used to either shrink or stretch a wall panel. Instructions for use below:

                                      1.) Select tool (click stretch wall icon)
                                      2.) Select the wall panel you want to modify.
                                      3.) Select either the start or end of the wall panel (red or green circle).
                                      4.) Position cursor to either shrink or stretch wall panel.

                                      Also note that this tool will not adjust adjacent wall panels even if they are connected at the corners to the wall panel being modified. This is by design. I will release a tutorial shortly explaining the reasoning behind this behavior.

                                      Nathaniel P. Wilkerson PE
                                      Medeek Engineering Inc
                                      design.medeek.com

                                      1 條回覆 最後回覆 回覆 引用 0
                                      • medeekM 離線
                                        medeek
                                        最後由 編輯

                                        Shrinking a wall:

                                        wall_stretch.gif

                                        Click on the image to view animation.

                                        Nathaniel P. Wilkerson PE
                                        Medeek Engineering Inc
                                        design.medeek.com

                                        1 條回覆 最後回覆 回覆 引用 0
                                        • medeekM 離線
                                          medeek
                                          最後由 編輯

                                          Tutorial 13 - Stretch Wall Tool (7:41 min.)

                                          The audio is a little strange in this video, not sure why, I will check the audio out in more detail for future videos.

                                          Nathaniel P. Wilkerson PE
                                          Medeek Engineering Inc
                                          design.medeek.com

                                          1 條回覆 最後回覆 回覆 引用 0
                                          • medeekM 離線
                                            medeek
                                            最後由 編輯

                                            Version 1.4.7 - 06.02.2020

                                            • Enabled the "Wall Join" tool within the Medeek Wall Tools toolbar.

                                            Note, that to join two walls they must be colinear and their START and END points must be coincidental.

                                            Nathaniel P. Wilkerson PE
                                            Medeek Engineering Inc
                                            design.medeek.com

                                            1 條回覆 最後回覆 回覆 引用 0
                                            • 1
                                            • 2
                                            • 41
                                            • 42
                                            • 43
                                            • 44
                                            • 45
                                            • 73
                                            • 74
                                            • 43 / 74
                                            • 第一個貼文
                                              最後的貼文
                                            Buy SketchPlus
                                            Buy SUbD
                                            Buy WrapR
                                            Buy eBook
                                            Buy Modelur
                                            Buy Vertex Tools
                                            Buy SketchCuisine
                                            Buy FormFonts

                                            Advertisement