Medeek Wall Plugin
-
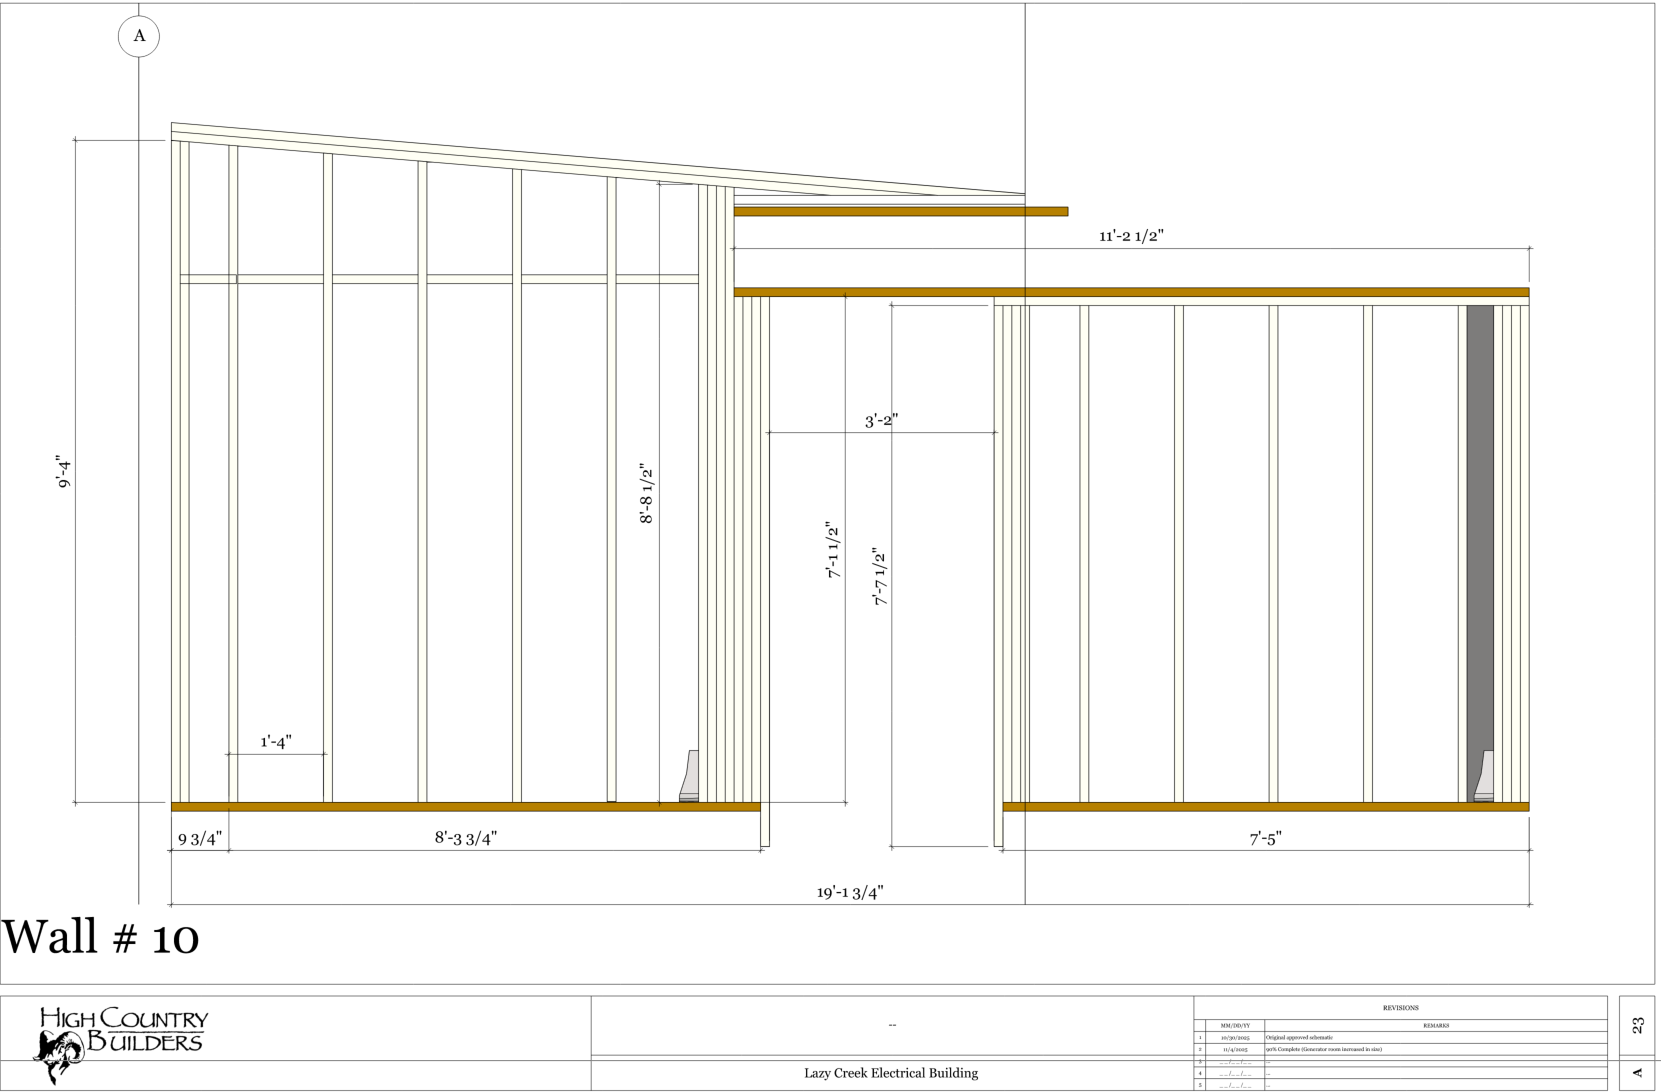
Well... I thought I was done with balusters and newel posts, but I'm not quite there yet.
The problem is that with metal or iron balusters they are often installed with a shoe as shown below:
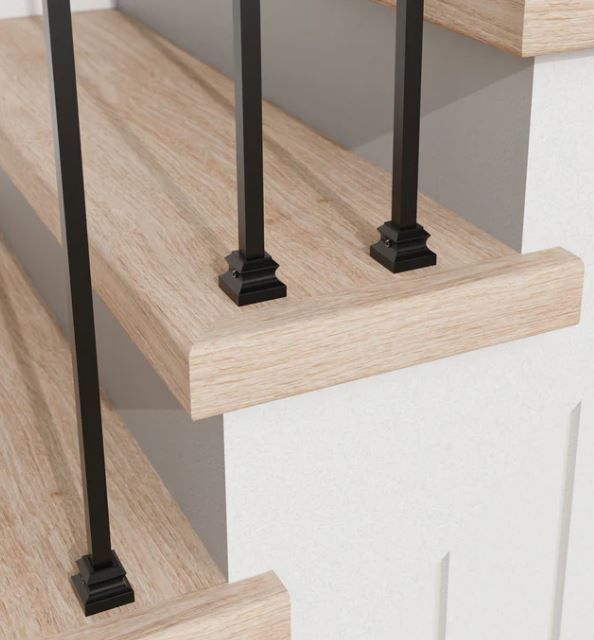
My current algorithm installs balusters just like they are installed in real life:
First I trim the top of the original baluster component/group and then I have to trim them individually for each of their bottoms because the balusters may intersect the treads at different heights hence their heights/lengths will be different.
Because of this a predefined shoe positioned at the base of the baluster component may work for one location (ie. no trimming required) but then it will be removed in subsequent baluster locations.
What this means in practice is that a shoe (if that option were enabled) needs to be a completely separate group/component just as it is in real life. My algorithm needs to position it individually in the Z-dir just as I trim each baluster bottom individually.
Arguably, there is a lot going on with stairs, the guys that install these must be real craftsmen, I certainly take my hat off to them.
-
Medeek Walls in action
Hey Nathaniel, Here is how I've been using the plugin for custom residential home building.
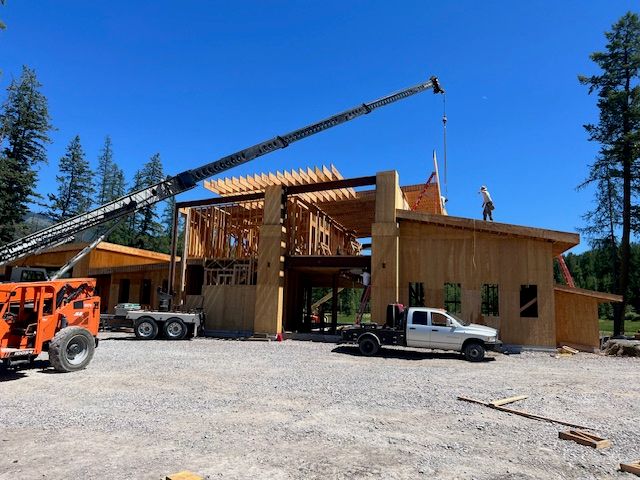
This is a project I'm working on.. it's called the sports barn its an entertainment complex with a golf sim, putting green and basketball court. On this project the architect, engineer and MEP all worked in Revit.
On this one I took the geometry from all the different consultants along with the CAD files for the floor plans and sections to build out the wall framing. I typically start with the 2D files and trace out the outline of the structure with the Medeek wall tool. I've developed my own toolset to treat the different models sort of like GitHub. I don't need all of the redundant geometry from 3 or 4 models so I commit the necessary components from each one to my main model.. Like steel from Struct and HVAC from the Mech.
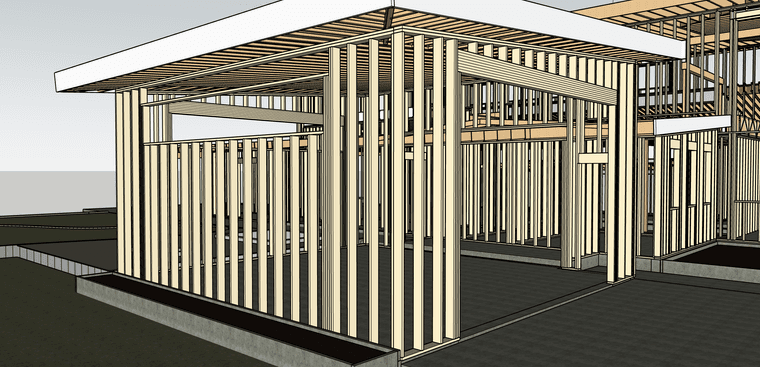
I use a combination of sections, benchmark elevations and my out math the set all of my plate heights. I then use the center lines for all the ROs in the 2D CAD file and cut in the window and door openings. I usually work in phases and don't worry about perfect ROs on the first pass.
When I have the overall structure framed up, I start to overlay all of the models I need to flush out. I compare the structural vs architectural ( i frame off struct) this usually goes a few rounds to hammer out the discrepancies.
Once all of the issues are flushed out I move to structural connections. Different projects require different levels of detail.. This was all stick framed on site so the blocking, corners and plate connections weren't very important. The main purpose of framing out this model was the lumber order. In this case it was quicker and cheaper to digitally build it and simply count the studs.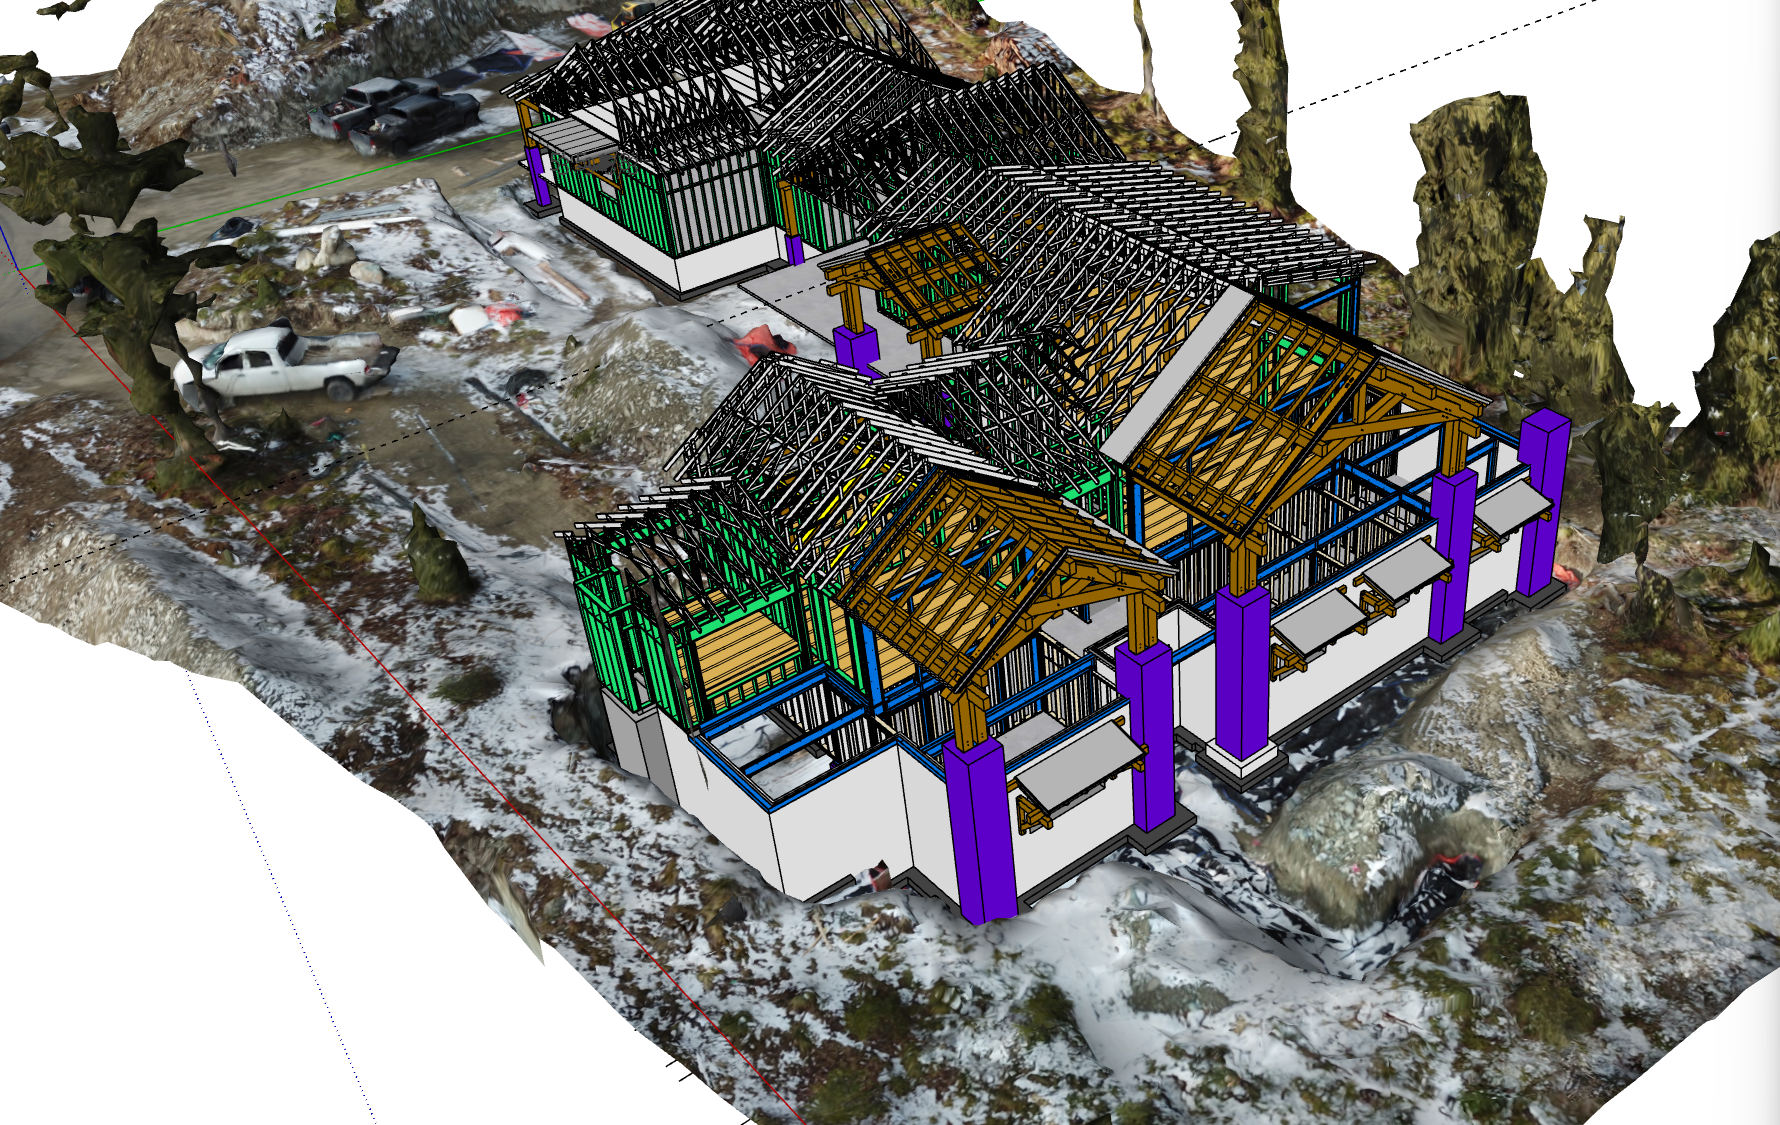
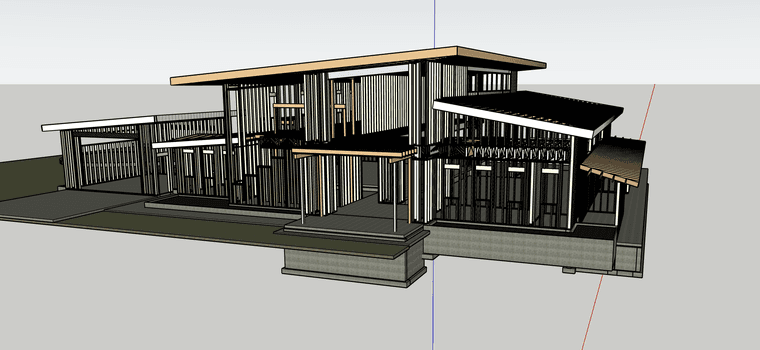
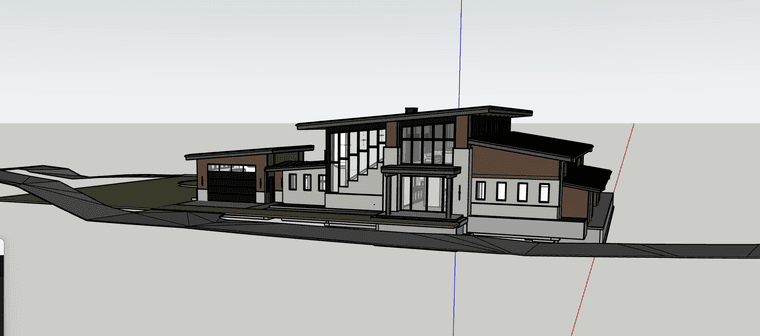
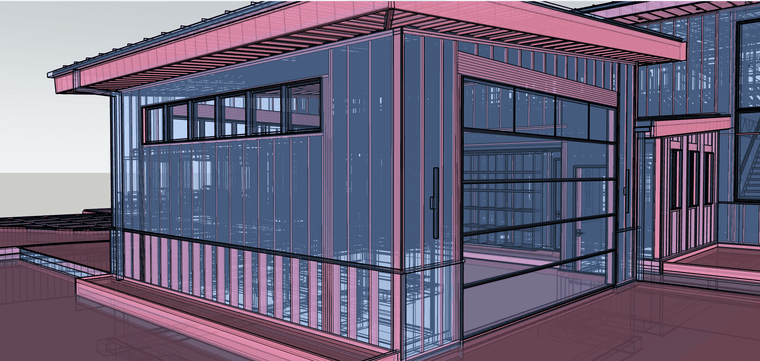
This job was a little different.. All the walls were prefabricated and all of the timbers were done in house.. This level of detail means everything needs to be flushed out in the model. The steel needs to be modeled to the fasteners and the need to be perfect down to the blocking for toilet paper holders.
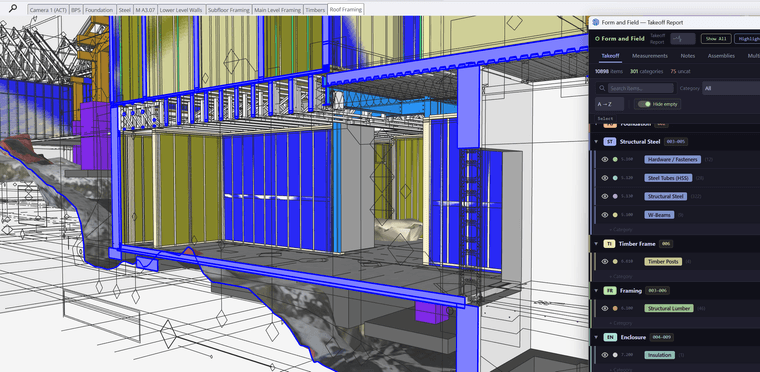
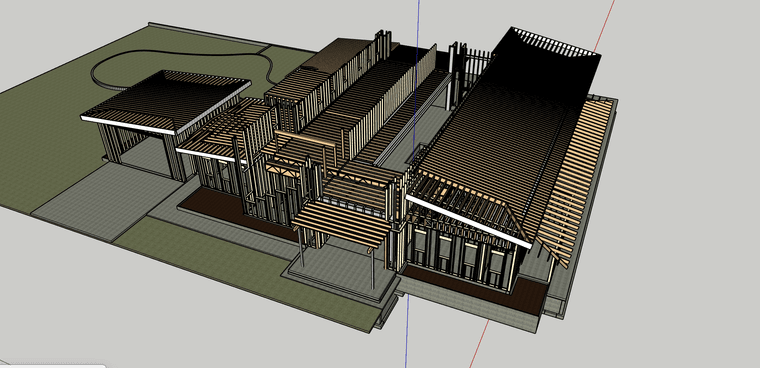
This house was designed in auto cad so there wasn't any outside geometry to start with. I lined up all the sections and details in place and modeled the foundation. The truss company did produce 3d shop drawing for this project that I was able to import and review.

To build the walls I produce a section cut of the walls to show stud orientation and interior partitions( they can be hard to see in an elevation). The shops for the walls can be a bit tedious but for the most part are produced in layout.
Let me know if you have any questions or suggestions.. I've been using this system for about 7 years now.. I've got what architects call a raised in a barn methodology for the way I do things but it seems to work.
-
Version 4.5.1 - 04.22.2026
- Enabled custom components as baluster shoes for vertical and OTP handrails.
- Added the following (L.J. Smith) baluster shoes into the baluster shoe component library: LI_ALFSH01, LI_ALR010, LI_ALRD201, LI_ALSQ301, LI_ALSQPL1, LI_PROCOL.
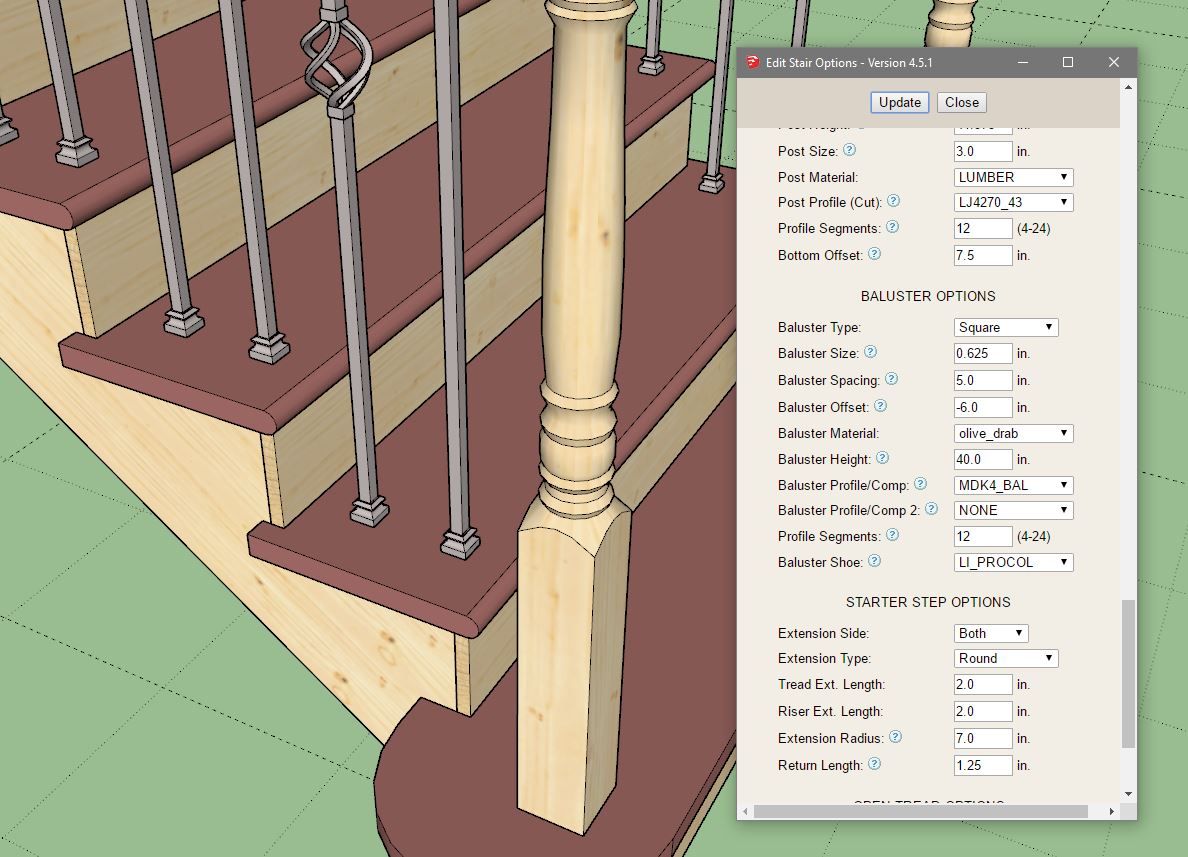
I took the time today to carefully model a few of these baluster shoes since they are fairly simple geometry and it is always fun to get my hands dirty with some actual modeling and take a small break from the code.
-
Wow, very impressive work. The level of detail in your models is something else.
It looks like you have a very diverse workflow, using not just SketchUp but various other design softwares.
-
-
That's awesome! 90% off for those in education. $33 instead of $330 is a huge discount.
-
Version 4.5.3 - 05.21.2026
- Added an inset option for in-wall columns.
- Added preview thumbnails into the railing draw and edit menus.
- Added a toggle option for the auto-rotation of corner posts within the draw and edit menus of the railing module.
[Uploaded Images Lost to Server Upgrade Issue May 15th]
-
Version 4.5.4 - 05.22.2026
- Added an option for a top and a bottom baluster shoe.
- The top baluster shoe can be controlled with the additional "shoe height" parameter, which in turn allows for baluster collars.
- Added the shoerail offset parameter to vertically offset the shoerail.
- Fixed a bug in the railing edit menu with metric units.
-
Version 4.5.4b - 05.22.2026
- Fixed a bug in the railing toolbar with metric units.
- Added preview thumbnails into the stair draw and edit menus.
- Added the following L.J. Smith handrail profiles: LJ6203, LJ6400, LJ6601, LJ6701.
-
Version 4.5.5 - 05.24.2026
- Enabled presets for railings within the draw and edit menus.
-
Version 4.5.6 - 05.25.2026
- Enabled presets for beams.
- Enabled presets for in-wall columns.
-
Version 4.5.6b - 05.25.2026
- Enabled presets for stairs.
-
Version 4.5.7 - 05.26.2026
- Enabled presets for posts.
- Added the following L.J. Smith handrail profiles: 684, LJ6011, LJ6A10.
For those interested I am pulling all of my handrail geometry from LJ Smith's webpage at the following link:
-
Version 4.5.8 - 05.30.2026
- Added a curved stair option into the stair module.
- Added two new parameters for curved stairs into the draw and edit menus: Inside Radius, Curve Direction.
- Enabled treads, risers and framing (primitive) for curved stairs.
-
Version 4.5.9 - 05.31.2026
- Added two new parameters for elliptical curved stairs into the draw and edit menus: Eccentricity, Clocking.
- Enabled treads, risers and framing (primitive) for curved (elliptical) stairs.
-
Version 4.5.9b - 05.31.2026
- Fixed a bug with curved stairs.
- Added the curved stair parameters into the Stairs tab of the Global Settings.
- Enabled landing treads for circular and elliptical stairs.
- Enabled thrust blocks for circular and elliptical stairs.
-
Tutorial 87 - Curved Stairs (9:20 min.)
-
I've been working on close stringers for curved stair cases. The circular variety is pretty much figured out but the elliptical variety still needs an instantaneous adjustment to the stringer depth since the pitch angle of the stairs (slope) is constantly changing. The geometry of a 0.9 eccentric ellipse shows off this distortion quite well. I will hit it again tomorrow and see if I can't figure out a more accurate algorithm for these stringers. Sometimes I enjoy a good challenge, but this one has certainly had me scratching my head a few times already.
-
Impressive results. Huge timesaver too for users.
-
Medeek Wall: Version 4.6.0 - 06.03.2026
- Added a curved “closed” stair option into the stair module.
- Enabled closed stringers for curved (elliptical and circular) stairs.
- Added a separate layer for stair stringers.

Hello! It looks like you're interested in this conversation, but you don't have an account yet.
Getting fed up of having to scroll through the same posts each visit? When you register for an account, you'll always come back to exactly where you were before, and choose to be notified of new replies (either via email, or push notification). You'll also be able to save bookmarks and upvote posts to show your appreciation to other community members.
With your input, this post could be even better 💗
Register Login


Advertisement