QuickTut-OrganicLampShell[intermediate]SubD+ VT+QFT+Flowify
-
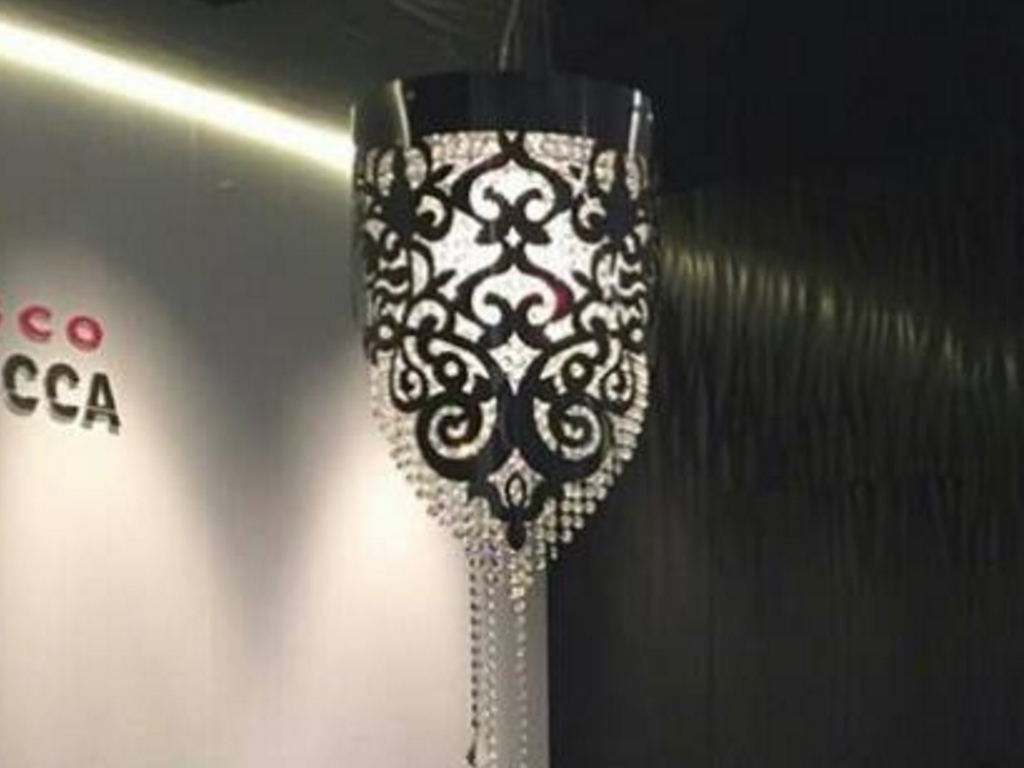
Today i modeled this nice lamp shell from this photo. I would like to share here a very bulk and quick tutorial on the workflow i followed using mainly QFT + SUBd + VT + Flowify.
I started from a rough trace of half of the ornament profile from the reference photo using a mix of regular SU arc/line + fredo's polyline segmentor + quadfacetools pencil + vertex tools extrude.
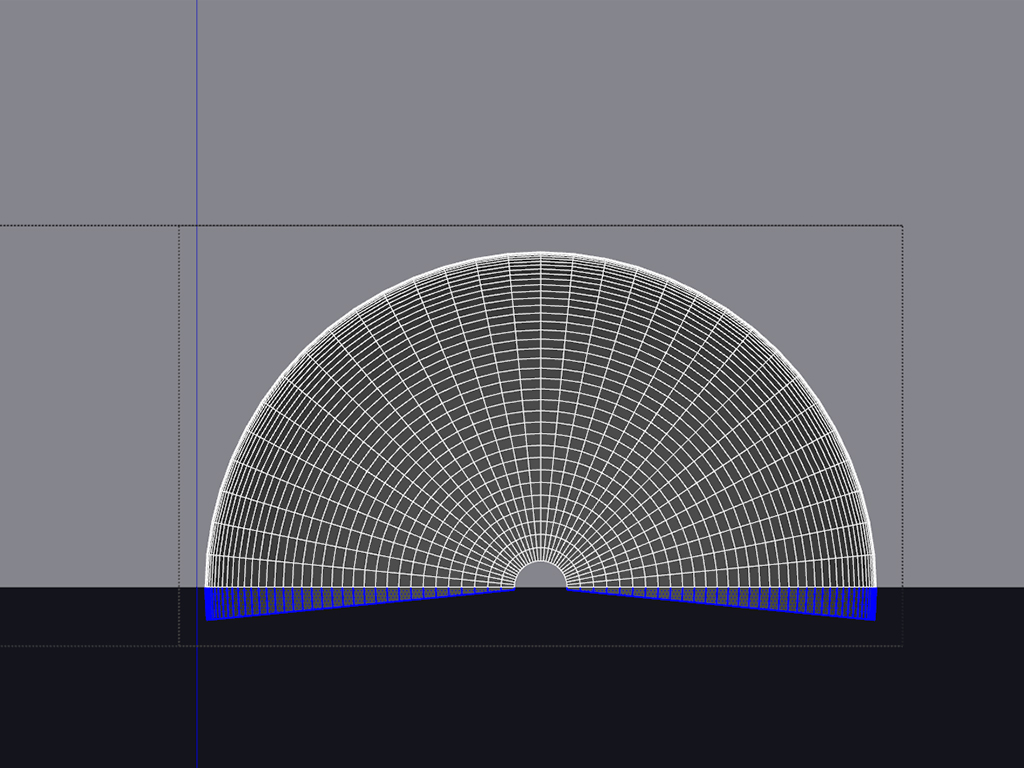
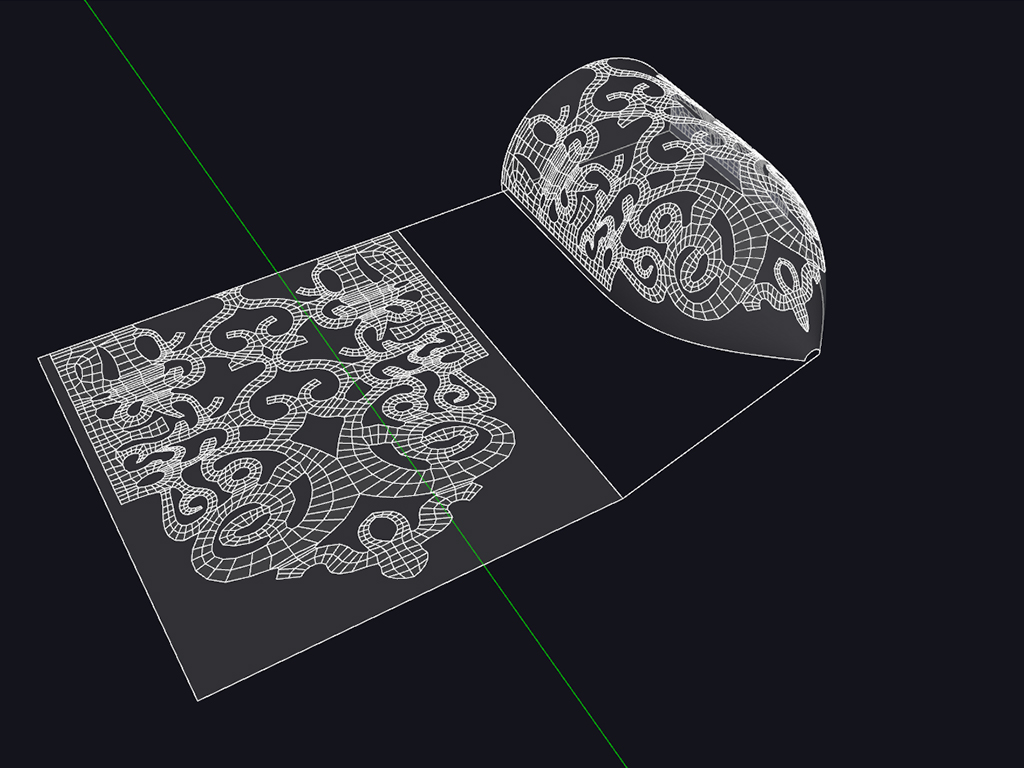
Then i traced a proper volume for the shape, starting from and 8-side circle extruded and manipulated furthermore using vertex tools gizmo and then subdivided at a couple of iterations of sub-d
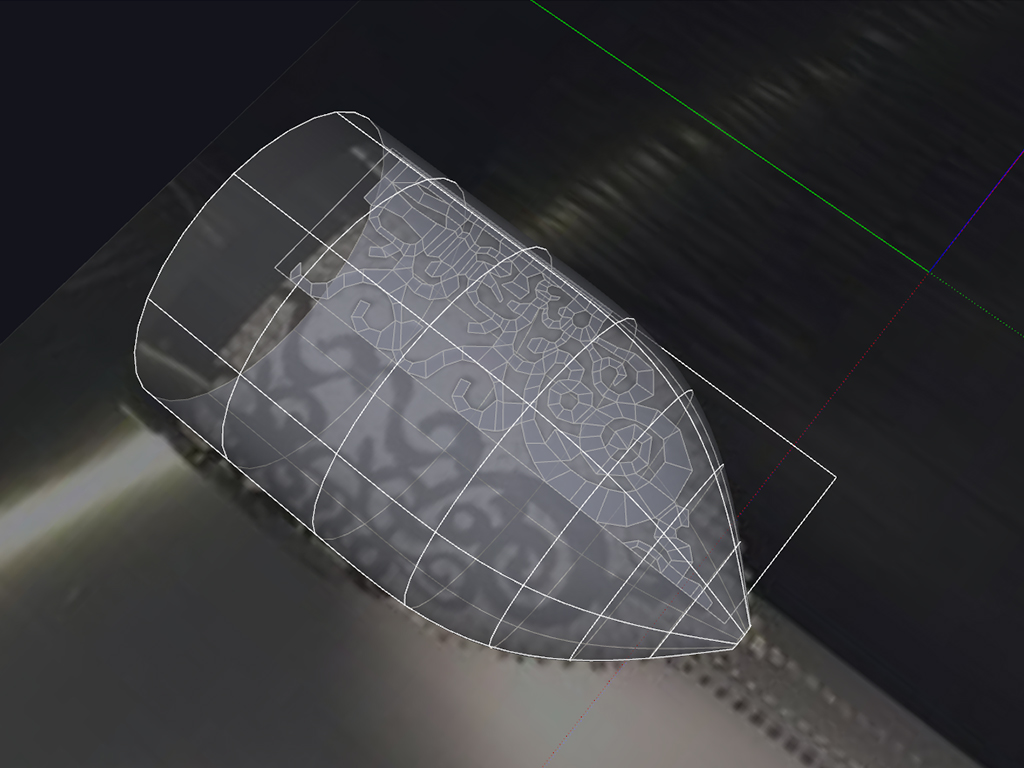
I used unsmooth quads, then selected half of the shape and used "grow selection" in quadface tools to include the loops higlighted in the screenshoot below (this will help flowify to better fit the shape) inverted the selection and deleted all the unnecessary geometry..
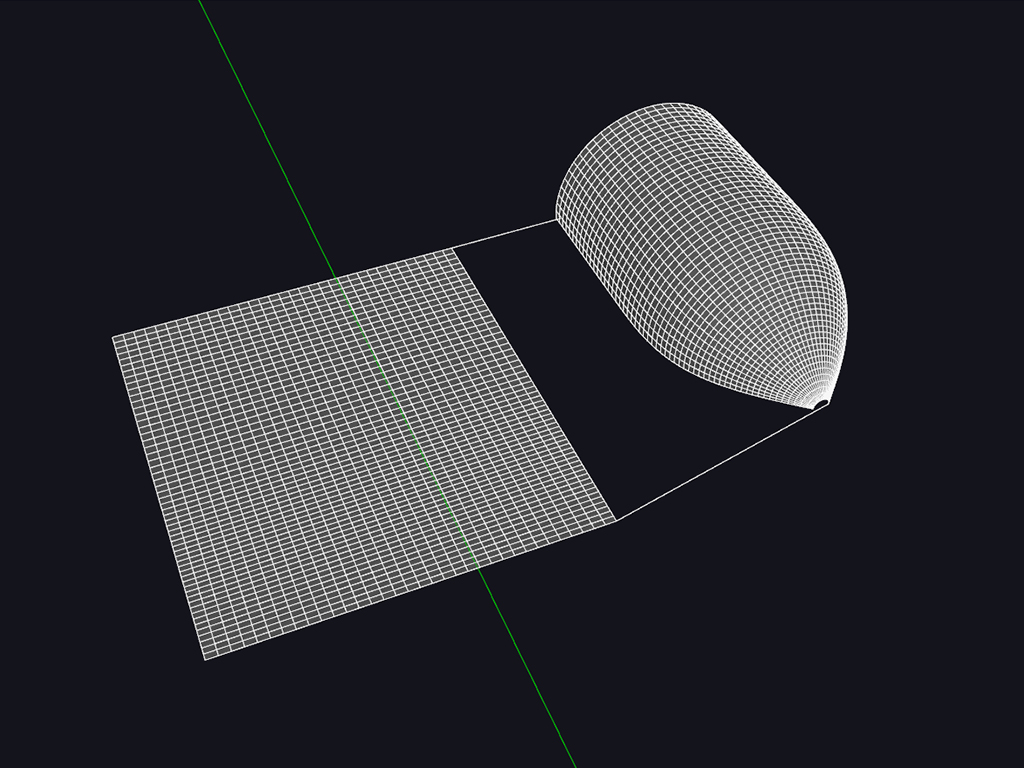
Then i used quadfacetool unwrap to unwrap it to the flat grid and arranged the base for flowify as you can see below
Then i went back to the traced profile mirroring the geometry like this
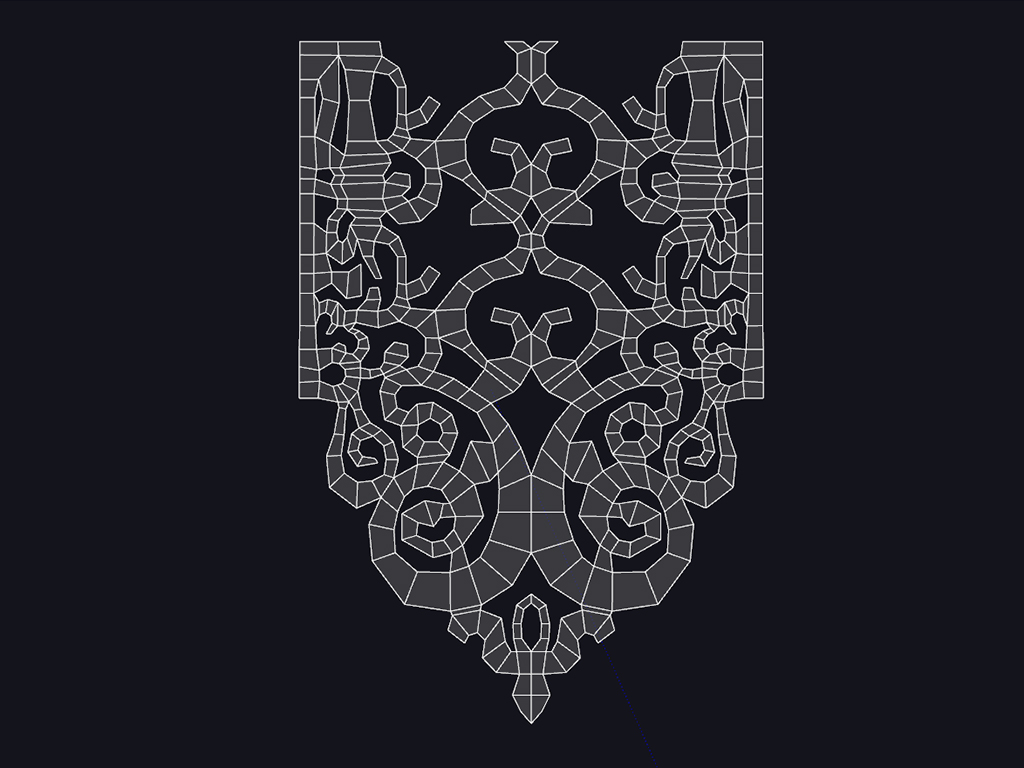
at this stage i grabbed a few vertices from the bottom end to stretch them using vertex tools with soft selection.. in this way i compensate (just eyeballing) the fact that i traced the distorted bottom part from a flat image and now i'm going to distort it again, so i sort of "reverse enginereed" that.. After that i give it a first single iteration of sub-d

Then i ran flowify without cut to get something like this
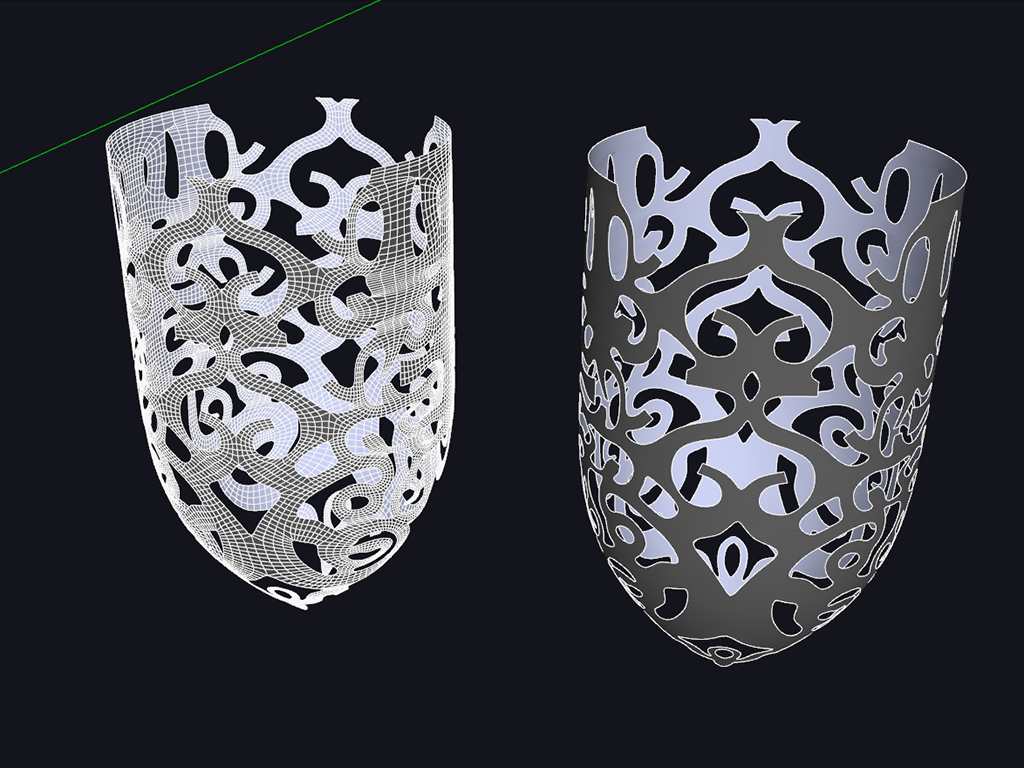
Finally i did a mirror/copy of this shape and ran sub-d once more for the final smooth.
That's it. I hope you enjoy.
-
Nice! Will be sharing this on the FB page.
(Though, a missing image I think? "he attachment 0.jpg is no longer available". And a typo in the thread title, Fowify instead of Flowify)
-
i think i fixed both

-
super!
-
Cool
Hello! It looks like you're interested in this conversation, but you don't have an account yet.
Getting fed up of having to scroll through the same posts each visit? When you register for an account, you'll always come back to exactly where you were before, and choose to be notified of new replies (either via email, or push notification). You'll also be able to save bookmarks and upvote posts to show your appreciation to other community members.
With your input, this post could be even better 💗
Register Login


Advertisement