Workflow - rendering small rooms
-
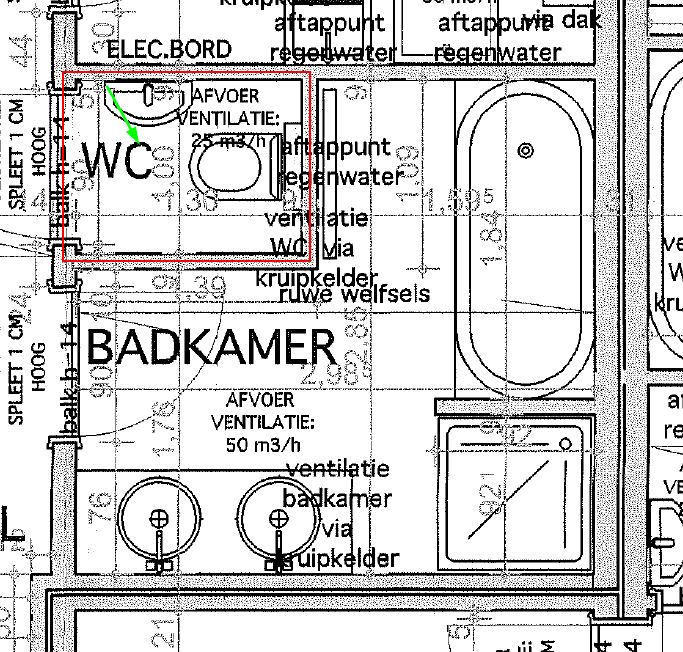
I have to render a small bathroom. See the picture in attachement.
To have a better picture I left out the toiletroom (red rectangle), because the camera (green arrow) is standing over there and the viewport is making it so that the walls aren't missed. I also change the field of view in small rooms.
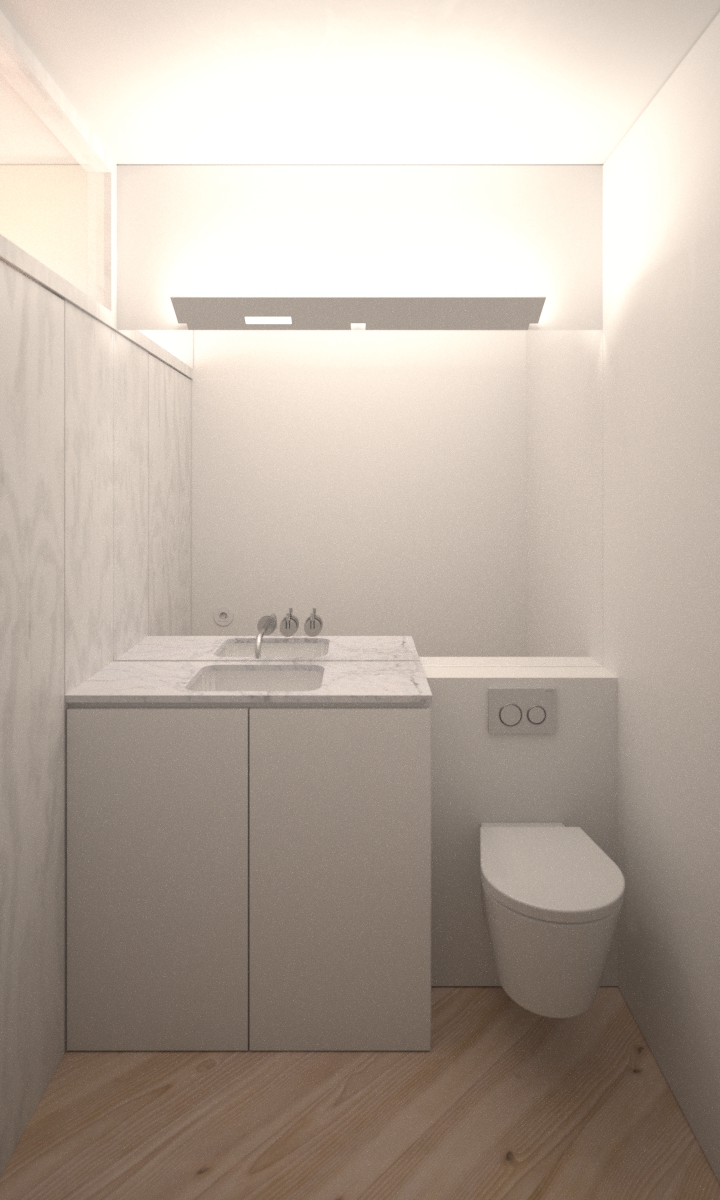
After rendering I noticed that the mirror reflects the room without he walls of the toiletroom. So the picture isn't representative anymore.
I'm curious how other people would tackle this problem...
I was thinking about section planes, walls that are translucent on one side an normal on the other side, rendering with walls and copy/paste the mirror part in post production...
-
I use Section planes but render on Thea, doesn't Vray support them?
-
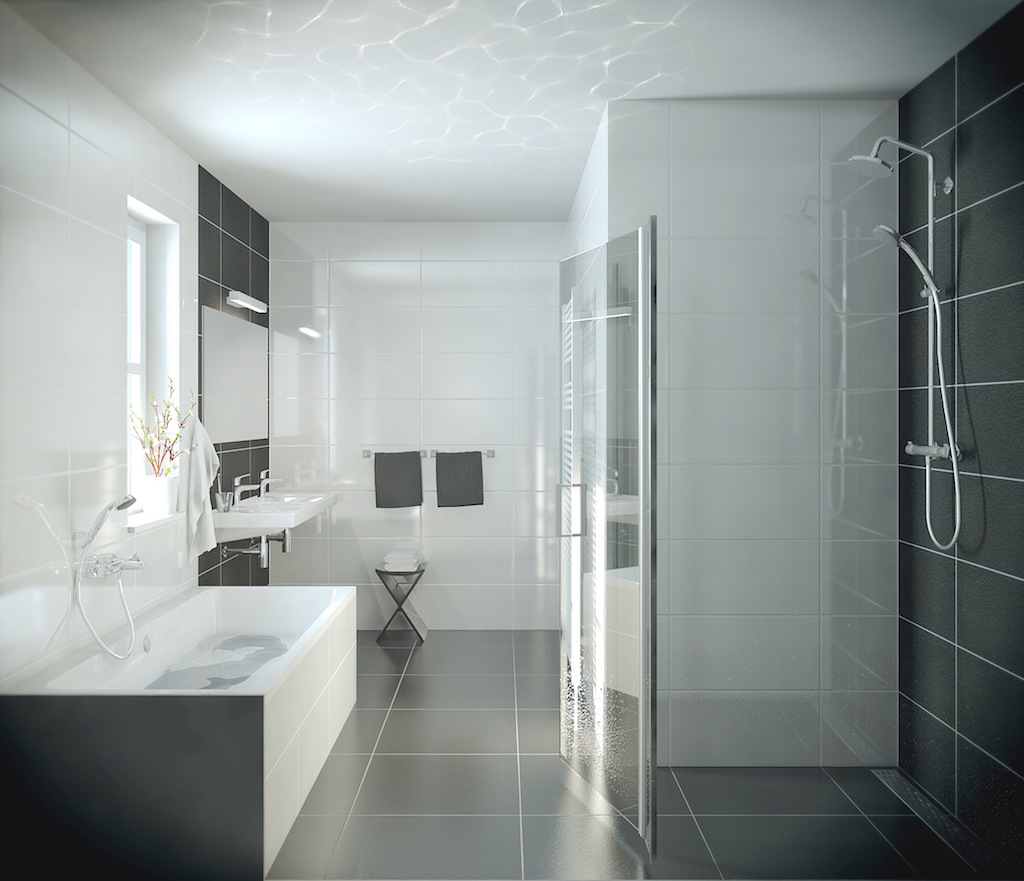
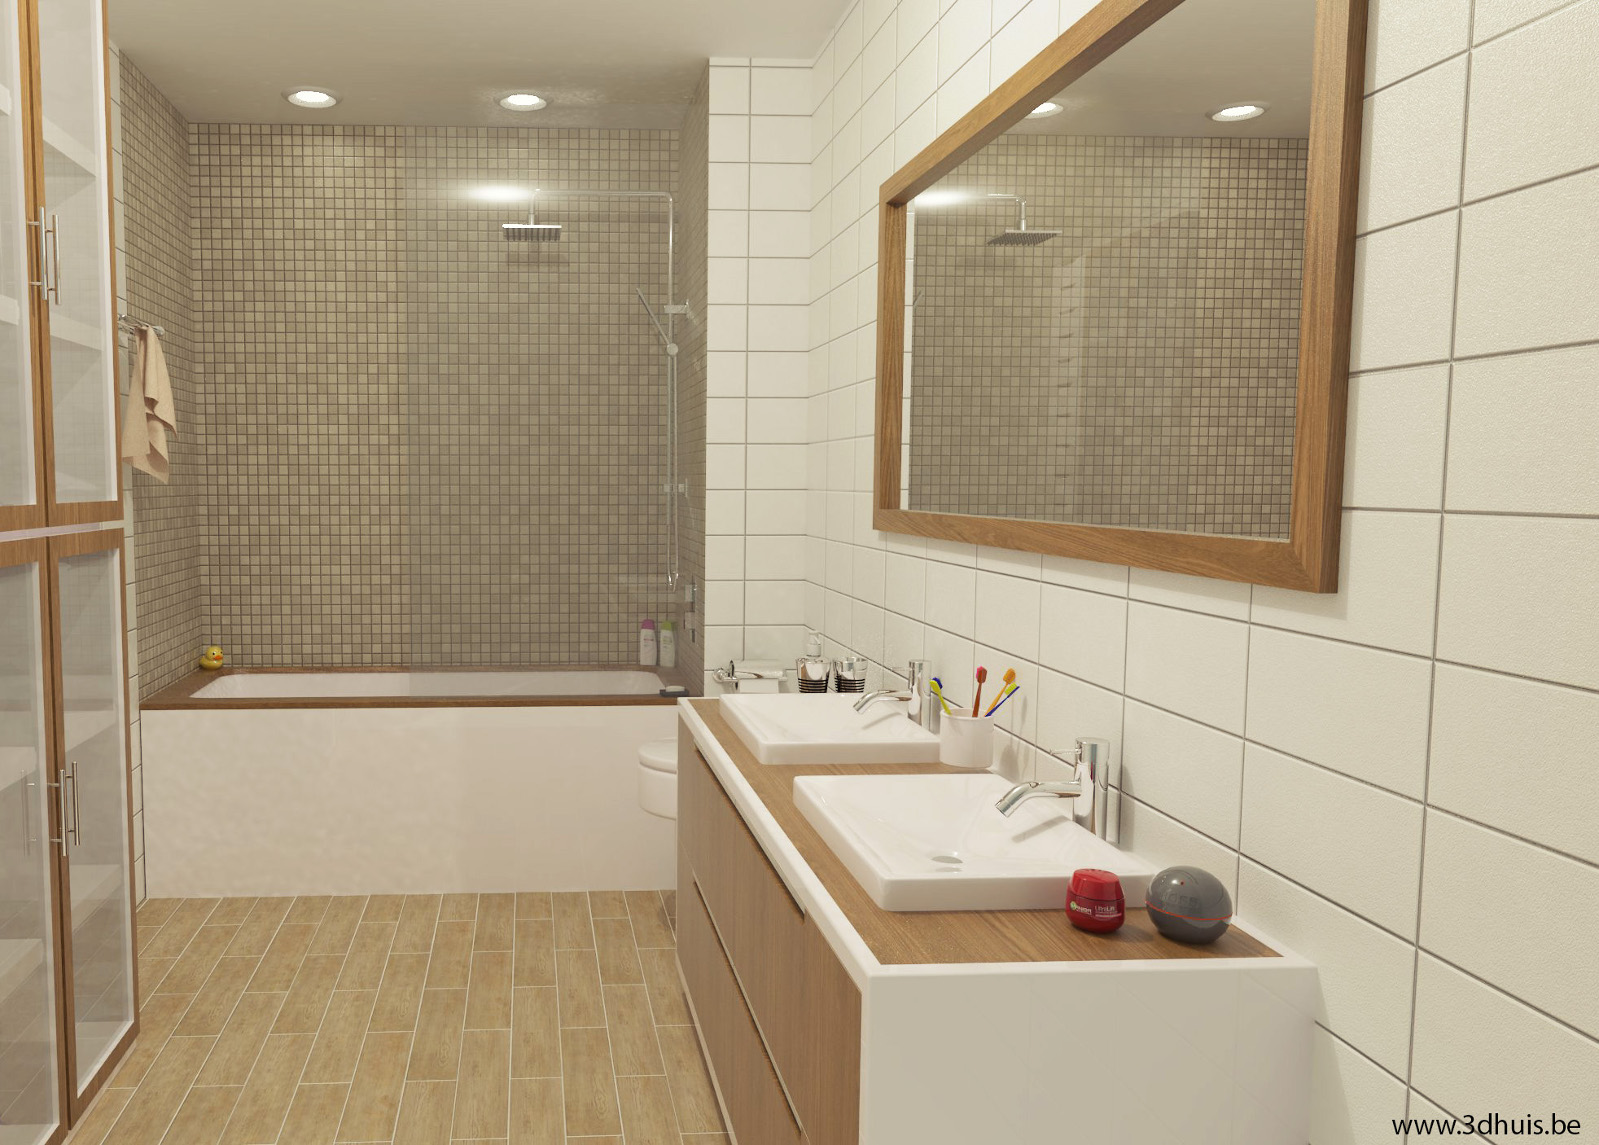
If you want a good representation of the bathroom, why don't you take the camera to the other side (above the washing cabinet. Or stand in the dooropening. Better yet is to make a render from the above. But if the client wants a render from eyeheight I would choose the dooropening. I did once make a render of a bathroom (see attached). It's also a smaller bathroom (like you find in many dutch homes
 ). In this case I "removed" one wall to get a good view. You could do the same from the side of the bath.
-
@JQL As I said I was thinking about section planes, but I dont think the walls cut by the plane will show up in the mirror reflection. I'll try it...
@Peerman If you see the layout of the room, it's clearly the best angle to capture the most of the bathroom. Standing in the door is working around the problem not solving the problem.
THX for the tips!
I'll probably extent the wall with the door and put the camera over there as I have done before.
-
You could also try creating a "Sketchup 2 Sided material" the outside face would be 100% transparent and the inside face would be the same material as the walls.
-
Water droplets on glass and shower wall...
-
@rspierenburg said:
You could also try creating a "Sketchup 2 Sided material" the outside face would be 100% transparent and the inside face would be the same material as the walls.
What am I doing wrong? I am trying to use this technique but am seeing the sun showing through the wall with the 2 sided material.
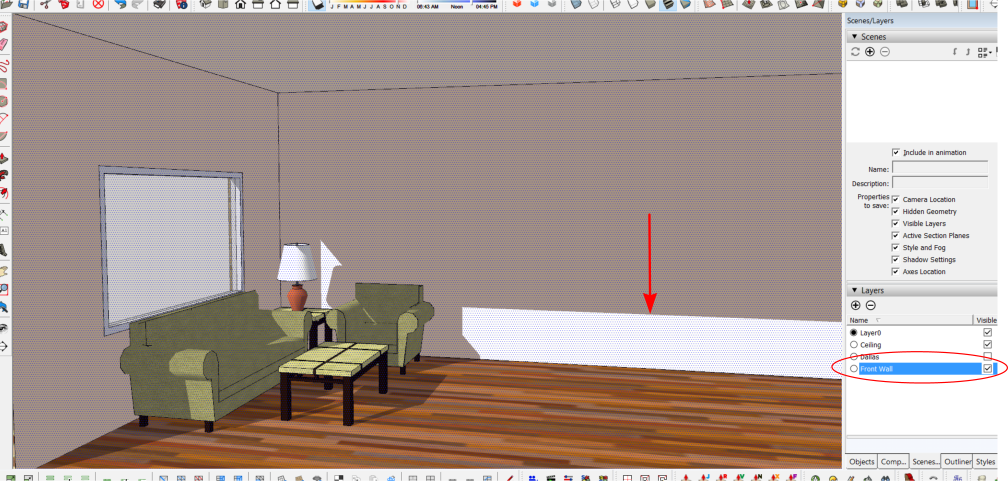
I am having 2 problems, as the arrow shows, I am still seeing the sun showing through the front wall even though it is using the 2 sided material.Additionally, when I try to render it with Twilight Render Hobby, because there is a front wall there, I get a weird color for the wall.
-
Dave, I'm going to sneak in here and try to help you out.
First off Twilight won't render proper with the camera outside a wall that has a solid material on the front face and a transparent material on the back face. if memory serves Twilight only reads materials on front faces. Actually did a quick test, you only get a screen full of weirdness.If you have to render "looking through a wall" to get the scene set up you want. hide the wall or make it transparent both sides. Render with the sun disabled or light will pour in the open side. Use your interior lighting ( invisible emitter in ceiling or point lights ). position a plane outside your window and make that an emitter to give you light coming in the window. You can apply an appropriate image to the plane outside the window and then assign your light emitter properties to it.P.S. I think your getting the hard light and shadows in the image you posted because you have shadows enabled .
-
@tuna1957 said:
Dave, I'm going to sneak in here and try to help you out.
First off Twilight won't render proper with the camera outside a wall that has a solid material on the front face and a transparent material on the back face. if memory serves Twilight only reads materials on front faces. Actually did a quick test, you only get a screen full of weirdness.If you have to render "looking through a wall" to get the scene set up you want. hide the wall or make it transparent both sides. Render with the sun disabled or light will pour in the open side. Use your interior lighting ( invisible emitter in ceiling or point lights ). position a plane outside your window and make that an emitter to give you light coming in the window. You can apply an appropriate image to the plane outside the window and then assign your light emitter properties to it.P.S. I think your getting the hard light and shadows in the image you posted because you have shadows enabled .
Tuna, this is exactly the answer I was looking for. I have looked at the Twilight tutorials a bunch of times and never see anything like this. I will go work on it some more. I do not want to distract from this thread anymore so I will discuss it, if needed, on the Twilight forum. See you there......again, thanks very much.

Hello! It looks like you're interested in this conversation, but you don't have an account yet.
Getting fed up of having to scroll through the same posts each visit? When you register for an account, you'll always come back to exactly where you were before, and choose to be notified of new replies (either via email, or push notification). You'll also be able to save bookmarks and upvote posts to show your appreciation to other community members.
With your input, this post could be even better 💗
Register Login


Advertisement