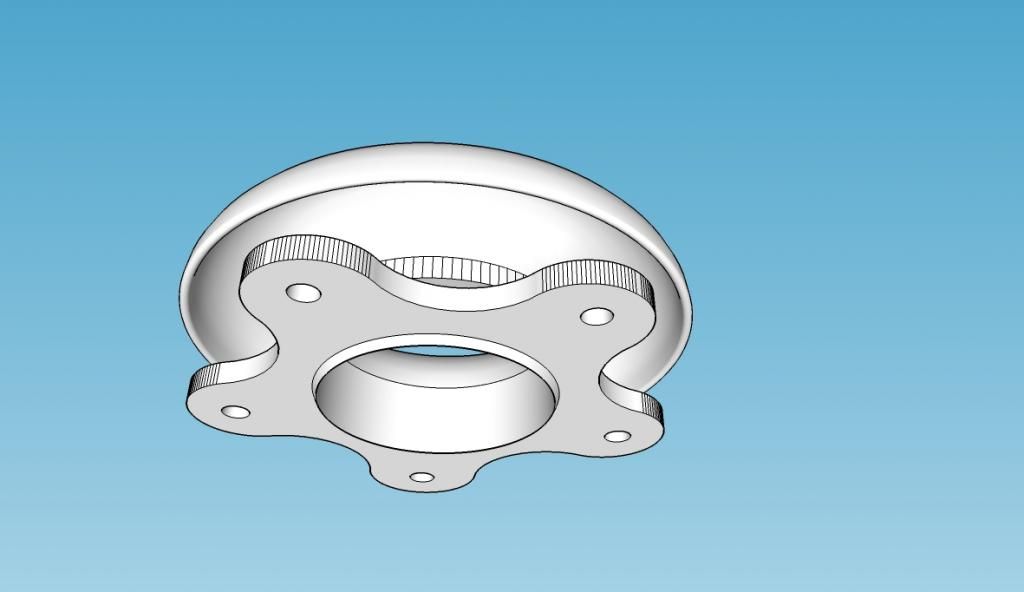
Problems with a half-torus
-
@d12dozr said:
Great! It's a learning process, and you're getting a crash course

You're not wrong there!!!

Just trying to get a quote now, had one for £43 which I thought a bit harsh so I'm trying some other companies now.
I can't see the plastic you recommended so I've just gone for 'standard' ABS.
-
-
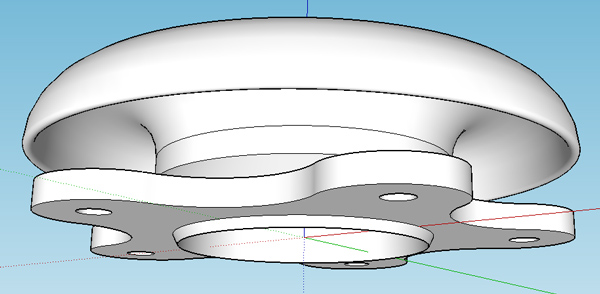
Looks good!
You can use the soften edges window to smooth out some of the lines (no difference for printing, only looks nicer ).
).
-
@teig said:
Just trying to get a quote now, had one for £43 which I thought a bit harsh so I'm trying some other companies now.
That's about the best price for a part of this size on a commercial printer. Cost on a desktop printer is about 1/10 that price, which is the biggest advantage of using one of them. With your newer design, you actually have a little more room for cleaning out support material.
@cotty said:
Looks good!
You can use the soften edges window to smooth out some of the lines (no difference for printing, only looks nicer ).
).+1

On the flip side, this is closer to what it'll look like after printing:
See the faceting on the curved bell surface? If you want that to print smooth, you'll need to increase the # of segments on the curves (Chapter 4 of the book). If the faceting is no problem, then you're good to go.

-
The faceting is a problem, I would need to polish all those off to a mirror surface, for the bellmouth itself at least, the mounting flange etc doesn't matter.
I've been told that some desktop printers will automatically build in support material so it looks like it's going back to that again
-
Can I increase the number of circle segments now? Or will I need to redraw it from scratch again?
-
Definitely redo the model with higher resolution curves then - no reason to polish by hand more than necessary! Once you've push/pulled or follow-me'd, it has to be redrawn, unless you saved the intermediate steps like I show in the book.
Yep, pretty much any printer will automatically add the support material - that's whats shown in the T-rex model I posted before. Cleaning the support material is the tricky part, especially in an enclosed area like your model. Sorry if I didn't make that clear earlier.
Here's a video showing how the support material is cleaned out. On this particular model, it went very well.
-
Thanks again d12dozr, that is a real help. I thought I had to put in all those supports and had been scrabbling around the t'interweb trying to find where and what spacing you put them in at.

Back to the drawing board for v14 it is then....

-
I am getting the hang of it! V19 was drawn in 45 minutes last night, solid first time

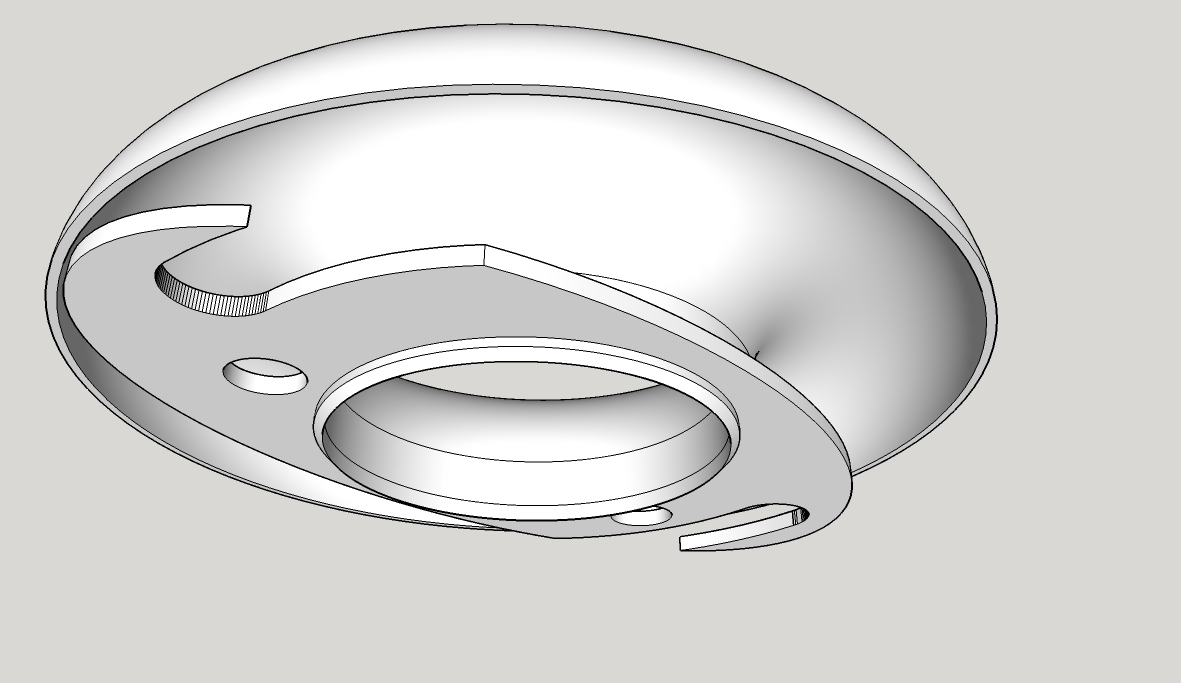
-
Cool but you have forgotten the V6!

-
-
New design is SEXY!
One question...is this area under much stress? If so it may be a good idea to add some meat so it doesn't break easily.
-
Not much stress, it only has to hold the weight of itself up and the one my mate test-printed weighed in at 50g so not very much at all, nothing that a suitable washer won't support (I hope
 ). This version will weigh in a fair bit lighter too.
 -
Well since you pointed that out I've had the compulsion to fiddle
 But... I can't work out a way to add a bit of 'meat' to that area? Short of starting from scratch that is. To strengthen that area I've tried making an arc on the base and Push/Pulling but it leaves gaps.
v6 added for Pilou

-
I would try making the shape you want to add as a separate solid group, then use Outer Shell to combine them.
-
More study required...
-
I'm back again

I'm on version 34 (or so) now. After a lot of research reading mind-boggling papers on how to optimise the design I have changed my design slightly.I'm having problems with the Follow Me tool again, it won't do this:
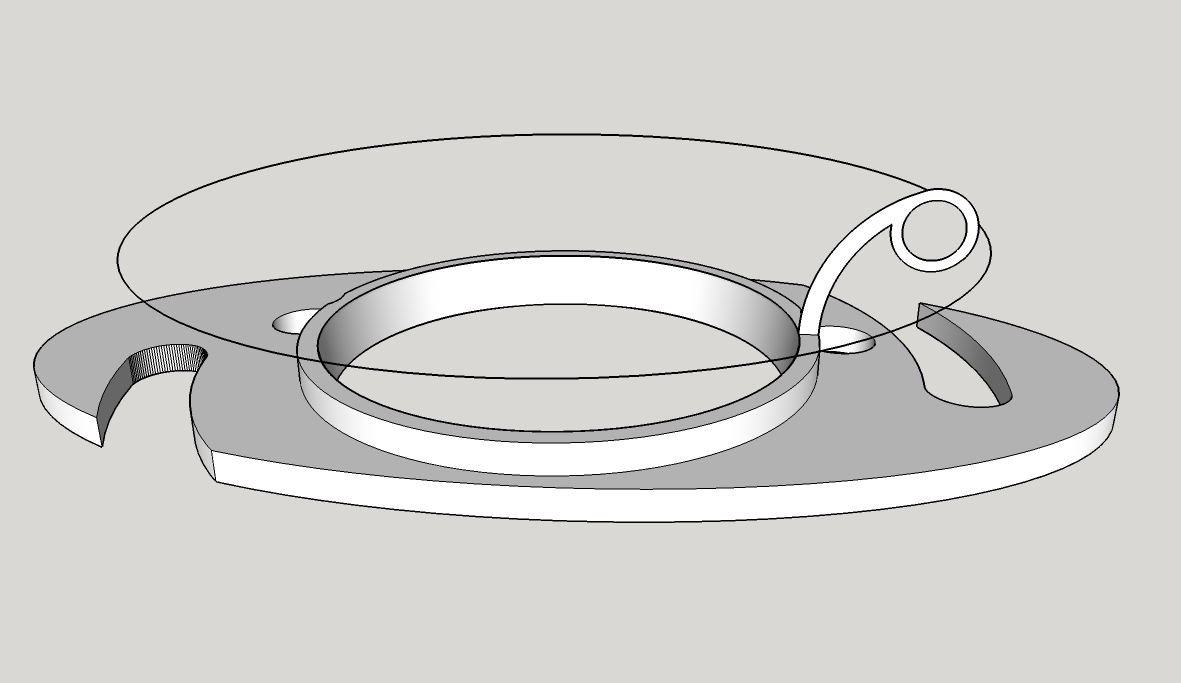
Is there any way I can make it work? I've tried it a few ways on different radius circles to follow, but it will not have it. I've tried it with half-circles and solid circles, this version is trying to be hollow to save weight. Anyone have any ideas?
v6 for Pilou
 :
: 
-
Moved the face away from the other geometry and scaled the model up (1000x)...
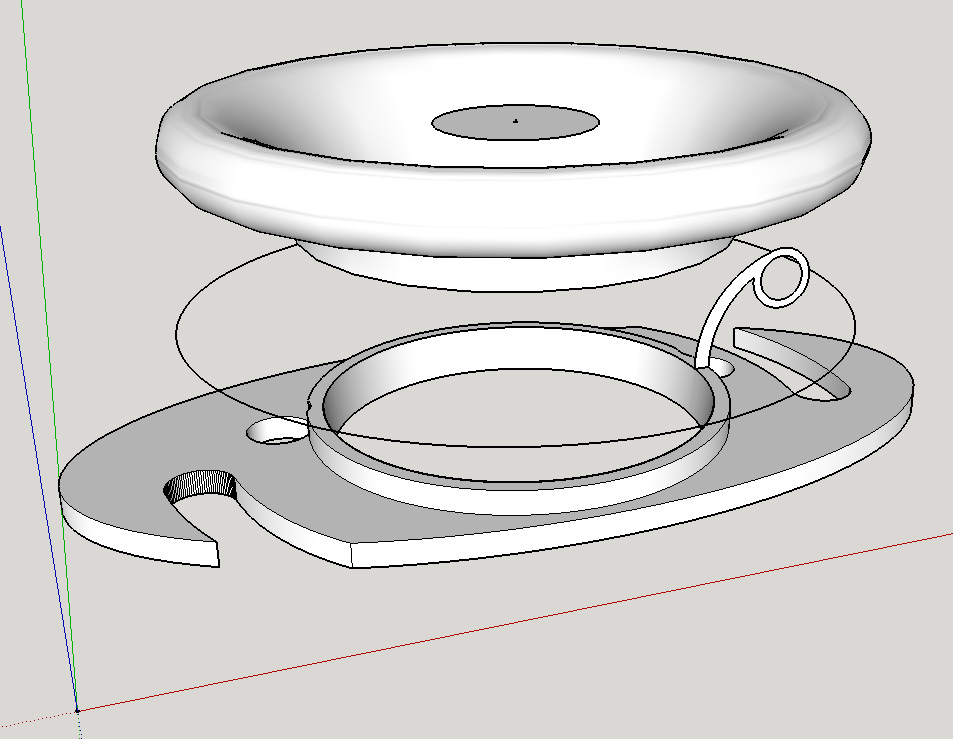
-
@unknownuser said:
v6 for Pilou
Not just for me but for all users who have not the same up version than you!

PS you are making an engine in 3D Printing ?
What will be the fuel ? And for what vehicle ? -
@cotty said:
Moved the face away from the other geometry and scaled the model up (1000x)...
[attachment=0:1vs06ddx]<!-- ia0 -->follow34.jpg<!-- ia0 -->[/attachment:1vs06ddx]
That looks brilliant.
Err.. How do I move a face away from the other geometry? Every time I try I get little 'strings' attached that just stretch out.
And the scale tool. Sorry for sounding stupid but if I scale it by a 1000x what do I sale by to get back to my dimensions?
Thanks.
Advertisement
