Problems with a half-torus
-
Here, I'll give you this gif, and see how you go.
But remember to make it a component this time.Edit:if you are wondering what the first context menu was, it was just the intersect face one, but it was off screen so a moved down and did it again to get it where you could see it.
-
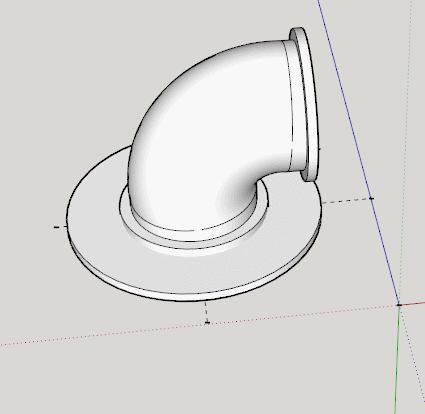
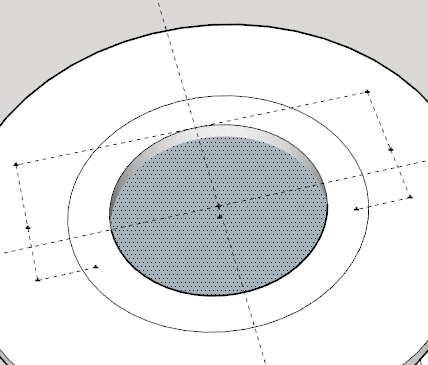
And I thank you once again Box, I did what you said, couldn't see what you could see to understand why it worked bu the result is solid!

-
On your original when you look into the pipe you see a blue face, this it the back side of the top face of the flange, so by intersecting that face you can remove the part blocking your airflow, and then removing the other edge/ring gets rid of an internal face.
-
I knew immediately I'd have internal face when I pulled 'backwards' didn't know to get rid though. I do now
Onwards and upwards, time of home soon for some sleepsssss. Once again, TVM Box. -
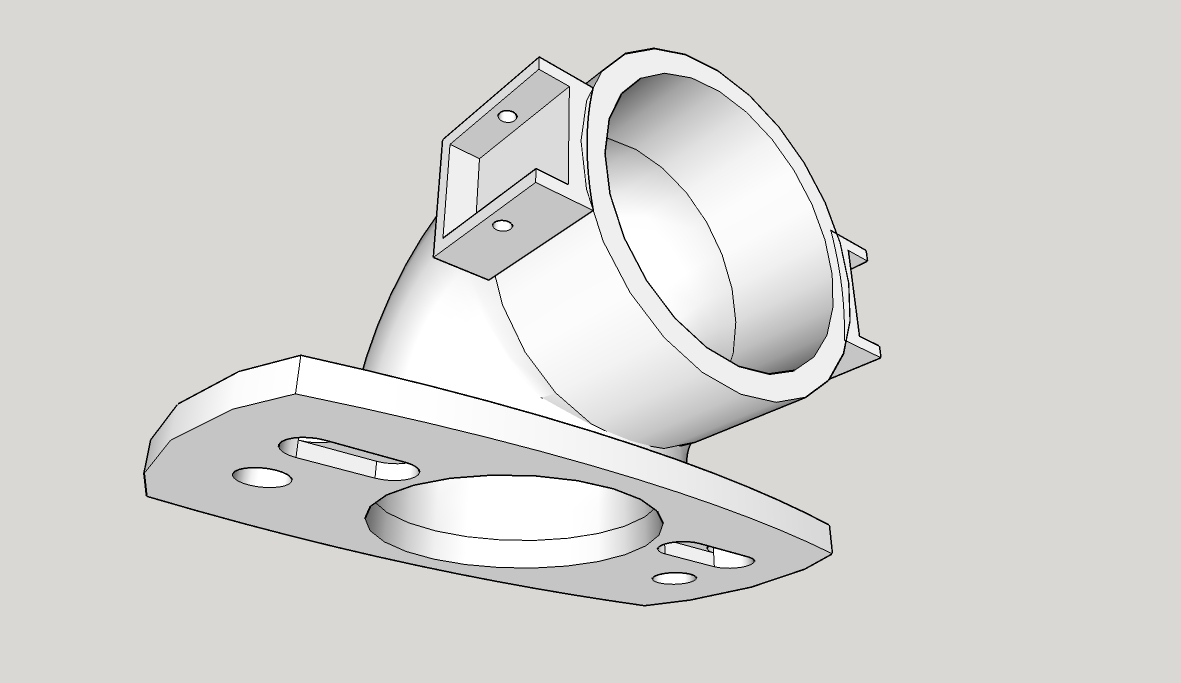
Been playing again tonight and seem to have nailed it
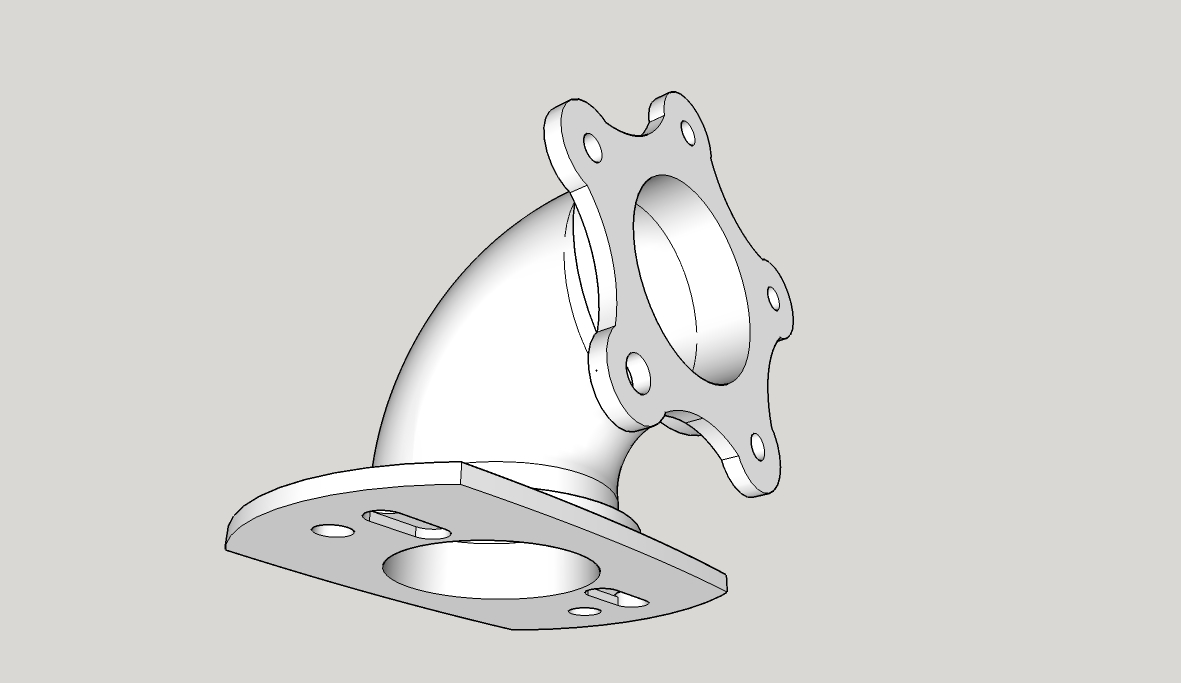
Now to get rid of the five star mount and think about how to draw a snap-on clip type system. I've drawn loads of bellmouths of various sizes; it'd be really cool to be able to clip-on clip-off different ones and be able to compare the difference in the torque/power response immediately

-
Superb, Teig! It's neat to watch your progression from the beginning of the thread to now

-
Indeed is is good to see.
Have you thought about a keyhole type slide fitting.
Slide it on and a simple quick release split pin to lock it. -
Or R-pins for more simplicity? Yes, good idea. I've been looking around at plastic snap-clips for ideas but that might be simpler.
-
@d12dozr said:
Superb, Teig! It's neat to watch your progression from the beginning of the thread to now
I did that myself at the weekend, looked back to the start of the thread that is, my comical first-attempts put a smile on my face
-
@box said:
Have you thought about a keyhole type slide fitting.
Slide it on and a simple quick release split pin to lock it.I'm not sure what you had in mind Box, but I've knocked this together as a concept, can anyone see why it wouldn't work?
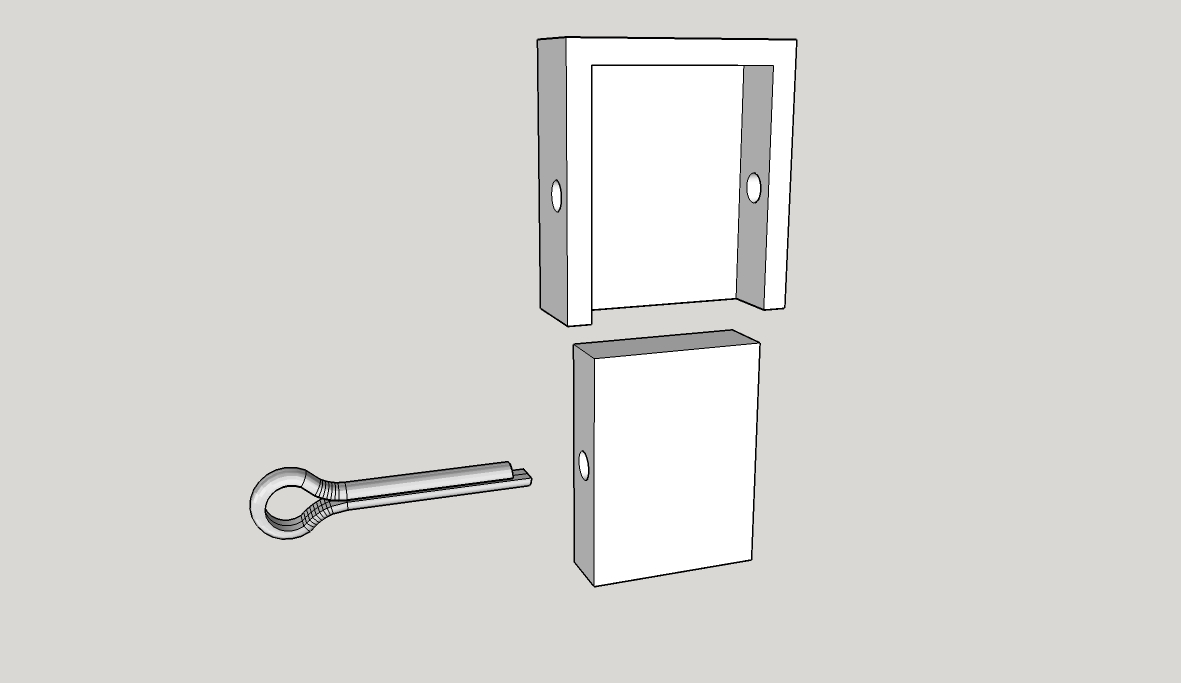
I know the split pin isn't long enough but I can't figure out how to stretch it and it's only for demo.
-
An hour later and I've managed to attach the clips to my model:
Solid Inspector2 is reporting them as solid, SolidSolver is saying I need to select one or other. How would I go about combining the three components into one solid?
-
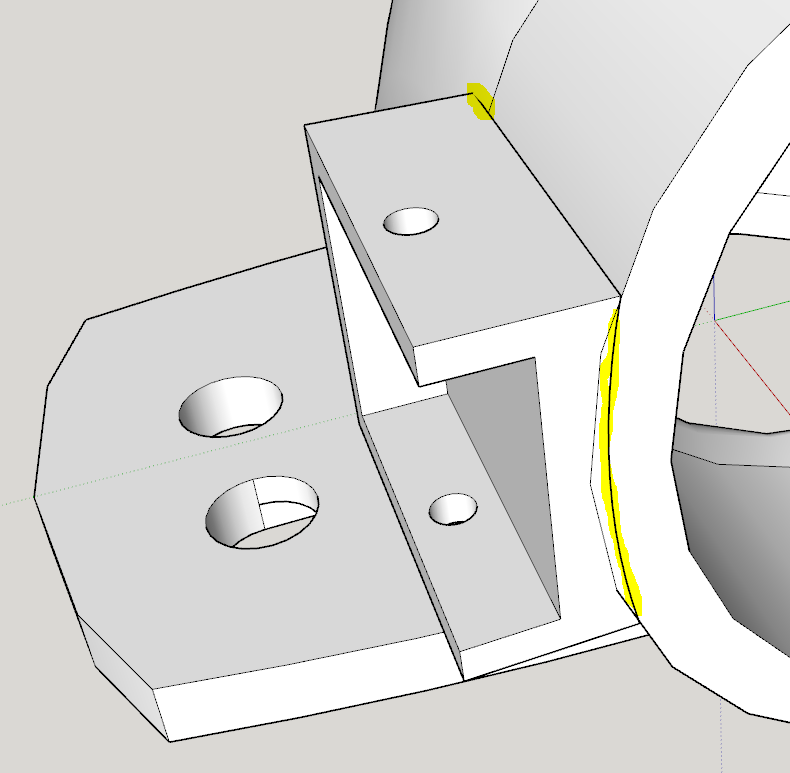
Assuming the main part is a solid [group it and see its Entity Info...] you'll need to 'merge' the 'clips'
Note:
The 'clip' on the right is not in the same relationship to the pipe as the left 'clip'.
I assume it should be...
Also the back edge of the clips intersect oddly with the pipe-part and their backside radius does not match the pipe's either [see image] - it will mean far more tweaking later on...
Fix those and then with the parts in the same context use 'intersect'.
You should then be able to use SolidInspector/SolidSolver OR add a SectionPlane to look inside and erase the unwanted faces/edges.
-
Even easier than using Intersect with Model would be to make the elbow a solid group, the select all 3 groups, Right Click > Outer Shell to combine them into a solid group.
-
@d12dozr said:
Even easier than using Intersect with Model would be to make the elbow a solid group, the select all 3 groups, Right Click > Outer Shell to combine them into a solid group.
But, isn't that a Pro only Solids feature ? -
@tig said:
@d12dozr said:
Even easier than using Intersect with Model would be to make the elbow a solid group, the select all 3 groups, Right Click > Outer Shell to combine them into a solid group.
But, isn't that a Pro only Solids feature ?outer shell is in suFree8 and suMake.. it's the only solid tool which is in both free and pro versions.
(it's the same thing as Union in suPro.. though for whatever reason, i find it more reliable than union in pro so i use outer shell.. but really, i can't figure out why suPro includes both OuterShell and Union
 )
)
EDIT
well, apparently there is a difference:@unknownuser said:
The result of an outer shell is similar to the result of a union. However, the result of an outer shell can only contain external faces while the result of a union can also contain internal geometry.
there's an example image of the difference between the two at that link.. i guess i've never encountered a situation which would require union vs outerShell.
-
Of course you are correct !

But as you point out 'outer_shell' removes all internal 'holes', so it's dangerous if your group is a say a 'nutshell' form [with a 'wall'] as its inner faces will be removed. -
When they introduced Outer Shell in SU 8, it was for the home 3D printing crowd so they included it in the free versions. It does indeed remove all internal geometry, which is what you usually want for 3D printing. If there is internal geometry not connected to the outside at all, then it usually is not needed for printing anyway.
It is one of the features I use the most for making 3D printable models.
-
Thanks `again folks
@tig said:
Assuming the main part is a solid [group it and see its Entity Info...] you'll need to 'merge' the 'clips'
Note:
The 'clip' on the right is not in the same relationship to the pipe as the left 'clip'.
I assume it should be...
Also the back edge of the clips intersect oddly with the pipe-part and their backside radius does not match the pipe's either [see image] - it will mean far more tweaking later on...
Fix those and then with the parts in the same context use 'intersect'.
You should then be able to use SolidInspector/SolidSolver OR add a SectionPlane to look inside and erase the unwanted faces/edges.Well it was solid at some point, it just isn't now...
 The clips were meant to be in the same relative places but of course I do it the amateurish way: by 'feel'
I set the outer radius of the elbow to the same as the inside of the clip - 27.2mm - but unfortunately they didn't match up
I've moved the clips 'in' so there's no gaps between them and the 'body' so I hope that works.
I seem to have some very weird anomalies going on at the back of the elbow, also under the 'front'. What are they, why did they suddenly appear when I ran SolidSolverand how the begorra do I get rid of them?
My mate's been on the blower, says split pins aren't easy enough, he want snap-clip type things, I'll have to search around t't interweb for ideas.
-
@d12dozr said:
...you can use Netfabb Basic to quickly decimate (reduce the # of polygons) an existing model with out having to re-draw the whole thing.
Here's how: open model in Netfabb, Right click > Level of Detail > Choose something like 50%.
I just learned that this decimation is visual only, and you can't save the decimated model. D'oh!
-
@teig said:
I seem to have some very weird anomalies going on at the back of the elbow, also under the 'front'. What are they, why did they suddenly appear when I ran SolidSolverand how the begorra do I get rid of them?
Looks like the follow me path was too sharp for that size of profile. You can select the elbow geometry > Right click > Intersect selected, then clean up the internal geometry - or make the bend not so sharp, and then you won't get the nasty intersecting geometry.


Advertisement