Make edges worn
-
Hi, is there a method or a plug to automatically manipulate the geometry of a selected model by creating small or big anomalies of some sort, for a fatigue-looking result? Something like this example - a plugin for Cinema 4D:

All i've found is about achieving the opposite, so, is there any (fast) way?
-
You could look at this tool http://sketchucation.com/pluginstore?pln=ene_fractalTerrain_v1.0.0_2
With suitable parameter adjustments it might do what you want ? -
Thanks for the link, although this one modifies the whole face. I tried to extrude each face and apply it there but the results were not so good, and the method isn't very convenient. This plugin could do a nice work on creating stones and such. Anyway, it's closer to what i want from anything else i've seen.
-
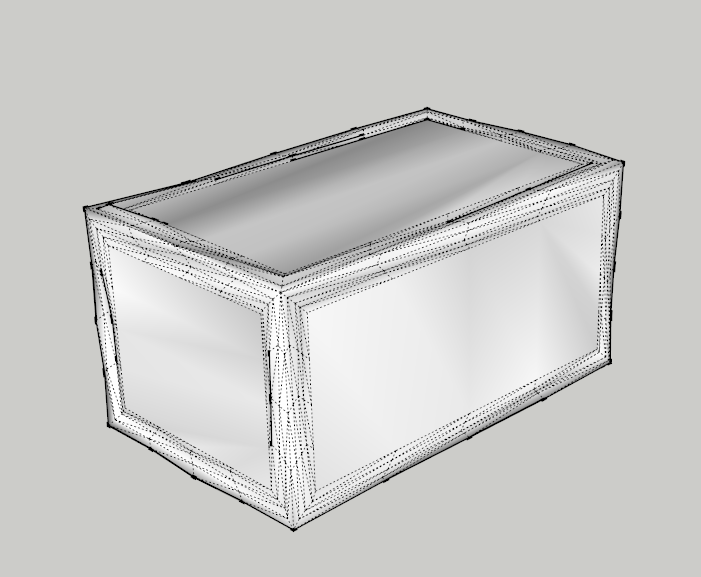
If you offset the faces of the cube, then select just the 'rings' of perimeter edges and apply the 'Erode' fractal tool what happens...
-
Yes, these are the results i had more or less when extruding. It gives an interesting effect but doesn't look like worn, plus the edges now are, well... protruded. Even if i pull the face to the front a bit, it still shows. The thing is that i can't find any way at all to achieve this weathered effect. Subdividing each edge and move the points up and down certainly isn't the way to go, especially for a huge building.
-
You are better off using a textured material. Doing full geometry would make the file huge and sluggish.
-
Or perhaps think about using a Style with jaggedy edges

-
@box said:
You are better off using a textured material. Doing full geometry would make the file huge and sluggish.
That was my first thought too, since my purpose is to export into Unreal engine for real-time rendering. But coming close to the model one would see the difference. I know of other methods a texture can be used for the effect, like parallax mapping, but i've not much of experience. If there was a way of doing it geometrically with SketchUp, i could always do a polygon reduction (together with quad conversion). Maybe i shouldn't be using SU in the first place?
@tig said:
Or perhaps think about using a Style with jaggedy edges
That was the first thing i did, thinking it would export the model like this as well. Sorry, i should have mentioned from the start i want to use the model in Unreal engine.
-
did you try 'Sandbox Tool' to make an irregular mesh to start with?
john -
@driven said:
did you try 'Sandbox Tool' to make an irregular mesh to start with?
Hi, i can't see how would i embed Sandbox in the workflow. I don't want to build a model anew, i want to be able to modify it so i can have two versions of it - the one i've built, and its "eroded" version. I think of an "age" modification method/plug, random inner deformations on the edges of a selected face/model.
-
Model Scrambler?
-
I'd suggest using Blender to sculpt the hi-poly detail and bake out the maps from that.
Then on a lo-poly mesh you can shrink-wrap it to the hi-poly object and use the hi-poly texture bakes to trick the effect of added detail.
-
@krisidious said:
Model Scrambler?
Again, it manipulates the faces, not the edges. More or less what the Fractal Terrain does, TIM suggested.
@rich o brien said:
I'd suggest using Blender to sculpt the hi-poly detail and bake out the maps from that.
Then on a lo-poly mesh you can shrink-wrap it to the hi-poly object and use the hi-poly texture bakes to trick the effect of added detail.
I feared this would come! Guess i have to mess with Blender after all. It's kind of a love/hate relationship, i know you can do a lot with it and i've seen some great results, if only i could pass the confusing interface. It sounds quite straightforward. One question, just to be sure. I'm after the first example on the image below, the straight lines due to the geometrical structure of the model on the second example is what i want to avoid.

-
That's displacement giving that result.
Which is geometry heavy. There are means to to get close to this but your geometry will need subdivisions
-
And which is more efficient for real-time rendering, subdivisions and displacement, or sculpting and polygon reduction? I reckon, none of the two methods can be done inside SU, so exporting to Blender is the logical next step.
-
For realtime rendering you need to sculpt at hi-res and then decimate or shrinkwrap down to lo-poly
In fact there is no need to sculpt that much if you have a diffuse map to begin with. You need to pull the convex and cavity detail from the diffuse and use that to displace the hi-res mesh.
I know I'm using lots of silly terminology but it is all relatively quick to do with free tools.
-
Thank you. I'll do my research about doing what you suggest. No worries about terminology, it's a necessary evil, and learning the meaning of these terms will prove useful in the long run.
And nevertheless, i appreciate all of you for your time responding.
Hello! It looks like you're interested in this conversation, but you don't have an account yet.
Getting fed up of having to scroll through the same posts each visit? When you register for an account, you'll always come back to exactly where you were before, and choose to be notified of new replies (either via email, or push notification). You'll also be able to save bookmarks and upvote posts to show your appreciation to other community members.
With your input, this post could be even better 💗
Register Login


Advertisement