Rotating texture in a component
-
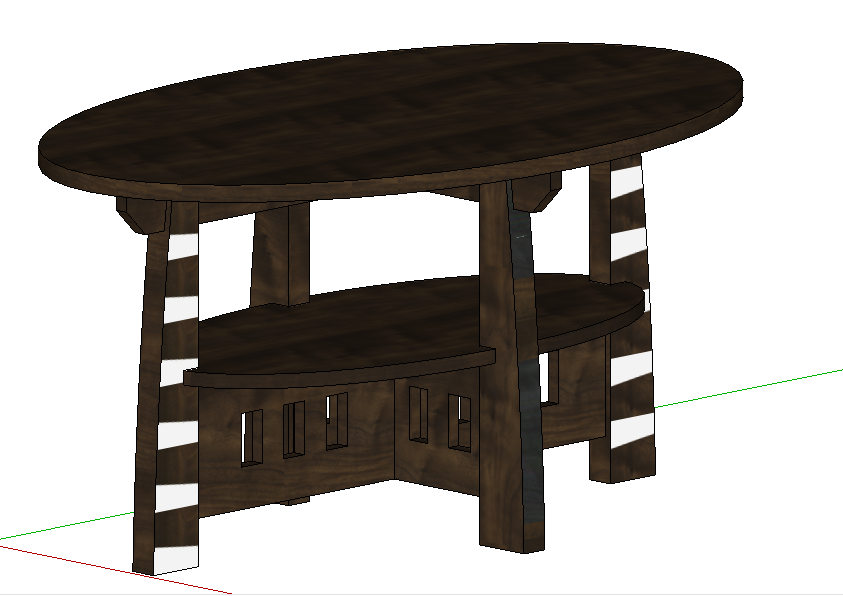
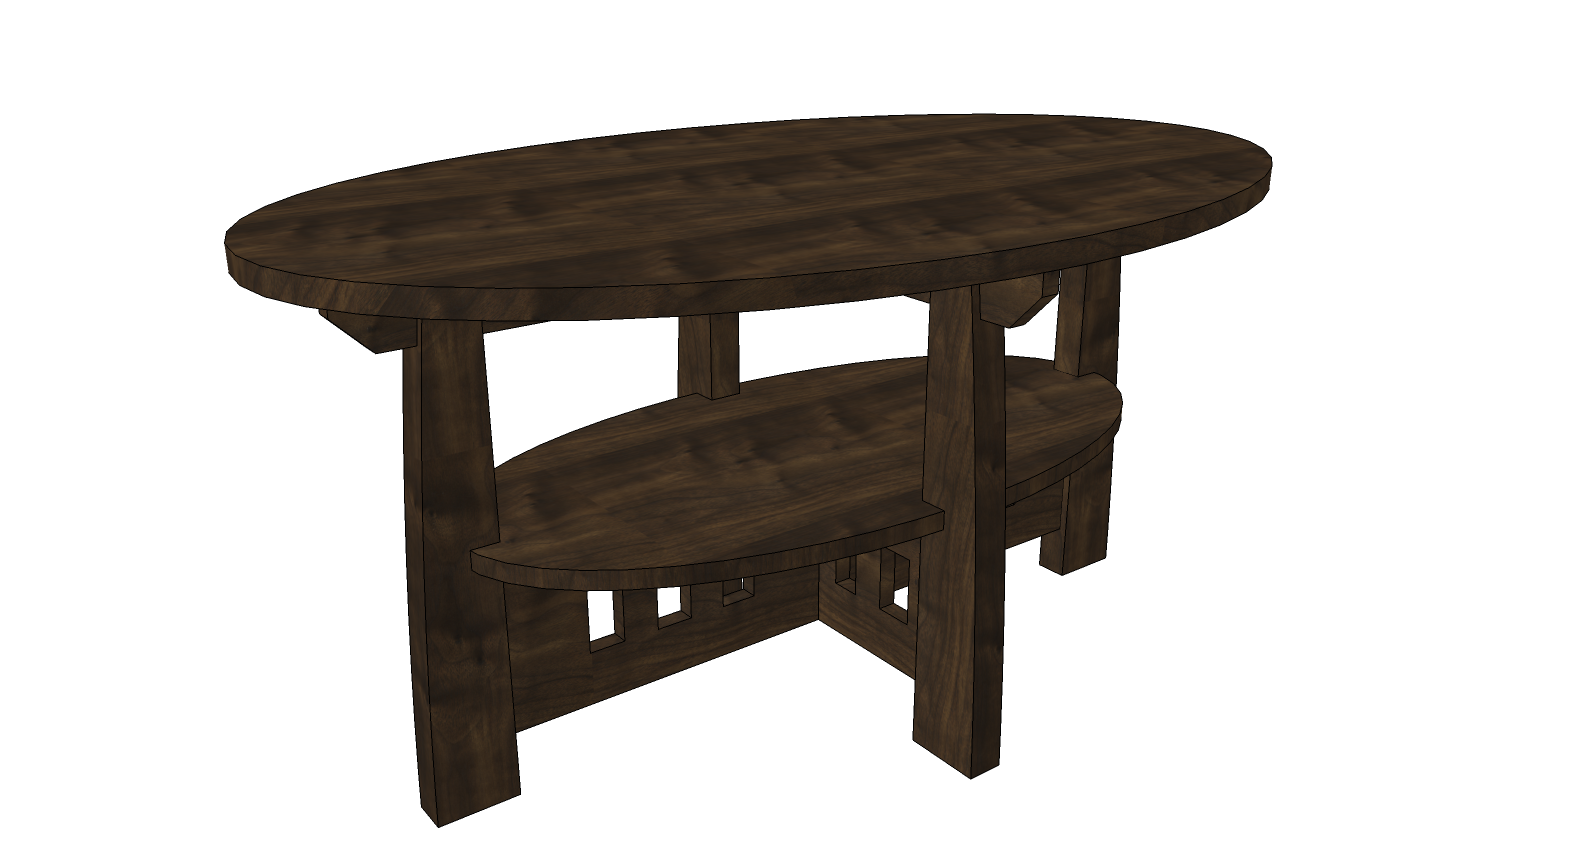
I am wanting to re position the material applied to the table below on the legs. This is a component. What I am doing is to open the component for editing, selecting the face, making a unique texture, then right click and open texture, select position and rotate 90 degrees. What I get is a bunch of stripes. I used this same procedure on the table top, also a component, and it worked fine. What am I doing different from the top to the legs? Is it because the curved side of the legs?
Thanks in advance,
Jerry
-
Jerry, you don't need to make the unique texture. You just need to right click on the face, choose Texture>Position. Right click again and choose Rotate>90°. Once you've done that on one face in a component, you can sample it with the eye dropper in the Materials window and apply it to other faces in the component or even to the faces in other components. I did a blog post on this a long time ago. Here's the link.
-
Dave, I know what you are talking about by clicking on the face and using the texture rotate. I open the component for editing, click on the face I want to rotate, click the right arrow key. The menu that comes up, does not have "texture" on it. It only has "make unique texture". If I click on that, then it brings up a window that has the "texture" option and can be rotated. I did the top with no problem, but the legs seem to be different. The context menu is different for both components.
P.S. I did not get the link...
-
The legs have curved surfaces, so you can't rotate the texture in one go. Go to view and enable hidden geometry then select a single face of the leg-->right click-->texture-->postion-->right click-->rotate 90. Now pick the paint bucket tool, press alt key and with the eyedropper pick the rotated texture and paint the adiacent face. Press alt again, pick the texture from the face and paint the next. And so on. Do the same for all the faces.
-
Massimo beat me to it. Remember that curved surfaces in SketchUp are made up of more than one face. An easier way to fix the materials would be to apply and rotate on one of the large flat surfaces and then select all the geometry, sample and apply the material as I did in the tutorial.
By the way, many of the components had the materials applied to the wrapper instead of the faces. You won't get the opportunity to reposition the materials when you do that.
Here's the link to the tutorial
Fredo's ThruPaint might be of interest to you but it's a good idea to learn the native tools first. They can often do what you need without resorting to other tools.
-
@jerrymich said:
...I did not get the link...
http://www.finewoodworking.com/item/23791/adding-materials-to-your-model -
jerry, if you do a lot of wood textures on curved surfaces you might want to download the Fredo Tools plugin. in the package is ThruPaint it makes orienting wood grain on curves a lot easier than with the native tool. chuck.
Hello! It looks like you're interested in this conversation, but you don't have an account yet.
Getting fed up of having to scroll through the same posts each visit? When you register for an account, you'll always come back to exactly where you were before, and choose to be notified of new replies (either via email, or push notification). You'll also be able to save bookmarks and upvote posts to show your appreciation to other community members.
With your input, this post could be even better 💗
Register Login


Advertisement