Fishing net modeling
-
Hi everybody !
I'm trying to make a model of a giant fishing net and I'm wondering if there's anyway or plugin available to do it.
So far I already tried pipe along path wich makes my sketchup crash.
I did achieve small scale success with the 1001 bit tools architecture plugin using Rectangular grille and circular grille tool, but it seems to add too much vertex and sketchup crash when I'm tying to apply it on a large wireframe surface.
The actual method I'm using is :
1 : I make the surface wich is about 50m x 8m with ondulation
2 : I use artisan plugin to add vertex with the subdivide selection tool
3 : I turn on hidden geometry and choose the style wireframe to only see the wireframes
4 : I select the wireframe of the surface and apply the Rectangular grille tool of the 1001 bit tools plugginIs there a better way to do this ? Thanks for your help !
Willipop
-
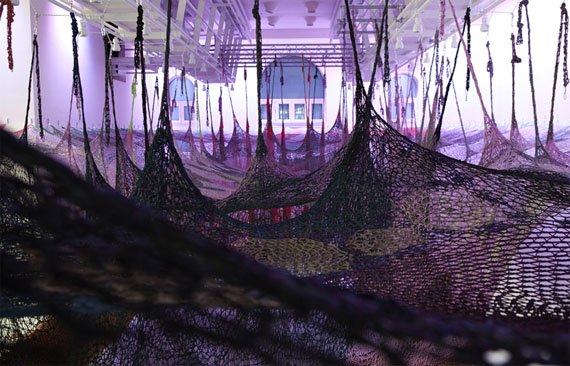
Do you habe an example picture of the desired net?
-
Not as precise as this but here is the big picture :

-
Have a look at Tig's extrusion tools, particularly Extrude Edges by Rails to Lattice.
-
I have this plugin, I'll try it right away ! Could tell me what is a lattice ?
Thanks for the help guys !
-
I'm having trouble with selecting the profile curve ... should I still work in wireframe style while using this tool ?
-
Is there a way to transform wireframes to edges ?
-
How about posting your SKP file so we can actually see what you've got?
-
Just as a start, this is a lattice made quickly with tigs tool.
-
Very nice Box !
Can you set the thickness of the lattice ?
I added a quick test (sketchup v8) but I'm using 2014.
-
Yes you can change the thickness.
But you need to think about the complexity of the geometry you want to create. A huge complex net made in one piece will bring any computer to it's knees.
If you want to do it make it in repeatable sections as components.
Or consider using a nice net texture. The image below is one of the default fencing textures.
-
I see ! The problem with the textrure is it won't cast the shadows !?
-
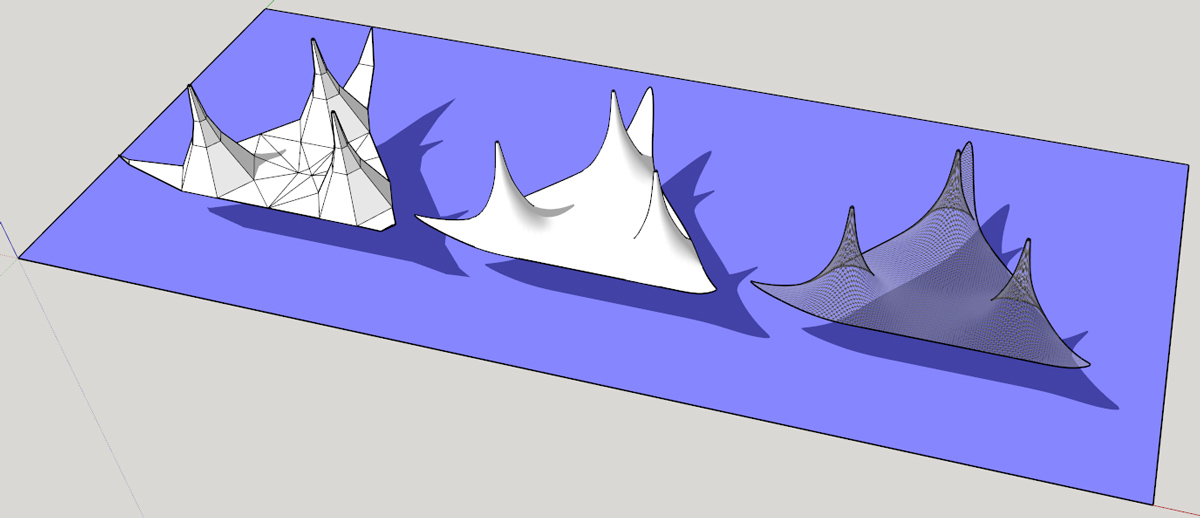
Example how to use Artisan to create the basic shape for texturing...

-
Super cool cotty ! how did you pass from the middle shape to 3rd shape at the very right ? Is this actual edges ?
-
@ Cotty, can you upload your file ?
-
@willipop said:
Super cool cotty ! how did you pass from the middle shape to 3rd shape at the very right ? Is this actual edges ?
I followed Boxs suggestion with the simple fence texture...
The model is attached.
-
I'm wondering if there is a way to turn hidden geometry lines into edges !?
-
@willipop said:
I'm wondering if there is a way to turn hidden geometry lines into edges !?
Yes, unsoften them. Select all and slide the soften edges slider. Uncheck both the boxes too.
-
Thx Oli ! I noticed we can change the weight of the edges in the style option but it is just for the display and it do not affect the weight of the shadows casted. Is there any other way too make the edges solid ?
-
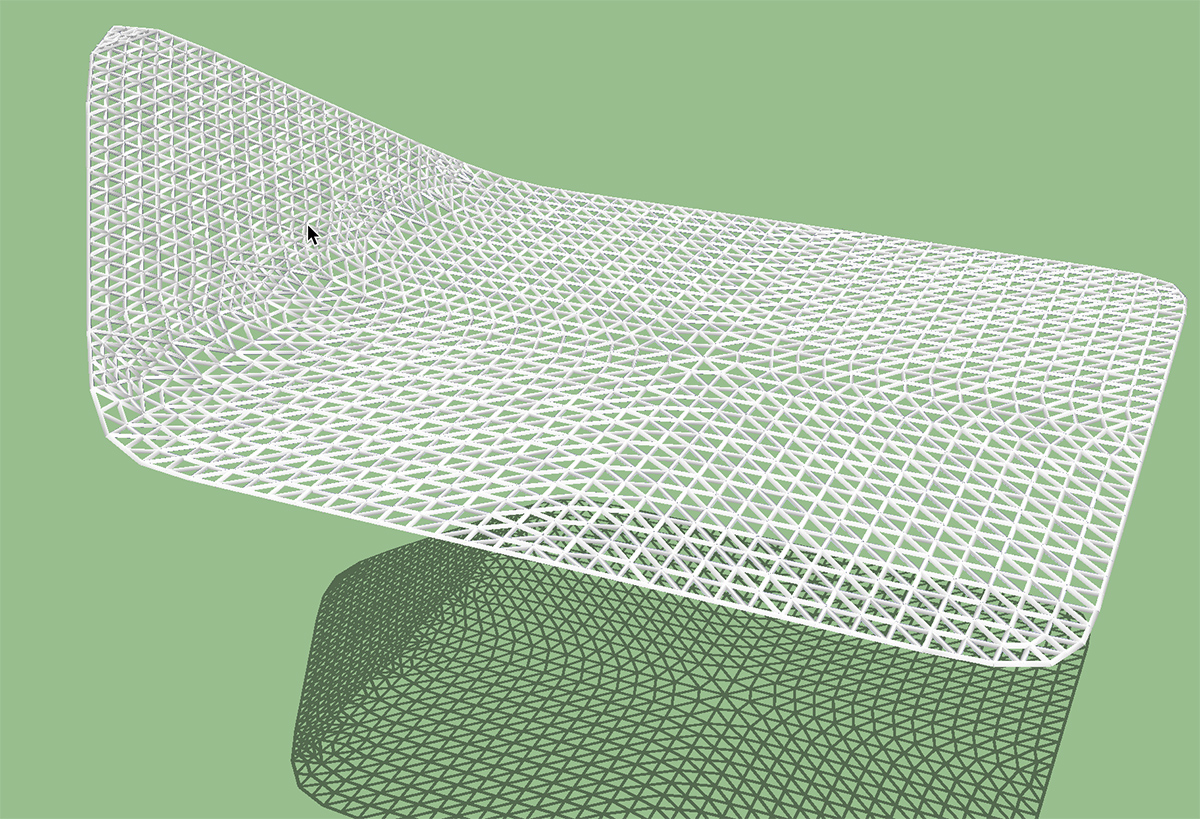
Here is a try I did today.
1- Sarted with a rectangle
2- Applyed several time the subdivide selection tool from artisan
3- Applyed the subdivide and smooth tool from artisan
4- Turned on hidden line and selected style wireframe
5- Selected the lines and get rid of the smoothing edges to get edges
6- copied those edges
7- Finally I used tube to cylinder plugin and It took 10 min approx of working progressI'll have no choice to go with this kind of work flow if I don't find anything better than this. End of semester is coming fast


Hello! It looks like you're interested in this conversation, but you don't have an account yet.
Getting fed up of having to scroll through the same posts each visit? When you register for an account, you'll always come back to exactly where you were before, and choose to be notified of new replies (either via email, or push notification). You'll also be able to save bookmarks and upvote posts to show your appreciation to other community members.
With your input, this post could be even better 💗
Register LoginAdvertisement


