Looking for tool to cut non-solids along a plane
-
Charlie,
Aside the Stamp tool not accepting a 0" offset value, I've been unable to reliably change it to any value. It may be a SU-2013 bug. After some effort I've found a reliable kludge (contradiction?) (see screencast and attached model). What SU version are you using? Can anyone else duplicate this behavior?
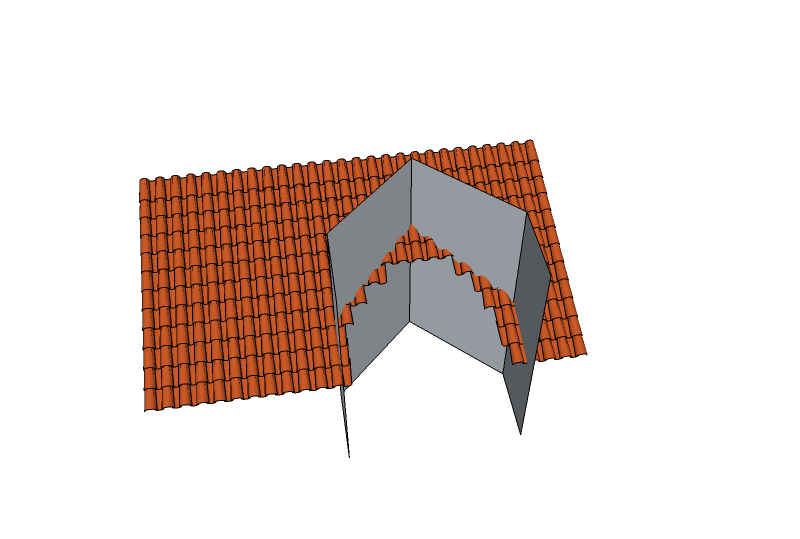
Using the Stamp tool is a good solution for my tile trim problem. I'll be using it.
There've been a lot of great suggestions and I've learned a lot. Thanks to all.
-
@kupono said:
Charlie,
Aside the Stamp tool not accepting a 0" offset value, I've been unable to reliably change it to any value. It may be a SU-2013 bug. After some effort I've found a reliable kludge (contradiction?) (see screencast and attached model). What SU version are you using? Can anyone else duplicate this behavior?
Using the Stamp tool is a good solution for my tile trim problem. I'll be using it.
There've been a lot of great suggestions and I've learned a lot. Thanks to all.
Kupono,
I am using SU 2013 Pro/Windows 7Pro.I looked at your screencast.........Try selecting the Stamp tool from the toolbar....and before clicking the mouse on anything....enter a value....6....."....enter.
Now select the entity you wish to stamp....and then of course the surface to which you want to stamp.
This works reliably for me.
FYI:
Also....after fooling with this just a bit more I can almost set a value of zero.By entering .001...."....enter......the stamp offset value displays as ~0"
Best,
Charlie -
Yup, that does indeed work--and offset = .001 is close enough for govt. work.
Thanks again.
-
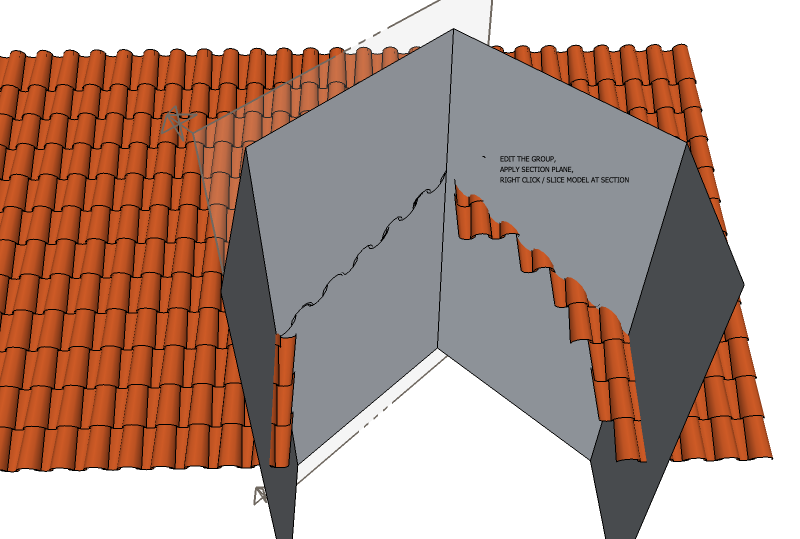
Remember that if you apply Slice Model at Section inside a group, the rest of the model is not affected.
-
Thx for the V6!

Seems the Apply Section right click / Slice Model at section is not in V7, V6 ?
I have only Create Group from Slice
and so no Aplly Section itself ! Volume trimmed can't be copied as itself trimmed! -
Slice Model at Section is a feature of Zorro2, I don't know if it is V6 V7 compatible.
-
@kupono said:
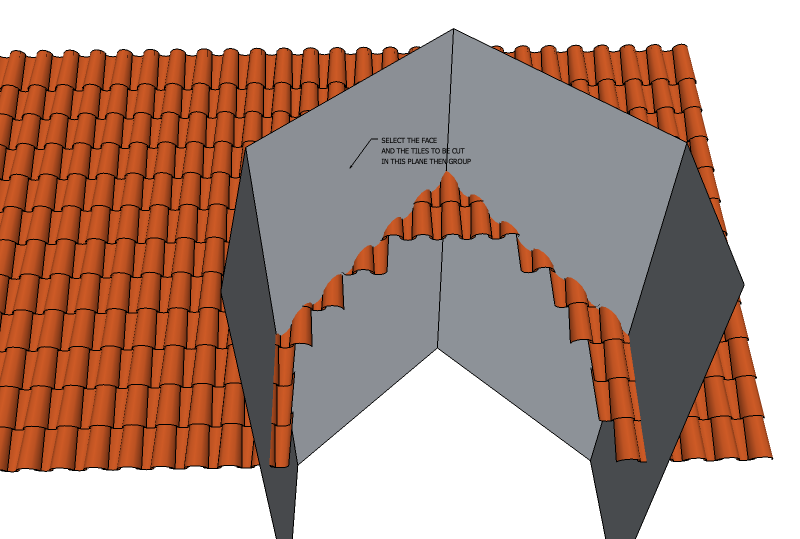
- you have to make each cut tile unique, then run the solid tool for each (taking a lot of time).
Not an answer to your problem at hand but I noticed your statement about using the Solid Tools. You don't need to make the components unique prior running the Solid tools. The mere act of modifying the components with these tools essentially does the make unique for you. It replaces the original component with a group.
If you did make your tiles solid components, it wouldn't be that difficult to Use Trim to cut the Tiles.

Here's a quick example. The transparent gray box is the trimmer. Tiles are all instances of the same component.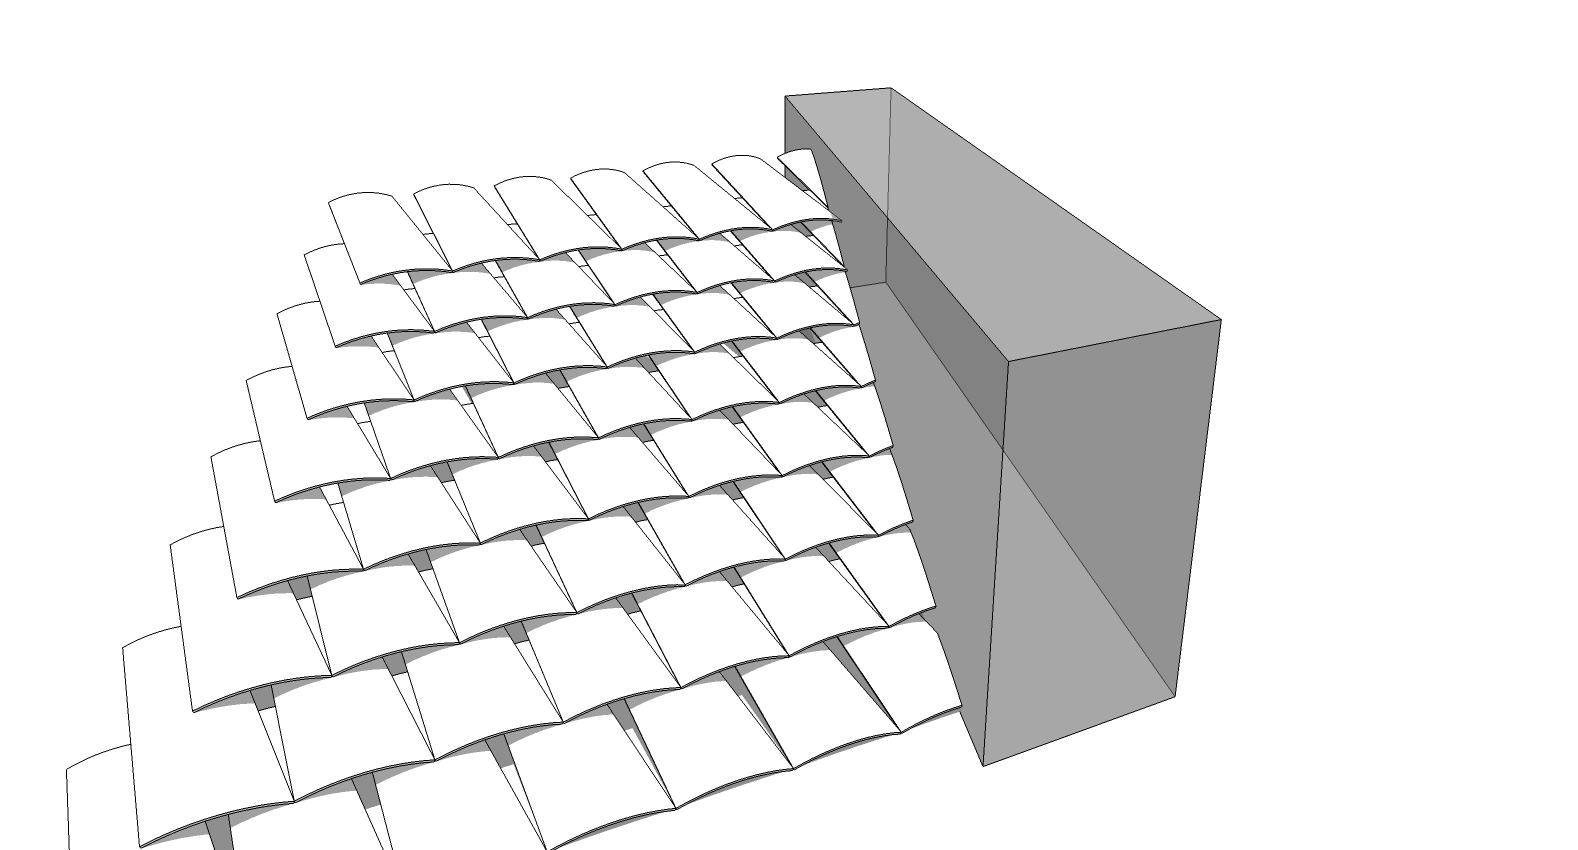
I select the Trim tool and clicked on the gray box. Then I clicked on each of the tiles that was partially within the box. All that remains is to delete the box. Each of the modified tiles is now a group called "Difference." -
@unknownuser said:
Then I clicked on each of the tiles that was partially within the box
There is no pluging for make that automatically ? (after a general selection of these particular tiles for example )
-
Ah, Plugin Pilou, if there was anyone who would know, it ought to be you.

I was only showing making the cuts using native tools. I didn't use any plugins nor did I bother to look for any.
-
@unknownuser said:
@unknownuser said:
Then I clicked on each of the tiles that was partially within the box
There is no pluging for make that automatically ? (after a general selection of these particular tiles for example )
It's what Zorro2 does in my example.

-
@unknownuser said:
Slice Model at Section is a feature of Zorro2
@unknownuser said:
Slice Model at Section is a feature of Zorro2, I don't know if it is V6 V7 compatible.
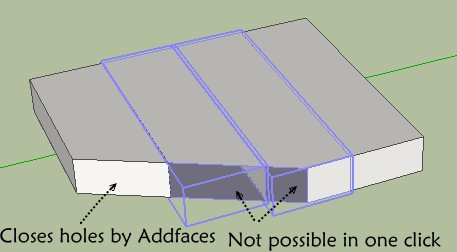
Cool : that is compatible and cut all the components!

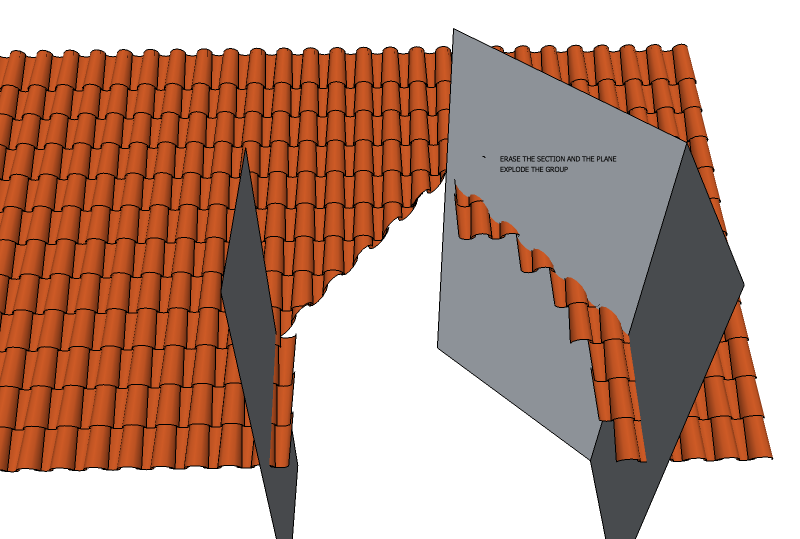
The only default is these volumes can't be closed in one click with the Add Faces by Tig!
(if you don't want all explode)
(Call the Ruby console and write addfaces)
But maybe I have forgotten something
-
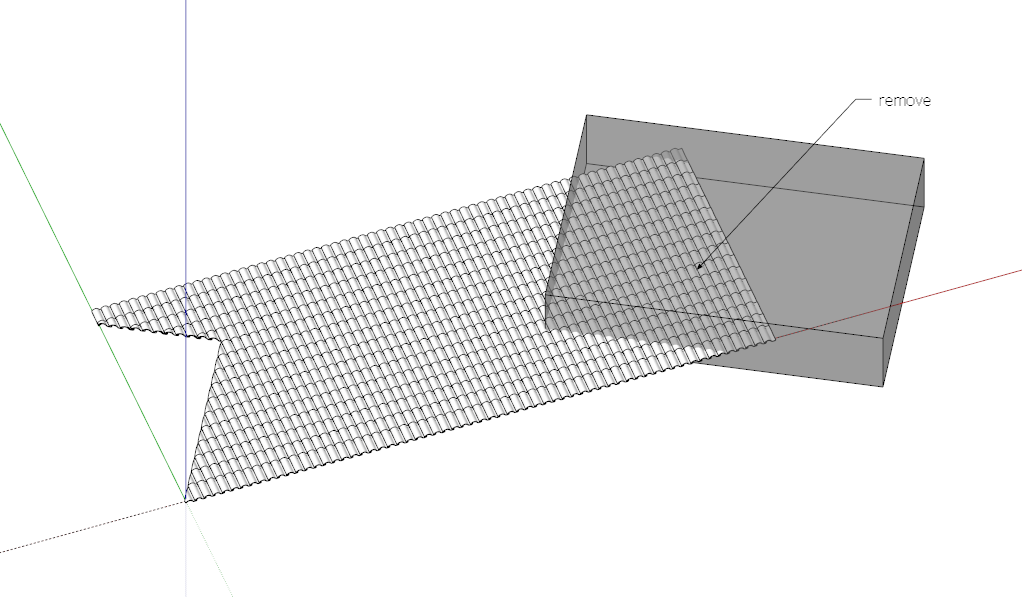
So, using instances of tile components, what would be the quickest way to remove tile inside the box?
-
I did it with Trim and used Delete for those tiles that weren't crossed by the box sides. You have a bunch of copies of the tiles in the same place--sometimes as many as three overlapping each other which makes it look like Trim isn't making the cuts correctly.
Edit: In practice you probably don't want to apply a translucent material to the cutting box because that material gets applied to the faces in the cuts on the roof tiles.
-
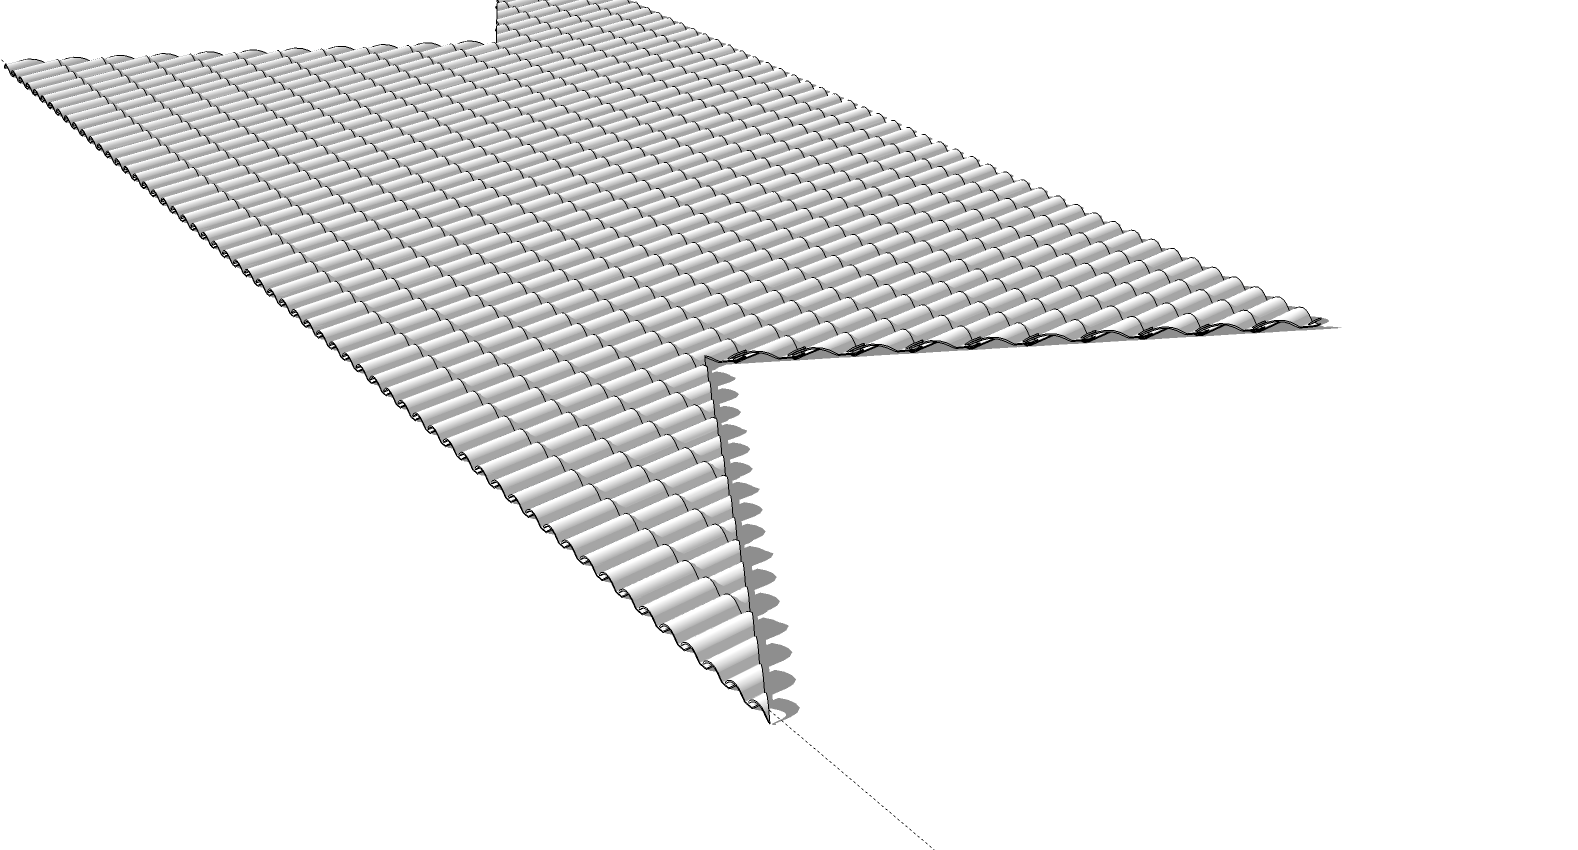
Apologies for the overlapping tiles.
After experimenting with the various approaches, it appears to me that trimming instances of tiles components with the Solid Tools Trim tool may be the quickest method overall. My thinking has evolved over this thread and I now see the value of having solid tiles. For one, they look much better, and they save space.
Now that I know the Trim tool makes trimmed components unique, saving what I thought was an extra step,I find it relatively easy to step through and trim each tile. Zorro2 is a great tool and will very quickly trim groups of tile components, making each one unique as it does so, but it leaves the trimmed edges without a face. This is fine in many cases, but when you want a face, it takes time to edit each component to replace it. That said, there's a place for each method.
Hello! It looks like you're interested in this conversation, but you don't have an account yet.
Getting fed up of having to scroll through the same posts each visit? When you register for an account, you'll always come back to exactly where you were before, and choose to be notified of new replies (either via email, or push notification). You'll also be able to save bookmarks and upvote posts to show your appreciation to other community members.
With your input, this post could be even better 💗
Register Login


Advertisement