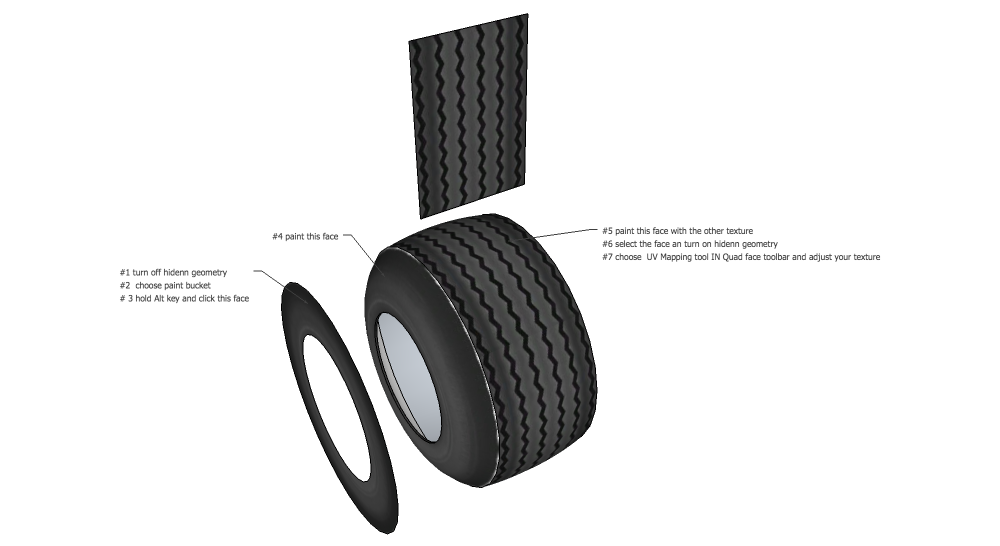
Making tyres in SU
-
Hi misters,
This is definitely an instructive thread with many important tip and tricks


@gaieus said:
I used UV Tools (not UV Toolit)
->>
Whaat_UVTools v0.1
Whaat_UVTools 0.2 Pro (Beta)
Whaat_UVTool tutorial@gaieus said:
Good. What are you rendering it with? It looks like Kerkythea. IMO a little (bit more enhanced?) bumpiness would add to it. Of course, eventually there needs to be some environment or a render to look good (even for the reflections as there needs to be something reflected of course)
http://forums.sketchucation.com/viewtopic.php?f=79&t=42691&start=15#p380035
Concerning giving some bump in a render engine:
Here are some useful links:
[url=http://news.sketchucation.com/making-bumpmaps-in-google-sketchup/:33lcwfn0]Making Bumpmaps in Google SketchUp[/url:33lcwfn0]
to understand better this technic:
[url=http://forums.sketchucation.com/viewtopic.php?f=323&t=16660&start=15#p131738:33lcwfn0]Re: [Plugin] Color by Z[/url:33lcwfn0]
[url=http://forums.sketchucation.com/viewtopic.php?f=323&t=24513&start=30#p243505:33lcwfn0]Re: [Plugin] Heightmap from model[/url:33lcwfn0]
and to obtain the modeled texture into SketchUp you can use
Thomthom's Bitmap to Mesh: see the video and download link in Rich's famous [url=http://forums.sketchucation.com/viewtopic.php?f=323&t=39504:33lcwfn0]SketchUcation Plugin Video Tutorials[/url:33lcwfn0][url=http://forums.sketchucation.com/viewtopic.php?f=323&t=33183#p292727:33lcwfn0][Plugin] Normal Map Maker[/url:33lcwfn0]
and I've just discovered this tutorial to give some bump into Photoshop:
Bump maps in Photoshop
[url:33lcwfn0]http://www.michaeldashow.com/tips_bumpmaps.html[/url:33lcwfn0]Cheers,
simon -
Thank you very much for your answer. I will give UV Tools a try and learn another plug-in
 One more and my head will explode next
BTW, this is a new view of tires Gaieus. I think the tire industry would not be amused if customer wants to have new tires with an horizontal tread
 I know, this is only for demonstration purpose but it looks very strange if the tread is 90° rotated....
Thank you again.
-
I have looked at your model, have you any reason to give your tire thickness?
-
Hi Simon,
@simon le bon said:
Hi misters,
This is definitely an instructive thread with many important tip and tricks


I agree with you, definitely, this is a very important thread for me too. As a SU newbie there are a lot of behaviors not known or not understood in SU but for the 'hot shots' completely self-evident. This is maybe the reason why this thread is such long. Many times the professionals (you all) are giving excellent hints but we newbies are missing a guide how to reach the goal. If you miss to do one step the result can be completely different... This is very important for the professionals to think that they were also starting from the scratch and they have reached their level in trying, asking, watching video tutorials and learning investing tons of hours.
@simon le bon said:
Concerning giving some bump in a render engine:
Here are some useful links:
Making Bumpmaps in Google SketchUp
to understand better this technic:
Re: [Plugin] Color by Z
Re: [Plugin] Heightmap from model
and to obtain the modeled texture into SketchUp you can use
Thomthom's Bitmap to Mesh: see the video and download link in Rich's famous SketchUcation Plugin Video Tutorialsand I've just discovered this tutorial to give some bump into Photoshop:
Bump maps in Photoshop
http://www.michaeldashow.com/tips_bumpmaps.htmlSimon, I would like to thank you very much for the additional links and information's. This is very useful for me and for sure also for other people.
-
Hi Gilles,
@gilles said:
I have looked at your model, have you any reason to give your tire thickness?
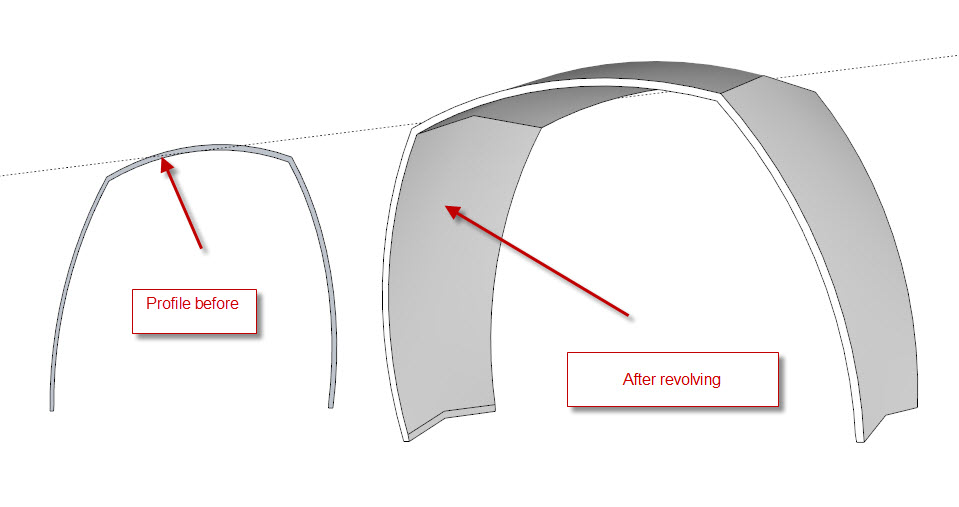
Which thickness do you mean? Strength of materials or the width of the tire? Strength of materials was given due to the drawn profile that I have revolved with the follow-me tool. Width of the tire is given by the function of this tire. This is an implement tire used in the farming industry which will be flatten with the weight of the charge (2-3 tons).
-
@lecra said:
...BTW, this is a new view of tires Gaieus. I think the tire industry would not be amused if customer wants to have new tires with an horizontal tread
 I know, this is only for demonstration purpose but it looks very strange if the tread is 90° rotated...
Haha. I did not even realize. I saw something was wrong but just went ahead with the example.

-
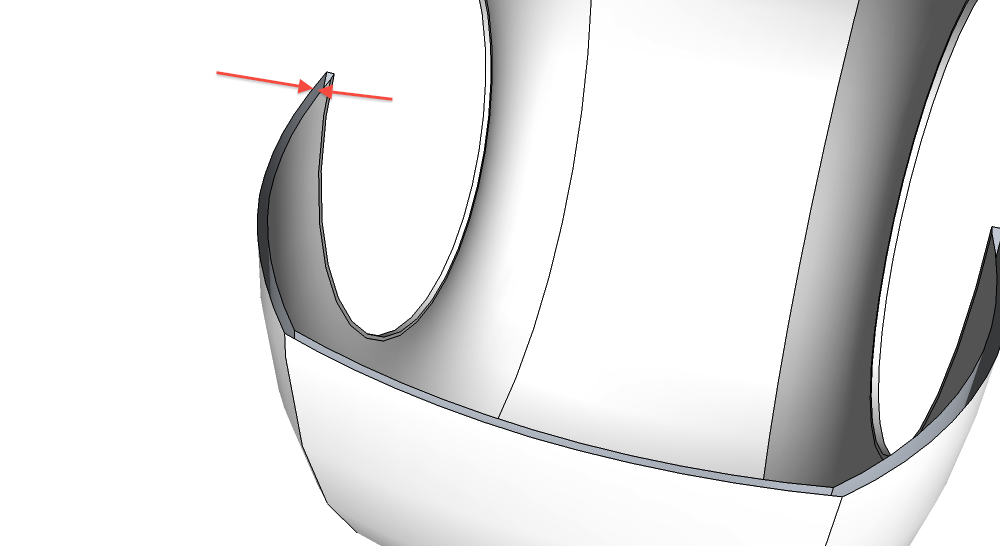
I mean this, it will increase the size of the file.
-
Ah yes, I also noticed that the tyre has wall thickness. Completely unnecessary. In theory, indeed it is advisable to model everything "physically correct" (i.e. with thickness) but only where really needed.
-
Gilles,
@gilles said:
I mean this, it will increase the size of the file.
No specific reason
 It comes out of the idea to incorporate the tread in the profile and then revolve. This will produce a lot of additional faces which are not desired in the game engine I use, using a lot of memory. Below you can see the very beginning of the model:
A bientôt.
-
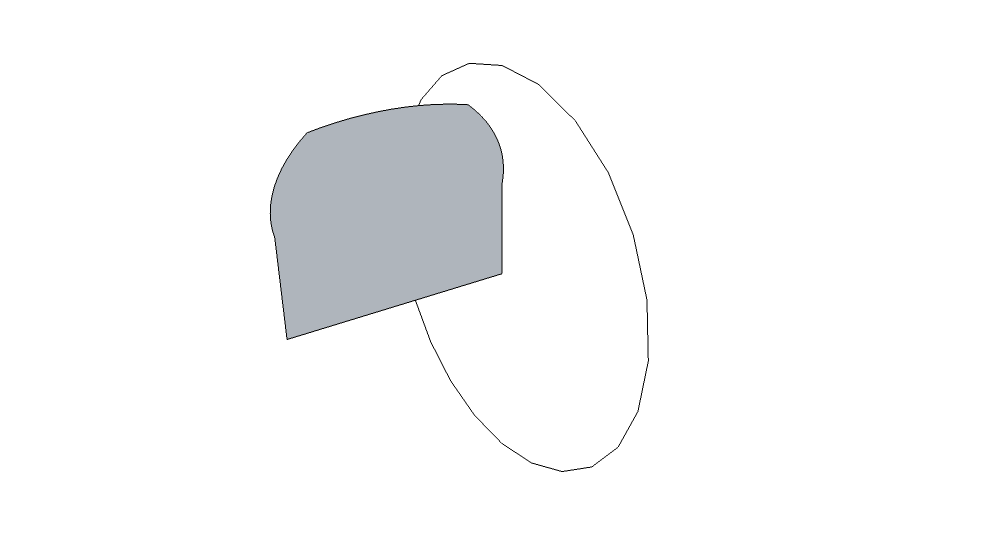
You could do it this way.
Less work.
-
Gilles,
@gilles said:
You could do it this way.
Less work.I know. I take this way out of another idea.
The problem is still the UV mapping of the tread and sidewall. I had a look at the UV Tools Gaieus mentioned, but I really don't know how to use that. It is so complicated!!
-
-
Dear Gilles,
@gilles said:
http://forums.sketchucation.com/viewtopic.php?t=39442#p348501
Thank you for your short tutorial. I will give it a tray, even if QuadFace is still a 'black book' for me!


-
You may want to check out Tgi3D's cross-section-editing tool. This feature is unlimited in the free training edition.
Ogan
-
Hi oganocali,
@oganocali said:
You may want to check out Tgi3D's cross-section-editing tool. This feature is unlimited in the free training edition.
OganWhere do you mean can I use this plugin? Concerning what? Can this help me fighting against the texture mapping issues I have?
-
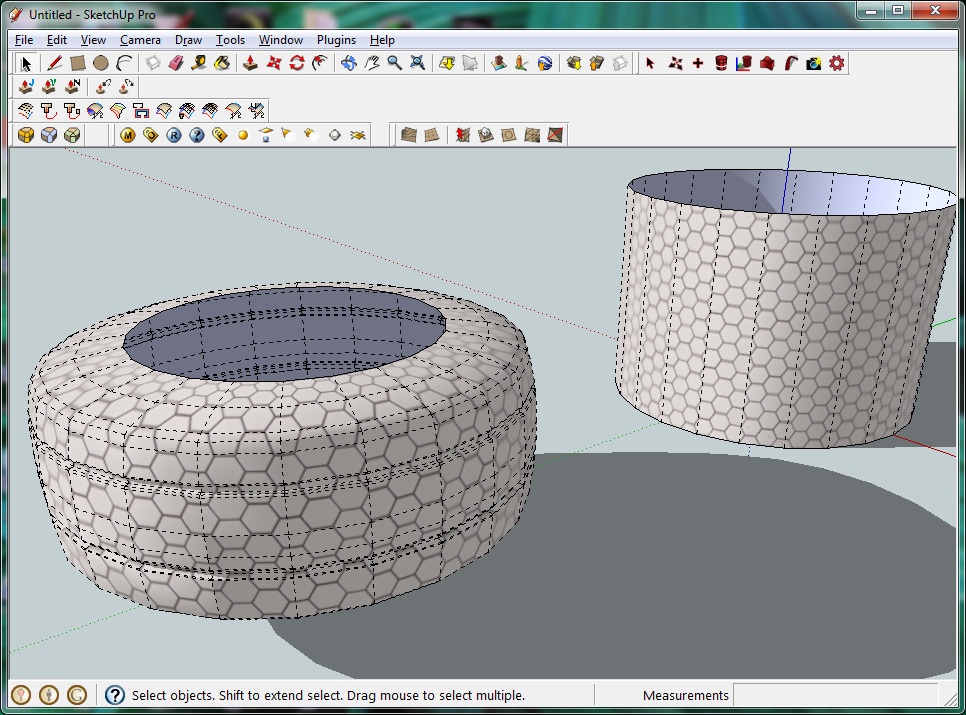
Basically you use it to convert the cylinder on the right to the tire on the left (with texture) easily.
-
Hi oganocali,
@oganocali said:
Basically you use it to convert the cylinder on the right to the tire on the left (with texture) easily.
[attachment=0:3vfaxnzg]<!-- ia0 -->crossexample.jpg<!-- ia0 -->[/attachment:3vfaxnzg]Ohh, I see. Interesting. I was searching for this tool, but I'm not sure if I understood that this is part of the Amorph plug-in, right?
Thank you for your support.
-
Yes this is part of Tgi3D Amorph. This feature is available unlimited for free in the training version.
-
Hi all,
Me again! I hope to nott bother you with my problems but this story with the tires is really producing headache to me. In this tread i received a lot of suggestions how to make such a tire. I choose the one with thomthom Quadface tool. This one is leading me to something that I also don't understand:
How can I have this space on the left and right side at the edge and not having the canal near to the sidewall edge? I have deleted the canal left and right in the texture but this does not help.
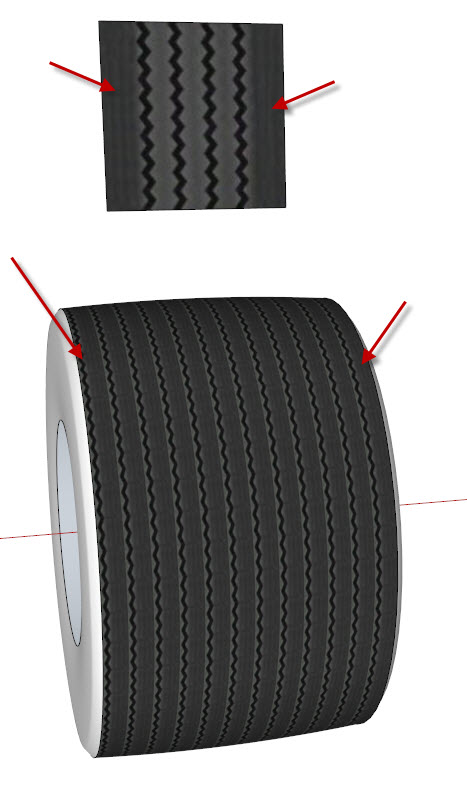
Attached the model:
FlotationTireStrautmann6.skp -
oganocali,
@oganocali said:
Basically you use it to convert the cylinder on the right to the tire on the left (with texture) easily.
[attachment=0:96mqqya7]<!-- ia0 -->crossexample.jpg<!-- ia0 -->[/attachment:96mqqya7]Could you show me how you have formed the cylinder with TIG cross section tools?
Advertisement
