[Ongoing-Tutorial] How to make a car using SDS/Artisan?
-
I've always wanted to make such a tutorial but I've always gave up on it because it's too complex for me to have enough patience to record it or store all the pics needed. It was frustrating I would always remember some detail that would need mentioning after I already passed a certain stage....

Anyway, making cars with SDS is not hard but it can be fiddly epecially if you want a certain shape.
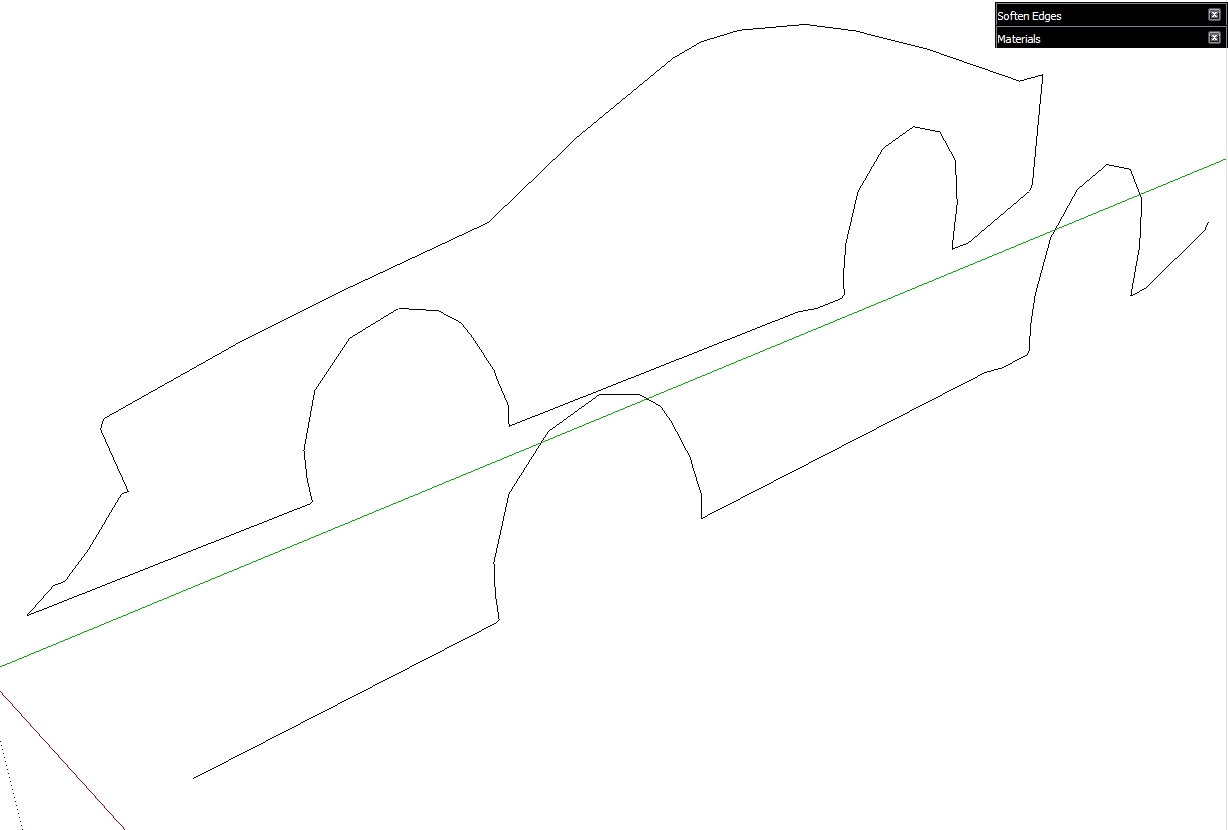
I will post the process of me modelling a car from scratch for SDS here and I will answer your questions. I think this way it will be easier for you guys to learn and also easier on my nerves.First stage: Pick a car you like the side view of. it's important to get the proportions right so it's easier to get those from a real car. Import the pic and draw the profile. Don't draw too many line you'll add details later. Then you can delete the picture.
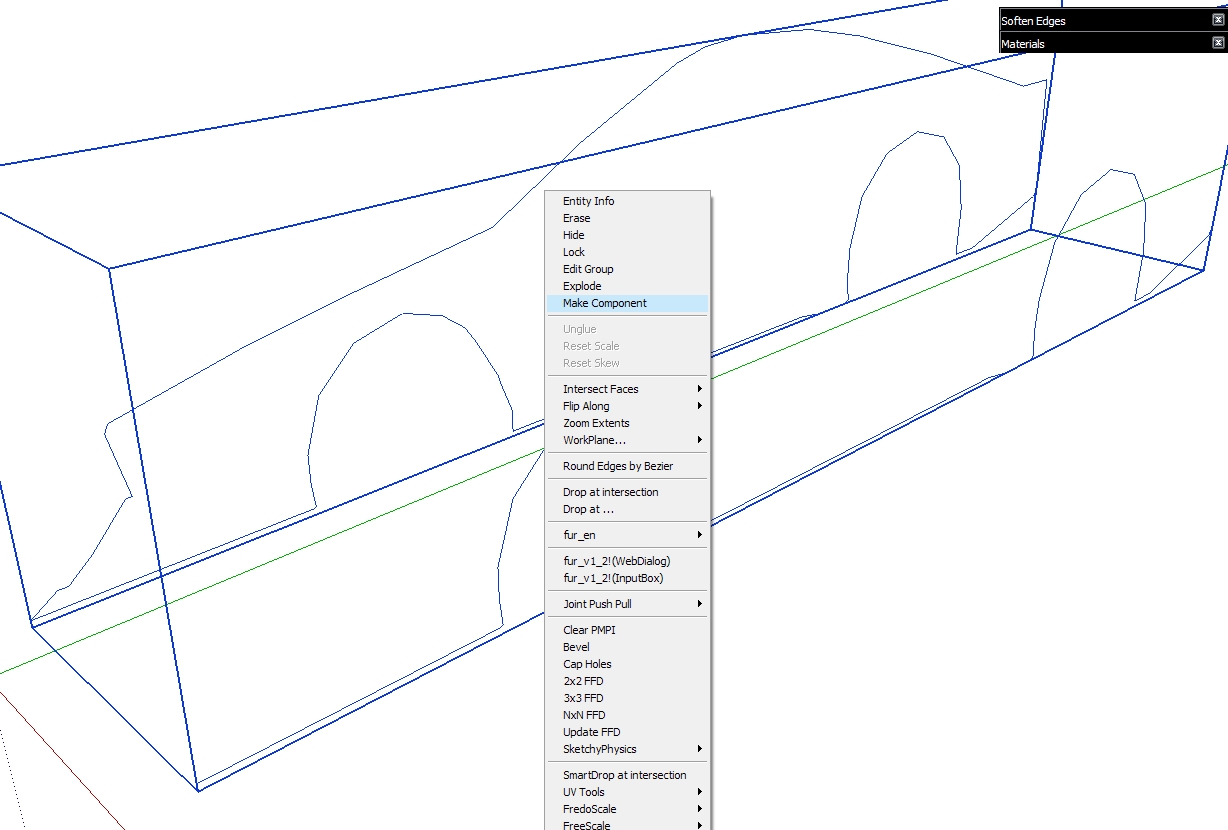
Second stage: Select the wheel wells and bottom lines of the car and copy it and move it to the side of the car. After that select all and make it a component.

-
Now copy only the wheel wells and scale them up a bit but keep the bottom aligned. You can start stitching the arches together. (Note: I made a mistake and left the bottom lines on the outside arches but you should have them on the inside ones.) Also copying the otside arches and dragging them backwards and the stiching them you create the inside of the wheel wells.
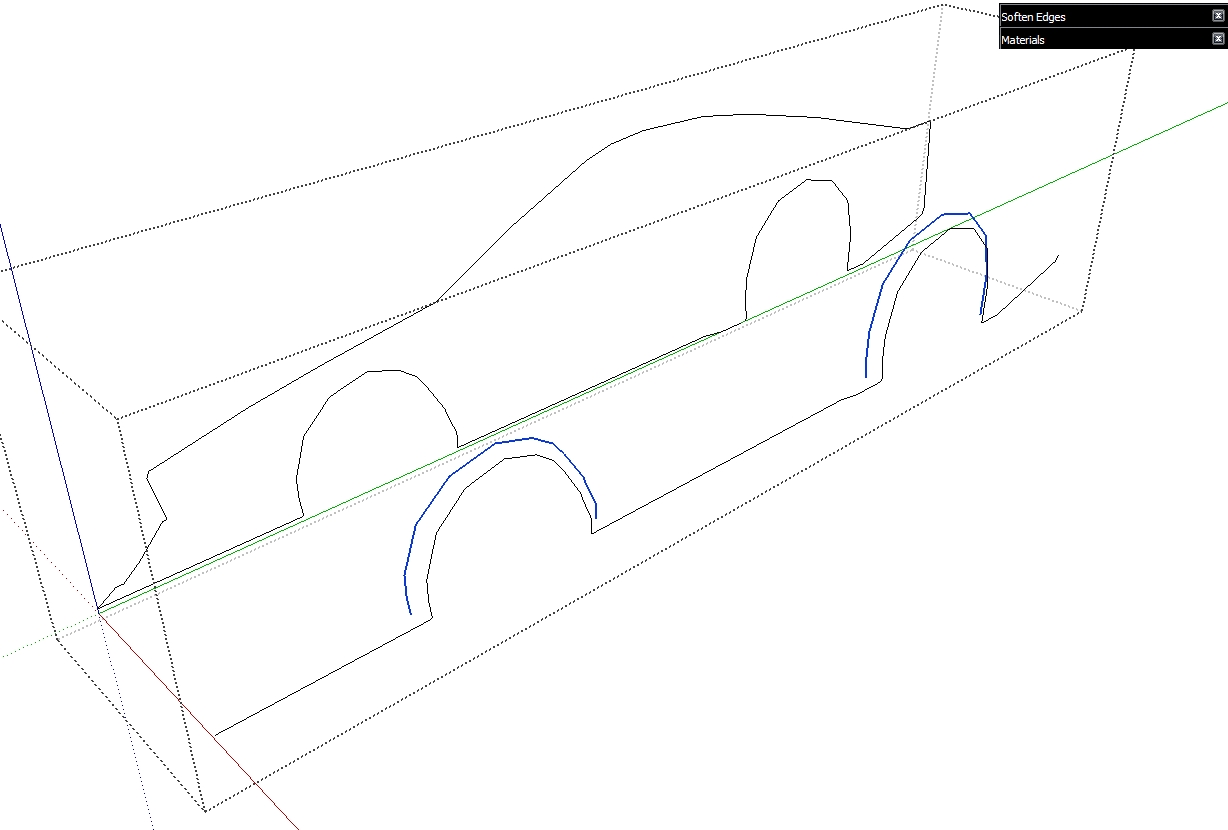
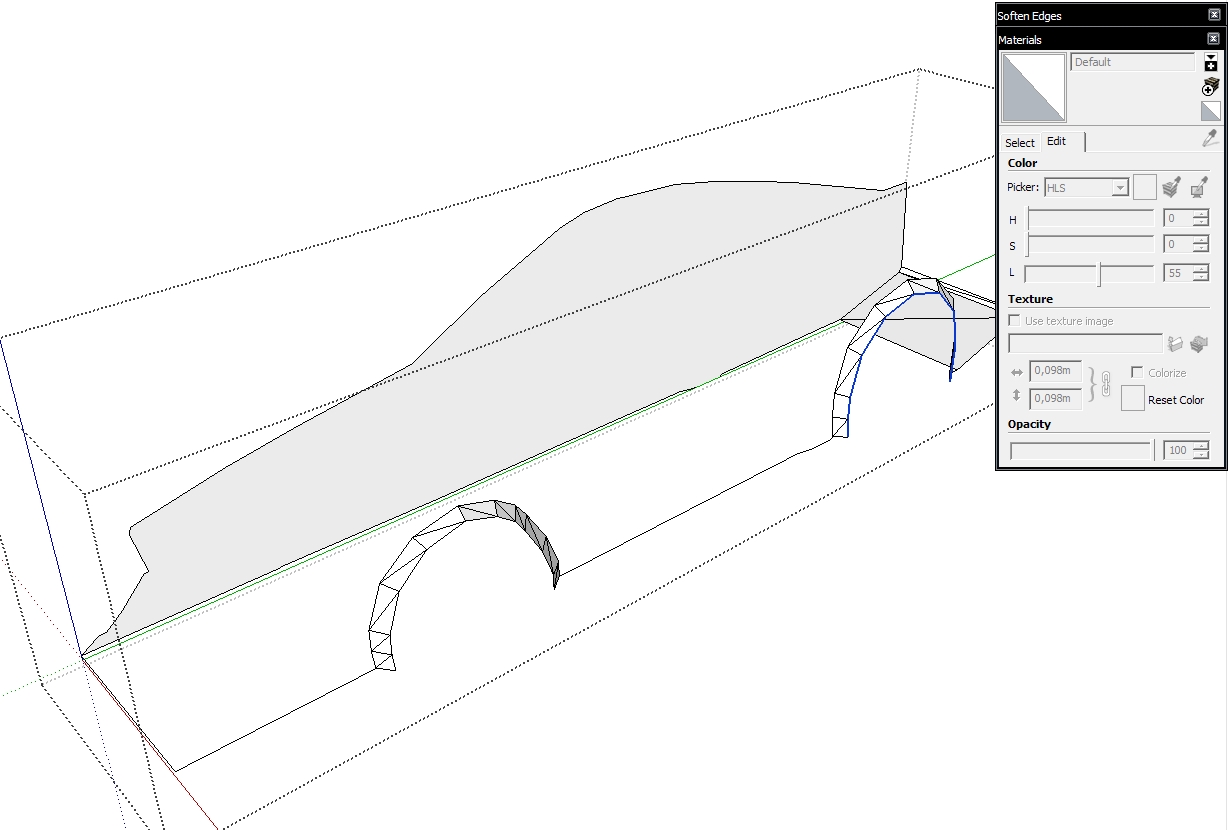
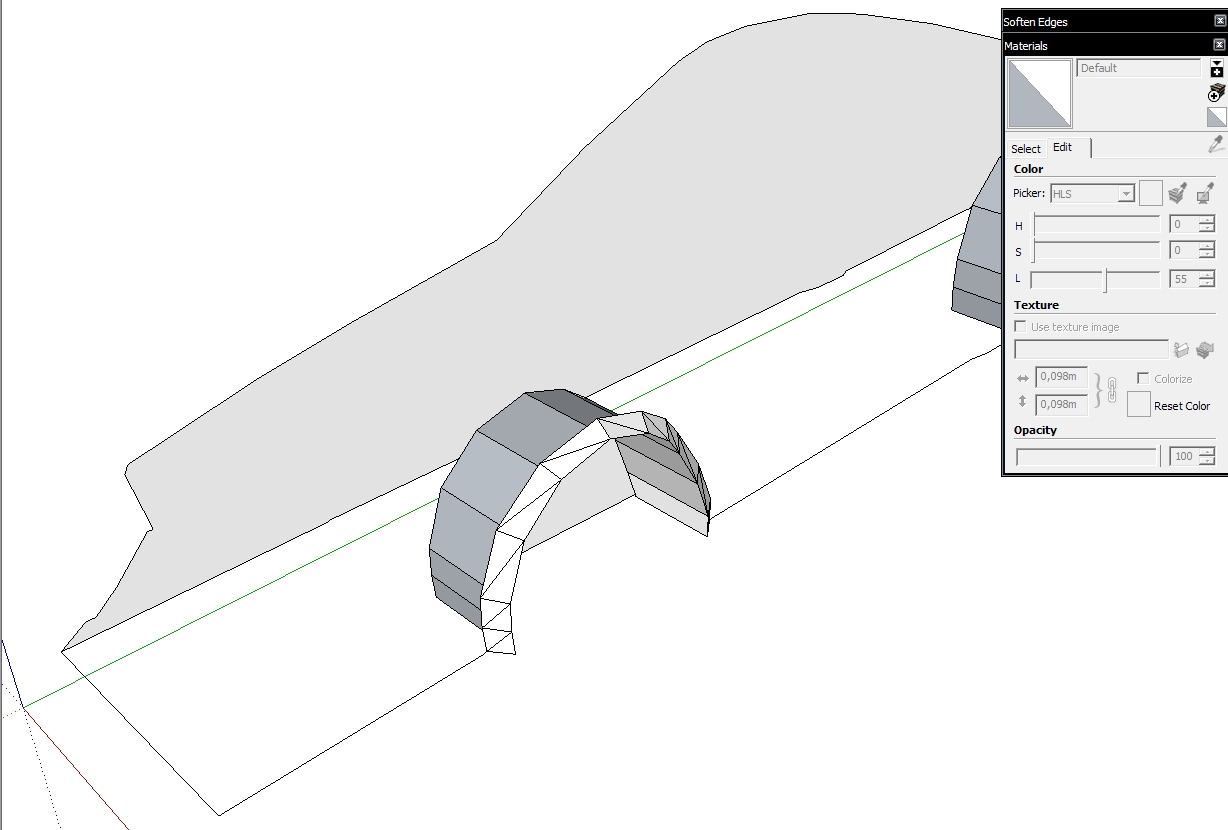
-
Hi, Marian:
Nice start. I hope to watch this tutorial develop over time.
-
@mitcorb said:
Nice start. I hope to watch this tutorial develop over time.
Hi mitcorb, Thanks. I hope it will help people make more cool smoothed cars

-
I jumped a bit ahead and stitched a bunch more lines. Basically you just have to copy and paste lines and in some parte use the scale tool. At this stage there isn't much fiddling. The sides will be more of a challenge, sometimes I hate making the sides of the car. That's mostly because you need to have to have some sort of ideea of what kind of design elements you want to use and I normally don't and get a bland side which I have to redo over and over...

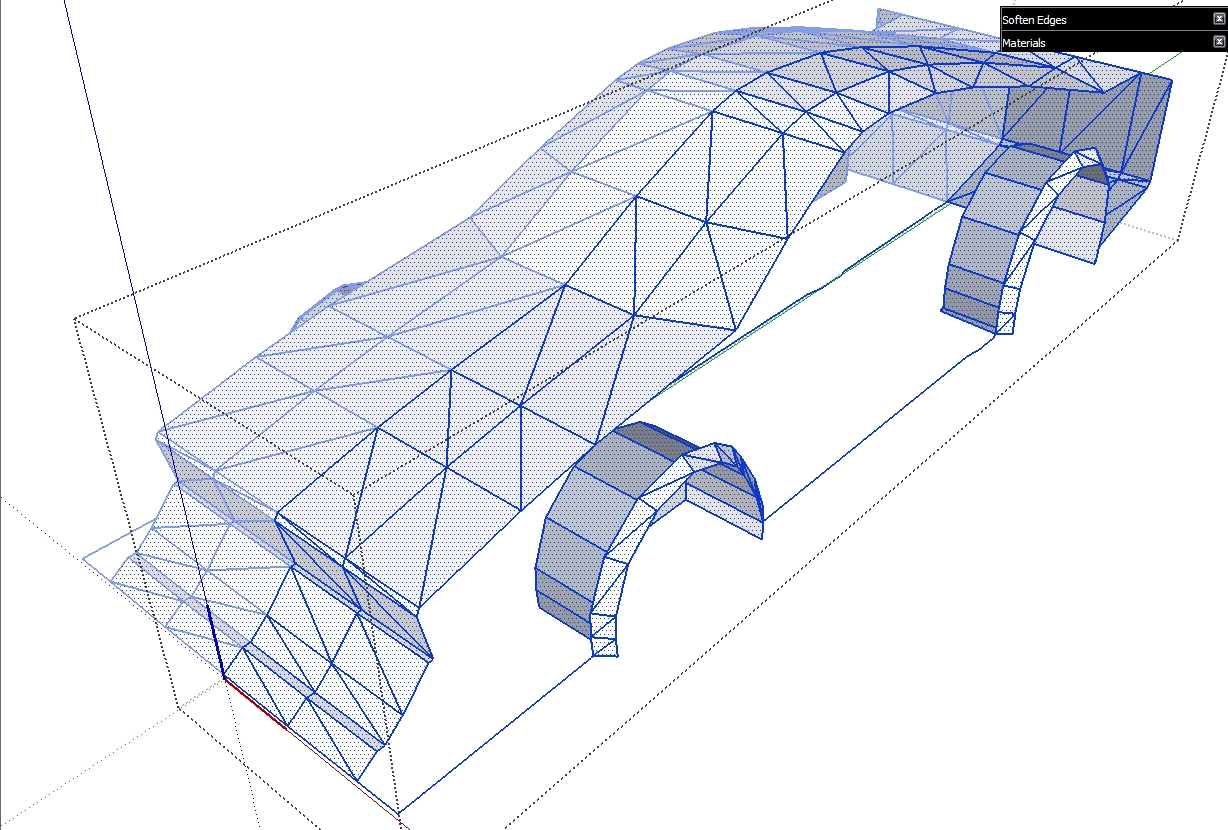
Remember when I had you make the lines into a component? Well now you get to see why that's important if you don't know already. Copy the half of the car to one side and use the scale tool to make it look like a mirror version and then move right next to the other half forming a whole car. If you did it right you'll have a complete car but on which you can change things on one side have the other side automatically make the changes.
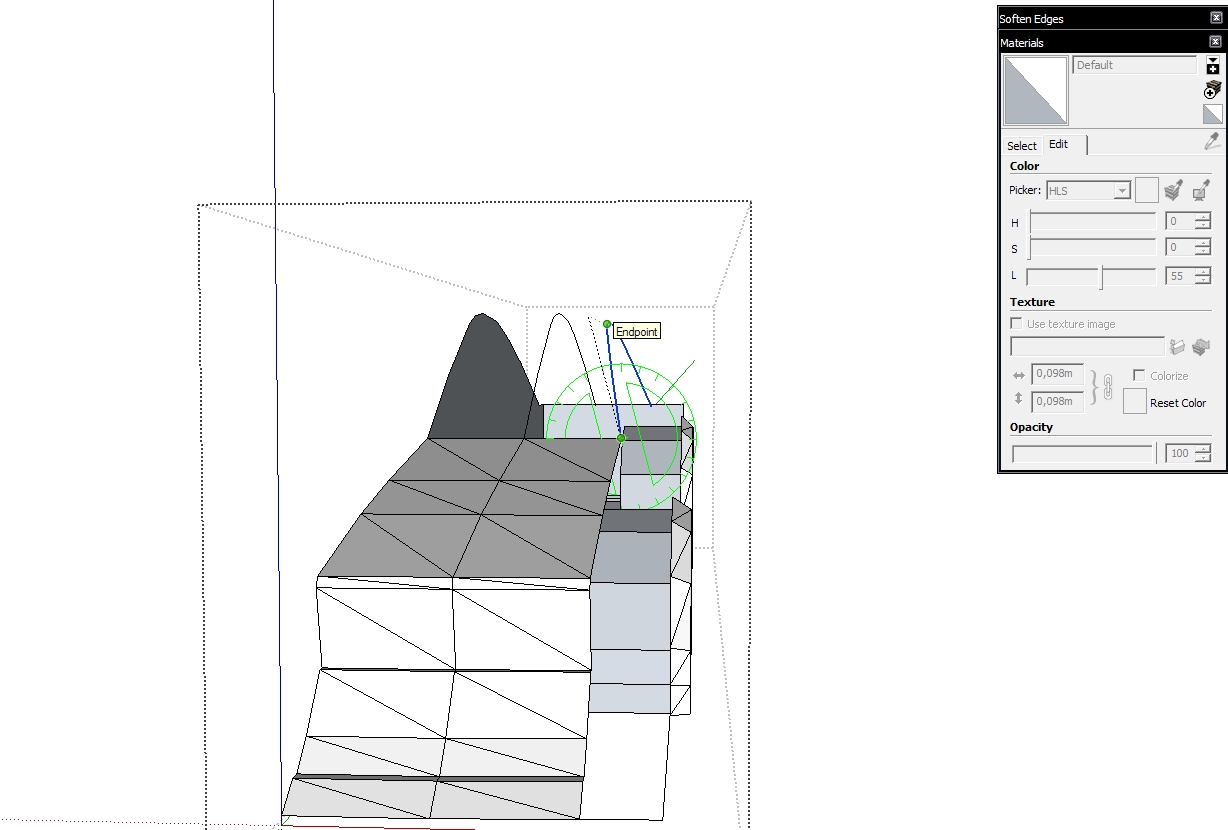
-
My advice would be now to select the inside wheel wells and group them. That way you'll avoid having odd geometry in that area when smoothing. You can smooth them separately later on.
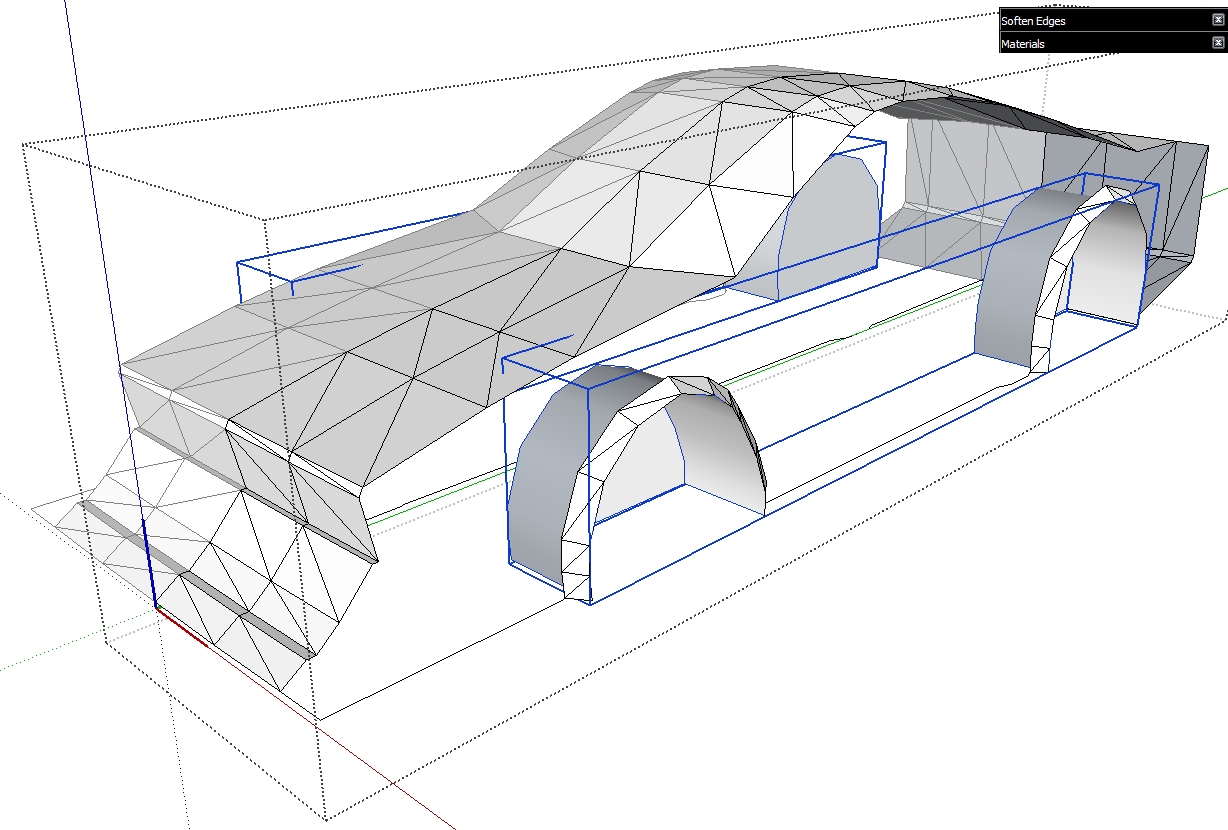
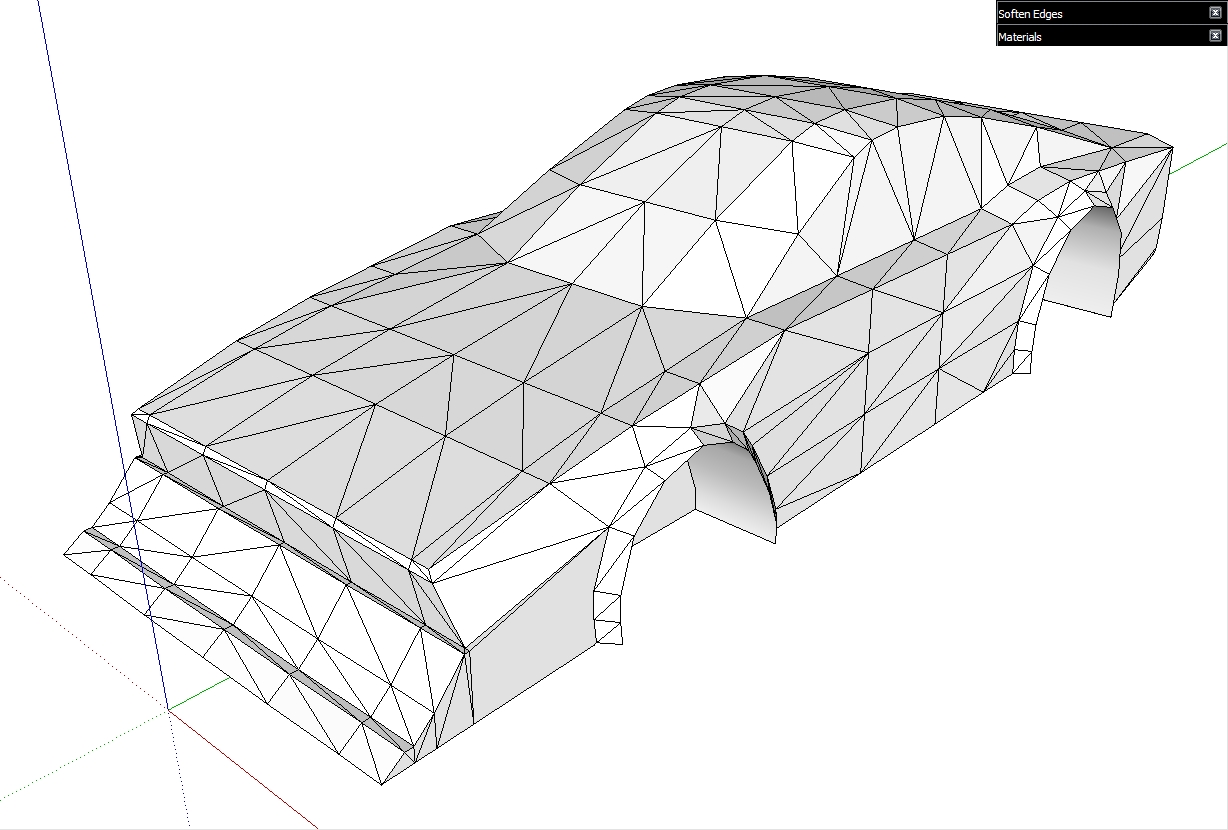
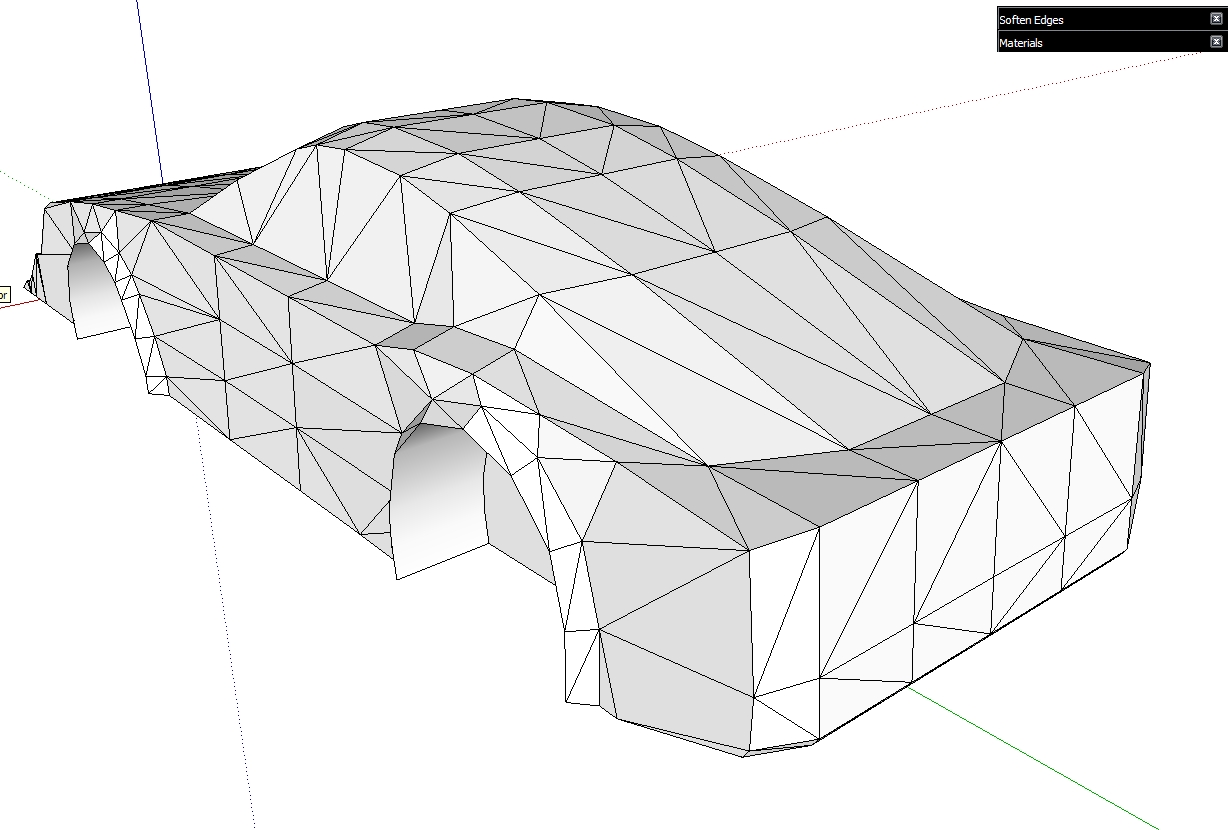
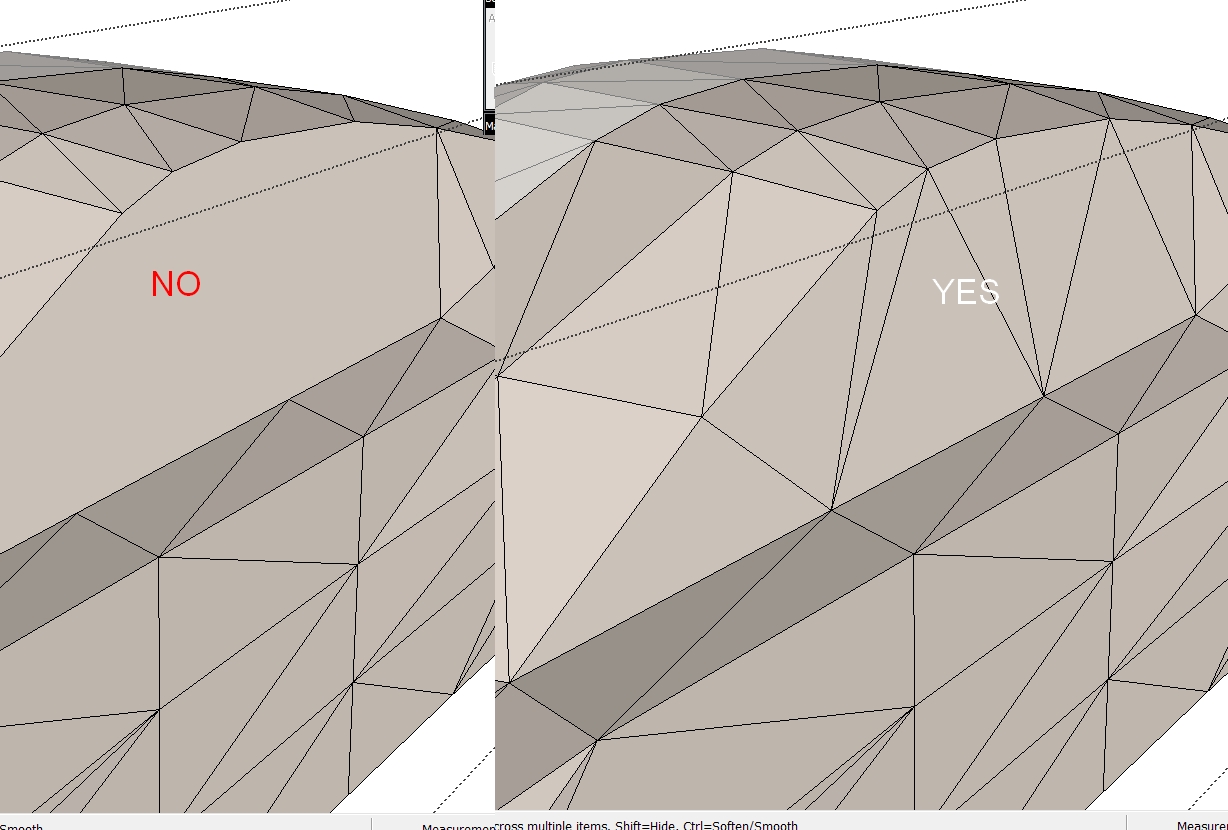
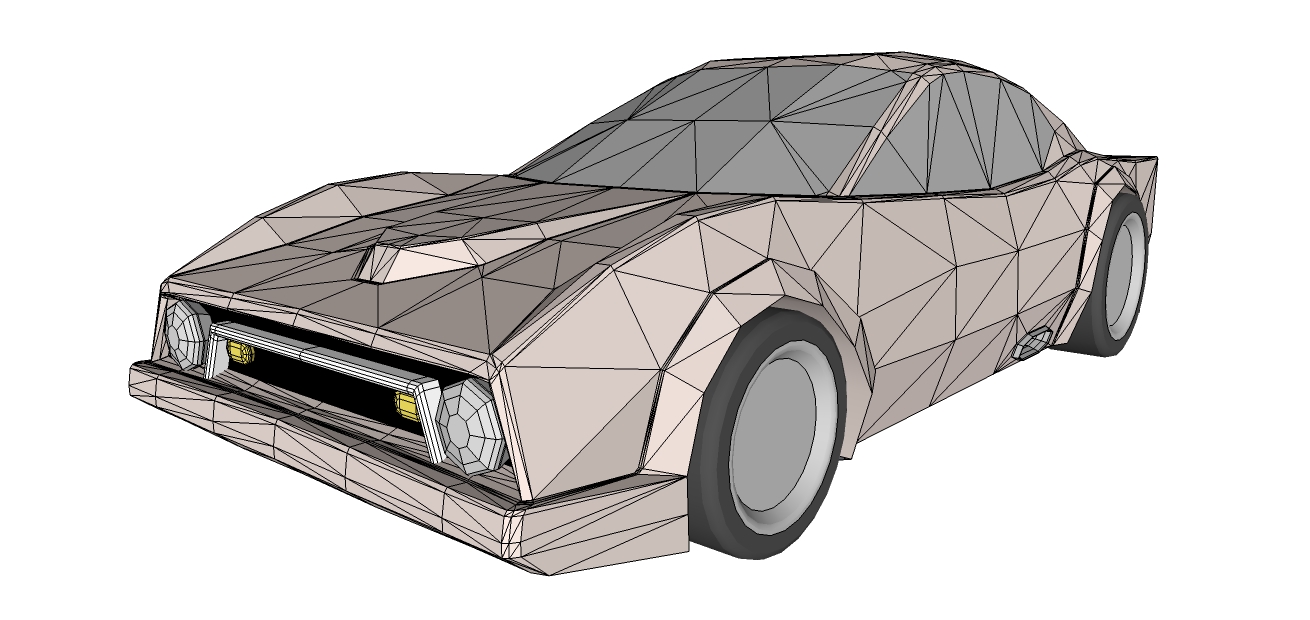
Now go ahead and stitch the side of the car. My suggestion here would be to have lines similar like in my model. What I mean is to try to have a balance of how many triangles you use and how you connect the geometry. Don't connect the whole side with only 3 or 4 triangles and don't join other geometry with one big face and not have have other lines, that's likely to happen with the side windows.If you followed me so far..Congrats you now have a crap model of a car
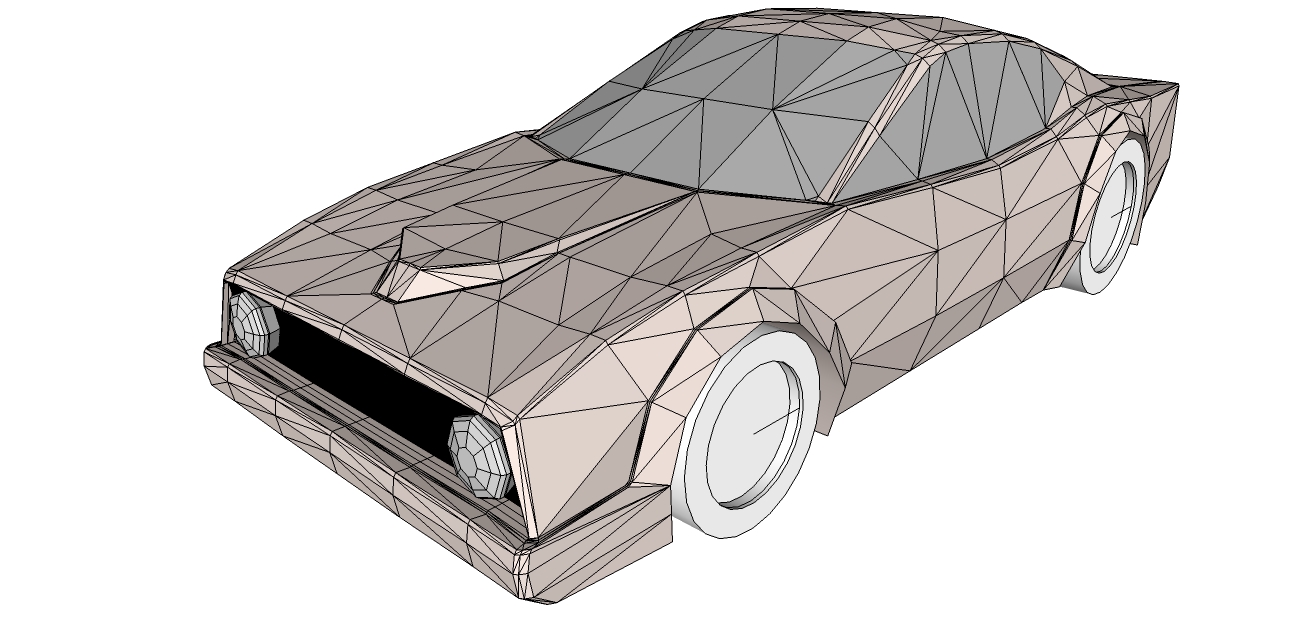
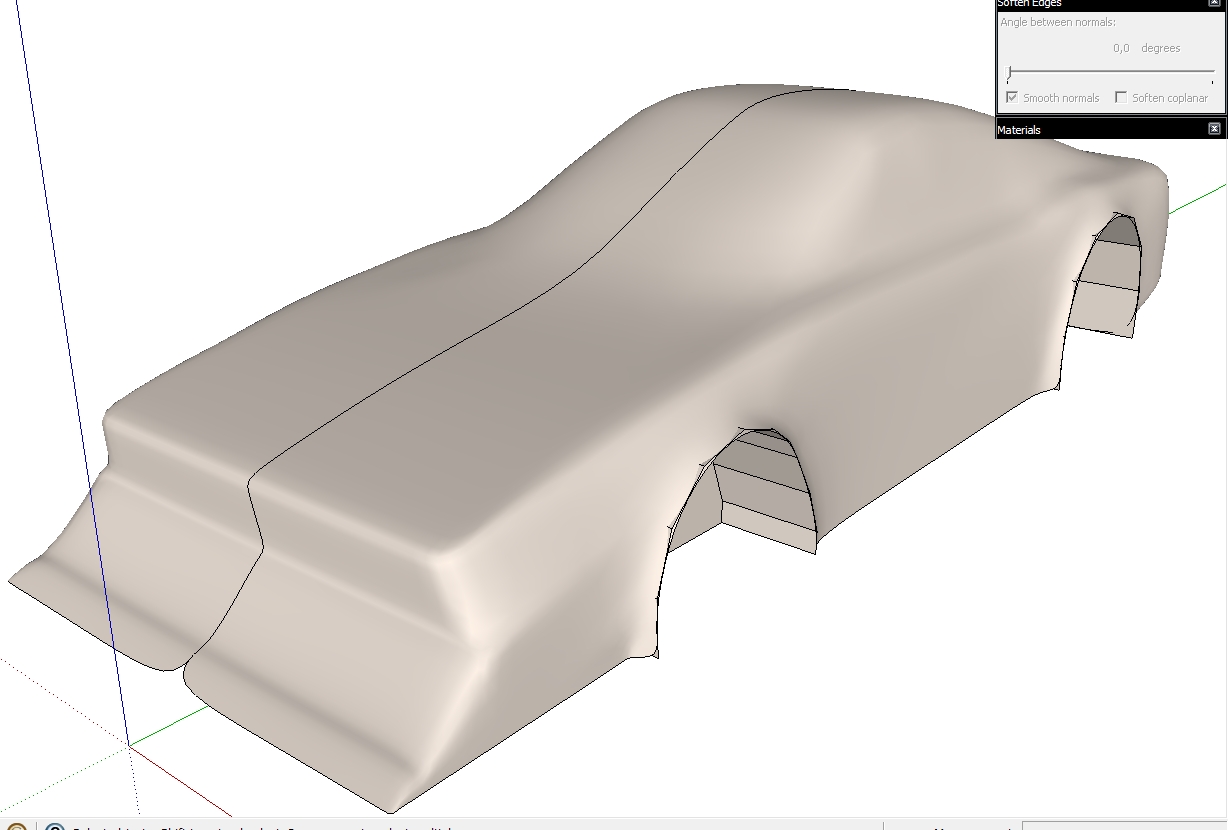
 And now we can see how our car looks Smoothed for the first time. Still crap but it's smooth crap
I've also attached the SU model here so you guys can have a look.
If you look closely at the picture with the smoothed car you can see that at the middle bottom part in the front the geometry is split. That's because there's a corner which is not connected to any other geometry in the component. To correct this kind of behaviour when smoothing geometry you have to use the crease tool. Look at your SDS/Artisan toolbar and find the crease tool. It lets you have vertices and lines which will remain in the same place when smoothing. The crease tool will be an important tool so remember it and use it well.
At this stage it's the time to make any major modification to the design, when the mesh is relatively simple and you don't have to delete much geometry.
-
Hi, Marian:
It's looking good. Are you keeping progress images as you proceed with the development, or did I miss that?
Edit: I am thinking you would want to keep skp's of all the steps for future reference and/or publishing? -
Hi,Mitcorb. Yes I post images as I proceed. The car is now in the same state as shown above
I normally don't keep any files up until I have the car fully stitched.
After that I save separate files for most versions in both low poly and smoothed. Take a look at some versions of my cars here http://www.deviantart.com/download/150756465/Sunbeam_Evolution_by_Marian87.jpg or the more up to date video http://www.youtube.com/watch?v=gomKM8wGUII and here http://www.deviantart.com/download/152264013/AXA_Evolution_by_Marian87.jpg -
As I said above now is the best time to modify the design, it depends on each of you the direction in which you want to take the design.
Because editing vertices is especially important for tweaking these kinds of cars I'll go over how you do that with SU in case some of you didn't know it can be done. Use the move tool over vertices until a green dot appears, then click and hold and move it in the direction you want.
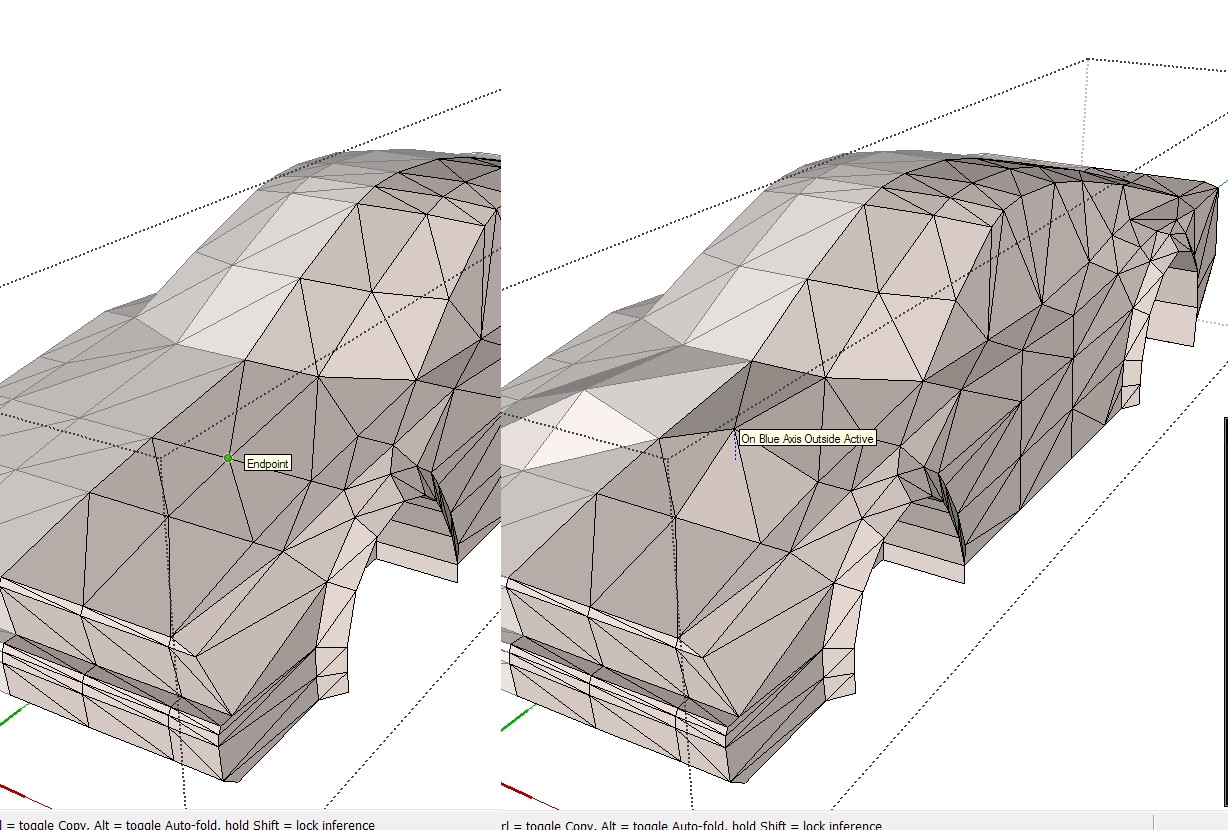
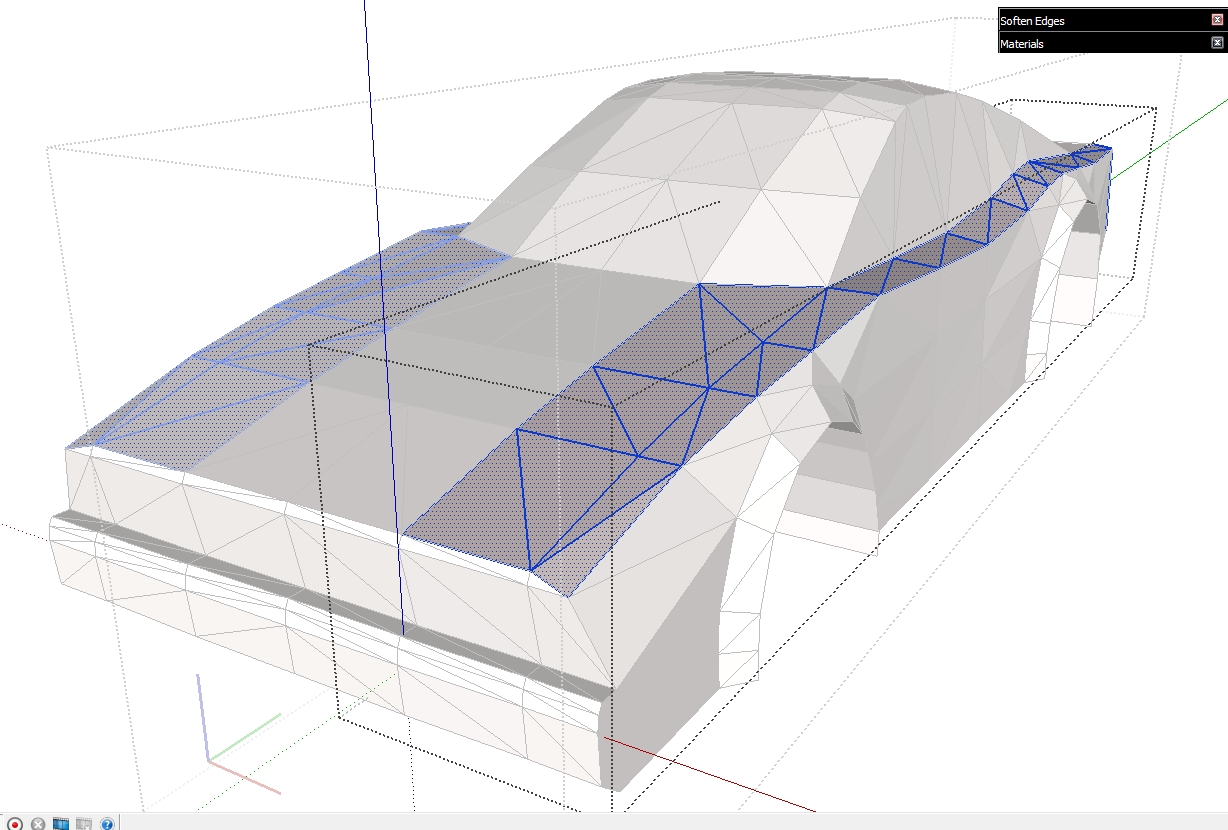
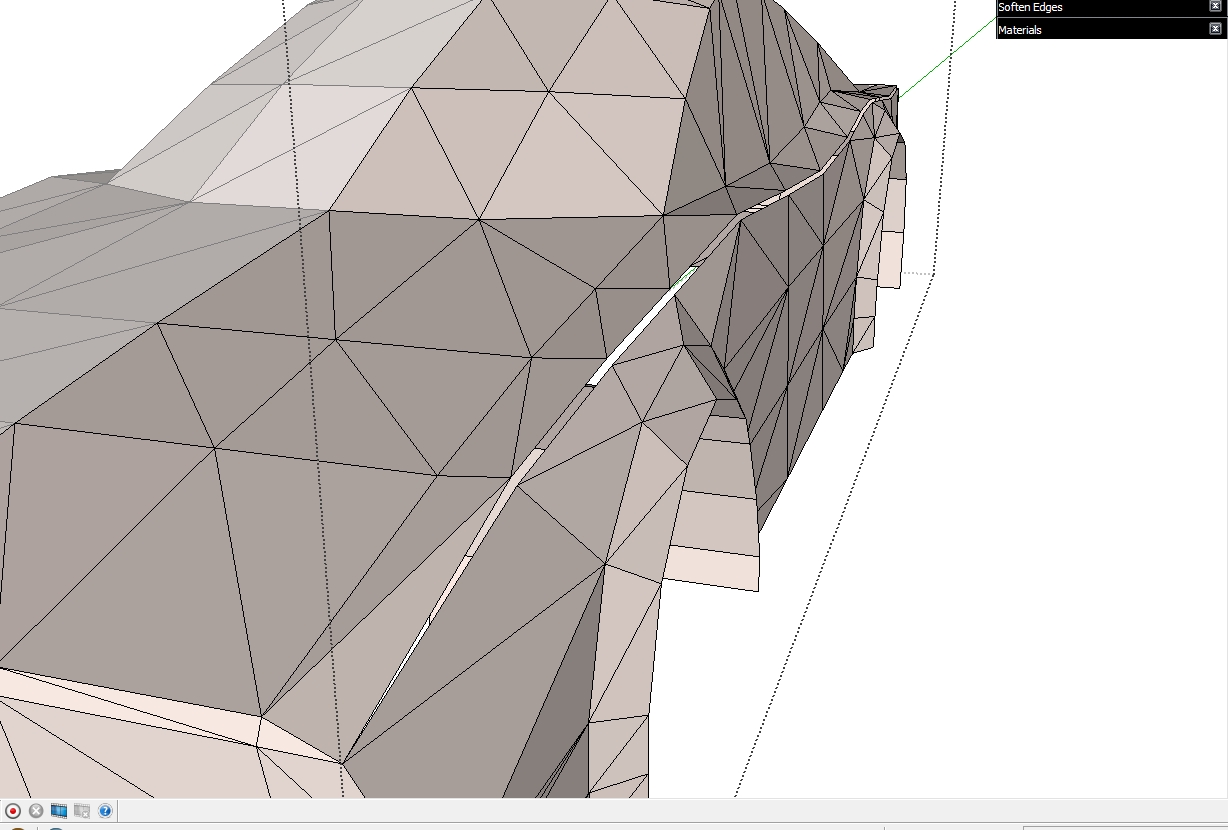
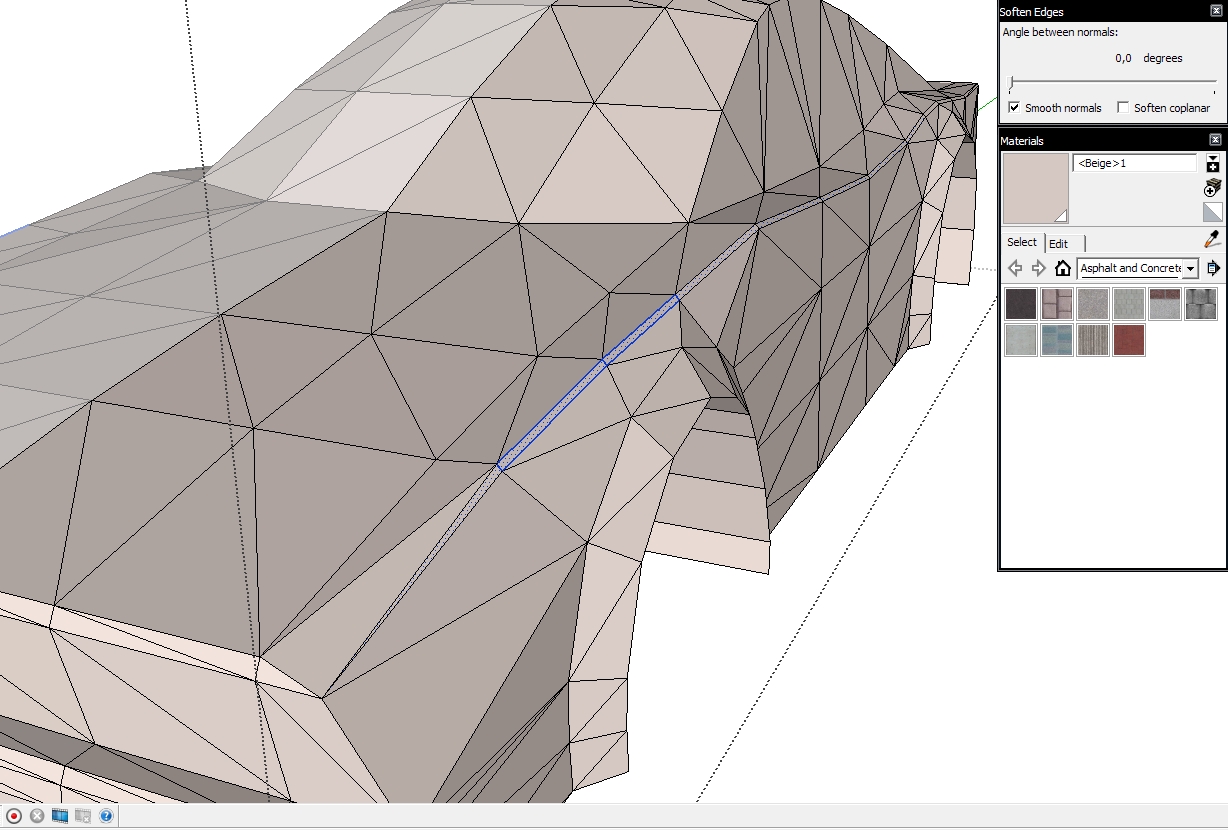
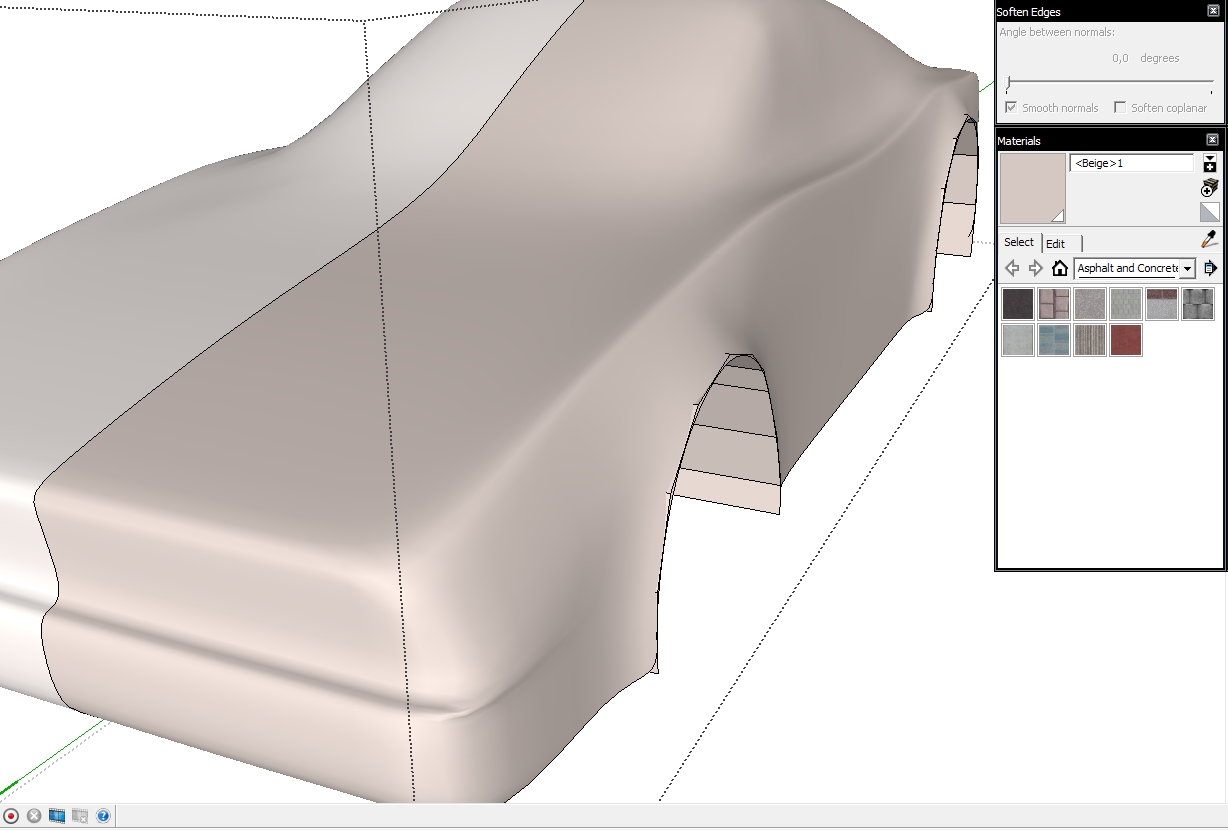
Another important aspect of modelling for SDS is the concept of "doubling" lines to have crisper lines once smoothed. In some cases you'll need to triple the lines to get an acceptably crisp line.
Select the geometry along the line you wish to double make it into a group, then select only the lines and move them to the side a bit or up or down depending on the mesh. After doing this you can explode the group and start stitching the gap. Now you can see the difference in the smoothed mesh.
-
-
-
@deanlegg said:
Can anyone tell me the little problem on the hood?
The problem on the hood is related to what I said a few posts up. Look for he NO and YES picture hope that makes it clear. You should connect all lines and not let them connect in the midlle of a face like you have on your hood.
-
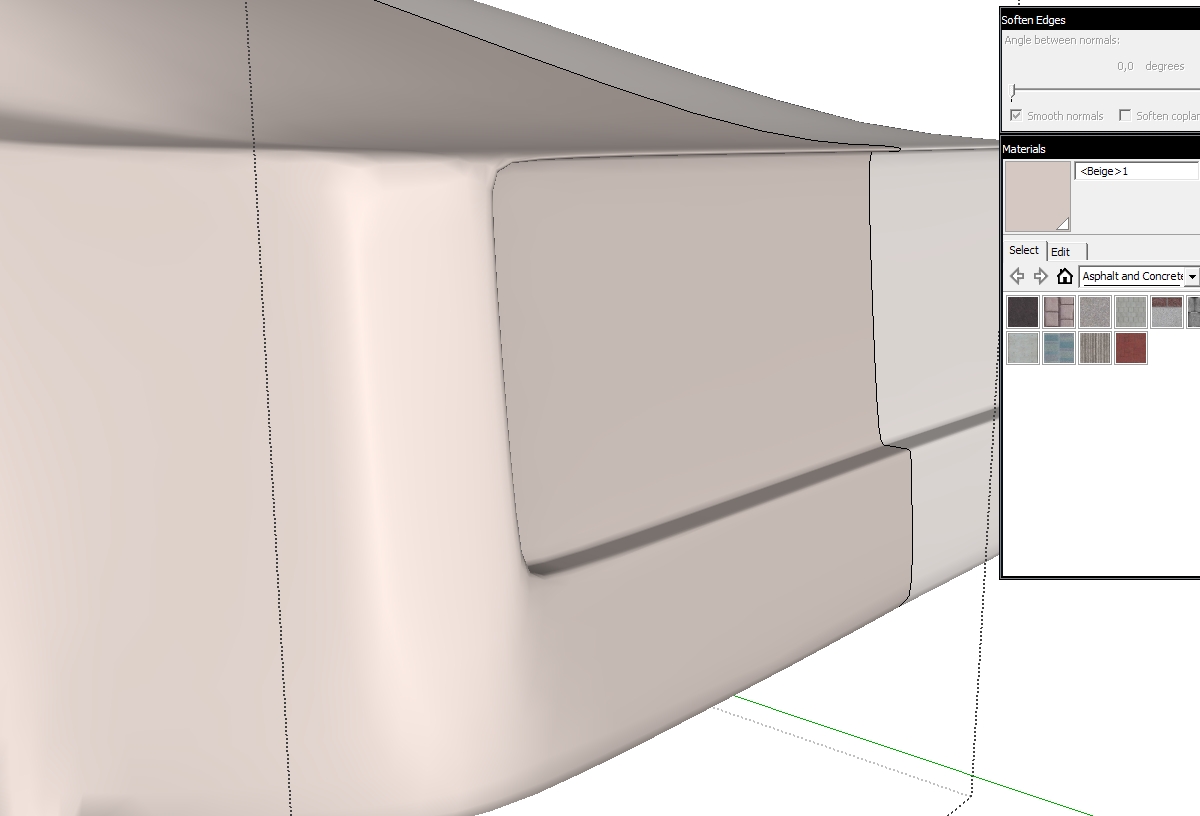
Today we'll be addressing the issue of how to keep edges square on ducts, inlets, concave openings etc.
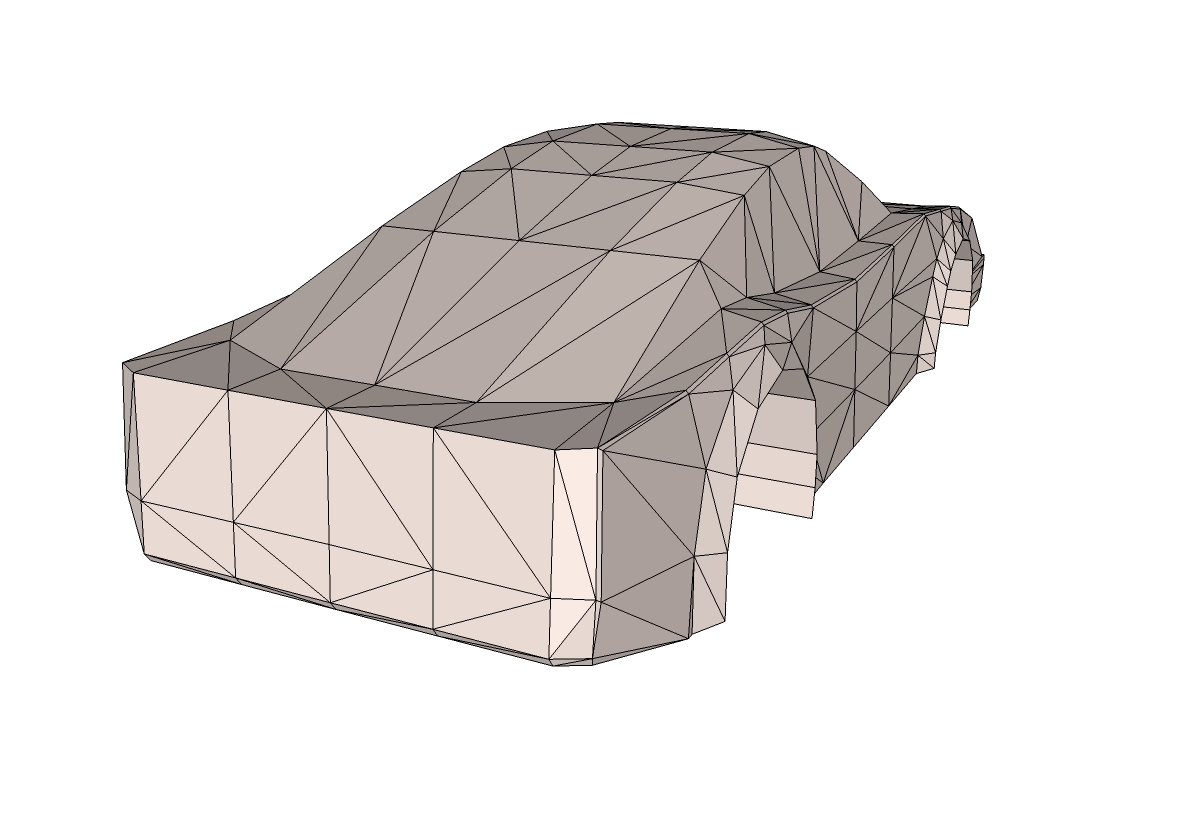
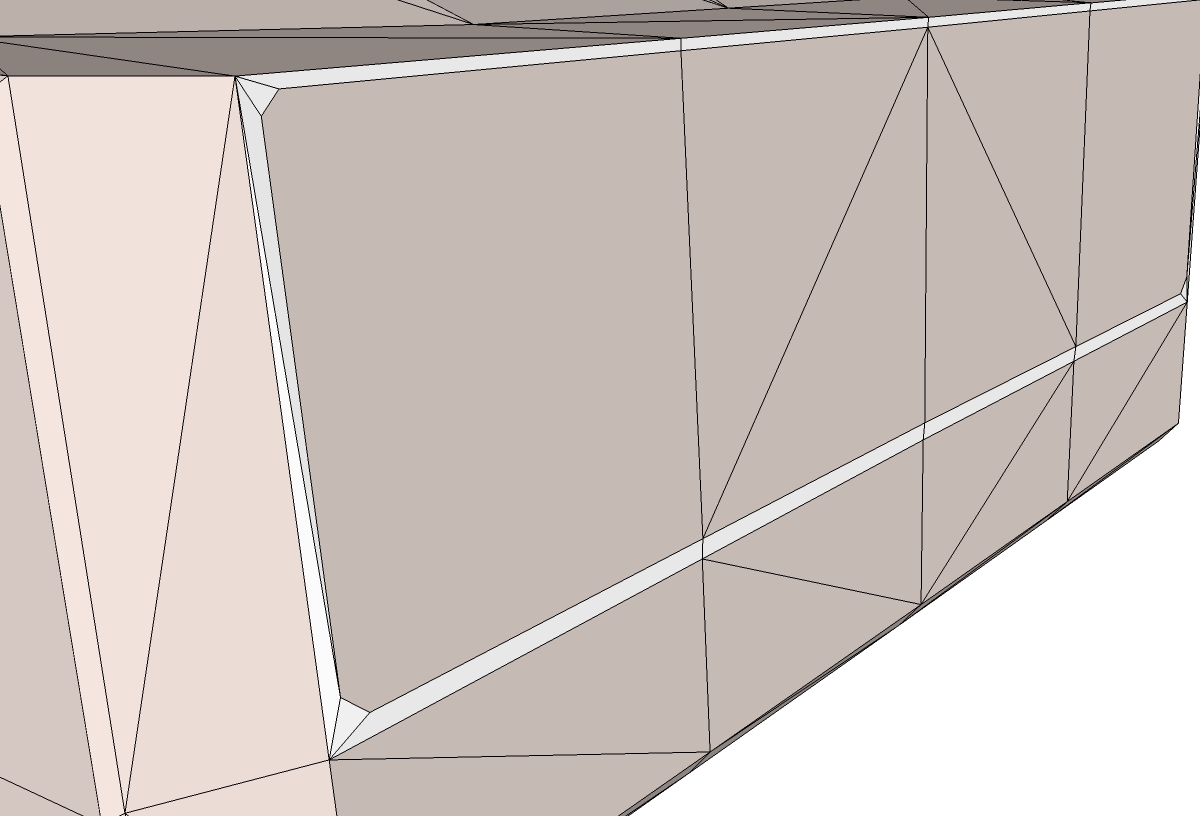
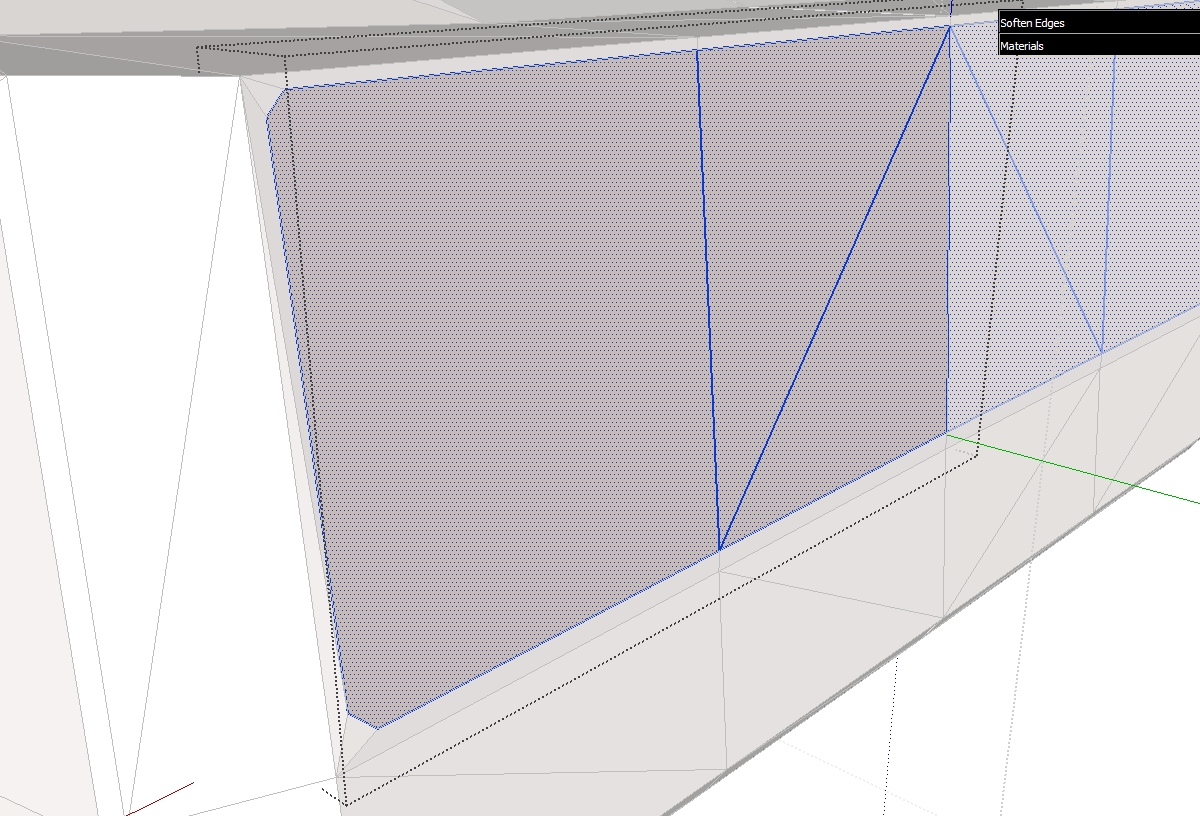
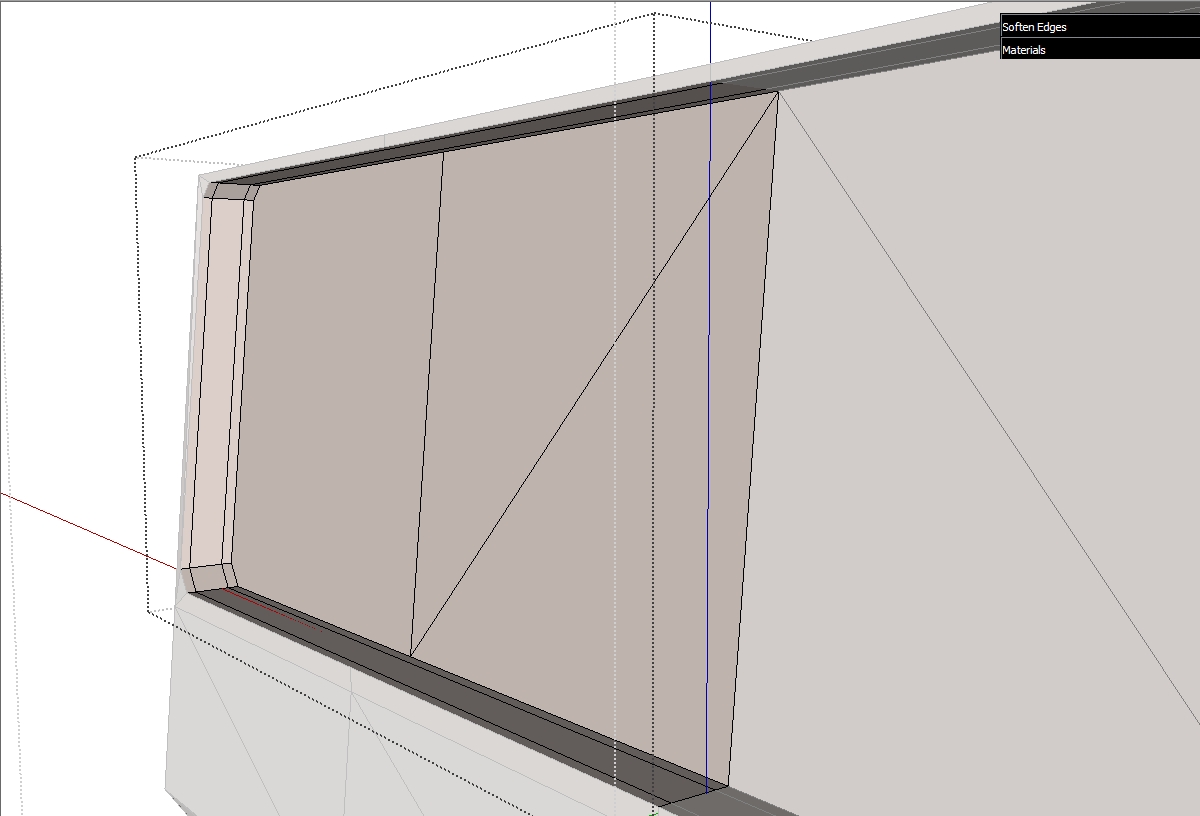
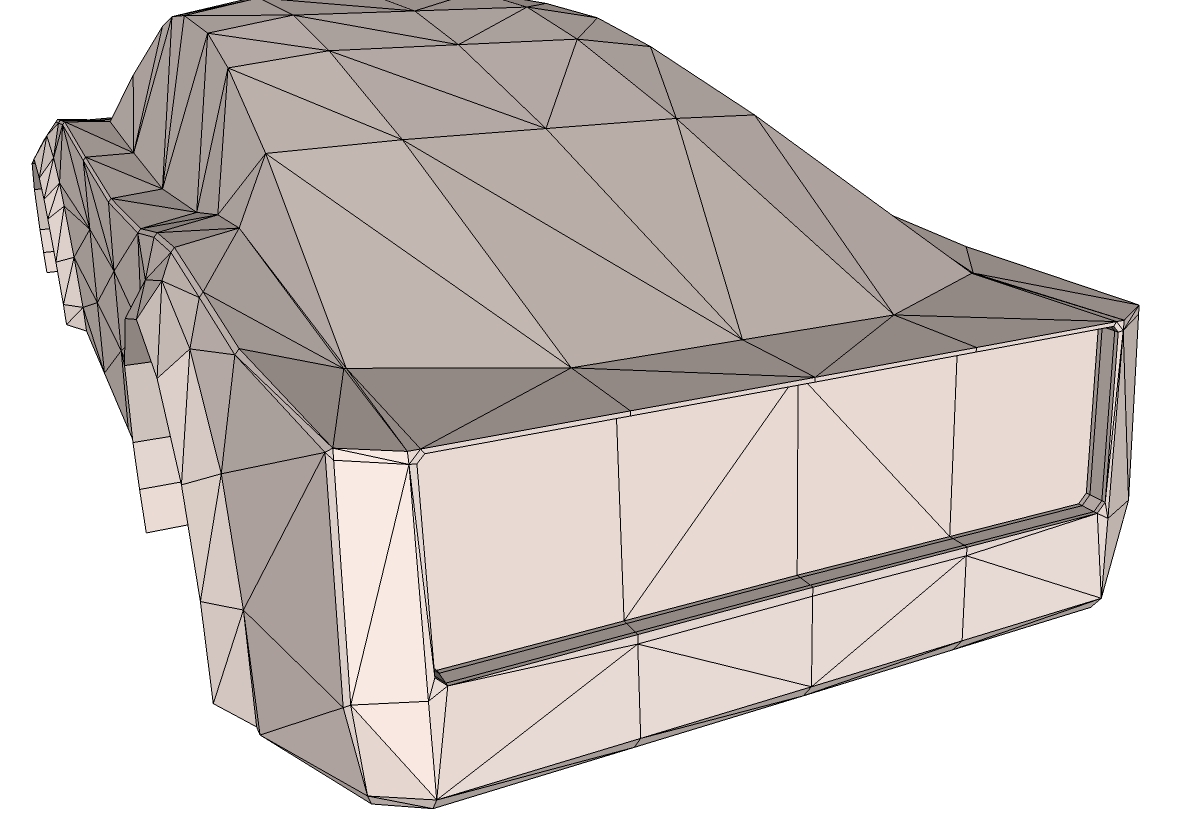
In the example I used I made opening in the back of the car. The first steps are similar to how we "doubled" the lines. Select/group/move lines/ungroup and stitch. Also remember that if you want crisp edges you'll have to double the outside and inside ones.
In some places doubling is not enough to keep the corners crisp, or the shape square. To fix this you have to cut the corners like in my pics below. Imagine that you take a square and cut its corners and make it into a hexagon, that the process here. You'll also have to tweak, fiddle and delete some lines around the corners in order for the shape to smooth correctly. You can control how crisp those corners become after smooth by bringing the lines in the corner close together.
That holds true in most all cases of doubling, the closer the lines are the sharper the smoothed outcome.
-
Marian,
Thanks for your tutorial! I'm following along. How do you create your double lines? Do you use a front and rear imgage as well?
-
@marian said:
Select the geometry along the line you wish to double make it into a group, then select only the lines and move them to the side a bit or up or down depending on the mesh. After doing this you can explode the group and start stitching the gap.
-
@lapx said:
Do you use a front and rear imgage as well?
Sorry I didn't answer this one until now, I was in hurry last time.
Simply put, no, I don't use anyother pictures for the front and back. That's because using this method you are not making an accurate representation of an existing car. It is meant to make it easier to start modeling a car, but nobody says you can't do it differently. This is the way it works for me but I encourage you to experiment or use other methods.
-
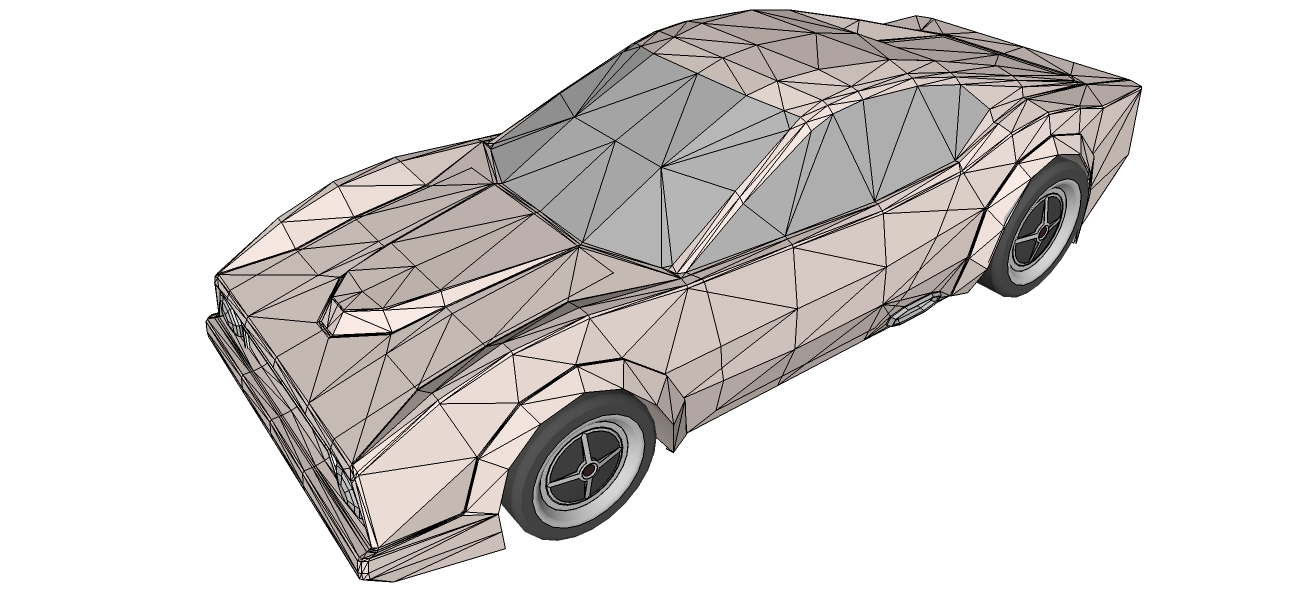
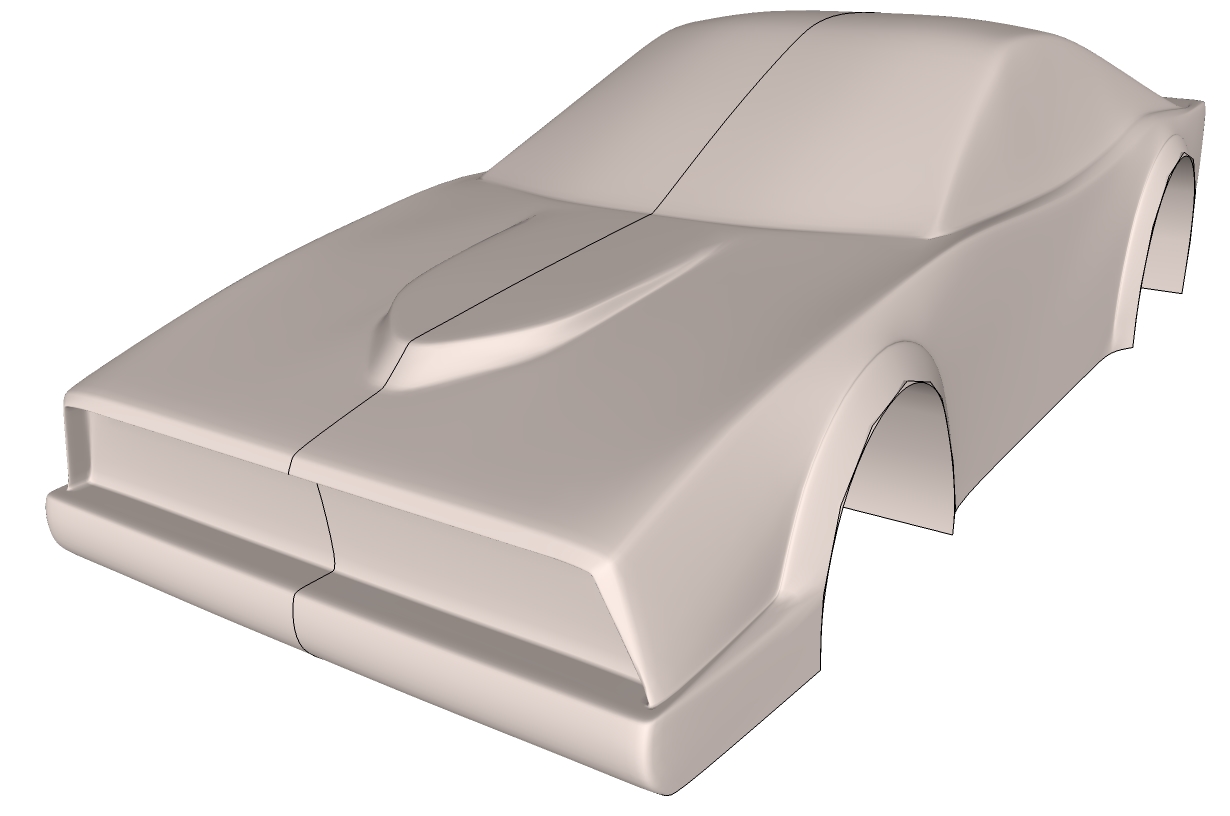
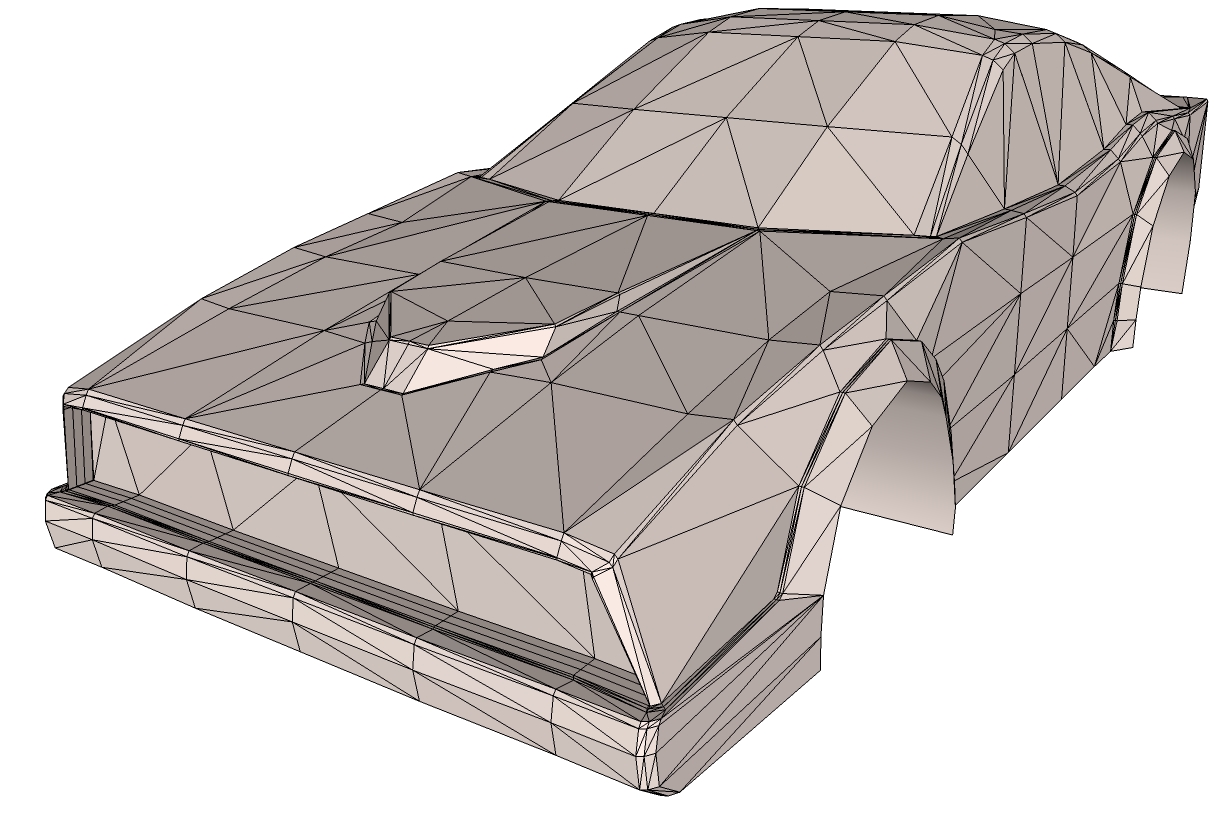
Some more progress. Not much to explain here. I just doubled the lines more so the shapes make more sense.
-
-
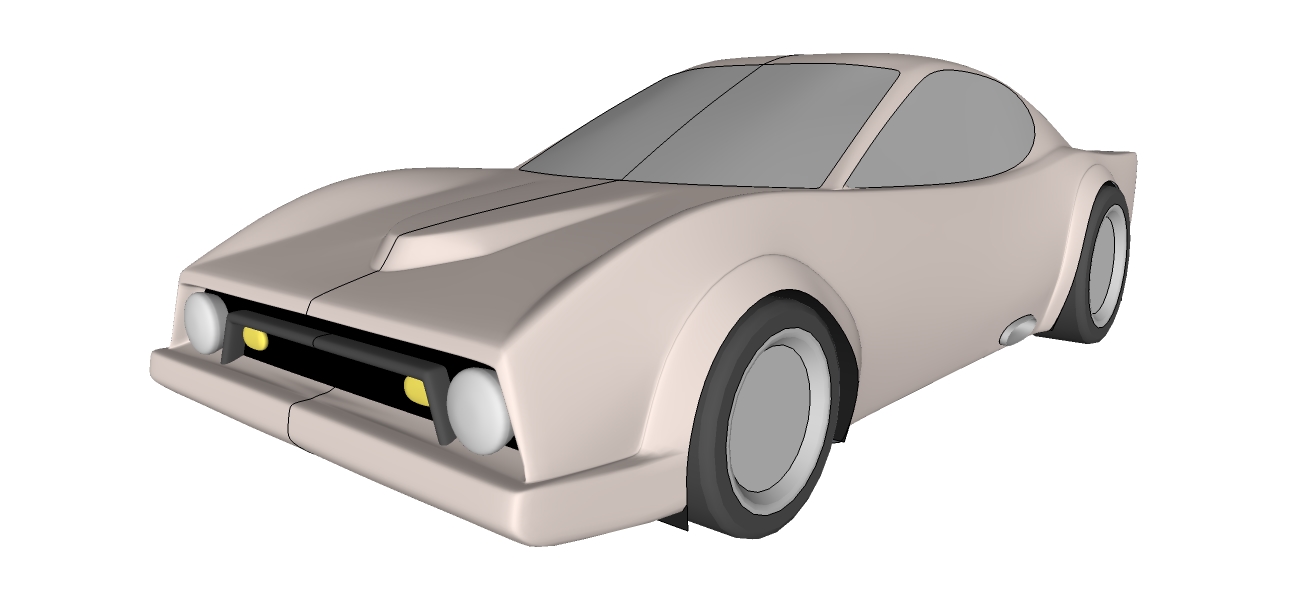
Some more progess.
I'm not sure if all of you who watch this thread understand what and how I do stuff, so please ask any questions you may have.

-
Advertisement
