[Plugin] Hole Punching Tool
-
@unknownuser said:
Maybe it's the name...it frightens me

What do you suggest? One of my longer tool names?
MakeYourSelectedStandardCuttingComponentFormHolesInTwoFacedSurfacesLikeWallsEtc.rb
Perhaps it does need 're-branding' - BUT it does do the holy-grail - ordinary cutting components that 'punch' through two faces... ANY advice welcome
-
Du you want the video?
-
-
@tig said:
Thanks

But... I fear that out of the millions of Sketchup users only ~100 have this new tool... which does what many have wished for.........

I'll spread the word among my students. let's see if this number of users grows.
-
@edson said:
@tig said:
Thanks

But... I fear that out of the millions of Sketchup users only ~100 have this new tool... which does what many have wished for.........

I'll spread the word among my students. let's see if this number of users grows.
And I have already been spreading the word:
http://www.google.com/support/forum/p/sketchup/thread?tid=3eebfcfb1a4bd106&hl=en
Of course, I cannot do anything if the OT never comes back to check his topic and the reply out...

-
Help
it can not work with [ clf_shape_bender ]
after Punch loaded, run the [ clf_shape_bender ], SU Crashed!!!
-
I get the same results as UncleX. Curious.
-
@dave r said:
I get the same results as UncleX. Curious.
It is odd as there should be no connection...
I have reproduced it too...
HolePunch does add some observers to Definitions and any new definition that is added.
Perhaps it's clashing with the way ShapeBender adds its new shape-bender component definition ?I am investigating...


-
Here is an updated version http://forums.sketchucation.com/viewtopic.php?p=271170#p271170
1.7 20100121 Observers are now first removed then added to avoid duplication and rare clashes with other scripts.******It appears that the way ShapeBender copies/adds component-instances/definitions and also uses 'make_unique' etc fell foul of the HolePunch definitions observers: a definition could occasionally get two of the same HolePunch observers added which really messed everything up big time!
In this updated version the HolePunch definitions observer 'removes' the definition observer before 'adding' it to avoid having more than one of that observer attached to the same thing [usually it's not already there, but the .remove_observer() only returns true/false on success/failure so if it's not there to remove it doesn't cause a problem with the following code].
I've retested this with ShapeBender and now I haven't managed a glitch let alone a BugSplat [yet].
Please try it and report back...

-
Thank U
the bug is solved. -
@unknownuser said:
Please try it and report back..
Yep, Shape Bender now works just fine, and Fredo Scale bend also, btw.
One other thing to report though:
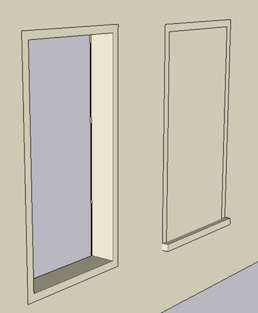
( I have the same problem with one face cutting compos.) If a component has some geometry outward of the cutting plane, like a overhanging sill for instance, no cutting or punching anymore. I noticed that the reglue option stays available even after having selected it to apply.
Strange thing is that if a flush installed component has a part pulled out, all already installed instances stay punched. Not the ones installed thereafter.
-
Mariocha
Can you post am example SKP.
I get no problems with cutting compo's that project outwards ?
I need to see its cutting plane etc...

EDIT: I have managed to find a compo' with a protection face that didn't punch consistently.
I fixed it thus: place the component on a wall.
Edit it, Select All, Intersect with Model.
Place new instances of the compo' and they will Punch Holes consistently...
-
@unknownuser said:
...place the component on a wall. Edit it, Select All, Intersect with Model...
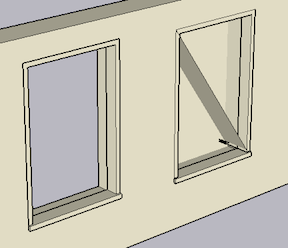
Done that. Got a little better but not quite it yet: some weird "parasites" after Punch.
Model joined; Frame is simply made of a box, Offset on a face and PushPull to make opening.
-
Mariocha
Your wall had its back-face reversed which didn't help.
Also there were some stray lines inside the Component [Xray mode to erase them].
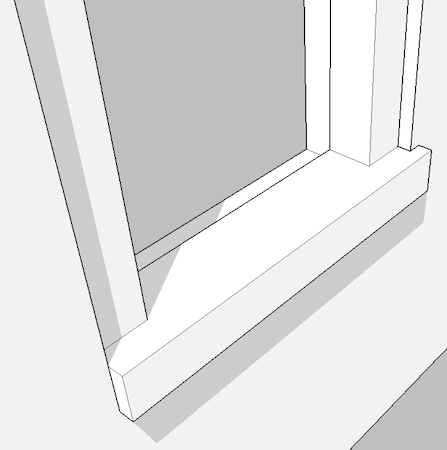
BUT most importantly - a punching component needs a loop of continuous edges to form the punching template: when you introduced a 'sill' it made two interrupted loops of edges... The fix is to inset the bottom/ends of the sill ~1mm so that the 'frame' still keeps its continuous loop and punches properly. You'll never notice that the sill isn't exactly aligned...
See this image and updated SKPsill problm.skp
-
Hey thanks. I will try that.
One precision though. I forgot to say that the reversed back and the stray lines appeared after asking to punch. Before that it was a brand new file with brand new wall and frame, no mess up.
edit;
So the loop must be made out of uninterrupted segments. No other line can butt to any one segment.
Offsetting the sill sides is not practical, kills the Punch time saving. So I made the sill a group and it works. Hiding the "seam" lines helps making the frame and sill look as a whole.
Hoping the script can be further enhanced to manage colinear lines on the cutting loop.
i]edit-bis[/i];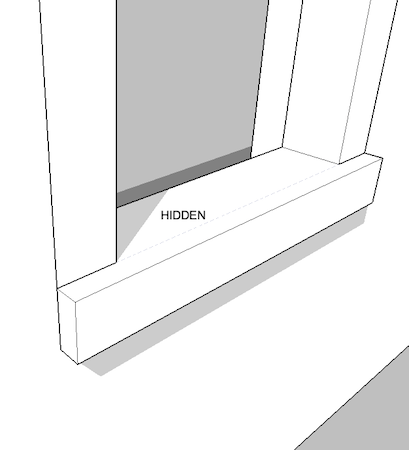
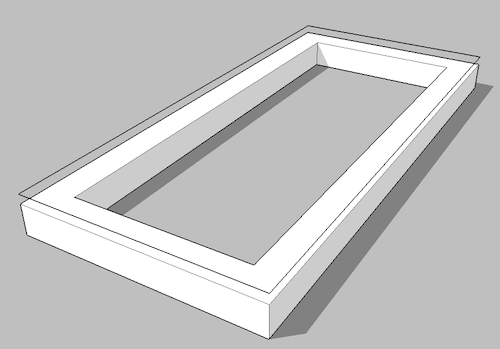
Worrying about inset windows, made me further investigate and find the easy way to do any frames. Make the whole frame a group (so it can have any shape, protrusions, insets) then make the loop at the wall face position, select everything an make component. Punches very well.
-
Here's v1.8 http://forums.sketchucation.com/viewtopic.php?p=271170#p271170
Algorithm improved to find the Cutting-Component's 'cutting-loop[s]' vertices - to use for the matching with Punched-hole - this avoids glitches if multiple edges in the Z=0 plane - like projecting sill parts etc etc...
[ Mariocha - not need to fiddle with the geometry now...]
 -
Wow ! I knew you could do it. !!

-
@mariocha said:
Wow ! I knew you could do it. !!

I have completely recast the algorithm to work out the cutting >> punching 'hole[s]' edges - I thinks it's quicker AND now it should always 'punch' a hole the same shape as the 'cut' hole...

-
Nice !
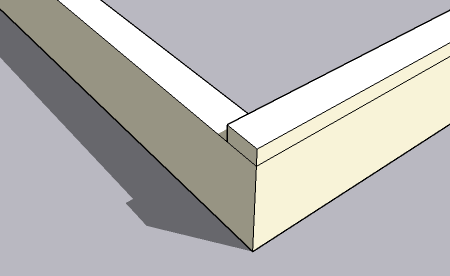
The edges of the cutting loop are still needed, right ?
-
The cutting-component needs its cutting-edges defining, so that SUp knows what part of the cut-face to hide.
The hole punching simply mimics that set of cutting-edges, ignoring unneeded internal edges - just as SUp does when cutting...
Advertisement


