[Plugin][$] Curviloft 2.0a - 31 Mar 24 (Loft & Skinning)
-
NEW RELEASE: Curviloft v1.7a - 23 Feb 18
Curviloft 1.7a is a maintenance release with the following additions:
- Parameters can be preserved across Sketchup Sessions. For compatibility reasons, the option must be enabled in the Default Parameters dialog box.
- Toolbar icons in SVG (Thanks to RichOBrien) for SU >= 2016
- Bug fixing

IMPORTANT: It requires LibFredo6 v8.1 or above.
See Plugin Page of Curviloft for Download (or use the Sketchup PluginStore plugin for auto-installation.
Fredo
-
@fredo6 said:
Parameters can be preserved across Sketchup Sessions.
Thank you Fredo, was hoping exactly for this!

-
Thanks for the update and for informing us so quickly.
-
You're welcome.
One day, I'll need to update the GUI to make it clearer (and cleaner). After all these years, I realize that Curviloft is still in Beta!
Fredo
-
@einstein said:
And secondly, there's this bug that when I use the tool, close it and open again, it doesn't bring that menu bar on viewport's top to adjust options but goes straight to generating junction. And I can't come back and set connection options. Have to open a new model and copy my geometry to it. I think it was already discussed somewhere so I'm just bringing it "in the board".
Not sure I understand. Curviloft never goes directly to generate Sketchup geometry. It ony goes to Preview mode when you have an initial selection.
Could you clarify and illustrate your case.Thanks
Fredo[/quote]
Referring to "preview mode bug":
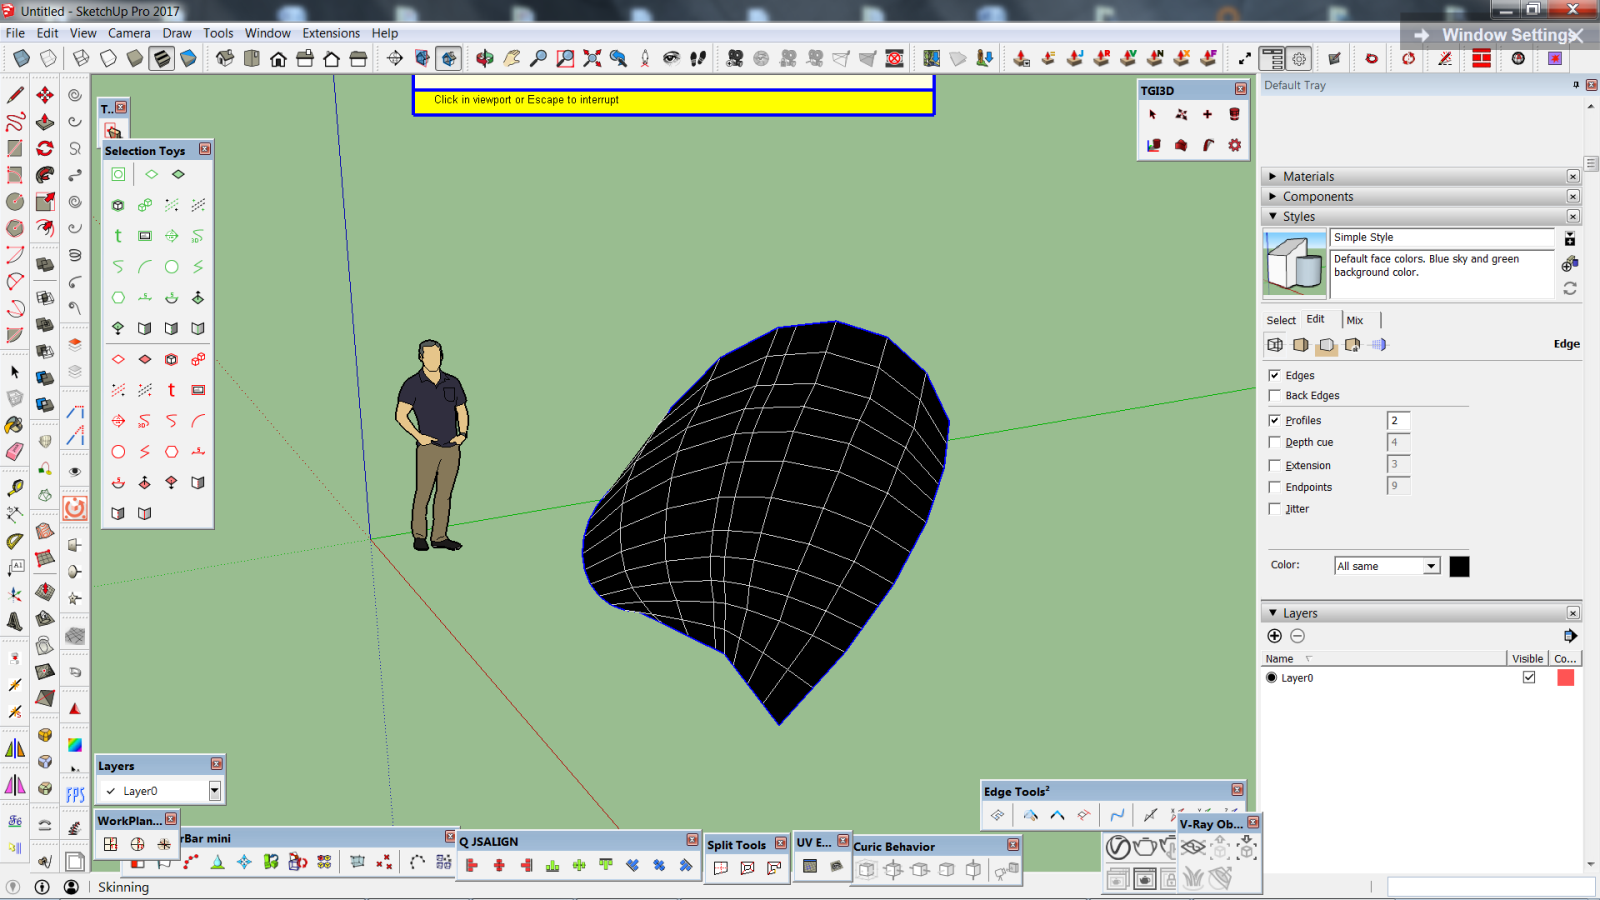
when I select contours and run Skin Contours (or preselect the tool, regardless) I cannot bring the grey toolbar to set parameters. It goes straight to surface generation.
I tried various sets of contours, every time the same thing happens.
-
@einstein said:
Referring to "preview mode bug":
when I select contours and run Skin Contours (or preselect the tool, regardless) I cannot bring the grey toolbar to set parameters. It goes straight to surface generation.
I tried various sets of contours, every time the same thing happens.That's not what I observe.
Your profile says you use SU2014. Is it the version you use for this buggy situation?Fredo
-
@fredo6 said:
@einstein said:
Referring to "preview mode bug":
when I select contours and run Skin Contours (or preselect the tool, regardless) I cannot bring the grey toolbar to set parameters. It goes straight to surface generation.
I tried various sets of contours, every time the same thing happens.That's not what I observe.
Your profile says you use SU2014. Is it the version you use for this buggy situation?Fredo
I'm using SU 2017 (updated my profile just now) and updated Curviloft to newest version.
I was thinking, if you have time, you could create another command in drop-down menu like "Go back to settings" next to "Go back to contour selection". -
@einstein said:
I'm using SU 2017 (updated my profile just now) and updated Curviloft to newest version.
I was thinking, if you have time, you could create another command in drop-down menu like "Go back to settings" next to "Go back to contour selection".I am still puzzled by the fact that you could go directly to Generation.
Does it happen with any model?For going back to Preview from Generation, just use the Orange Back Arrow in the palette.
Fredo
-
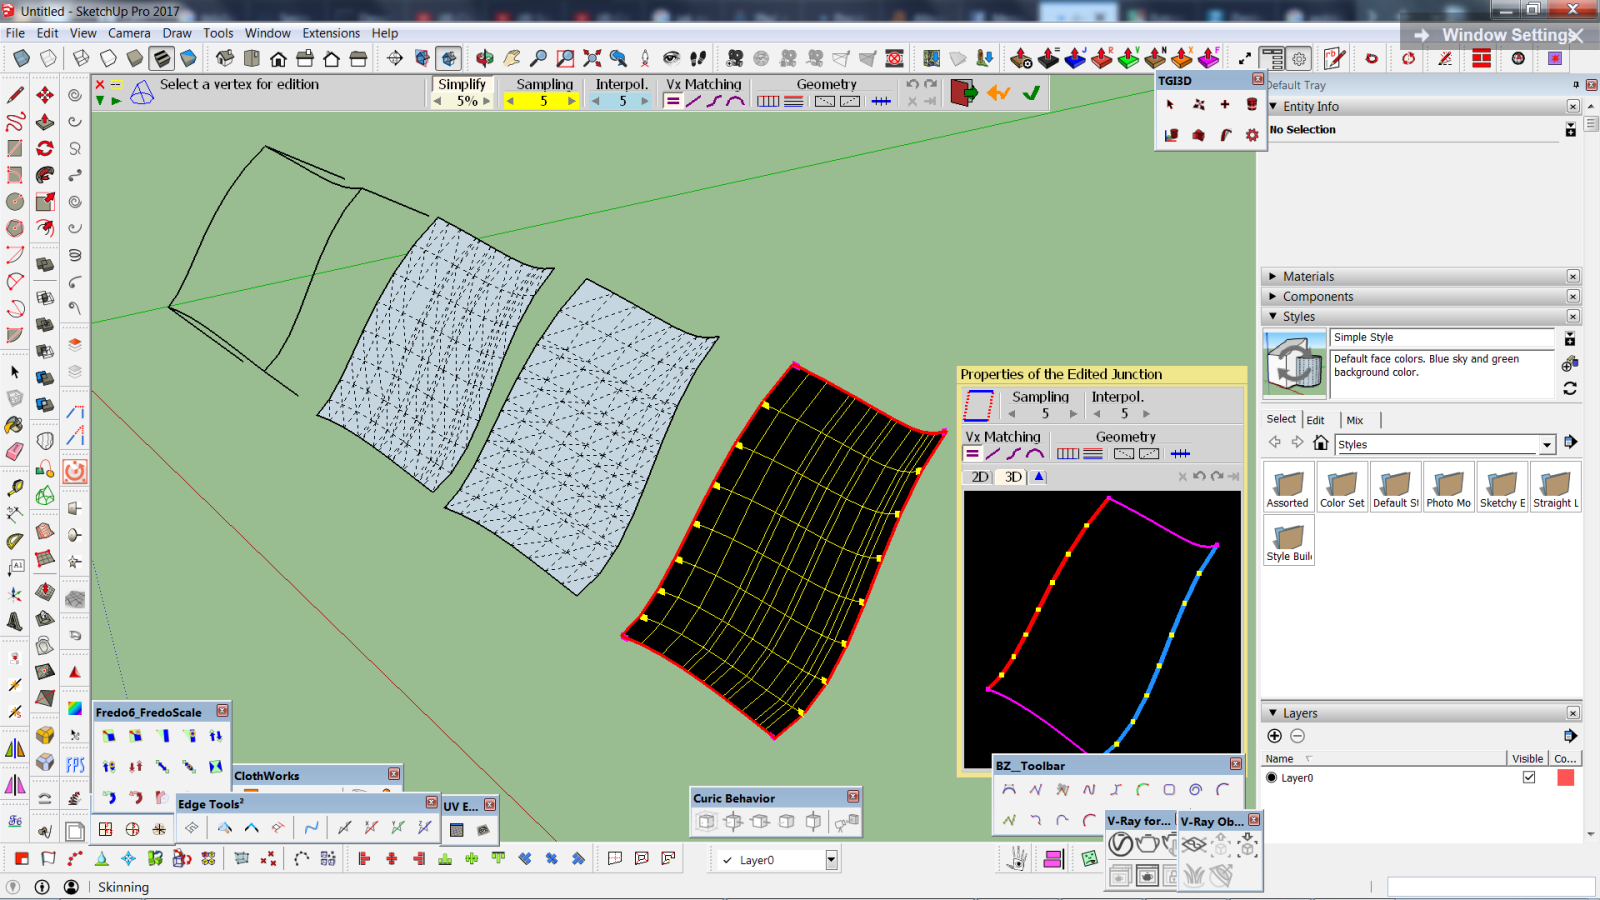
As in the screenshot, I cannot see Orange Back Arrow, no arrows at all. The tools gets stuck at the stage of generating geometry. It happens when I create a set of contours which is too difficult for the tool to process (precisely: to distinguish where one contour ends and starts next one - this is how I understand it). I still can select contours manually but I cannot adjust properties because the grey toolbar never appears.
Here's an example model - when I select contours and run Skin Contours, no surface is generated. Then I go back to contour selection, pick them manually and OK, the surface is being created but I cannot add sampling, interpolation etc.
What's more, if this happens, entire model gets "infected" and the grey toolbar doesn't appear anymore, even with other contour sets. Until I restart SU.
-
@einstein said:
As in the screenshot, I cannot see Orange Back Arrow, no arrows at all. The tools gets stuck at the stage of generating geometry. It happens when I create a set of contours which is too difficult for the tool to process (precisely: to distinguish where one contour ends and starts next one - this is how I understand it). I still can select contours manually but I cannot adjust properties because the grey toolbar never appears.
Here's an example model - when I select contours and run Skin Contours, no surface is generated. Then I go back to contour selection, pick them manually and OK, the surface is being created but I cannot add sampling, interpolation etc.
What's more, if this happens, entire model gets "infected" and the grey toolbar doesn't appear anymore, even with other contour sets. Until I restart SU.
I have not seen a screenshort in your post. The Orange Back Arrow is in the button palette.
For your model, Curviloft is not perfect, and there are situations where it looses control. In your case, and more generally for skinning, it is a good practice to put small delimitor edges to help Curviloft find out where to cut the contours.
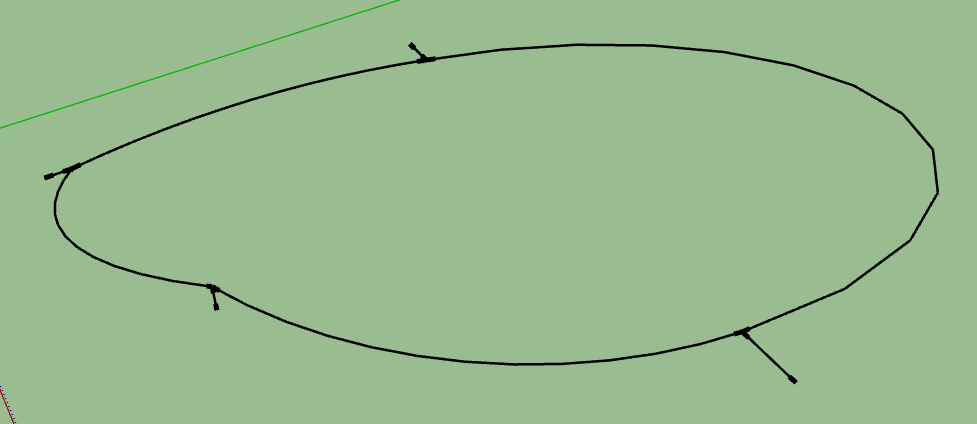
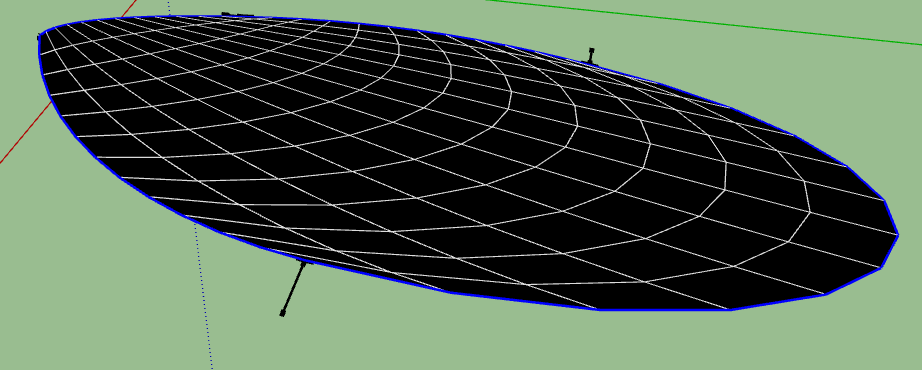
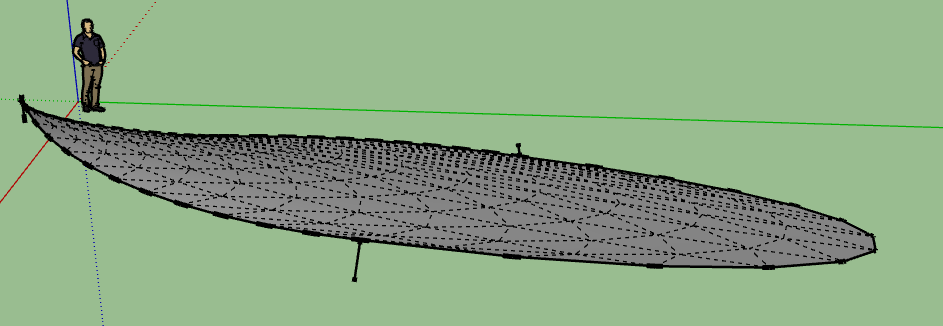
Fredo
-
One trick I have found when trying to CL a perimeter that is conjoined with other entities in the model is take a copy of the perimeter and move it (on an axis) out away from the model.
That makes it far easier to edit out anomalies that prevent the mesh from forming. You can also simplify the perimeter by deleting 2 adjacent short lines or deleting fragments and make one endpoint to endpoint line in their place.
Then you can create the surface without problem.
After which move the meshed group back to the model along the axis and cleanup the model where the lines should meet the surfaces endpoints.
-
In other words: my problem is not that I cannot create a surface - I can manage it. I cannot modify parameters of generation: sampling, interpolation etc. Here I put the screen again, it shows yellow processing bar. At this stage I cannot call back that grey settings toolbar. Even if the mesh is created. I said about "difficult" contour sets because they stop the toolbar from showing, even though the surface is still being generated.
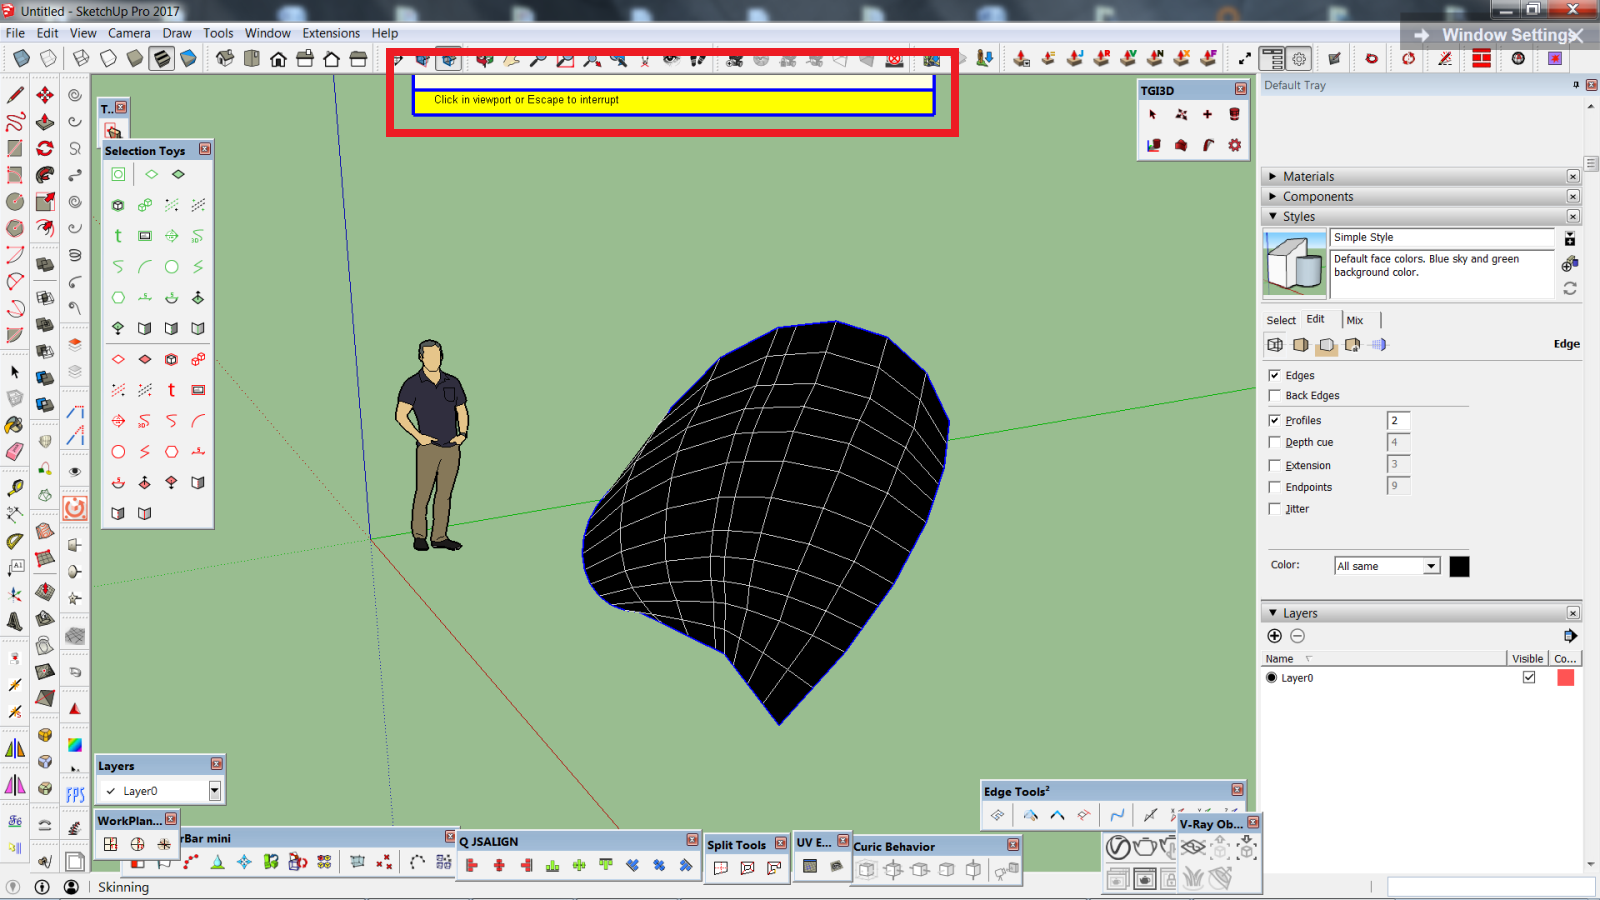
-
NEW RELEASE: Curviloft v1.7c - 27 Feb 18
Curviloft 1.7c is a major maintenance release fixing bugs in the Edge Selection process
In particular, Curviloft displays a message box whenever the contours are not complinat with a generation of geometry. This is the case for the Skinning tool when selected edges cannot be interpreted as sequences of 3 or 4 curve portions.
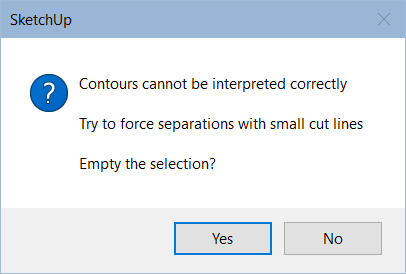
IMPORTANT: It requires LibFredo6 v8.1c or above.
See Plugin Page of Curviloft for Download (or use the Sketchup PluginStore plugin for auto-installation.
Fredo
-
FYI, the last couple of weeks I have had numerous crashes. I,m not sure, but it could be when dealing with large- segmented curves or with very small curves whose segments or angles are beyond SU tolerances. I believe 2017 and 2018 will now warn if arc-segments are incompatible when trimming, for example, the corners of a rectangle. If. Curviloft doesn’t error check for this or other warnings could this could problems? There were cases last week when merely passing the Progflile’s cursor over an edge, without pressing the mouse, would crash SU.
-
Hi!
I want to post a quick movie and my model to illustrate a bug that I described some time ago but maybe didn't explain clearly.
I had problems with curvilofting some more complicated contour sets, using Skin Contours. I was advised to draw manually "separation lines" at contour borders and that helped. But sometimes I forget or don't know that a certain set needs such separation, then I perform Skin Contours onto a problematic contour set and then Curviloft gets stucked. It endlessly shows yellow progress bar on top of viewport and doesn't let me back to settings (grey toolbar). Since this moment I cannot recover this toolbar with loft settings, until I restart SketchUp (which is very asspainful having almost 200 plugins installed).
The model shows a few complicated sets of 4 curved contours. The video shows the issue which comes even with simple contours after a difficult skinning is performed. It happens even if I start a new model in SketchUp.
Please tell me somebody if you also have this problem or is it just my computer...
SketchUp 2017, Win7, 64bit
-
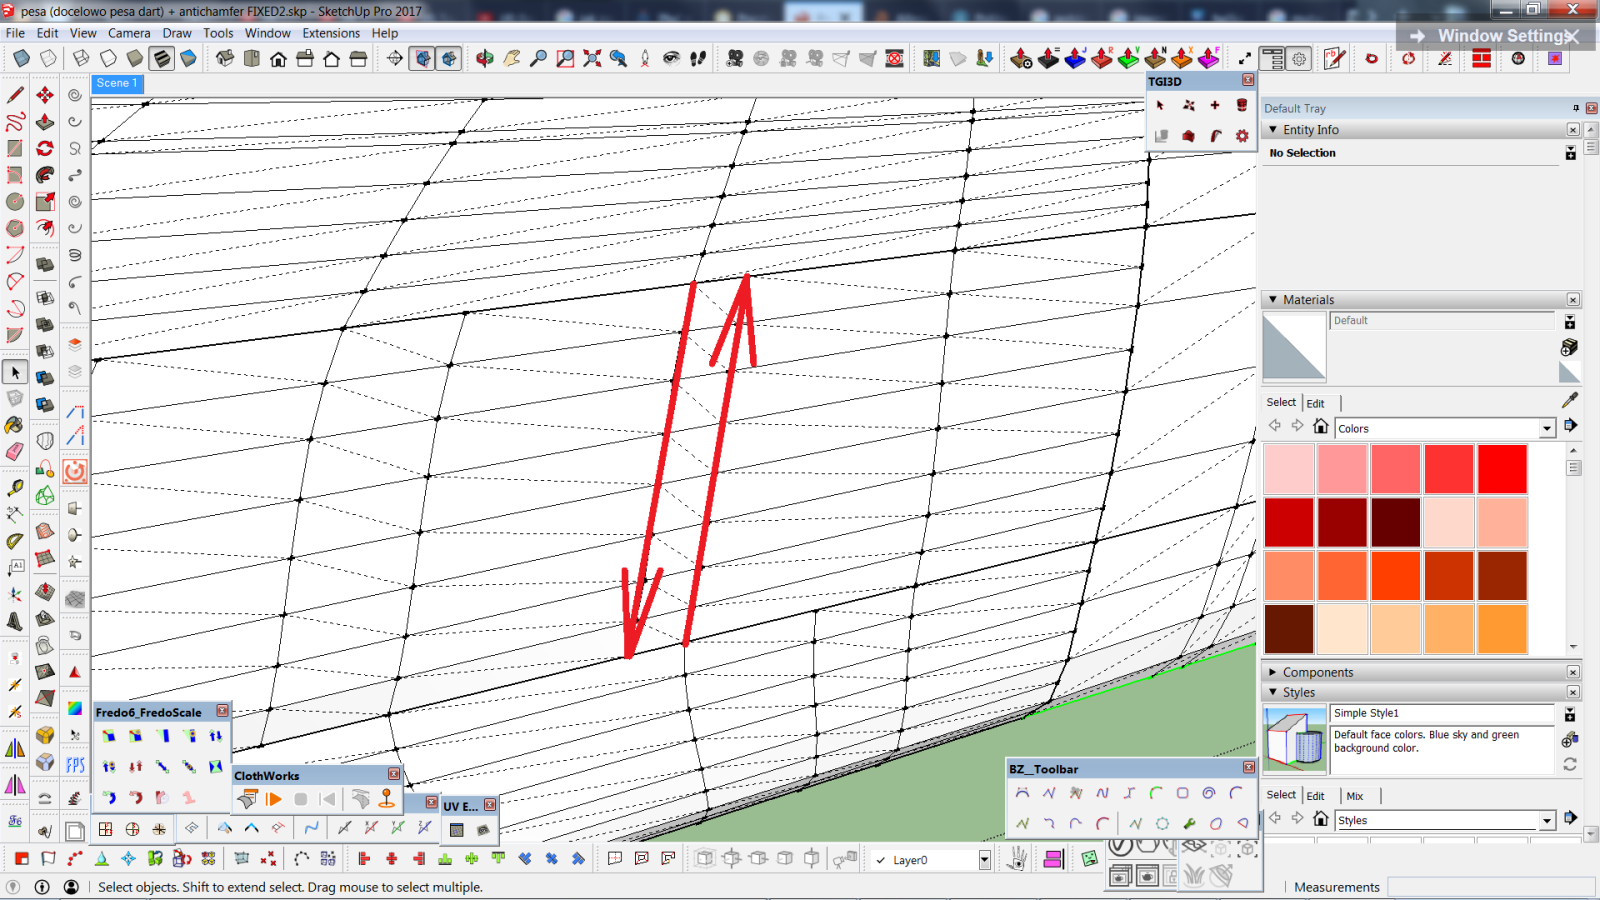
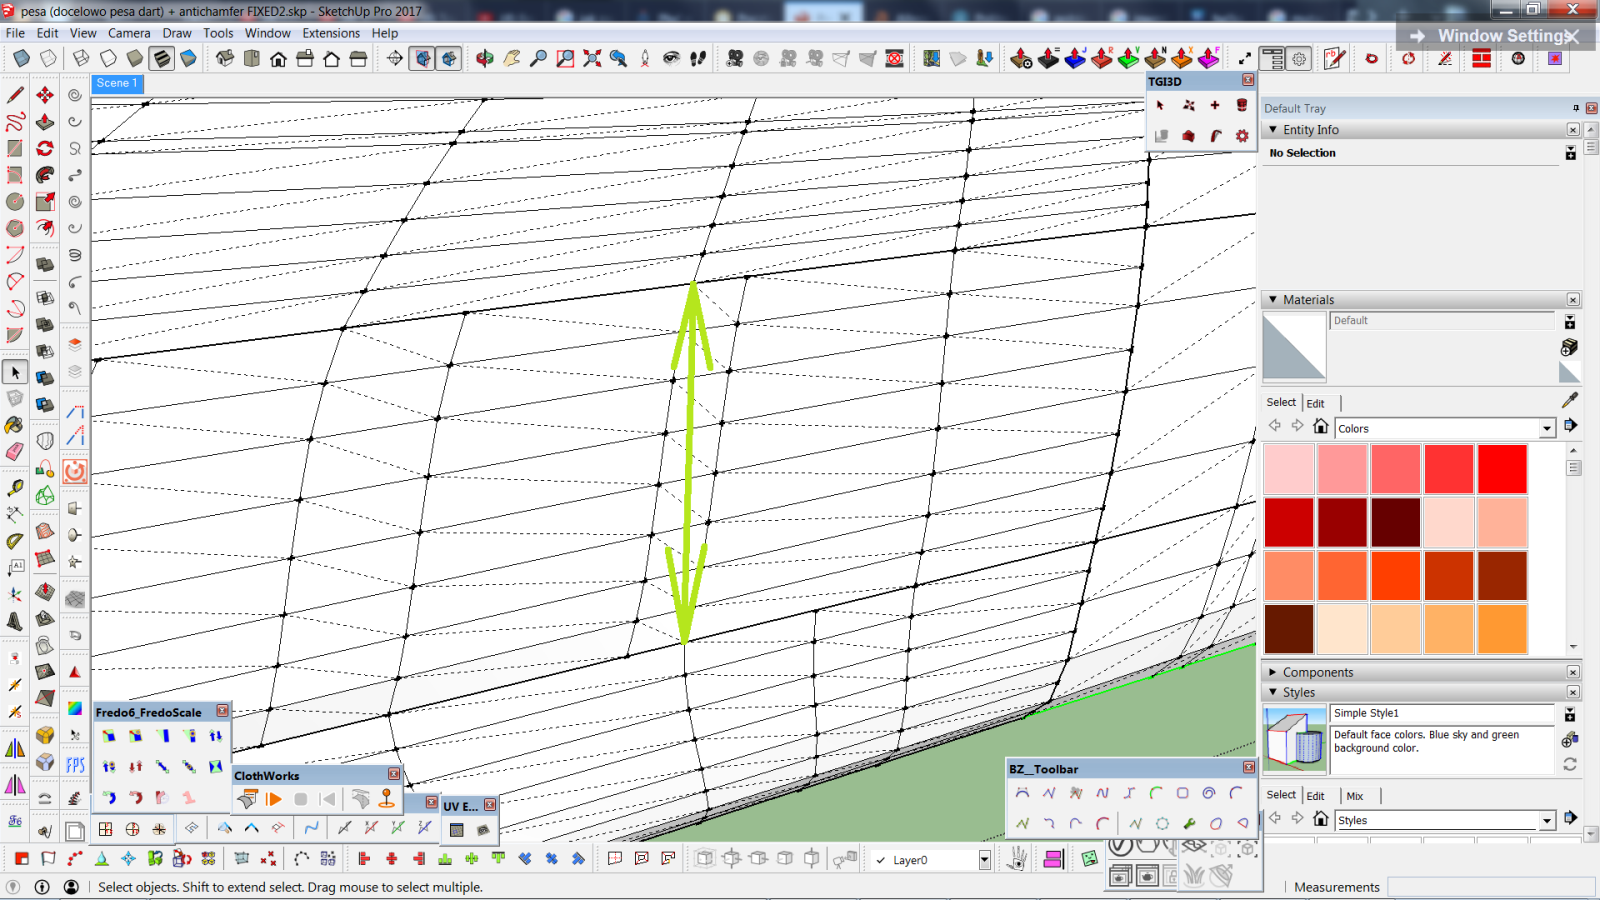
I also don't understand one thing. In the attached model I have four contours touching each other, each consists with 8 segments. So I perform Skin Contours and don't know why it adds some extra geometry. As if some of contours' segments were divided. But they're not. I'd expect 7 curves created along and 7 across the surface.
In this case it's not even possible to match vertices in order to eliminate additional divisions.
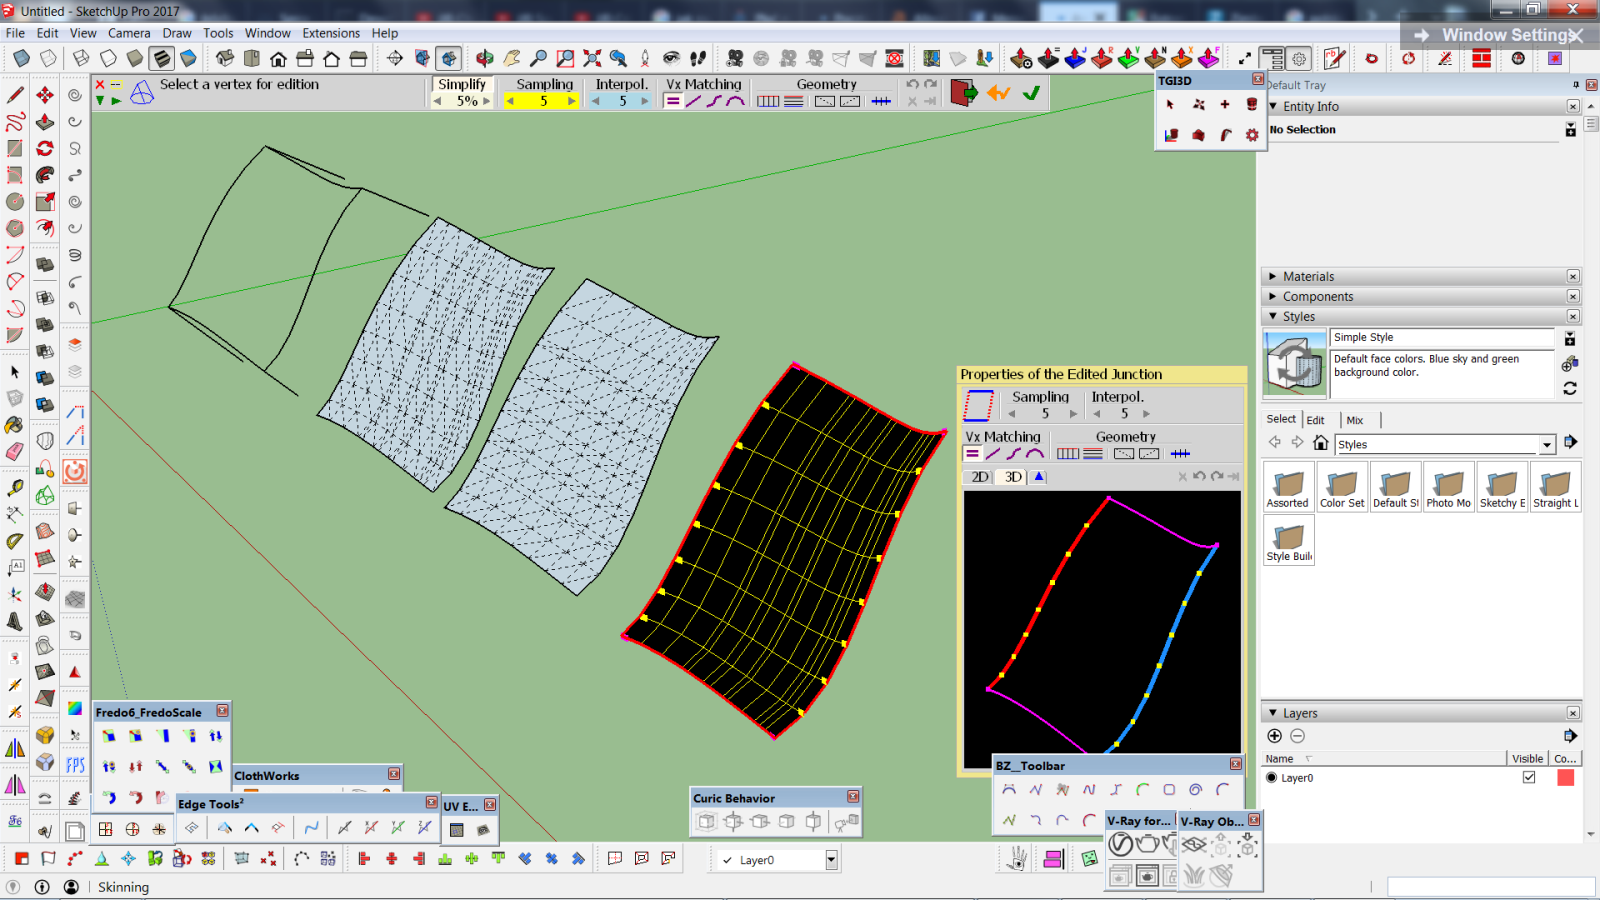
-
Curviloft does not align its lofted lines exactly to the vertices on the opposite side. If the spacing of the 2 opposite points are not aligned CL will just draw lines from each vertex to the opposite side on edge, and you get a lot of extra lines, some very close together.
I spend a lot of time adjusting lines to reduce that overall line and face count.
Use the ALT-Move Tool to move a vertex over to its closest partner. Pick the vertex on a perimeter that is on a straight portion of that segment.
It IS tedious, but in many of my big drawings I really need to reduce line count.
-
@einstein said:
The model shows a few complicated sets of 4 curved contours. The video shows the issue which comes even with simple contours after a difficult skinning is performed. It happens even if I start a new model in SketchUp.
Please tell me somebody if you also have this problem or is it just my computer...
SketchUp 2017, Win7, 64bitI had no problem with the model....
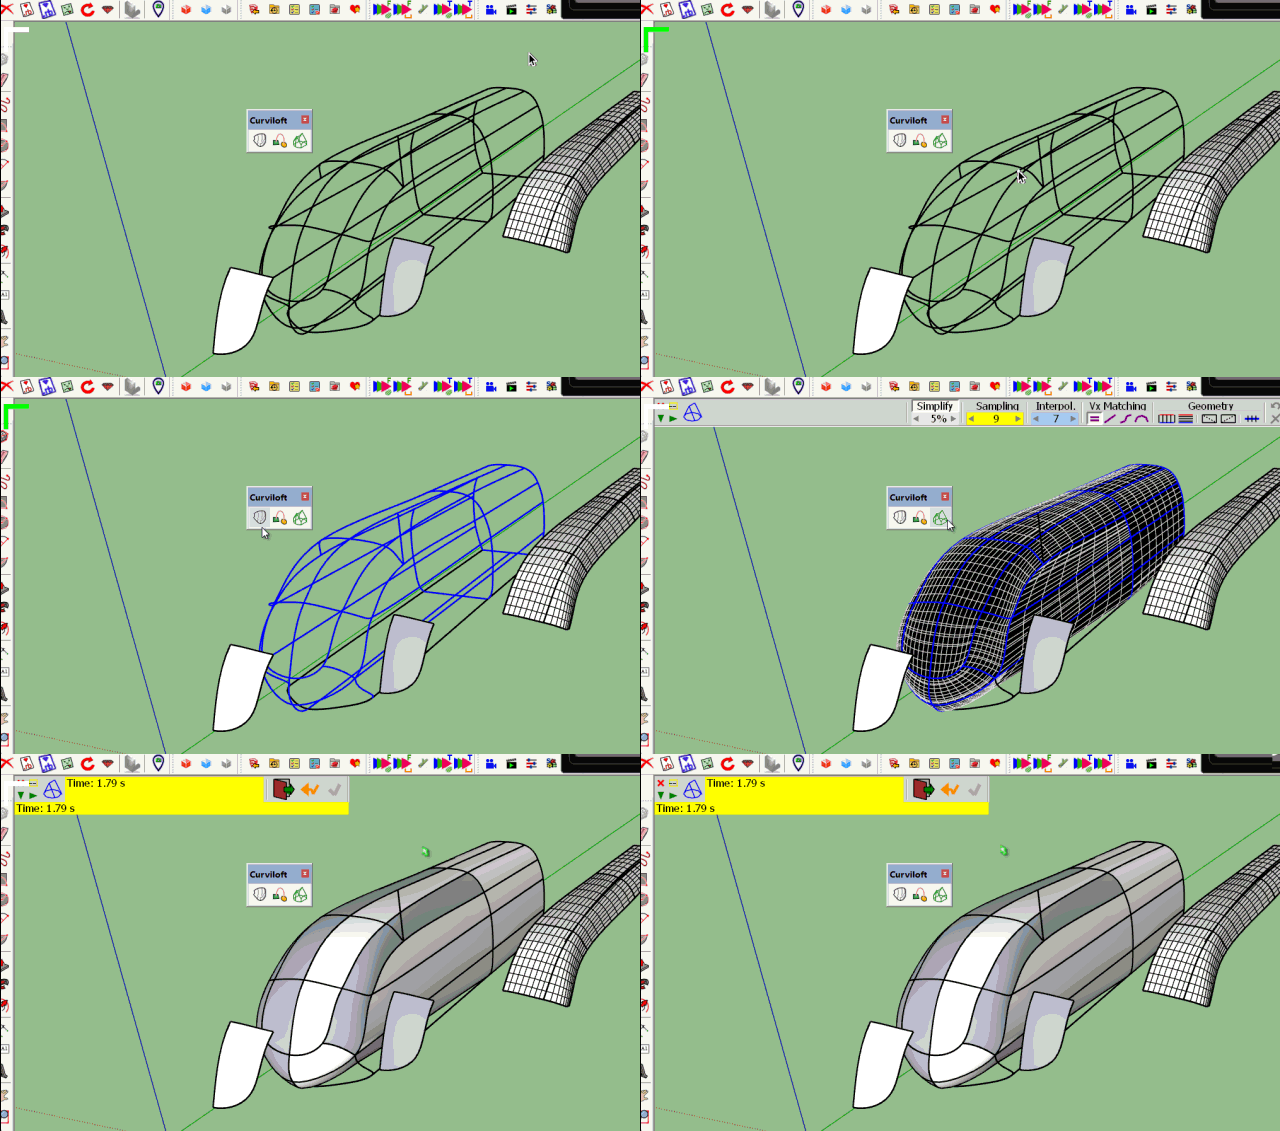
....But it's true that Skinning has sometimes difficulty to find out the right cutting of contours.
-
@jgb said:
Curviloft does not align its lofted lines exactly to the vertices on the opposite side. If the spacing of the 2 opposite points are not aligned CL will just draw lines from each vertex to the opposite side on edge, and you get a lot of extra lines, some very close together.
I spend a lot of time adjusting lines to reduce that overall line and face count.
Use the ALT-Move Tool to move a vertex over to its closest partner. Pick the vertex on a perimeter that is on a straight portion of that segment.
It IS tedious, but in many of my big drawings I really need to reduce line count.
Well, the issue is that if you join vertex to vertex, you get a skewed surface, even assuming the number of vertices on each opposite side matches.
So, there is no general solution to the problem, unless Curviloft does a resampling of the contours (which it does not do in the current version).
Fredo
-
It's no problem that I spend extra time matching vertices but as you can see in the screenshot, in this case it's not even possible cuz I can only match vertices left-right while additional lines appear top-down. If I Swap Rails and Profiles, it's opposite. What if we could match both rails and profiles at the same time or force automatical matching vertex-to-vertex? In some cases Simplify parameter will work but not always, even if I set it to 80%. Maybe it would make sense to give us 100% as a maximum value? I don't know if it's mathematically possible.
In the second screenshot with red arrows I showed how the connection is done and in the third one with green arrow - how I'd imagine it.I reinstalled Curviloft and still have this no-settings bug. What's more, it also affects Round Corner plugin so when I try to roundcorner some edges, it also omits settings

Advertisement


