Found a nice trick by accident
-
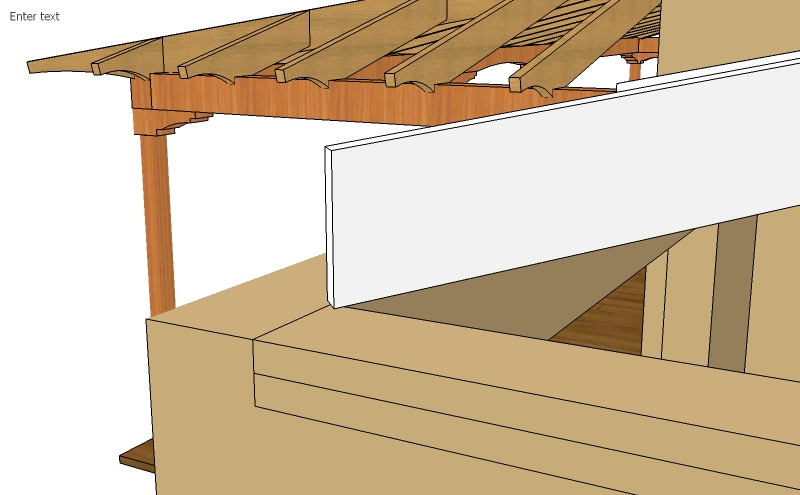
I was modeling some rafters and had a hip rafter that was at a 45 angle from any axis and was sloped so it is kind of a pain to extend. When you push pull it comes out at a horizontal angle, if you select the plumb-cut face it just swings around wildly if you aren't following a construction line.
But this had some stray geometry on it so when I selected the end face (the plumb cut) I noticed that it extended perfectly. I am working right now so I don't have too much time to explain any better but hopefully the pictures show what I am trying to say.
Hope this helps others.
-
i'm not quite following..
what tool were you using again? push/pull? select? -
I think that the point is that if you have an angled end on a shape like a rafter you can only pushpull it squarely to the face of the angled end [second image].
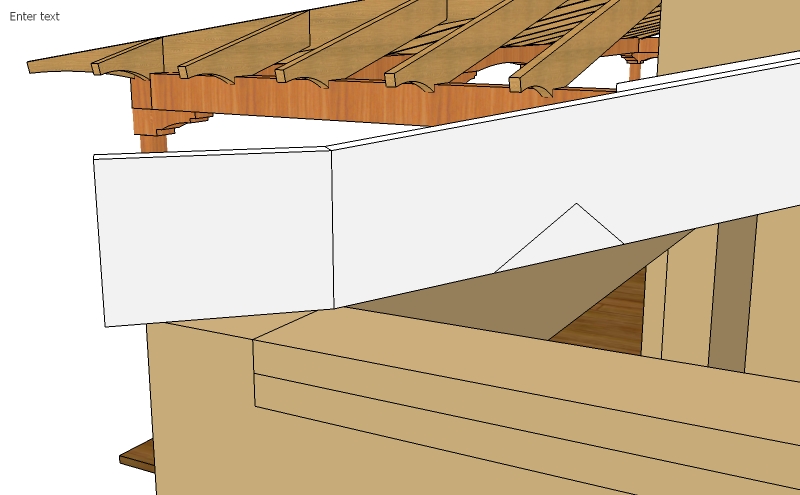
If you want to extend it along the length of the rafter you can select the angled face and use move on it and it relocates up/down the rafter's slope, constrained to its long edge direction...
There are also pushpull along vector scripts that can help do this, but a simple and quick fix in a case like this is simply to select the end face and move it...
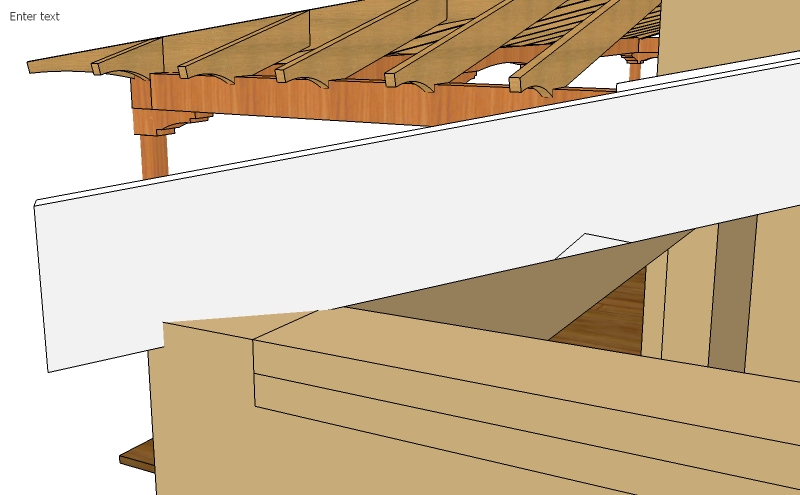
Incidentally, had you added a hip-rafter with a square-cut end you can readily adjust it to suit the lines of the main cut rafters - make sure it's longer than you need and strike some guide-lines along the tops and bottoms of the main cut rafter ends, now select just the top edge of the end face and move that, constrained a long the hip-rafters length so it snaps to the relevant guide-line, do the same to the bottom and the hip-rafter's end is now cut at an angle to match the main rafter lines... -
Tig is pretty much right about what I was trying to point out but not quite. If you have the rafter with no stray lines when you select the end and move it with the move tool you must have some guide or point to snap to or else it can move in any direction. With a couple stray lines on the geometry it will constrain its movement so it will only extend its length along its axis.
And he is quite right about there being a million other ways to achieve this goal. I just thought it was interesting behavior that I had never noticed before that was also useful.
-
Draw a cline [guide] down the long edge of the rafter, that let's you keep the moved end aligned...
-
TIG's right about drawing a guide along the long edge. Another quick trick that sometimes comes in useful when the line you are using to constrain the movement is, itself, wandering about (because youre moving the end of it) is to just Copy/Move a clone of that edge a couple of inches away and run the cursor along that instead...then delete when finsihed.
In this case, just copy one of the top edges of the rafter an inch or so upwards then use that as the guide. -
ah, ok.. the move tool.. i thought you found some weirdness with push/pull.
my entry in battle of the 'nother way to do it' (but this one wins
 )
)select the face then choose the move tool... put the move tool cursor on an edge further up the rafter.. press and hold shift.. push the mouse button and extend..
Hello! It looks like you're interested in this conversation, but you don't have an account yet.
Getting fed up of having to scroll through the same posts each visit? When you register for an account, you'll always come back to exactly where you were before, and choose to be notified of new replies (either via email, or push notification). You'll also be able to save bookmarks and upvote posts to show your appreciation to other community members.
With your input, this post could be even better 💗
Register Login


Advertisement