Rendering Workshop - Studio - still life
-
THanks for all the great help everyone!
-
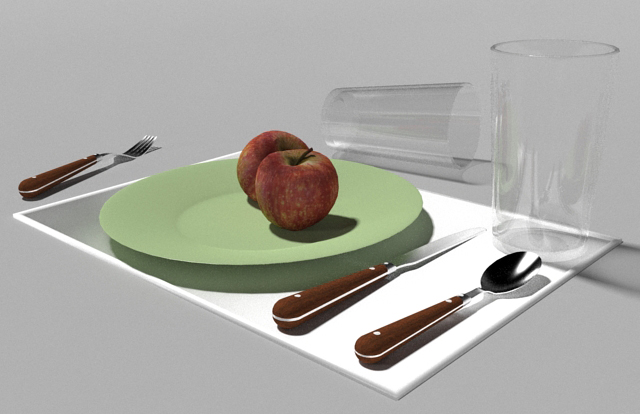
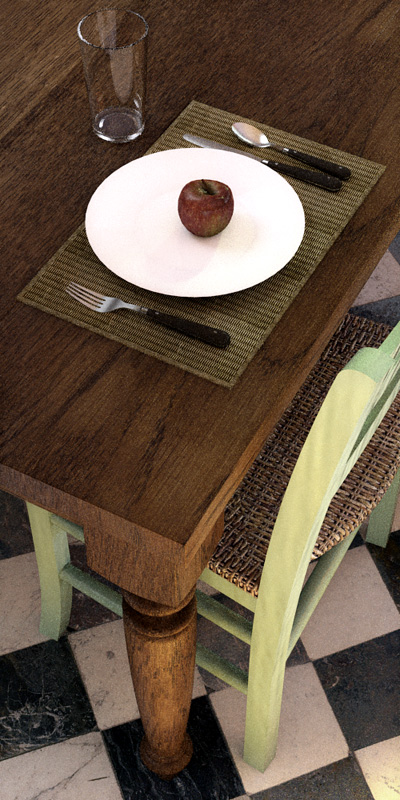
My late attempt with Irender
-
@richcat said:
My late attempt with Irender
Thank you for the image. (Does late mean "done late at night", or "turned in late"?)
It looks like you aimed a light on the glass which highlights the glass. However, for this model, I think you might want to get the viewer to concentrate on the apple. Try adding an additional light to the apple as well. Just as in a photography studio, you may want to add lights to highlight specific items. (Although since everyone else in concentrating on the apple, perhaps you wanted to concentrate on the glass. In that case, you should have put a "richcat" in it
 Or that shiny skull/helmet you used to use.)
Also, for studio images, it is not necessary to provide single sharp shadows, or even realistic shadows.
Here is a tip from a photography site:
@unknownuser said:
The main light should be at least three feet wide and in a soft box configuration. The reason for this is that a soft box places the surface of the light close to the subject without getting in the way of the camera or photographer. Another reason is that the light is kinder to skin surfaces and tends to wrap around the features without losing the modeling.
By using a very large spot light, the effect of bringing the light from a wide area will soften the shadows.
Al Hart

IRender nXt from Render Plus -
This weeks workshop worked out great! Especially because of Solo's model, and his advice on studio rendering techniques.
I was planning to do something on water for the next Workshop, but it turns out that Solo has already started a workshop on fountains. Take a look at it, and add your contributions. Render This: Fountain
Solo and I will try to get better coordinated for the next Rendering Workshop. Keep tuned...
Al Hart
IRender nXt from Render Plus -
Pete that fountain is just fab.
@al hart said:
Thank you for the image. (Does late mean "done late at night", or "turned in late"?)
Both - it gets too addictive, just change this and that, add more reflection, a bit of bump etc.
@al hart said:
(Although since everyone else in concentrating on the apple, perhaps you wanted to concentrate on the glass. In that case, you should have put a "richcat" in it
Or that shiny skull/helmet you used to use.)Yes I was concentrating on the glass, but not very well, and maybe I should put my old terminator rendered head on it
 , its just my kids did this Wii image of me, and it makes me seems a lot younger.
 I have re lit the scene as suggested and added a very subtle dof to highlight the apple. Now to turn in

-
Richard, that's a great render.
-
Thanks Pete
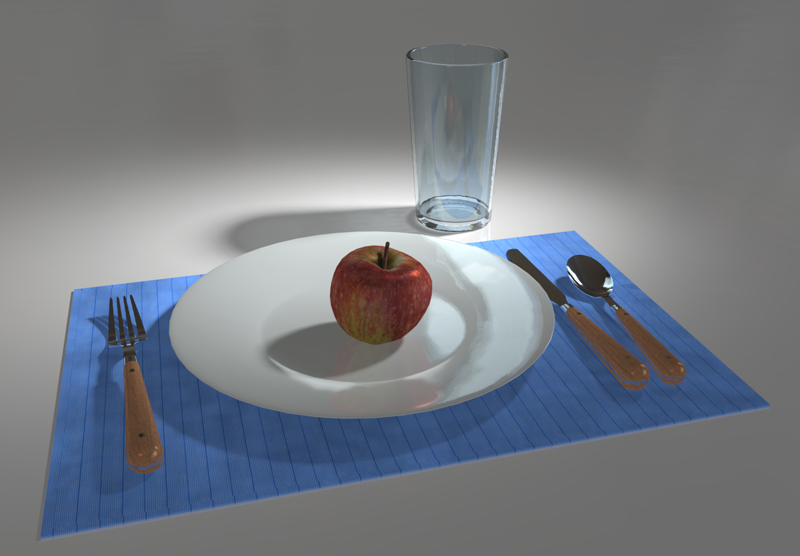
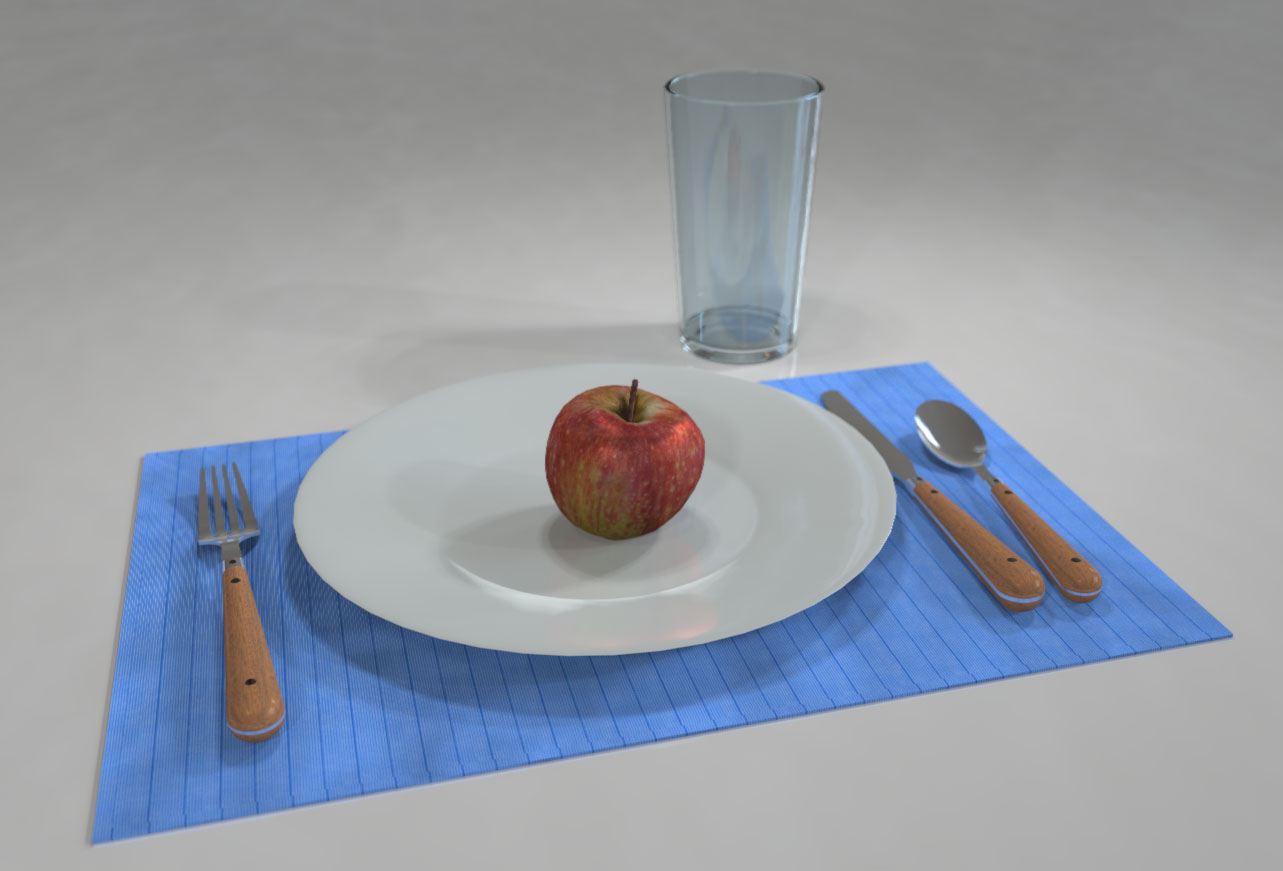
I didn't turn in as I just couldn't resist doing a bit more of a close up a bit similar to kwist and Adams. Remembered to adjust dof, but tried to keep it subtle again. I need to work a bit more on wooden handles, and try adding some dust to the plate,and the apples probably want tweaking ---- but I must get some sleep.
Looking and learning from people like Adam, Al, Kwist and of course yourself and others that keeps me striving for better and better, but it needs to be quick, fun and informative as these have been. I'm still working on the sss dragon, where there have been some really
 cool renders, mines no where near yet.

-
@richcat said:
Thanks Pete
I didn't turn in as I just couldn't resist doing a bit more of a close up a bit similar to kwist and Adams. Remembered to adjust dof, but tried to keep it subtle again. I need to work a bit more on wooden handles, and try adding some dust to the plate,and the apples probably want tweaking ---- but I must get some sleep.
Looking and learning from people like Adam, Al, Kwist and of course yourself and others that keeps me striving for better and better, but it needs to be quick, fun and informative as these have been. I'm still working on the sss dragon, where there have been some really
cool renders, mines no where near yet. Both of these two are a lot better.
But when you finally "hit the hay" (I don't know if that is a phrase using in the British Isles) You could let the scene keep rendering all night to see if it looks better with softer shadows (or not). (It feels strange offering advice to one of the best scene massagers in the community. Bit is is always easy to look at someone else's rendering - after hours of tweaking - and make suggestions, then it is to stay up extra hours and work on your own scenes)
Richcat, - and everyone - remember that we want to see your work too - not just the work of the experts. We can all learn more from advice on how to improve a rendering then by merely looking at the best results. (That doesn't mean that you "experts" should stop making submissions - just that the rest of us shouldn't be scared off.) Even near the end of one of these workshops i am pleased to see a newby download one of the engines, and give it a try.
@unknownuser said:
quick, fun and informative
- thats why I like these workshops where we all work on rendering a model - to try and learn techniques - and not just see you can add the best geometry - also, I have a chance rendering existing geometry - but would really struggle at creating the geometry myself.
Al Hart
IRender nXt from Render Plus -
@al hart said:
...and I will try to get better coordinated for the next Rendering Workshop. Keep tuned...

-
Hi Al- I thinks its "hit the sack" over here.
@al hart said:
one of the best scene massagers in the community...
Sounds kind of kinky

I appreciate the comment but I'm not up to the high standards of people who post here or in the gallery, as well as Boothy's in the IRender forum. -
Playing with more objects.

-
For the next Rendering Workshop, I have chosen some basic Kitchen items - which will "highlight" reflections. (excuse the pun).
Rendering Workshop - Reflection
This Workshop will be too easy for the master renderers on SCF. (It is intended for new users who want to learn more about reflection). But drop by anyway and offer your tips.
Al Hart
IRender nXt from Render Plus
Hello! It looks like you're interested in this conversation, but you don't have an account yet.
Getting fed up of having to scroll through the same posts each visit? When you register for an account, you'll always come back to exactly where you were before, and choose to be notified of new replies (either via email, or push notification). You'll also be able to save bookmarks and upvote posts to show your appreciation to other community members.
With your input, this post could be even better 💗
Register Login


Advertisement