Rendering Workshop - Studio - still life
-
As I expected would happen when I started this week's workshop, some of the rendering pros have already posted better images than I will probably be able to duplicate. But I wanted to try some simple ideas - whether they work well or not - so we can all learn from them.
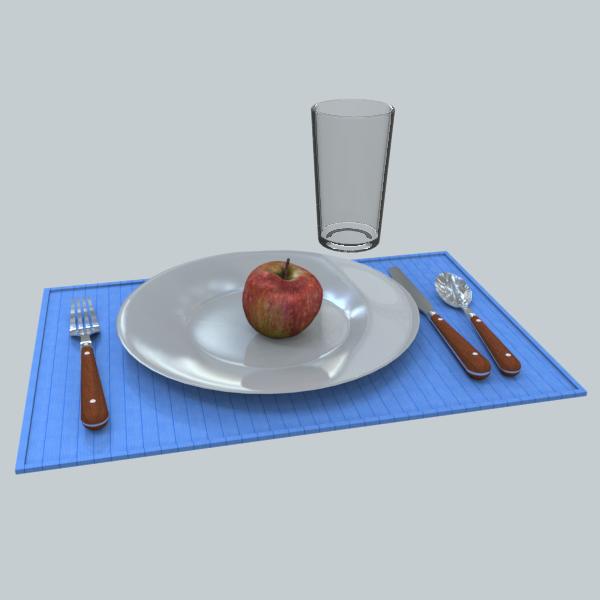
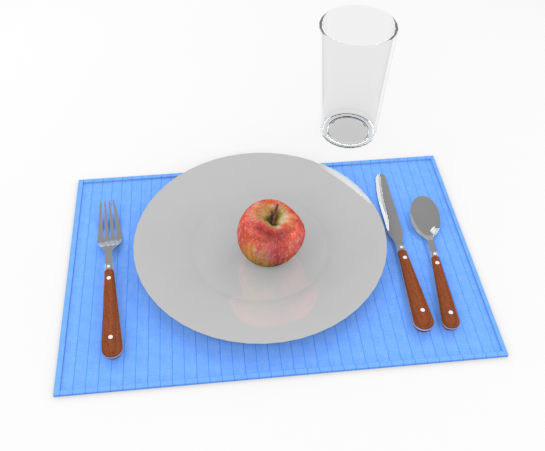
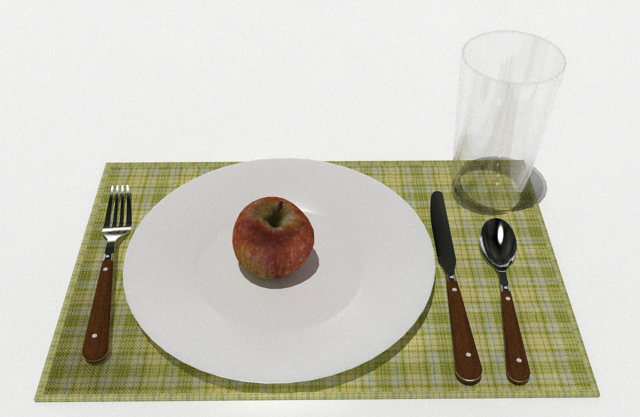
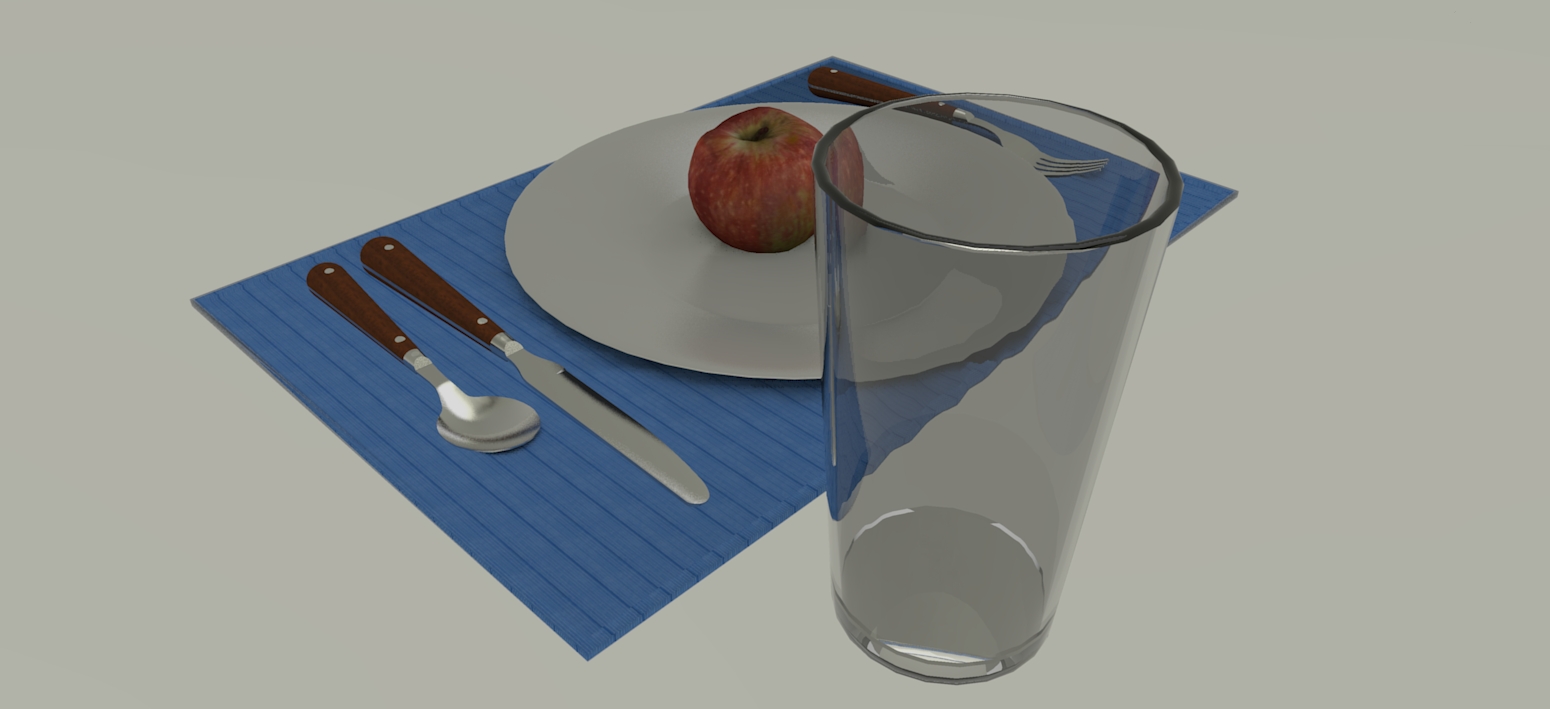
I took Solos model (thanks again for this), made the plate 60% reflective, the silverware metal 90% reflective and metallic, the apple 50% reflective and glossy, the placemat 40% reflective and glossy and marked the glass as "thich glass" and 10% reflective. (Since this is about lighting I figured I might as well make everything reflective.)
Then I added the rnl_probe HDRi (mentioned in the earlier post), and let it render for about 3 minutes. (The longer you let it render, the more points are sampled from the sky).
Al Hart

IRender nXt from Render Plus -
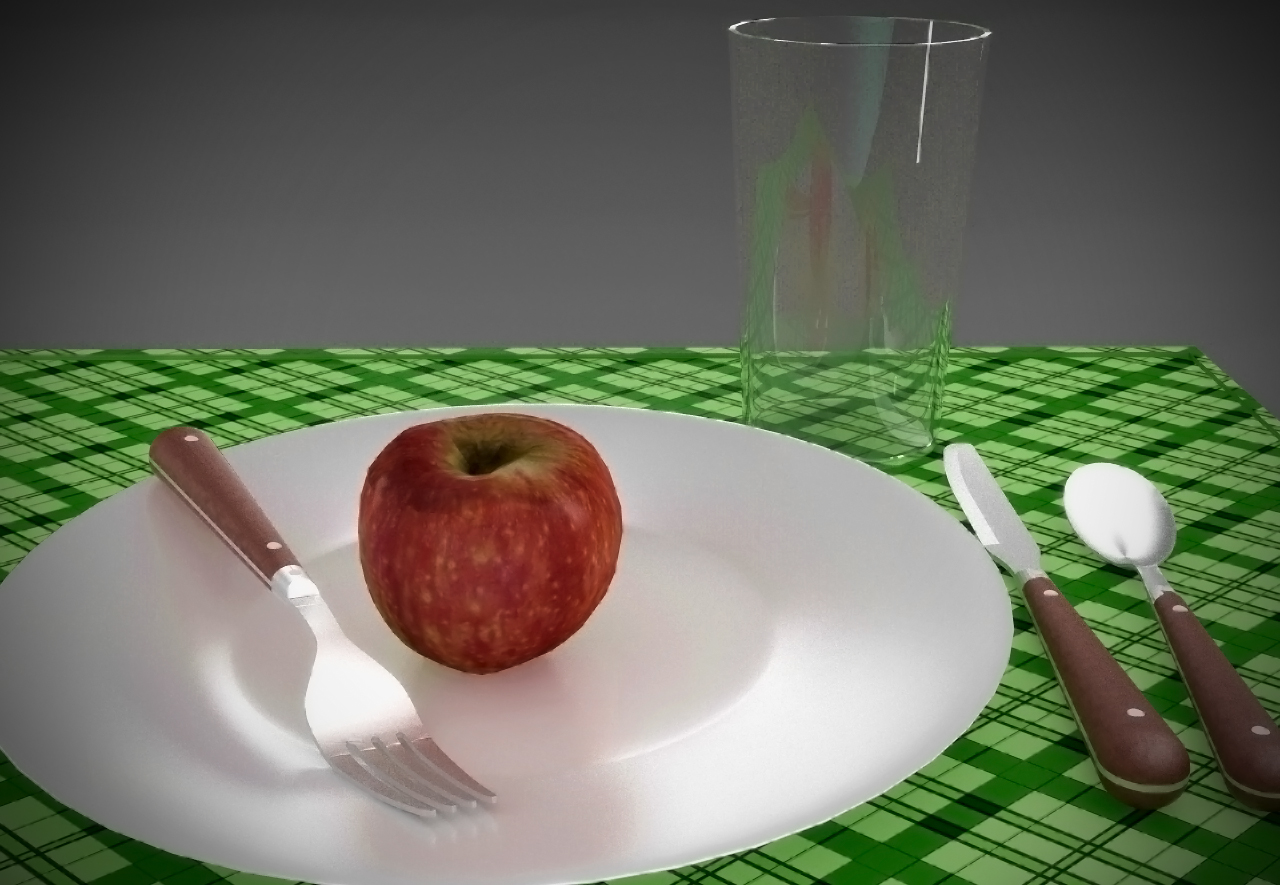
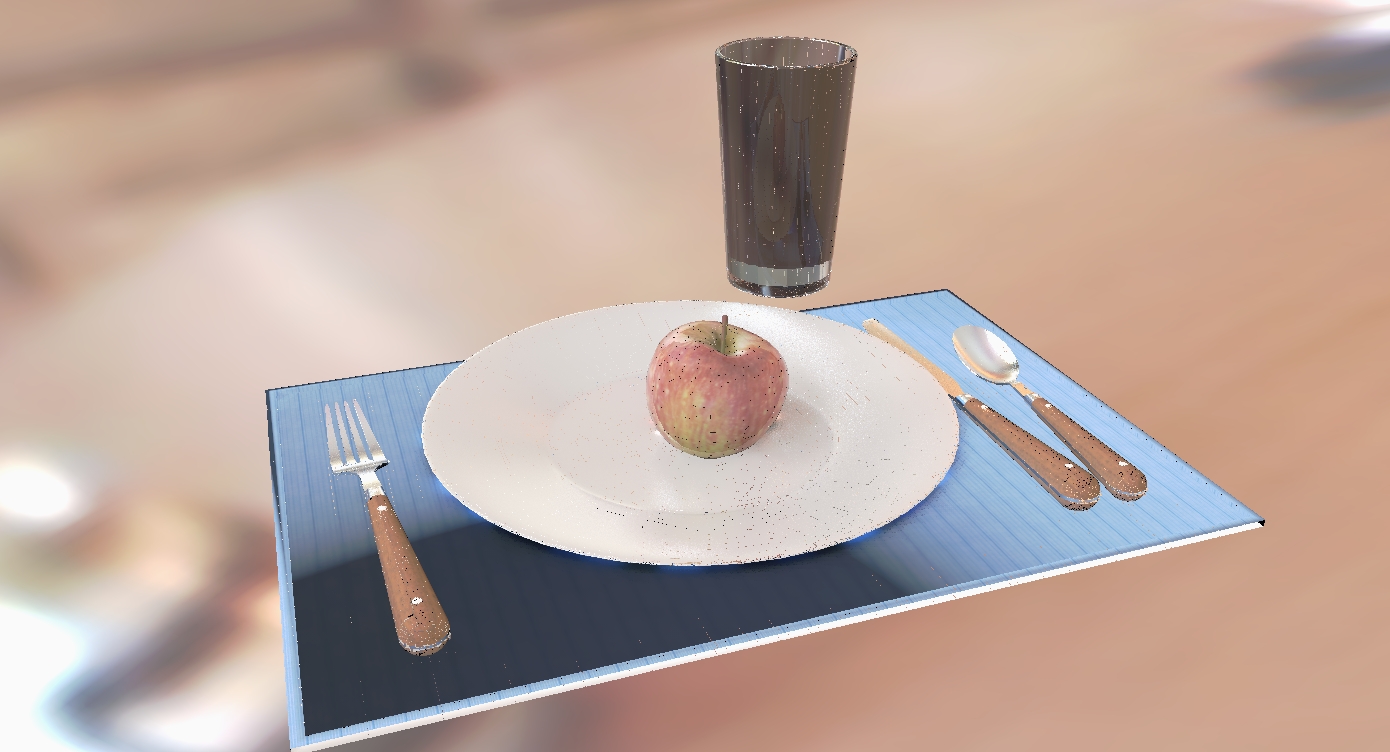
Here's a quick one with Vray using Solo's lighting and studio setup. Composition could be a little better, but I'm pretty happy with the materials.

-
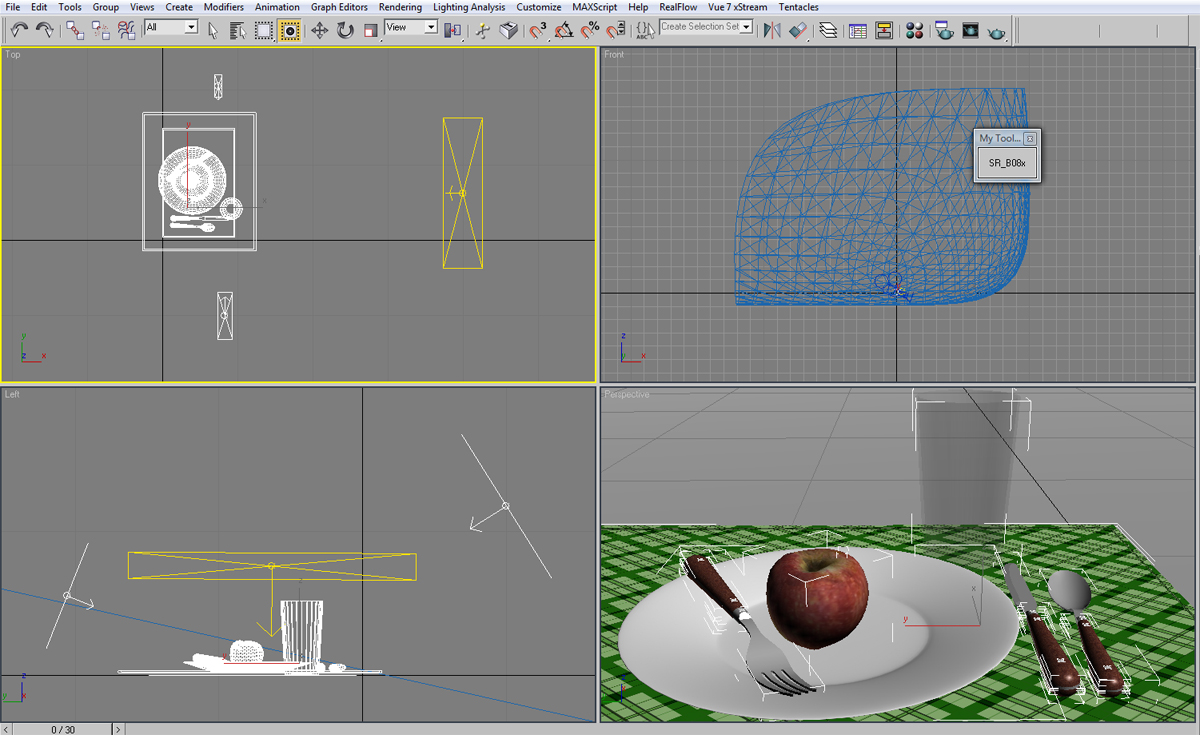
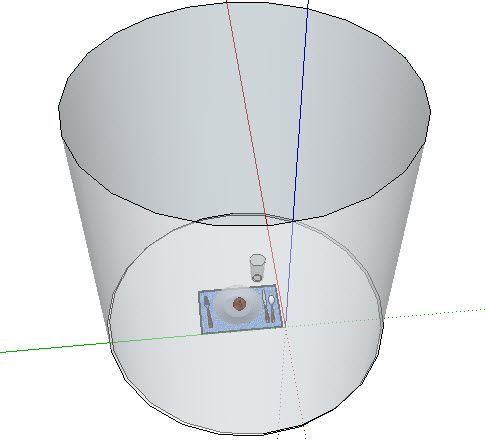
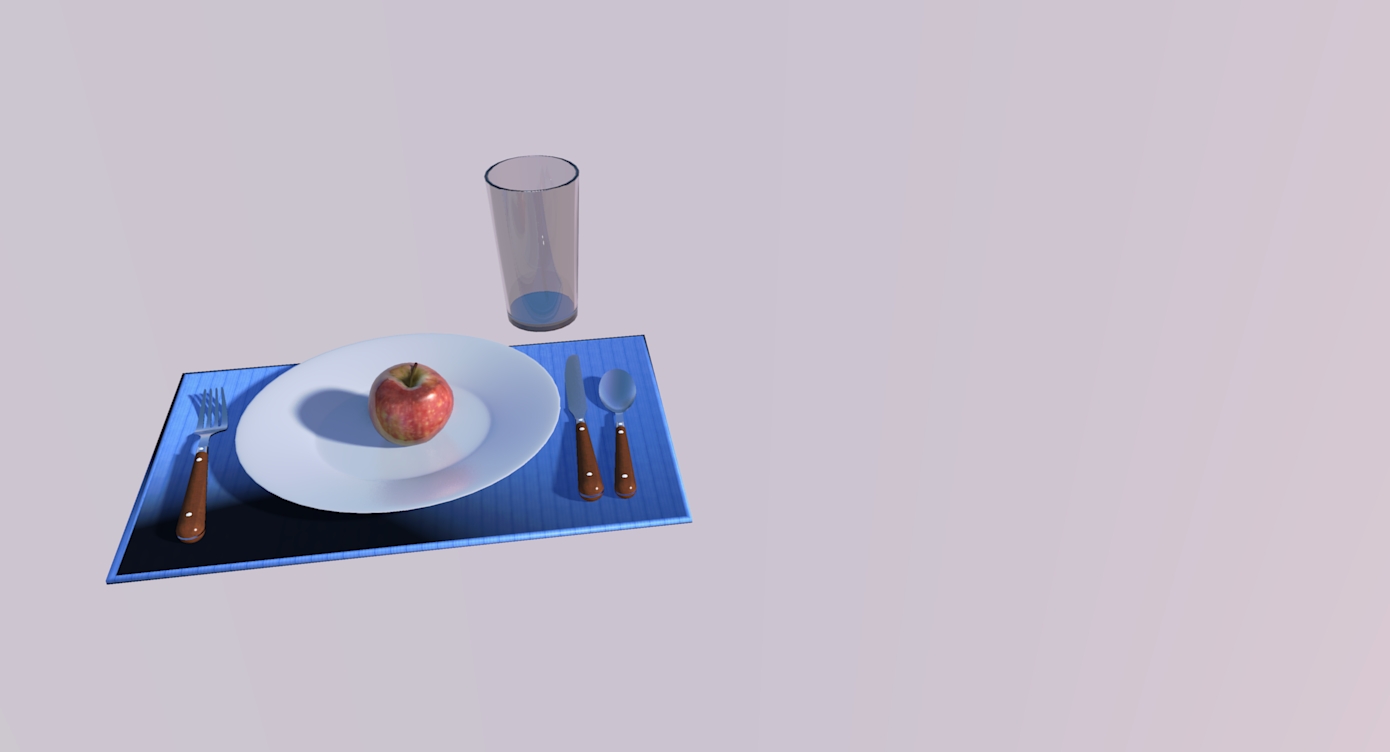
Next, I tried placing a cylinder around the scene and marking it as a light.
Not as good as the "Studio" Solo provided. But a lot simpler to model, and I wanted to see what it would do.
The cylinder is marked as "invisible", so it created lights and shadows, but does not appear in the model.
Here is the result. I think the lighting is too "flat", as you might expect from a symmetrical light source.
Al Hart
IRender nXt from Render Plus -
It's always difficult to explain certain render tricks on a generic basis as every render app has it's own ways of achieving certain results and they often even use custom terminologies.
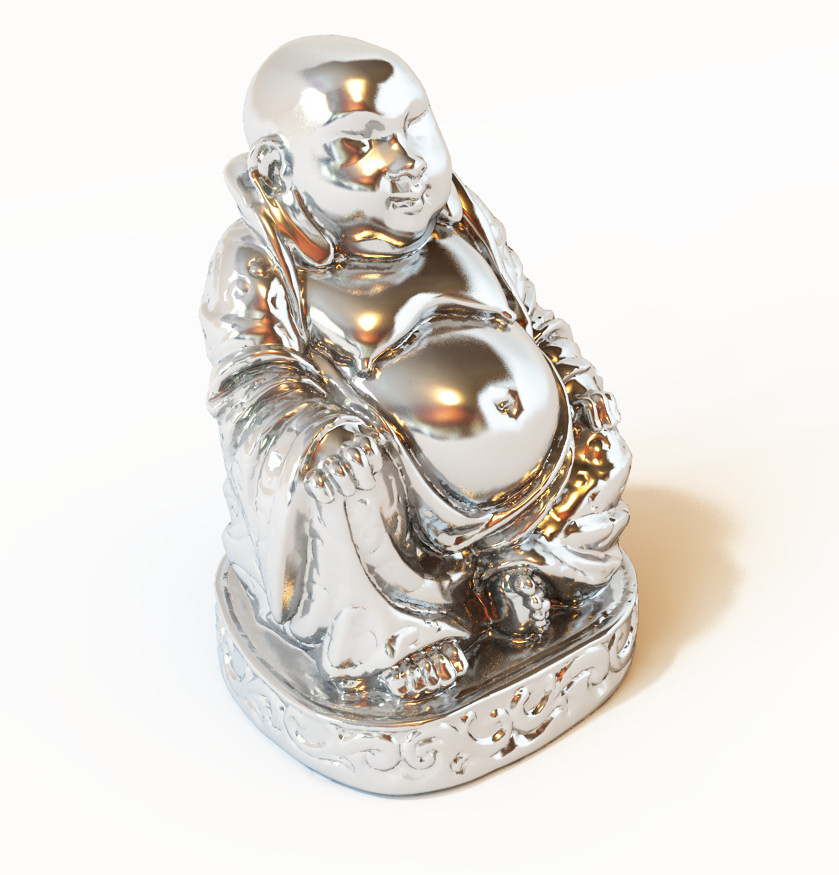
To highlight the Image based lighting again I used a different model, one with a little more reflection and detail as seen below of the SU model. I used the studio setup as described on previous page.
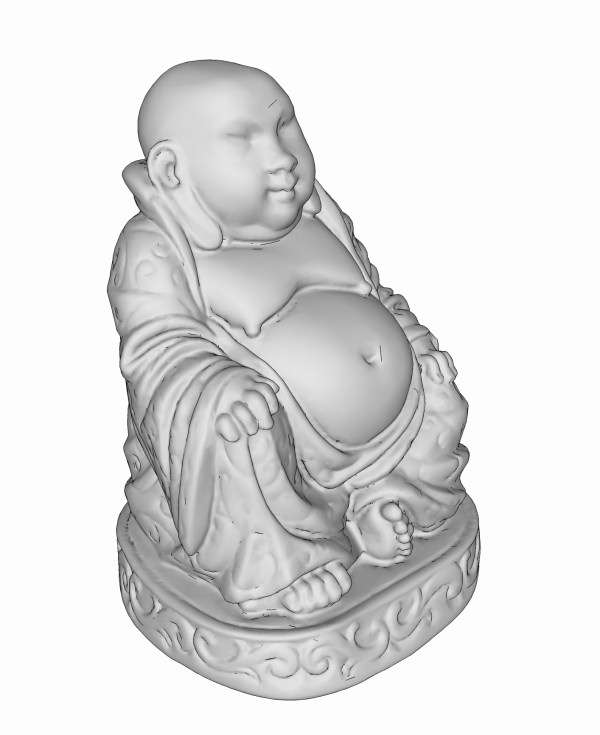
In the first render I used no HDR image, but only a basic sun with soft, light shadows. I made the background color white, notice that the metal looks lifeless and the reflections are very bland.
[attachment=2:1dvi6bu8]<!-- ia2 -->buddha no hdri.jpg<!-- ia2 -->[/attachment:1dvi6bu8]
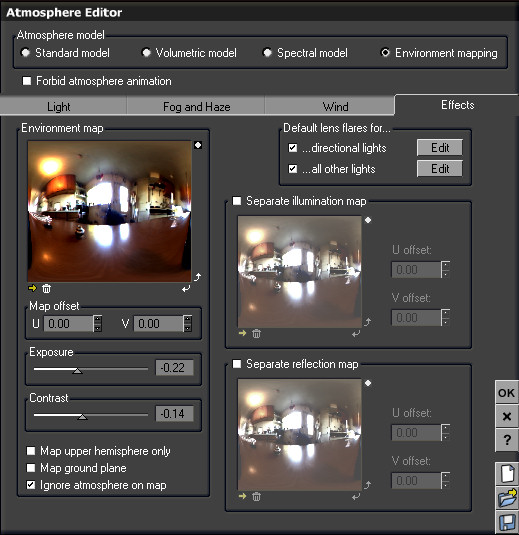
Then I added a HDRI, here is my setting for the folk that use Vue.
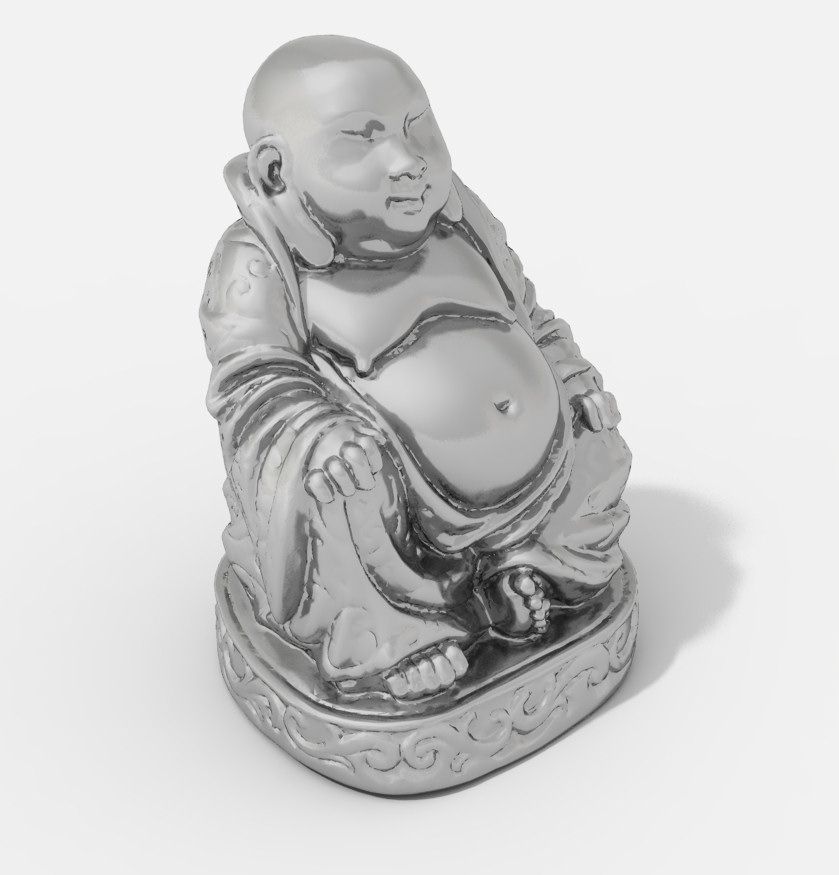
[attachment=1:1dvi6bu8]<!-- ia1 -->hdri settings.jpg<!-- ia1 -->[/attachment:1dvi6bu8]And the result, as you can see the HDR image give the Aluminum statue a lot more interest and detail.
[attachment=0:1dvi6bu8]<!-- ia0 -->buddha with hdri.jpg<!-- ia0 -->[/attachment:1dvi6bu8]
-
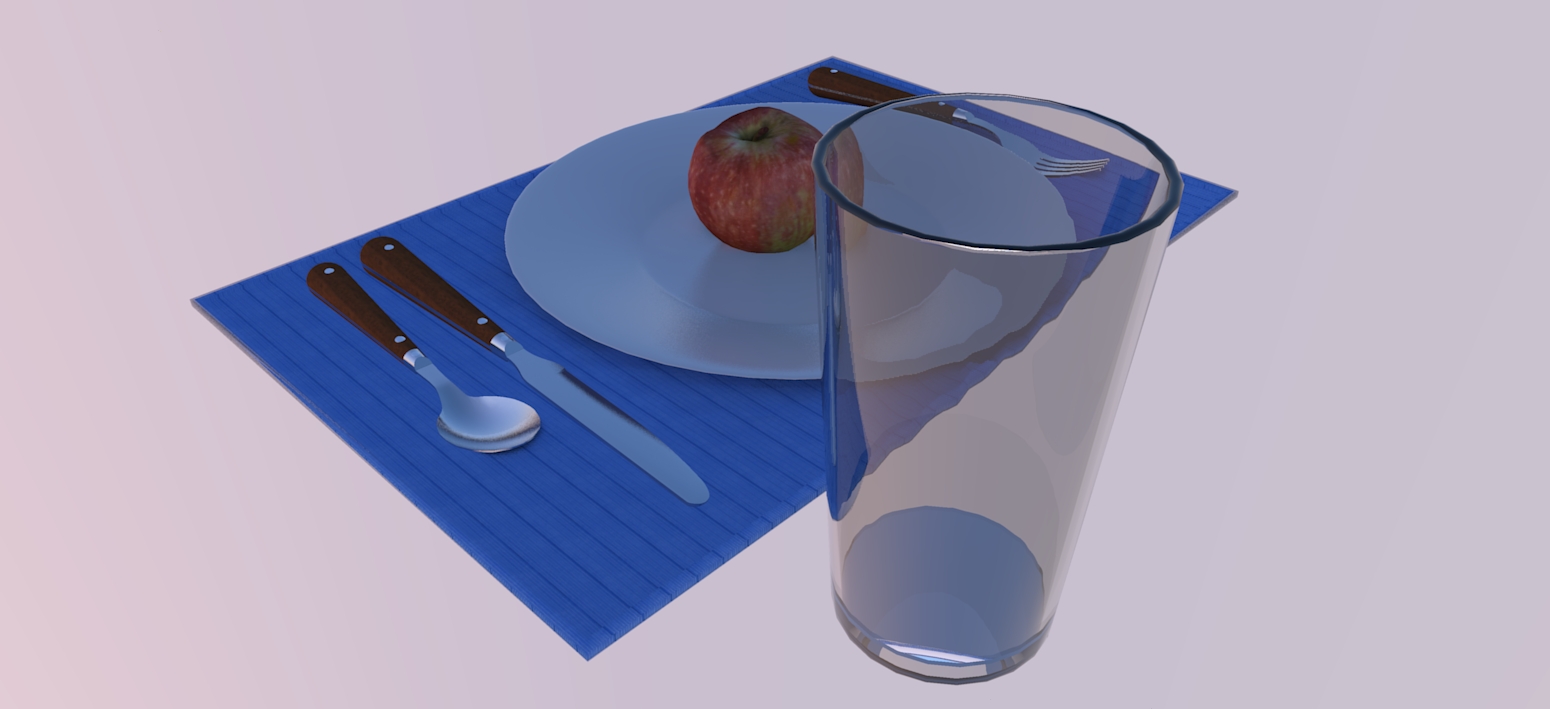
Solo thanks for all the information about setting up a still life! It was really helpful to read some of your tips.
This is a kerkythea effort using a 100 passes of MLT. Still needs work but it was educational....
-
@tallbridgeguy said:
Solo thanks for all the information about setting up a still life! It was really helpful to read some of your tips.
This is a kerkythea effort using a 100 passes of MLT. Still needs work but it was educational....
You have setup good transparency and good reflection. I think the next step is to find something to reflect.
Instead of the HDRi which has been shown a lot in this thread, you might try placing some interesting geometry somewhere where we can't wee it, but where it will provide reflection. (This can also be done by placing an offscreen image somewhere)
Al Hart
IRender nXt from Render Plus -
Here is my first effort - I down loaded the studio set up but hadn't a clue what to do withit so this is a materials application only - any tips on this HDRi thingy and studio set up anyone i.e a step by step , blow by blow how to do it workflow - and please, for the love of God (allah etc, etc....) keep it in a language that an irishman can understand!!!!!

-
@dermotcoll said:
Here is my first effort - I down loaded the studio set up but hadn't a clue what to do withit so this is a materials application only - any tips on this HDRi thingy and studio set up anyone i.e a step by step , blow by blow how to do it workflow - and please, for the love of God (allah etc, etc....) keep it in a language that an irishman can understand!!!!!
What rendering engine would you like help with?
Al Hart
IRender nXt from Render Plus -
Twilight Medium+ with no studio
Twilight Medium+ with studio
Thanks Al & Solo for the best Workshop yet
-
Hi Al
These rendering discussions are going way over my head at the minute - where do I need to start - photography, lighting, I dont know!!!- I have bought Twilight and the trial version of podium. I also have purchased Piranesi but I dont think it is suitable for PR renderings.
I would like someone to tell me of a good source of info in print or online where I can go and understand what is required to produce good images. You guys are amazing but to be honest I cringe when asking some of these questions and it puts me off participating in the forum quite a bit. Please give me some references to material where I can go off and get the basics of lighting, etc understood before I come back to bother you guys.
-
Dermot
For the above mentioned exercises you firstly need to use a renderer that is capable of achieving these results.
Twilight is capable of using image based lighting as well as shadow controls, unfortunately Podium does not have anyway of using image based lighting nor can you turn shadows off and on with omni's, which IMO disqualifies it for studio type renders.Do you have a copy of the Twilight manual? if you do go through it and see the sky probe and spherical sky explanations first, that will give you a guide as to how to apply HDRI's.
-
Cheers Solo
As you can see from my earlier post I tried the still life using twilight with preset Medium +. I have watched the Twilight tutorials and have gone through the manual and I understand that you apply materials and that you adjust the properties of those materials to get different reflections, shine etc.
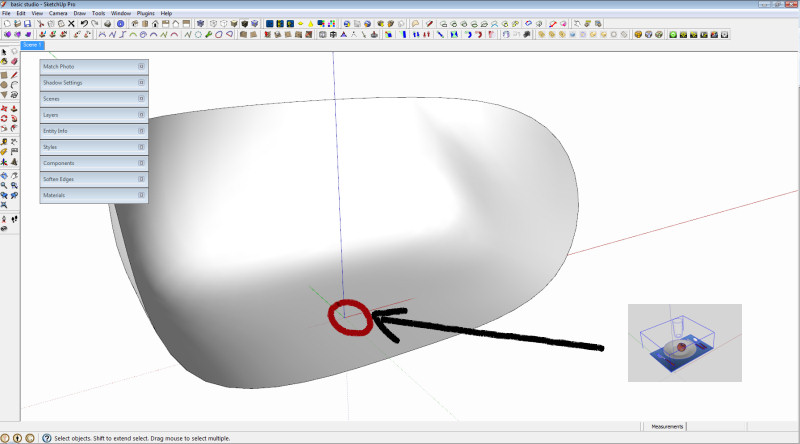
What I do not get is the terminology and how things work. I downloaded the studio set up you kindly posted into the still life model and it took me 10 - 15 mins to finds the bloody plate because the studio was so big!!! Are you getting some idea of how far down the food chain I am here!!

When HDRi comes into it - how do I put that into the mix - how do I place that into the model to give of light - do I apply it as a texture to a face that I create in the model?
These are the really dumb ass questions I need to ask??
-

I forgot about that, yeah the studio is large, purposely also, see how small the place setting is in my version.
-
@dermotcoll said:
Cheers Solo
These are the really dumb ass questions I need to ask??
Don't be put off. These are the questions the Workshop was designed for.
We want to let you see what others are doing. And we want to help you learn to do it yourself.
You might back up a bit, and start with Solo's first example.
-
Add the reflection properties needed to your model.
(Most renderers can grab colors, textures and transparency directly from SketchUp. But you need to add reflective properties yourself - since there are no reflective settings in SketchUp. -
Then try solo's suggestions of shining 3 lights at the place setting.
Don't worry about much else yet. If you are just starting out, you want to see how various things work - not just try for the best rendering right away. You can achieve some very good studio effects with this model and three lights.
Al Hart
IRender nXt from Render Plus -
-
Hi Dermot,
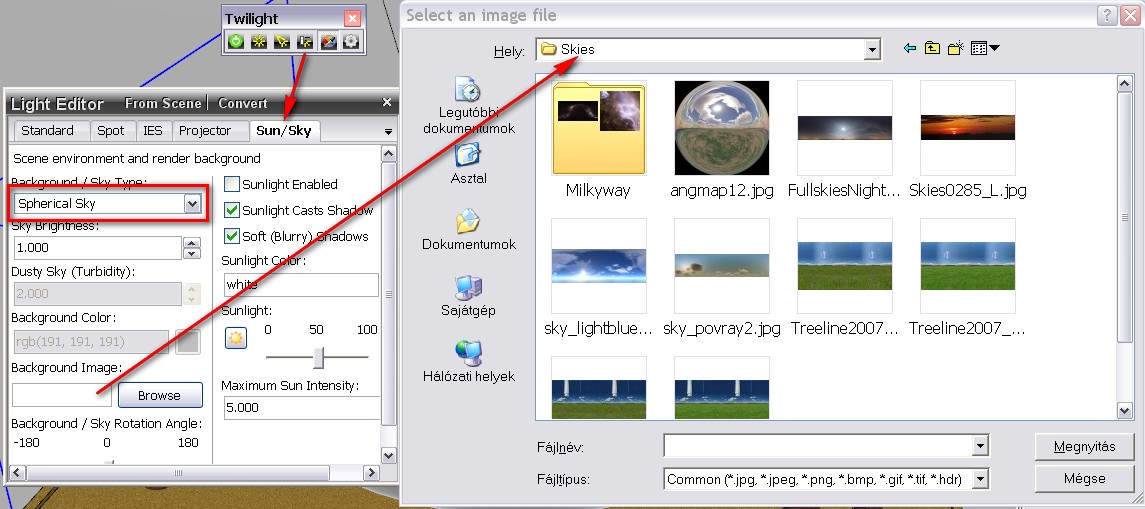
You just save your hdri (or any spherical or hemispherical) images into a convenient folder (not to "far" from your SU projects for easier browsing).
Now open the Twilight light editor (left of the material sampler button) and change the physical sky under the last tab (sun/sky) > and the top left pulldown menu is background / sky type. Now set the background image type and then below, browse to the folder you keep these images and select the one you want to use.
Edit - also notice that I disabled the sun so that only the image would light the scene. This can be both good or bad - depending on what you want.
-
Attached is a .hdri for you to test, it's the same one I used for the Buddha on previous page.
Unzip and put in a place you will find (best make a folder for all your future .hdri's)
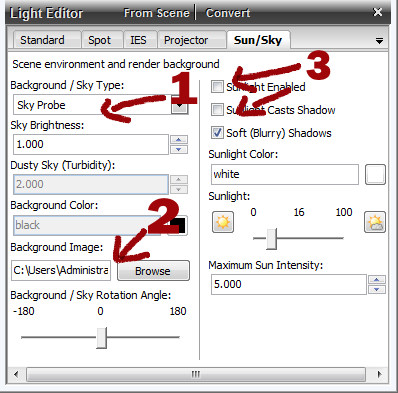
Then in the Twilight light editor set up like below.- select sky probe
- navigate to the hdri
- uncheck the sun and shadows
Now do a test render and from there you can play with the rotation, textures, etc.
edit... beaten by Csaba.
-
Thanks guys
Did that and I didnt see the hdri image anywhere in the model - should I have seen it and if so why didnt I?
I just did a quick render and there is something showing behind the studio set up - I take it I should have deleted the studio setup if Im using HDRi?
-
The studio is there to block the HDR image and only allow the reflections and illumination of the HDRI, you should be able to see the reflections on any shiny surface now.
-
Hi SOlo
If the studio is there to BLOCKthe HDRi image - how can reflections and iluminations from the HDRi actually effect / affect the model. I am cooking an image in Twilight on Medium now and when its is finished I will post it - if you could point out what you mean on it I would appreciate it. Slainte.
edit - what a d**khead - I deleted the studio on this one so I am seeing the HDRi image now all around the still life model. I will cook another when its finished and compare and contrast!!
-
Ah yes, the studio is only needed to
- have something "underneath" (otherwise you won't have shadosw cast anywhere) and
- to have something that - by reflecting the light coming from anywhere - gives a nice, global illumination to the scene.
Hello! It looks like you're interested in this conversation, but you don't have an account yet.
Getting fed up of having to scroll through the same posts each visit? When you register for an account, you'll always come back to exactly where you were before, and choose to be notified of new replies (either via email, or push notification). You'll also be able to save bookmarks and upvote posts to show your appreciation to other community members.
With your input, this post could be even better 💗
Register Login


Advertisement