[Tutorial > Texturing] Creating an arch material (SU 7+)
-
Use Thom's brilliant UV Toolkit plugin to UV map your texture onto the arch properly. In this tutorial, I used the arch I posted in his plugin topic here.
Now with the improved image manipulation in SU 7 (sorry those who still use earlier versions) we can make a unique, arched material from those little bits we used for the arch and then get rid of the dividing edges thus lowering our poly count on one hand and be able to re-use the arch material in other projects (provided we need the same size of arch).
Anyway, the steps:
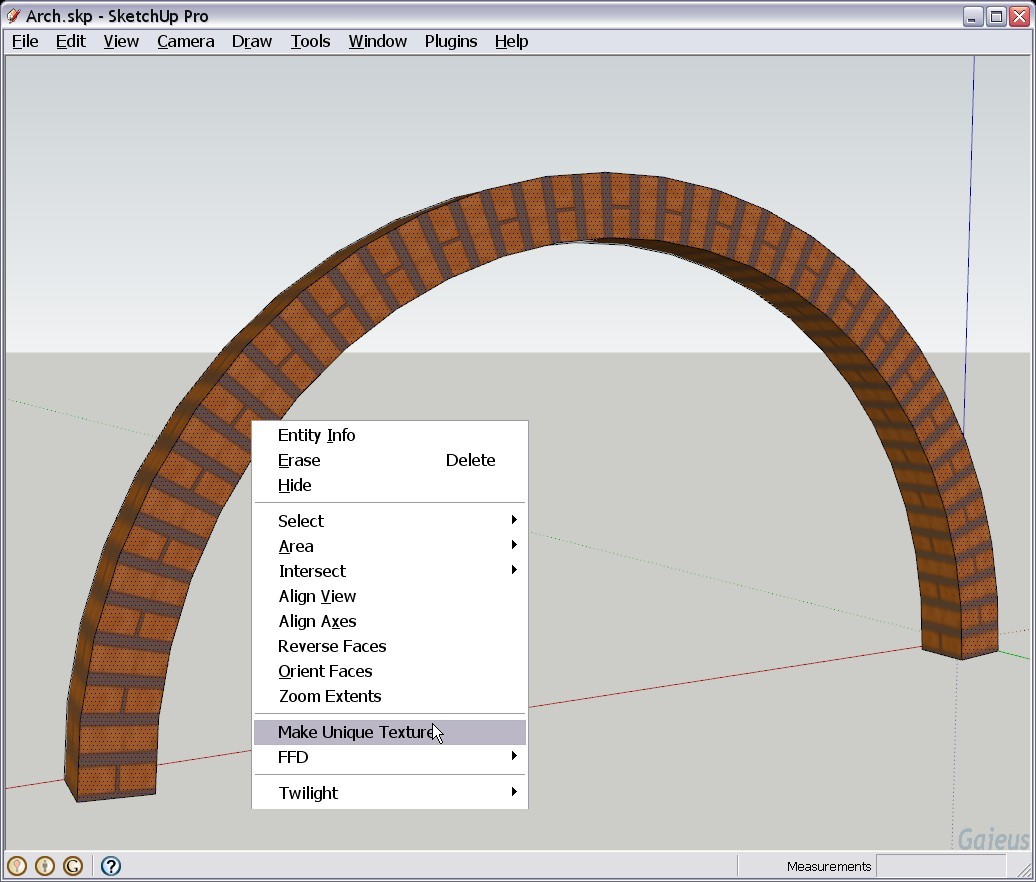
- Make sure hidden geometry is turned OFF, right click the surface with the tiny facets and the individual bits of material on them and Make unique.
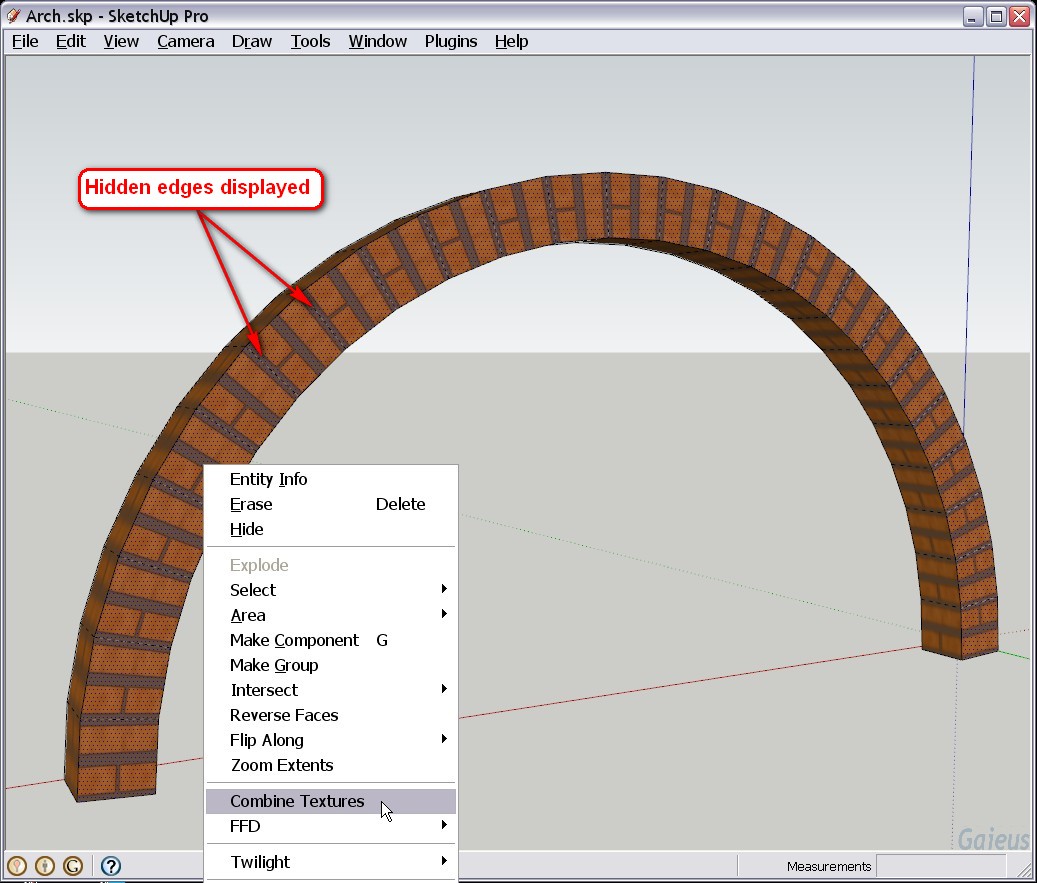
- Now while the whole surface is still selected, turn on hidden geometry, right click on any of the selected faces and Combine textures.
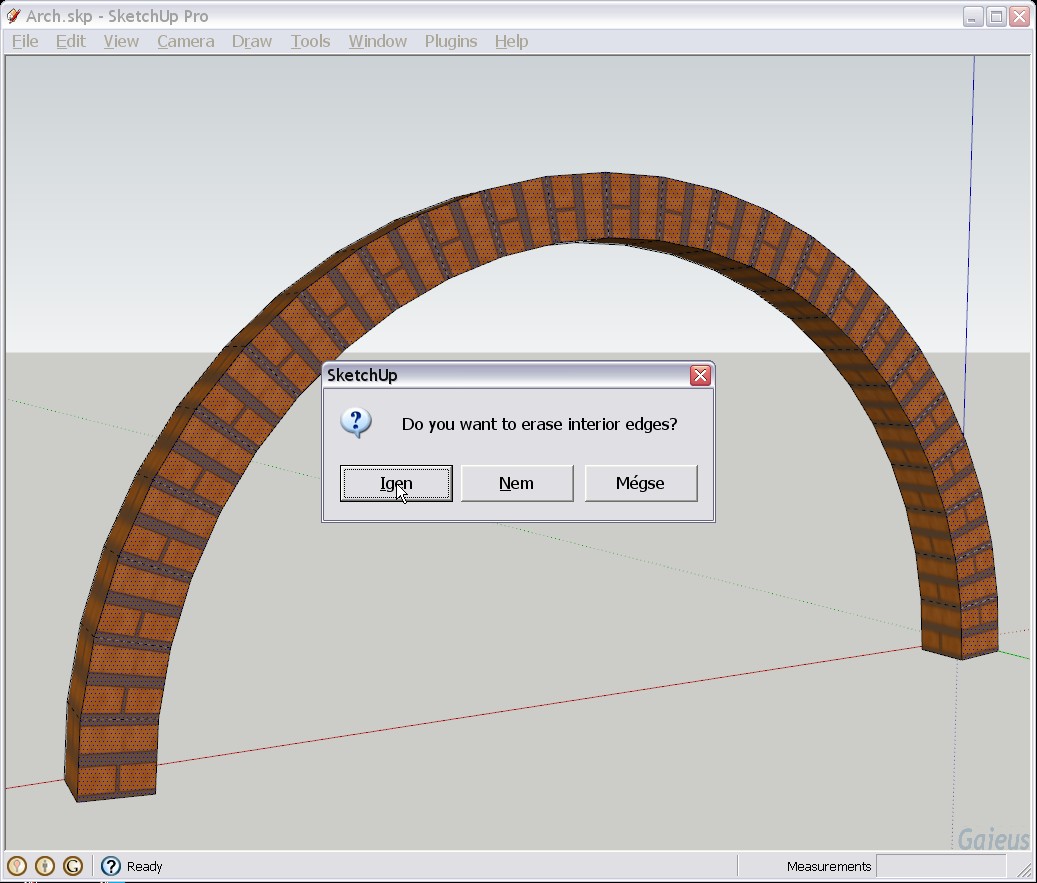
- SU will prompt you whether you "want to erase interior edges" (which has so far divided the facets of the surface adding quite a lot to the geometry) - answer YES.
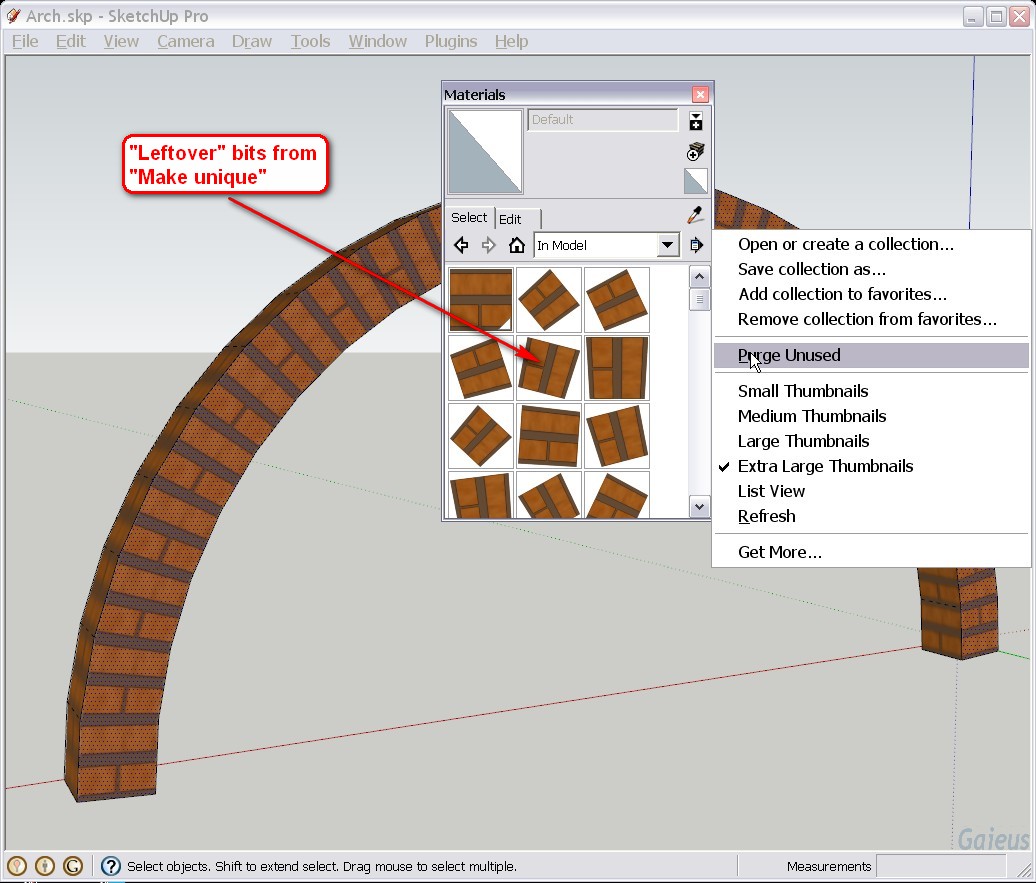
- Now we need to clean up the mess we made here when making the little texture bits unique - so go to your Material browser and Purge unused.
- And voilá - here we ended up with a single face and with an arch material perfectly UV mapped on it. SU will simply name it "Material" but in order to know what we have in the model, it's better to rename it (see it attached below).
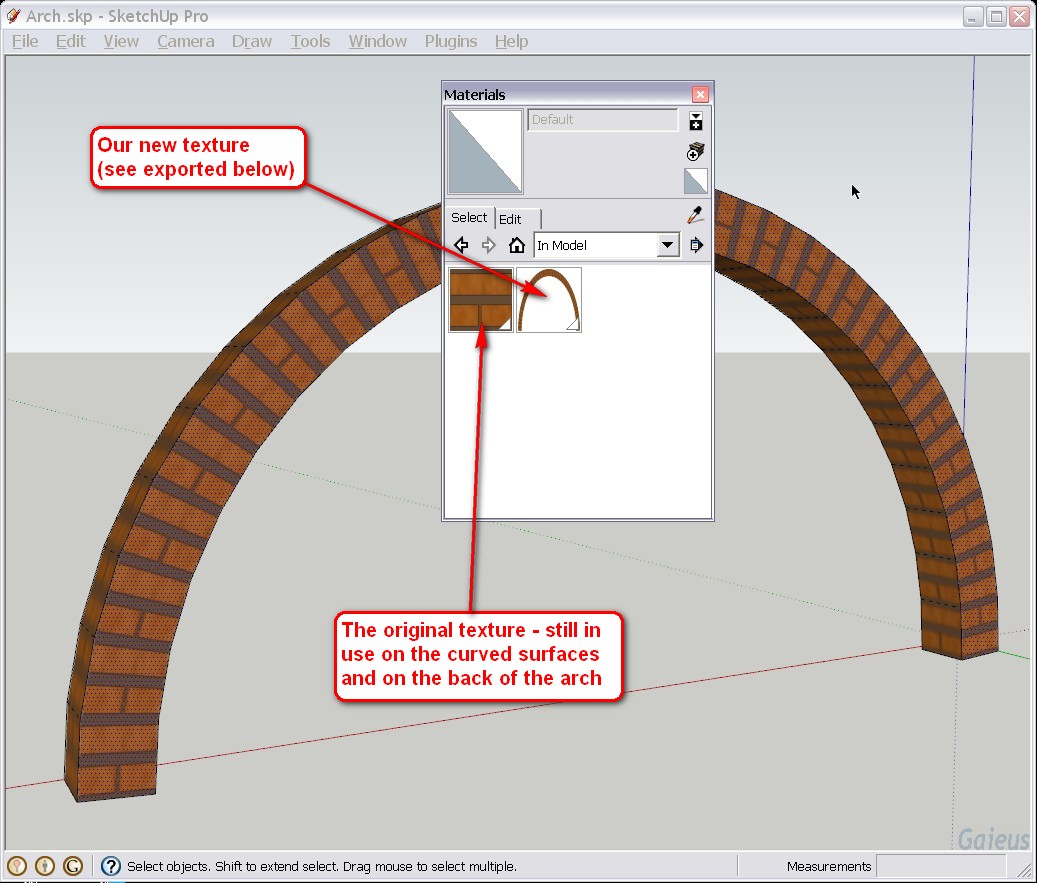

Here is the final result. Note that I only did the front of the arch so you can compare with the back. -

Cool!
Did didn't know the Make Unique feature removed the interior edges - very interesting. -
No it doesn't. It's the "Combine textures" feature in step 2.

-
 I intended to say that - but my brain doesn't connect all wires correctly before I've had my morning tea...
-
Wow! That was exactly what I needed

 Thanks!
 -
Thanks Aidus and James!
In fact, the idea came to my mind while enjoying a couple of shots of Absinth in my regular corner bar last night.

-

Absinth ... shivers
-
Many thanks! Keep running on heavy fuel!
-
Update:
Step 1 is not needed at all. If you start with Step 2, the UV co-ordinates applied on the facets will simply be "baked" into the final texture.
Of course, therefore Step 4 is not needed either.
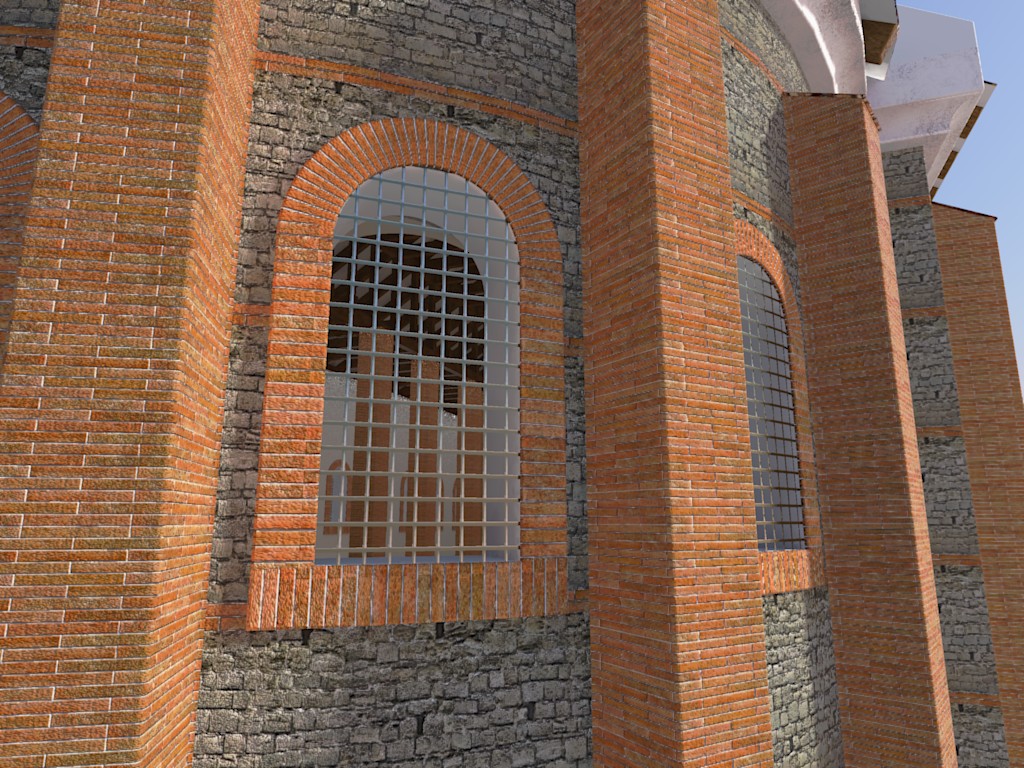
Then, if you use the image as projected, you can convenioently apply it on curved surfaces as well - just like in the picture below.
-
Nice model - got some more views?
-
It's really a WIP actually. There are like 5 more (different size) arches to texture then the walls inside some of the roof etc. Here are some WIP images though but really, it's not a gallery stuff yet - mostly just texture experiments (well, at least from a certain point as the first ones are only clays)
-
Excellent tutorial Gaieus! Thanks
As for Absinthe....it's illegal here for some reason? You can get it but it ain't served in Pubs. I'll stick with Póitín to get my kicks!
-
Very nice to know. Had I read it before, I would have used it for a project i was on to.
If you rotate 90 degrees the concept, you have baked textures for circular walls and pathways

Anyway, speaking of drugs, I'll go make some coffe!!
-
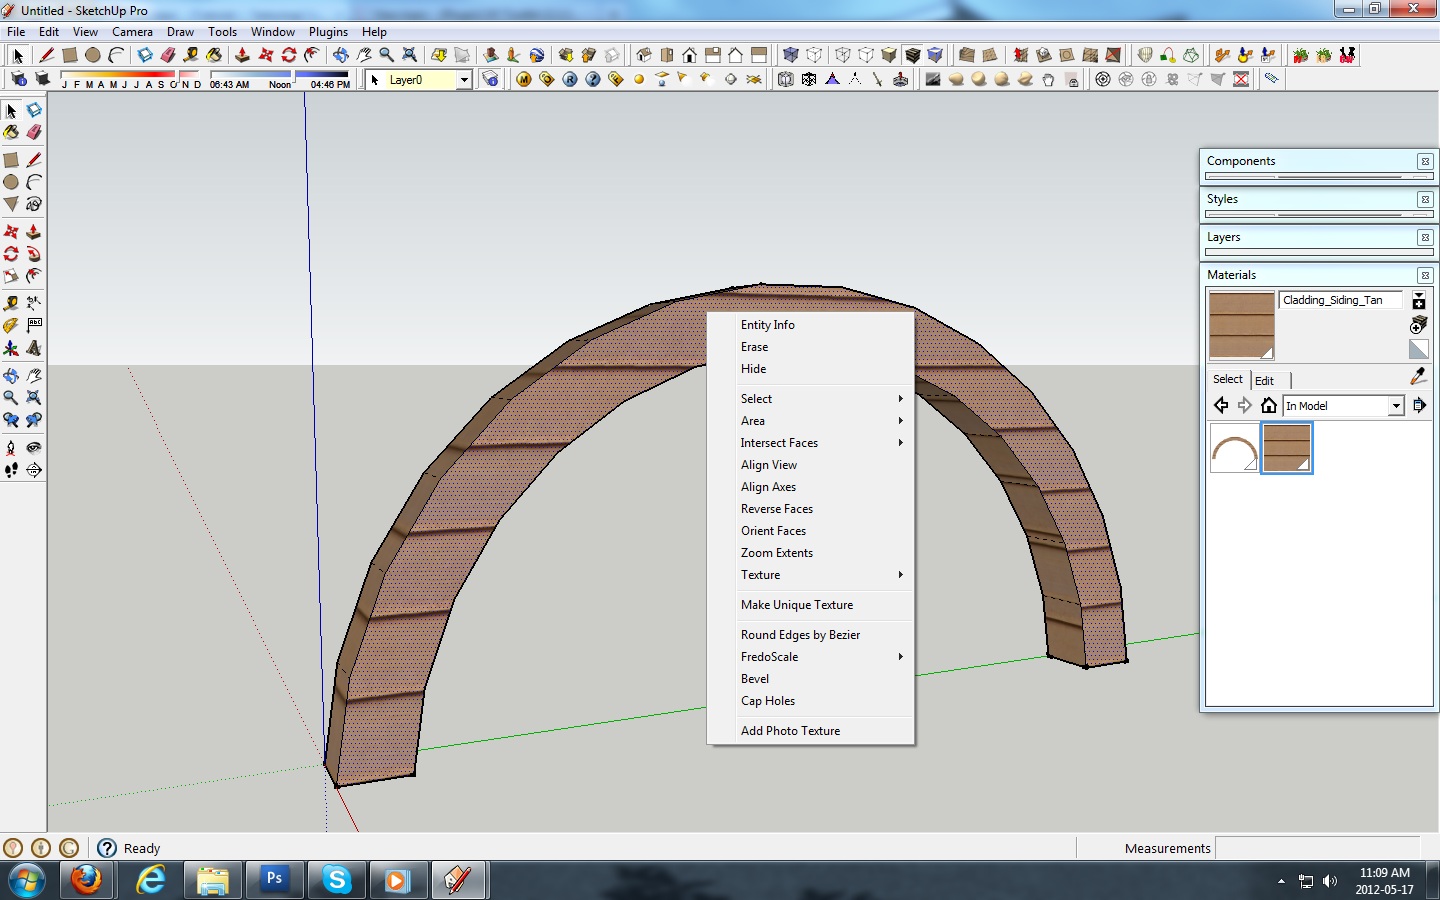
thanks Gaieus.very useful technique..but as i followed it step by step as you did,in the 2nd step i don't have combine textures option.do i have to use plugins to have that.
 please help
Shrijan
-
It seems that your arch face is not even divided so that you could combine the textures. In fact, the texture is not even arched.
Advertisement


