The "Duh!" thread (aka the Doh! thread)
-
@david_h said:
Thx TIG . . .unfortunately the Shortcut will take me to the menu, but I still have to do the manual switching to color by axis. .. which for as often as I use it is okay, but it is kinda frustrating that they fix what ain't broke.
I don't normally need to do this as I don't use Color by Axis very often but I just set up a keyboard shortcut for View/Rendering/Edge/By Axis and it toggles between All Same and By Axis with no problem.
-
yeah. . . that's the way I used to have it. . .but in the new View Pull-down... View>Rendering>Edge by Axis is no longer there. See pic above. Hence the problem. the closest Shortcut I could find was the one that takes me to the styles menu and then I still had to click.
NO worries. i don't use it that often either , but it's handy when I need to check things.I'll find a work around I guess.
-
I know we are in the Doh thread but.... Doh. David, Dave is saying use the shortcut settings that you will find in Windows/Preferences/Shortcuts to set a keystroke to that specific visual setting that you want.
In other words, make a shortcut so when you hit a key combination of your choice, or even one key, the style will change to Colour By Axis.
-
okay. . .I'm not a wizard here. It seems to me I have done that. I obviously am missing something. Not ashamed to admit it. Check my posts above to get the history of this and then I am more than happy to be schooled.
-
David, I'm not trying to school you but here's what I have.
Keyboard shortcut is set.
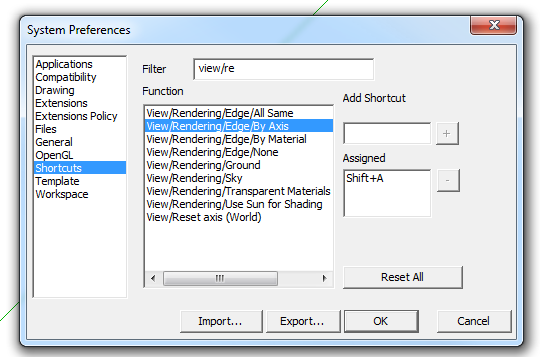
Edge settings for my normal default style.
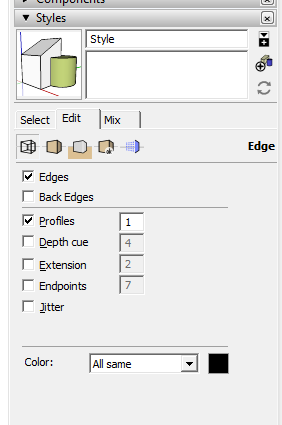
After hitting Shift+A to toggle the edge color by axis. It even shows the on axis edges colored in the thumbnail. Note, I only chose that shortcut because I knew it wasn't already used.
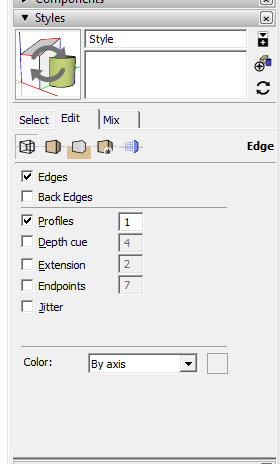
It toggles back and forth as expected.
-
Is this what you want? Sorry I did ctrl e rather than your preferred ctrl shift a.
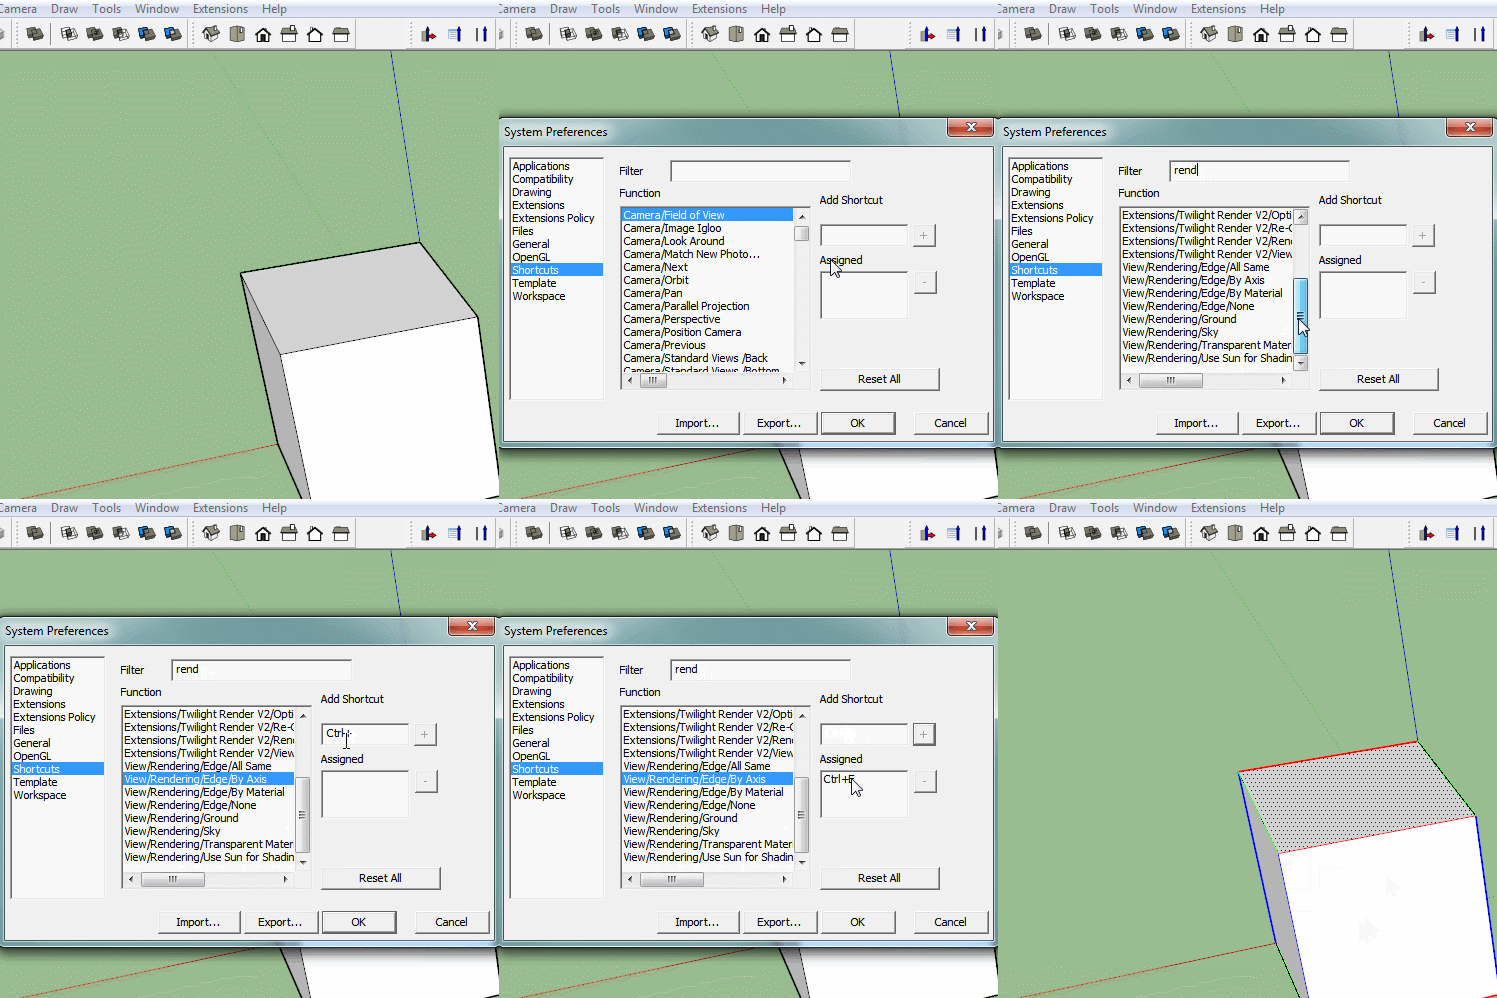
-
Dave R and Box. Sorry. DIdn't mean to sound defensive or whatever. I need to turn in my Green 'Top Sketchucator Badge" it was erroneously bestowed anyway.
I will re-look at this as per your hints. actually, I am not Skupping as much as I used to so I forget a lot of things.
again. . it's not keeping me up at night. . .yet
But It would be nice to get this resolved.
thank you so much.
D
-
Unsure if the right place to ask but I got a little issue with the new reference point stuff in Sketchup 2016.
Previously whenever we reference something, the cursor / protractor will go to the point of transform ON the object I want to adjust.
But now in Sketchup 2016, when I try to rotate something, I got mighty confused as the protractor appear at somewhere else, stuck behind/inside objects, parallel to the referred surface. INSTEAD of going to the point of rotation.
Is there a setting or something to go back to the old way?

-
In your screen shot from 2016 you have back edges turned on. Do you get the same result if you have them turned off?
-
@dave r said:
In your screen shot from 2016 you have back edges turned on. Do you get the same result if you have them turned off?
Yes I have to turn on back edge to even see the protractor which appear behind/inside other objects.
If I turn off back edge then I can't see the protractor in this example as it appear behind the cylinder. -
My most recent Duh! moment was finding that in the VCB (measurement field)if either of the two lengths was what you need just type the separator comma followed by a number or a number followed by the comma and Enter.
-
@bob james said:
@bob james said:
@jql said:
Apologies accepted if you post it on the Duh thread!
So here goes my duh:
@bob james said:
This seems so simple that it must already exist, but I could not find it.
For example: I want to make a 4" square post at a specific spot. If I wanted a round post there I would just select the circle tool, place the cursor at the point and drag out (or put a value in the VCB).
I'd like to be able to do that for a square: select tool, place the cursor at the point and drag out (or put a value in the VCB)
I apologize if this already exists
@jql said:
LOL bob you can make your life difficult if you draw a 4 sided circle and explode it.
Or you can make your life painless if you draw a 4 sided polygon without exploding it.
Those two are native tools. Do you forget sketchup also has native tools?
Your suggestions create 45 deg rotated squares.
Why can't someone just make a simple extension to make an orthogonally positioned square starting from a center point?How about this?
Use the four sided polygon as suggested. Place an initial polygon on the line of axis (your fence line?) with the placement/inference line on this axis. You now have a rotated 4 sided polygon at 45 deg to the axis. Place the actual fence post polygon to the required centre spot and use its placement line to pick-up a perpendicular inference from the initial polygon. Your fence post is now square on to the fence line. Hope I have placed this reply correctly.
-
Okay. serious gob-smacking d'oh here. I got it to work.
Thanks. Although. . I thought I did all this stuff. But whatever. .it works now.

-
@boofredlay said:
One for me was when Gaieus was from Gaieus' talk at the Basecamp (I saw the video) and using the rotate tool.
When you click the rotate tool and click the rotation point, don't let go of the mouse button... drag it out to either red or green (or any other snap point you set up) then click to start. This relieves any need for a vertical plane to get your rotation set up.
See image for example.
[attachment=0:1ay9p7c2]<!-- ia0 -->ClickHold.jpg<!-- ia0 -->[/attachment:1ay9p7c2]
I have been using SU since V2 and never knew that until last year.
- F##king 2009! I've been modelling with SU since 2006 and didn't know about this feature until today

- F##king 2009! I've been modelling with SU since 2006 and didn't know about this feature until today
-
Recent duh-moments in my modelling - watching Box's doodles to find out I've been using SU the wrong way for quite long. Again and again

-
Modelling small parts
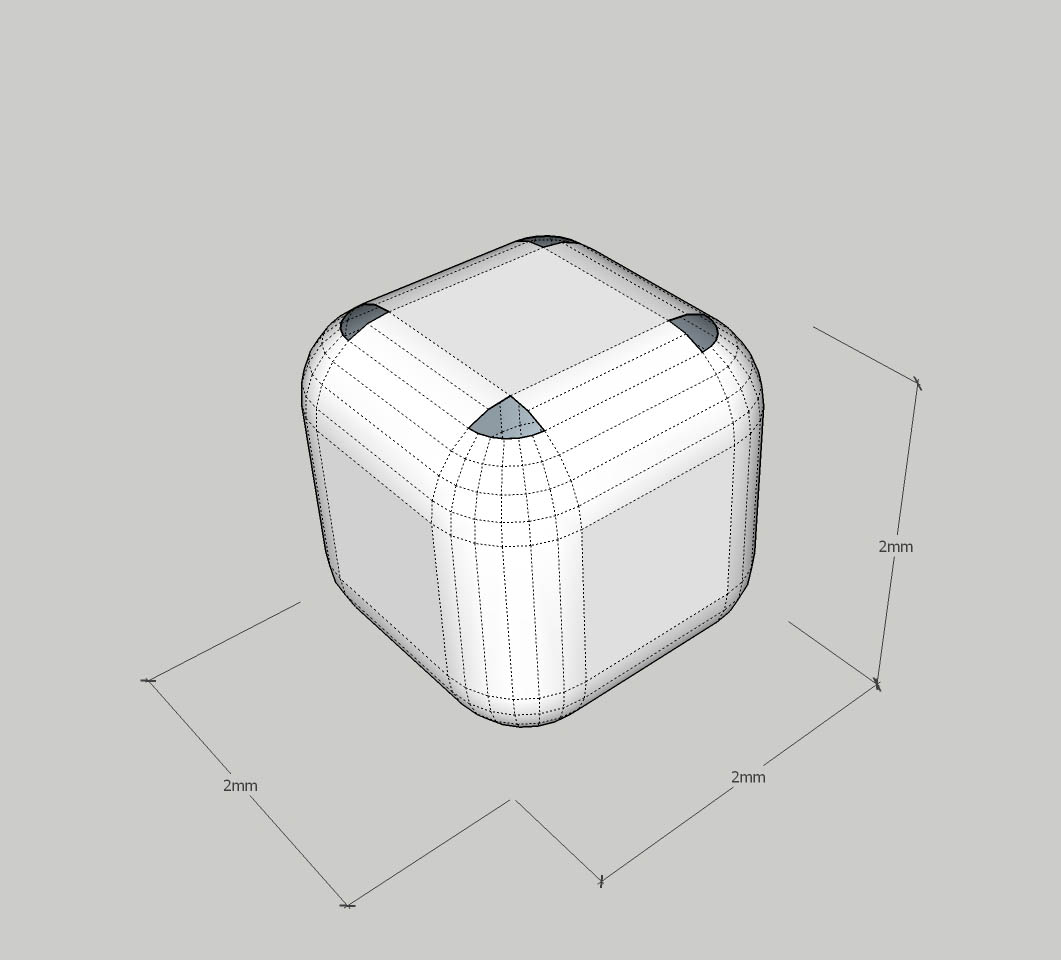
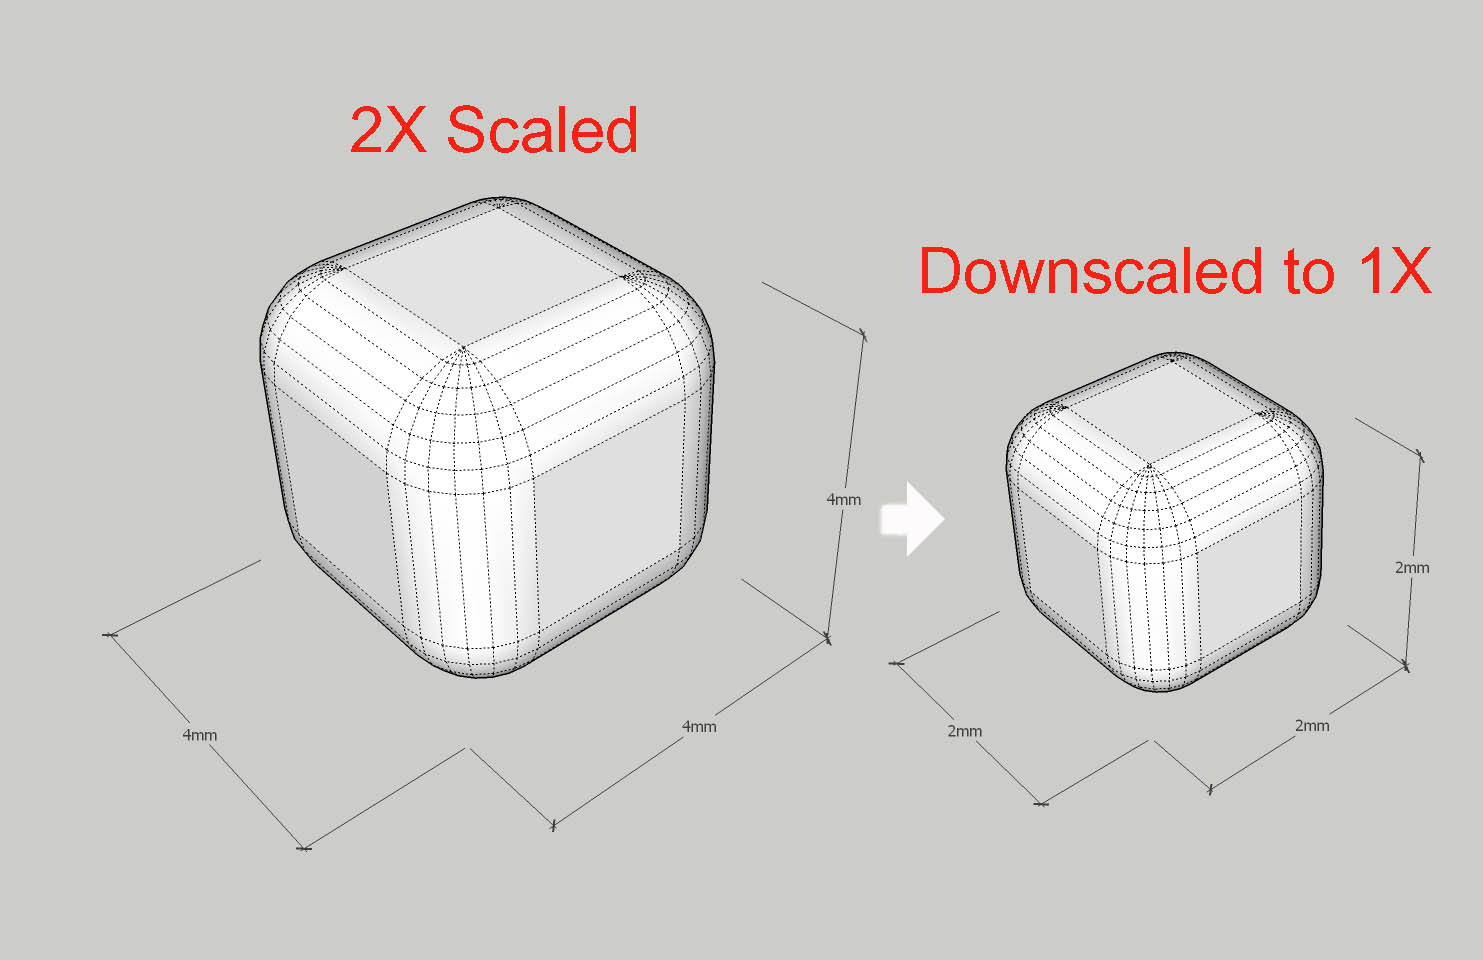
I´ve had som problems with curves when modelling small parts. Rounded edges/corners will not close. I found a workaround that works: Scale the model two times or more, do the rounding with double radius, -then scale down 0,5 to normal size.
-
@unknownuser said:
Modelling small parts
I´ve had som problems with curves when modelling small parts. Rounded edges/corners will not close. I found a workaround that works: Scale the model two times or more, do the rounding with double radius, -then scale down 0,5 to normal size.
 Yep. That's a standard recommended procedure for drawing small items in SketchUp. I use a slightly different procedure that works better for me but yours is the method most people seem to use.
 -
@dave r said:
 Yep. That's a standard recommended procedure for drawing small items in SketchUp. I use a slightly different procedure that works better for me but yours is the method most people seem to use.
I bet that method evolves making turning your geometry into a component (wich is default work for you) copy the component to the side and scale it up, work on the scaled up version and the correctly scaled version will update simultaneously.
Repeat the process as needed!
Right?
That's what I do too, even if I have to turn my groups into components. (Sorry Dave, but I simply love the components vs groups discussion!)
-
you should have a group hug
-

Advertisement


