Photo Match for Professional Architectural Photomontages
-
Hi all,
I have been using sketchup pro 6 for a while now and find it so intuitive and easy to use! I am a town planner and GIS Specialist by trade but we have recently decided to expand our skills to photomontagin services.
While Im pretty sure that 3DS Max is the industry standard for photomontaging work Im wondering have any of you used SkecthUp and its Photo Match option to do professional photomontaging for any of your clients? If so, do you think that it is accurate enough to hold up against one doen in say 3ds max and do you use other renderers within or after the sketchup modelling to improve the look?
I would really love to use Sketchup for this photomontaging but am a bit concerned as to its accuracy as it doesnt require camera location, focal lenght etc.
Thanks for your advice in advance!
-
Hi Harch,
Check this topic out:
http://www.sketchucation.com/forums/scf/viewtopic.php?f=81&t=13477Pretty convincing IMO.
-
@harch84 said:
Hi all,
I would really love to use Sketchup for this photomontaging but am a bit concerned as to its accuracy as it doesnt require camera location, focal lenght etc.It does, but it's determined by the way you set up the vanishing points. I've used it many times to set up accurate matches. But I don't like the Photomatch tool because I find it very awkward to match existing models to photos. It's preferred that you got a right angled corner with the photo taken about 45 degrees onto the corner. And that just doesn't work most of the times. More often than not I don't have perfect 90 degree corners and 45 degrees into the corner is not the position from where we want to present it. And that makes the matching more difficult. I much rather have 3DS max's method of placing matching points on the model, then their equal position on the photo and have the application work out the camera position from that. (Made a feature request of this.)
So yes, it's possible. But awkward.
-
We hardly have any "box" like buildings here so I don't really use it either (just tried out a couple of times to make sure I could if I wanted).
-
I am an architect involved with small domestic extensions and I am using it all the time. As thomthom says once you have created a model it is a bit tricky to then match it to a photo, but it is only a matter of technique. It is easier if you start with the photograph - but I nearly always forget to do that!
Here is an example
(the modelled and vray rendered part is the rear single storey extension)
David
-
That's a nice one!
In my work I only tried to use it once (I cannot attach it now) when from the remaining walls of a 16th century Ottoman mosque I had to do a reconstruction. It was merely to show how it would look related to its environment because we are hoping to rebuild it in reality (although later I decided to model all the surrounding buildings instead).
-
I've found that using the photo as a watermark in the background can be helpful in finding the angle at which to output your model graphic. It's not as accurate as Photomatch may be but it's helpful when combining your graphics in PS or Corel.
-
@unknownuser said:
As plot says the photo-match tool is not very efficient. Don't get me wrong SU itself is fantastic for photomantage.
@unknownuser said:
I much rather have 3DS max's method of placing matching points on the model, then their equal position on the photo and have the application work out the camera position from that.
The method above can actually be duplicated with SU and Corel and probably PS as well.
When I have very difficult mapping to do I take a shot of the piece within SU. I bring it into Corel set it down as a layer. I then creat my material layer over top and cut the material to match the SU image below. I import the texture and apply it....it fits like a glove and if not you can adjust it further by repositioning using the texture positioning tool.
I don't use Photomatch to map textures, but to match the camera so I can render the model in V-Ray and merge the images in Photoshop.
-
As dcauldwell said I think photomatch is really good for smaller buildings. I don't think that 3d Studio or AutoCad are significantly more accurate though when it comes to complex geometry. I tend to just go out with the camera and photograph every elevation I need and then apply them all as textures to an estimated or measured model. it takes longer but it is much more accurate
-
Now I am confused?
Are we talking about using photomatch just to extract textures, or photomatch to display a model in actual context? I thought the OP was talking about the latter. -
Yes, sorry, drifted away from the thread a bit there
-
@unknownuser said:
I would really love to use Sketchup for this photomontaging but am a bit concerned as to its accuracy as it doesnt require camera location, focal lenght etc.
Personally I wouldn't hesitate to use it for small or large buildings.
Although it doesnt require camera location, focal length etc, the technique it uses is equally as good - matching persective.
It gets easier to set up if the photo you are matching is taken at approx 45deg on plan, but clearly this is often not possible - so you make do.
As photographs are often flawed in some way (barrel or pincushion distortion) it still comes down to making final adjustments by eye.
For the record, the process I use is:-
a) on site take several photos, guessing at where you will prefer your viewpoint for the finished montage
b) create the model and match it to the photo in SU
c) render the model (I use vray)
d) export the render (I use png files)
e) Using photoshop (or equiv) paste into a new layer over the photo - sometimes you need to create further layers and copy foreground info so it displays in front of the rendered model.Its dead easy once you've done a couple of times!!
David
-
dcauldwell, amazing image. it took me quite a while to understand which part is not real

-
I found and saved these a while ago, very good show on how to set up perspectives (as tought in the old school days).

Cheers Jeff
-
Cool tuts!

Will be a classic!
-
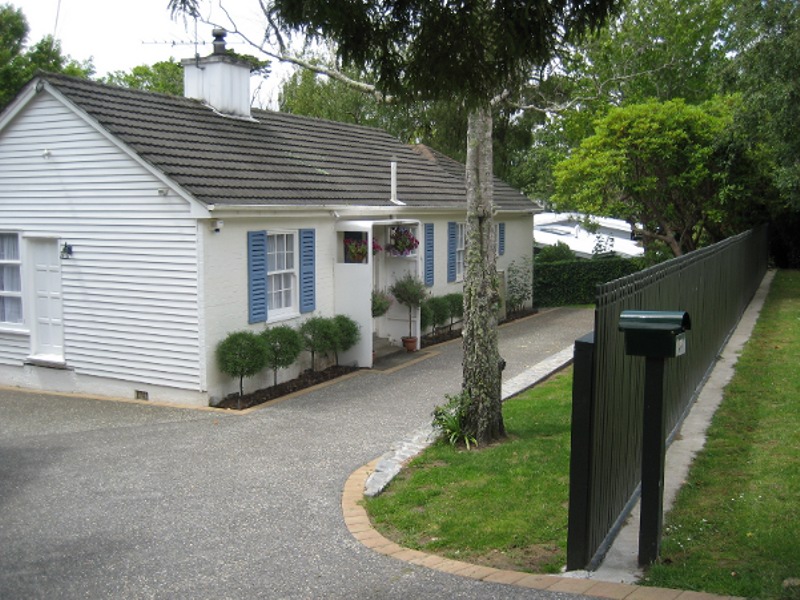
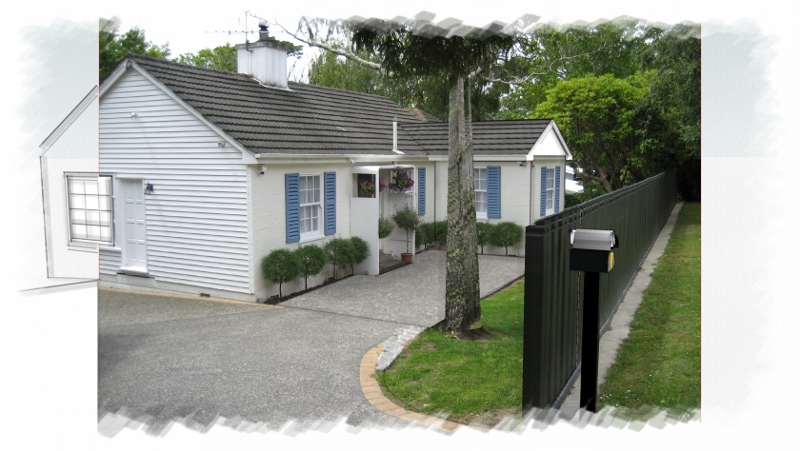
A quick sample of my photo matching, this was done in SU6 in about 1 hr straight from an origonal photo, can give clients a very good ex. of what there addition looks like.
I had to model the letterbox, fence and tree in foreground then locate in photomatched model. The picture probably needs fixing up in photoshop / gimp or similar to take some edges of.
cheers Jeff


-
Thanks for such a useful tut. It really explains perspective rules .


I'm translating it in FrenchMALAISE

-
@dcauldwell said:
Here is an example
(the modelled and vray rendered part is the rear single storey extension)
David
So david,
where is your models?
it's seems like photograph for me
-
G
Here is the rendered model. It is then merged in with the photograph in PS.
The mirror ball in the foreground was to check out the HDR sky, to see if it was positioned correctly.Cheers David

-
the other problem with photomatch for me, is that is creates a 2 point perspective or some odd setup.. which isnt supported by Maxwell... so its useless... my workaround is to use photomatch..tape a piece of trace to the screen.. trace over a few key edges... and then use that to create my own scene...
 haha..
Advertisement


