[Plugin][$] Tools On Surface - v2.6a - 01 Apr 24
-
It begs a couple of questions.
How many segments are you working with and what scale is your model?
If you are working at a small scale and lots of segments SU can have problems forming the edges.Also you may have the precision setting different in your metric version.
Here is a small example.
The larger circle was draw while the cylinder was scaled down and you can see how it distorts the surface. Scale up and the small circle can even cope with the distortion.
-
The same thing happens with intersect, when some of the intersections cause very short lines. Gaps happen. Perhaps ToS uses the same/similar methodology to form the line on the surface.
Try adjusting the number of segments forming the curve and see if that helps.

-
It is true that the calculation is not perfect when by chance very small edge are created.
One possibility you have is to active the Editor On Surface and join the missing segments
Fredo
-
Thanks for the tips. I figured out that it was a problem with this particular template (circle: radius: 1m, segments 24: no idea why this problem occurred there). I deleted it and with a new one it works.
-
Hey, I'm trying to draw arches onto a cylindrical room like in this video ( https://www.youtube.com/watch?v=jDqycuMUYvA ) however on using the joint push/pull tool to clear the arch out, it won't let me push the shape to the inner side of the wall so I'm only able to delete the outside arch. Sketchup thinks I'm trying to delete the rest of the cylinder when I try deleting what should be the inner arch. Also the drawing arc on curved surfaces tool keeps forming rings around my cylindrical room, not normal arcs! Help me please
-
Hi, may I just ask which version should I use. I have sketchup 2015 right now. THanks a lot

-
@murmurbalsita said:
Hi, may I just ask which version should I use. I have sketchup 2015 right now. THanks a lot

Use the version offered in the Plugin Store. It is also linked to in the first post of this thread. Pay attention to the details and make sure you also install the LibFredo files.
-
Maybe I'm missing something, but for a tool that's supposed to stay On Surface, this seems to have a tendency to pop onto the z-axis constantly.
I sue this tool to trace jpegs of site maps, and trace contour lines, for example. the plane I'm working on is solid, with nothing underneath. The vast majority of the linework I want to create is non-orthogonal (the contours)...but the tool is constantly snapping to x or y axis...which is merely annoying... but all of a sudden it will pop way out on the z axis and I'll discover it maybe 6-12 segments after.Is there any way to turn off orthogonal and produce ALL linework on a plane?
Also, it's sort of annoying that every time the line command is interrupted, the tool reverts to dashed line and I have to manually hit the icon for line to get it back to solid again.It's still a useful tool, and maybe I'm missing some user parameters. All constructive crit...thanks for all your efforts for us!

-
You don't need Tools on Surface to trace site plans. This extension was intended for drawing on 3d surfaces which the native tools won't do easily. For tracing a JPG or a site plan, though, the native tools will work just fine. If you feel the need, set the camera to Parallel Projection and select the Top view to look down on the image. I frequently trace images and leave the camera in Perspective mode.
-
There must be a place where the edges you drew across the surface don't touch the curved surface. Can you share that part of your model , at least?
-
For the start and end point, with the FreeHand tool, make sure you activate the inferencing so that they are on the border edges.
Fredo
-
Here's how I transfer flat shapes onto a curved surface. I do this on my airplane designs to place a very strict outline onto a curved fairing surface. It is far more accurate to draw a curve on a flat face than try to draw that curve on a curve, Fredo Tools on Surface notwithstanding.
The following set of screen caps should explain it. Ask me if you need more info.
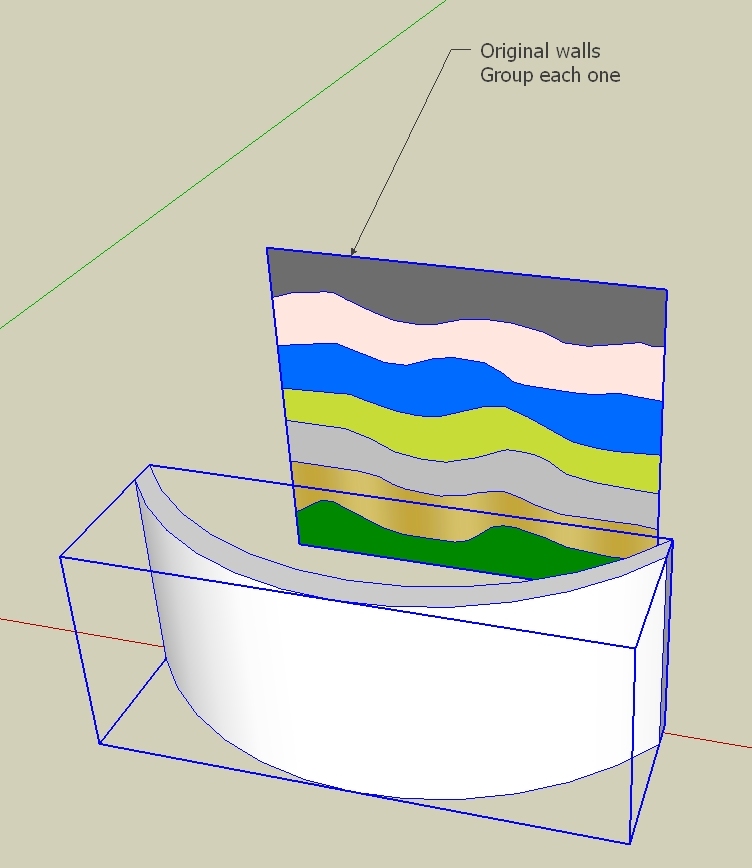
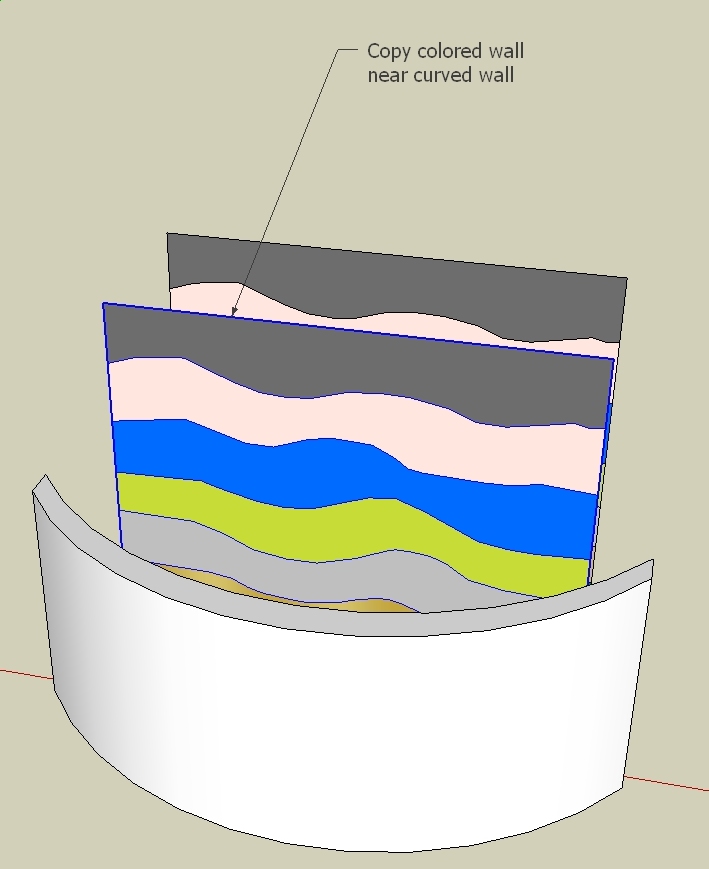
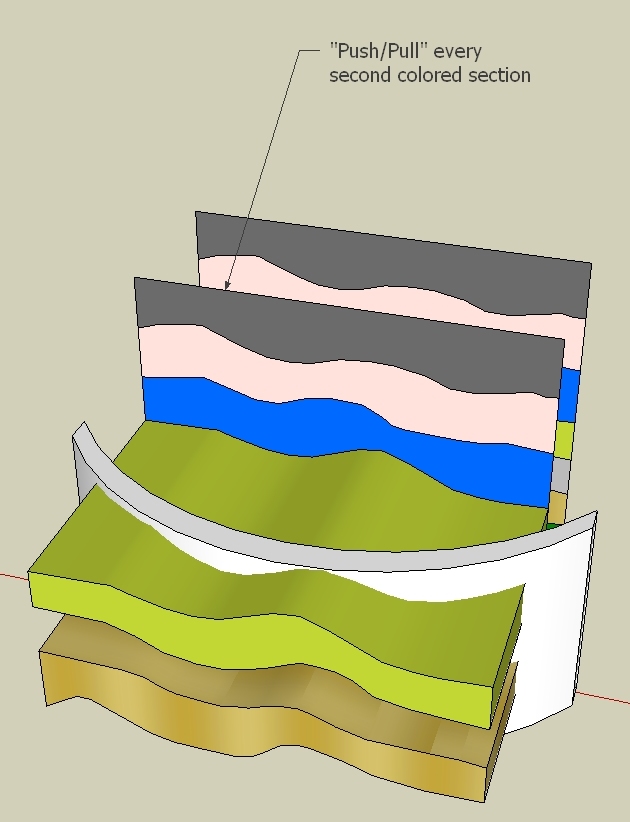
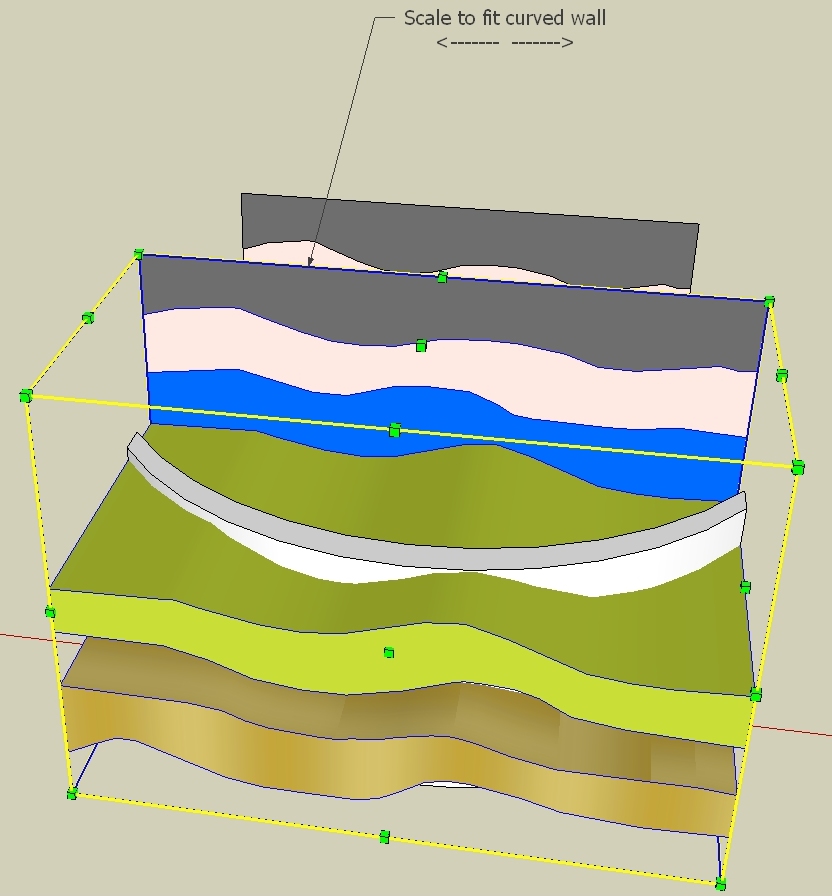
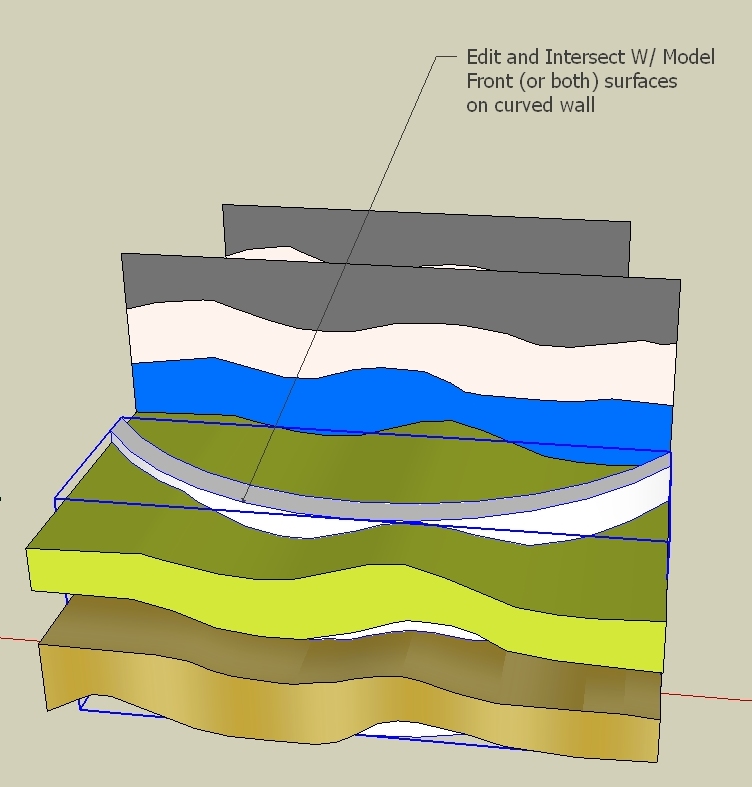
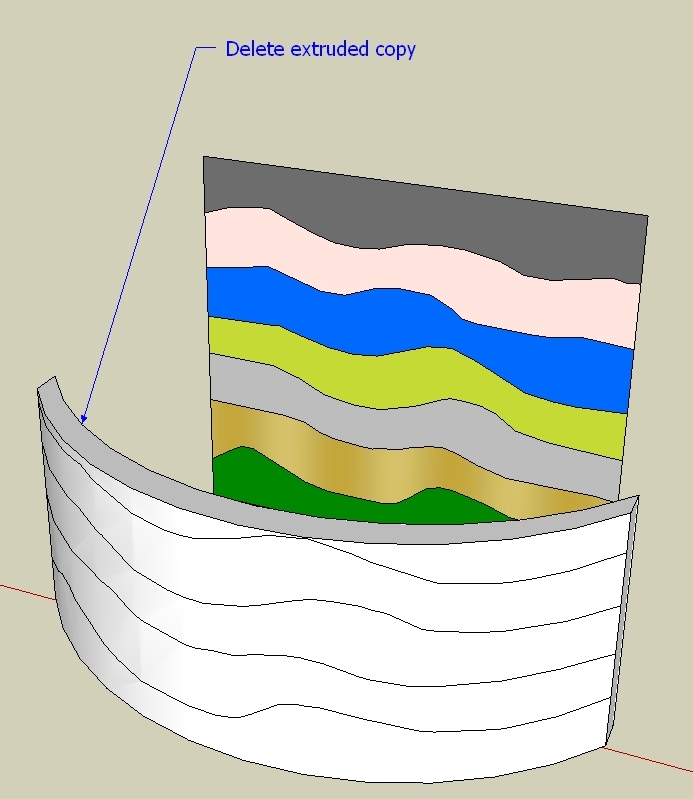
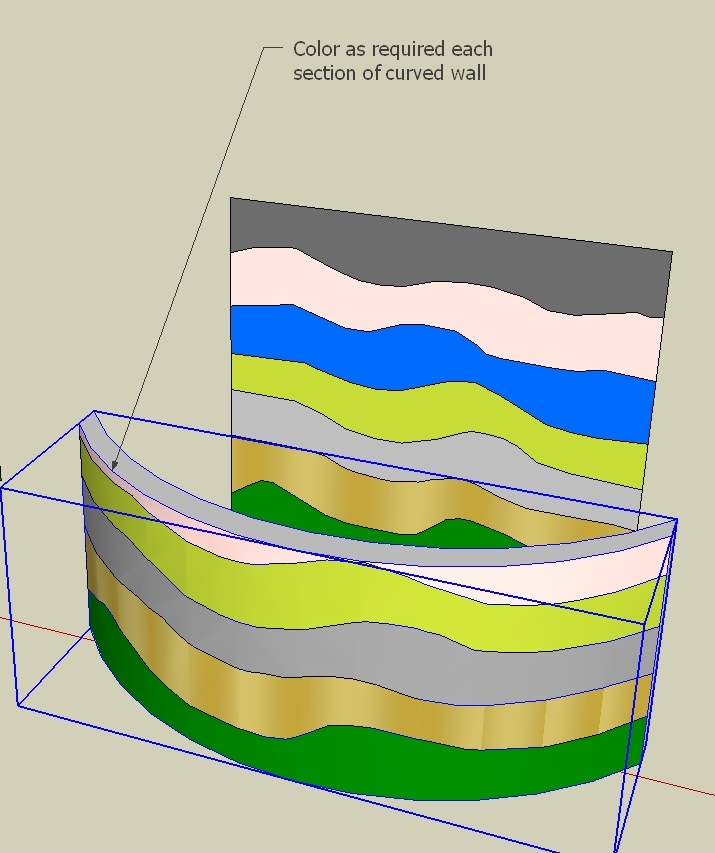
Hope that helps.
-
Fredo, How do I activate inferencing on the freehand tool? I only see it as a "without inferencing" option.
DAve R - How do i share that part of my model? It's far from top secret or elaborate, as I am a complete novice, so I'm not concerned with sharing the whole original file if that will help. But in the future that might be handy to know, how to share just a portion of the file?
jgb - I just saw your reply, so am literally just about to read through it.
THanks guys!
-
Hello,
I signed up just to get this plugin (which is my first!). Thank you.
Pretty novice user.
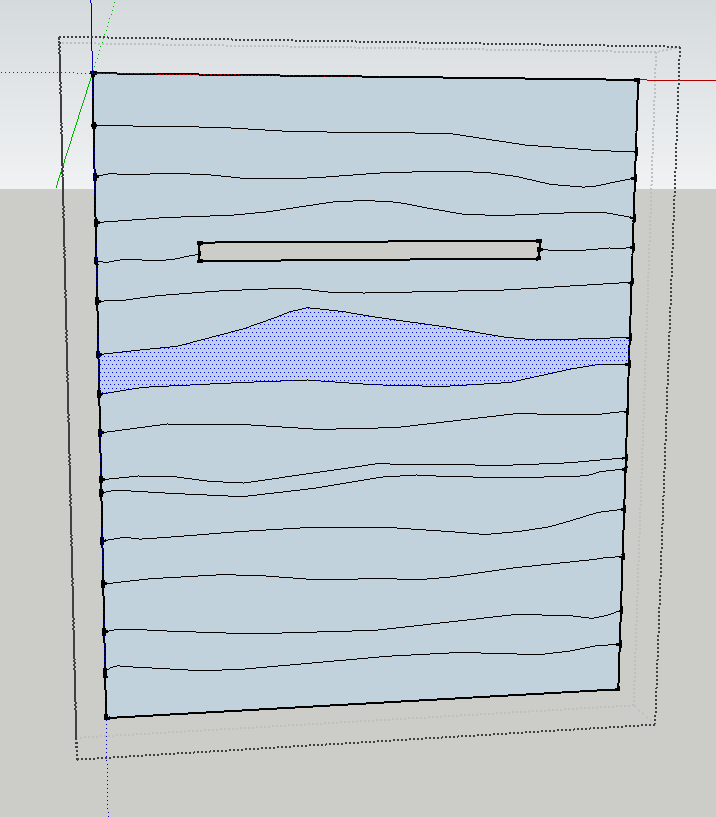
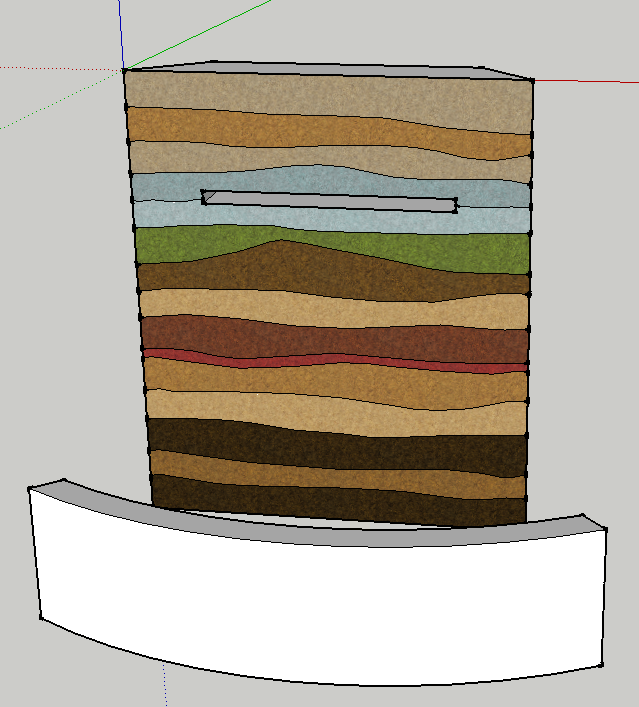
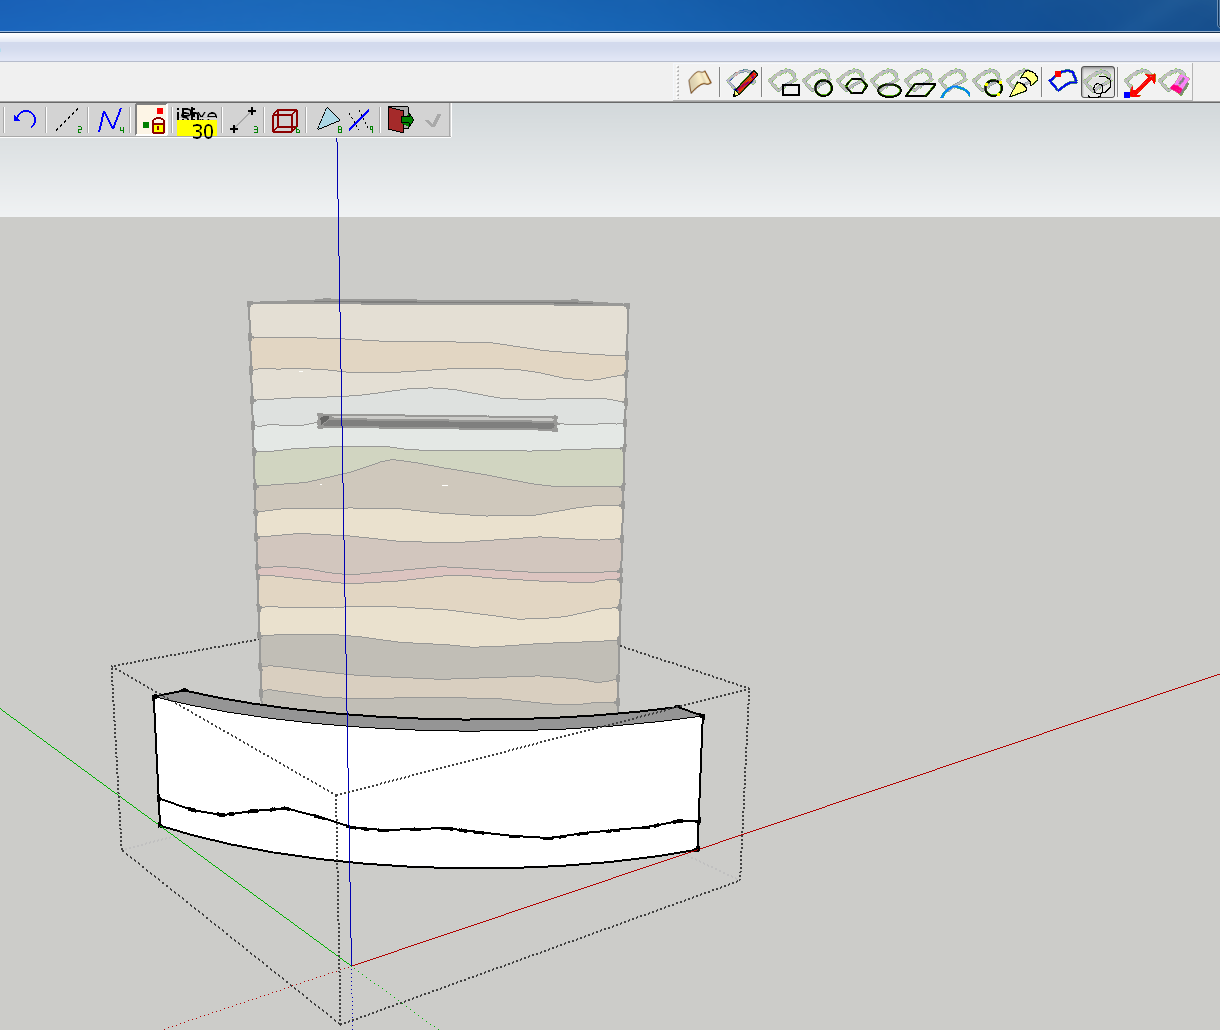
I have a contoured surface that I wish to break up into segments of freehand divisions so that I can colour them individually. I can do it on flat surfaces quite easily but have no idea how to do it on this curved surface.
Hopefully my sequence of attached images will make it clear what I am trying to accomplish.
Thanks for any assistance. It is appreciated!
s


-
@stulutions said:
DAve R - How do i share that part of my model? It's far from top secret or elaborate, as I am a complete novice, so I'm not concerned with sharing the whole original file if that will help. But in the future that might be handy to know, how to share just a portion of the file?
To share just part of the file, you could select that part and copy it to the clipboard (Edit>Copy) and then open a fresh SketchUp session and use Edit>Paste or better, Edit>Paste in place. Then save that file.
Or maybe in this case you can just upload the whole thing.
-
jgb, i was able to accomplish that with your method, thanks!
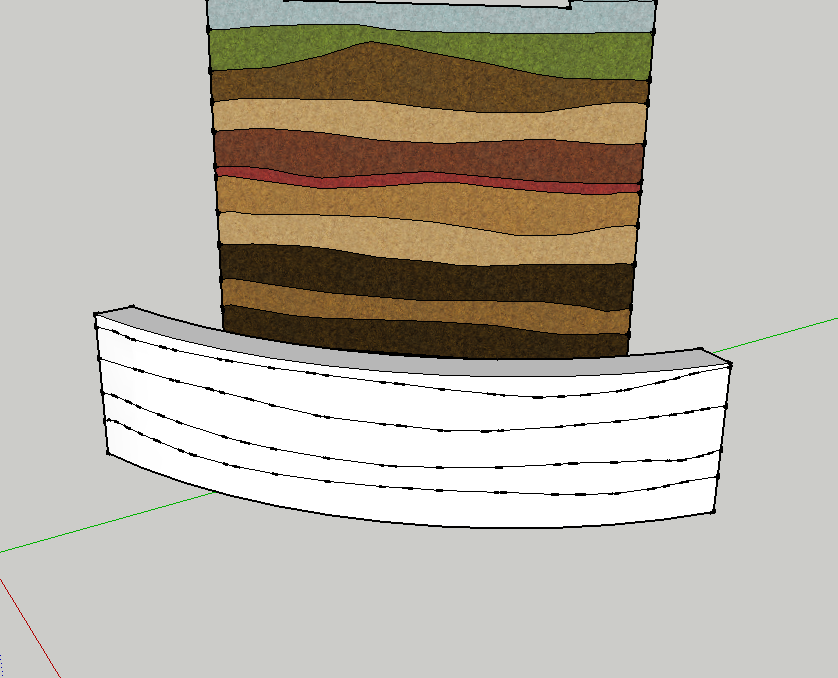
its good enough for what i need really, but why are my lines all crude looking compared to the nice smooth ones that your example shows?
thanks again!
-
You can disable the endpoints in the style settings.
-
@stulutions said:
but why are my lines all crude looking compared to the nice smooth ones that your example shows?
thanks again!
The style you have selected with the template has endpoints and extensions turned on. You can edit those out in the Edit tab of the Styles window.
-
you guys are awesome...thanks....
thats good for now, but im sure ill be back soon! haha
loving sketchup...got a 3d connexion and i borrowed/stole my wife's cintiq 13hd tablet, what an amazing combo of tools!
-
The difference is that you have "Display endpoints" turned on, and mine are off.
Now the weird part.
I set my line styles by a toolbar addin that has several types of line styles to select from.
It is supposed to replicate the menu items standard in SU. In this case, VIEW - EDGE STYLES.But my SU menu does NOT have "Display Endpoints" which is very surprising.
Mind you, I have been using SU for many years and with a lot of addons, to the extent that now I really don't know what many functions are native SU or part of an addon.

Maybe someone else can explain this, but I cannot find "Display Endpoints" in any SU menu.
Advertisement


