Follow Me tool not working with curve
-
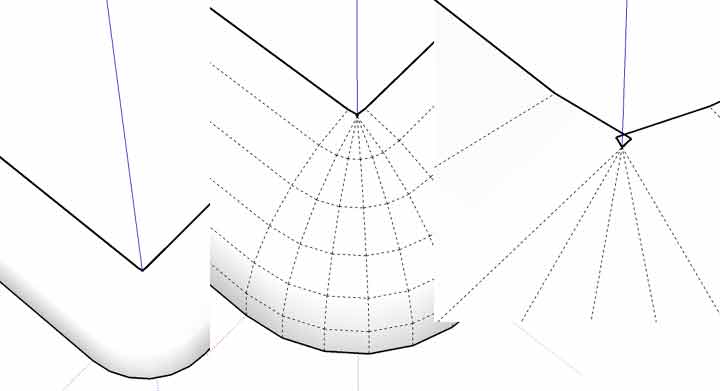
I find the Follow Me tool, even after lots of practice, to be the most difficult tool to master. Below is an image of a case where I am trying to drag a shape around a track to form a curve for the edges of the keyboard I am modeling.
The problem is that the Follow Me tool skipped the beveling of the corners. This may be that the corner is too sharp or the shape is too small. I am not sure what exactly is the cause of the problem. The last image is my "attempt" to do the corners although it looks quite horrible.
I know these images are not too helpful so I decided to attach the .skp file. Thanks for your help!
-
Hi
I notice that you work with small measurements the same as myself. My solution to this problem was to
1 make the model in your case the rectanglular shape including the curve required.
2 group the model, scale up by a scale of 10 or 100.
3 ungroup the model, then carry out the follow me operation at this incrreased size.This should then work. You will also have to use the same scaling up method for other shapes when working with small measurments.
cheers
Alan -
Alan is right, SU can "miss" faces when they get below say 1/16" (or about a millimeter). This is particularly so with the follow me and the intersect tools (both may end up with really small faces).
-
That did the trick. Thanks so much!
-
Another tip XX is to reduce the number of segments in your arc, before you use the Follow Me.
R click the arc, choose Entity Info, and change the number of segments. I usually only use three, and after they're Softened you can't really see the segments anyway.
-
Also note that the Follow Me tool is unable to turn a corner cleanly with an interior radius of 0. In these cases it always results in an odd bevel and a couple of small faces that look like the wings of a small butterfly.
Anssi

-
@anssi said:
Also note that the Follow Me tool is unable to turn a corner cleanly with an interior radius of 0. In these cases it always results in an odd bevel and a couple of small faces that look like the wings of a small butterfly.
Anssi
[attachment=0:1rbkp9xa]<!-- ia0 -->corner.jpg<!-- ia0 -->[/attachment:1rbkp9xa]
this one is very unpleasant...anyway, i had the same problem with the follow me tool and the scaling tool is definitely the solution.
-
The usual workaround for such a problem is either to do the extrusion along a curvy (not cornered) path (like in Dave's tutorial here) or to create a dome (hemisphere), quarter it and simply move the quarter hemisphere into that place in the corner.
-
well, in dave's tutorial there's still this littele hole:

-
-
@gaieus said:
@julius said:
well, in dave's tutorial there's still this littele hole:
Hm...

Gaieus, maybe you should switch avatars with Julius!?

Anyway, this matter was discussed by Noel Dent, Gully and .... Gaieus some (exactly) 8 months ago:
http://groups.google.com/group/sketchuphowto/browse_frm/thread/23b55b464cc16456/6b0c0732cc8b2bb6?lnk=gst&q=noel+gully+corner#6b0c0732cc8b2bb6
I think there was a follow up with file to explain further.
This 'bug' has been known for quite a while. You should close the gab by zooming in and do some stitching. -
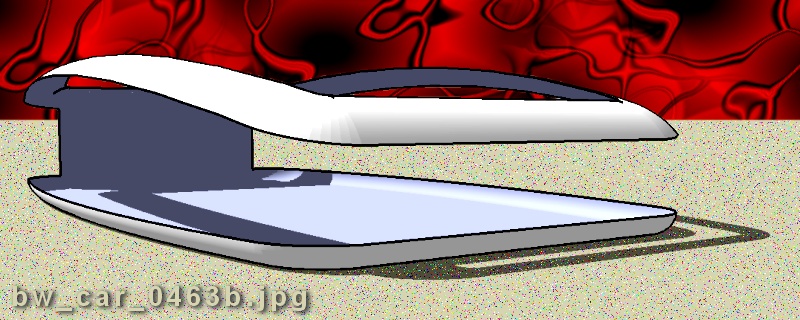
Here's another example of what you can do with the Follow Me tool . . . it's not just for planar (flat) applications, as illustrated in this image . . .

-
Wodan I know it does this "trick" when coming around a right angle corner but here the path was a rounded one.
I'd've bet that there should've been something like this result:

[Click on the image to download the skp file]@unknownuser said:
Gaieus, maybe you should switch avatars with Julius!?

Well, to tell the truth it is Gaius Caesar Augustus Germanicus (Caligula) on the coin. I don't think Julius wanted my avatar...

Edit: I see now the difference. Dave placed the face to be extruded inside the box (thus creating the glitch for the radius of the face was smaller than the radius of the rounded edge). In my example I placed it outside so the face could smoothly follow the path.
-
@greentoaster said:
Here's another example of what you can do with the Follow Me tool . . . it's not just for planar (flat) applications, as illustrated in this image . . .
Surely Brad it can be used on non-planar paths, too - it will just twist and distort so if you wanted an even extrusion, it would be a very hard work to be precise.
-
no, thanks, i prefer homer...

-
Julius,
Here's Homer for you


Cheers
Anssi
-
 well, actually i didn't mean that one
-
How is this one?

-
that's better
 [/off-topic]
 -
@alan wood said:
Hi
I notice that you work with small measurements the same as myself. My solution to this problem was to
1 make the model in your case the rectanglular shape including the curve required.
2 group the model, scale up by a scale of 10 or 100.
3 ungroup the model, then carry out the follow me operation at this incrreased size.This should then work. You will also have to use the same scaling up method for other shapes when working with small measurments.
cheers
AlanThanks, Alan, you're a star. Sometimes the simplest things make the difference....
Rob
Hello! It looks like you're interested in this conversation, but you don't have an account yet.
Getting fed up of having to scroll through the same posts each visit? When you register for an account, you'll always come back to exactly where you were before, and choose to be notified of new replies (either via email, or push notification). You'll also be able to save bookmarks and upvote posts to show your appreciation to other community members.
With your input, this post could be even better 💗
Register LoginAdvertisement


