[Tutorial > Modeling] Woodworking Dovetails - Tutorial
-
I put this together for a woodworking forum and thought I'd share it here. I'm sure it is quite simple for this community, but it was targeted at people who are primarily wood workers rather than electron pushers.
It's my first formal tutorial, so I'd appreciate any suggestions or feedback.
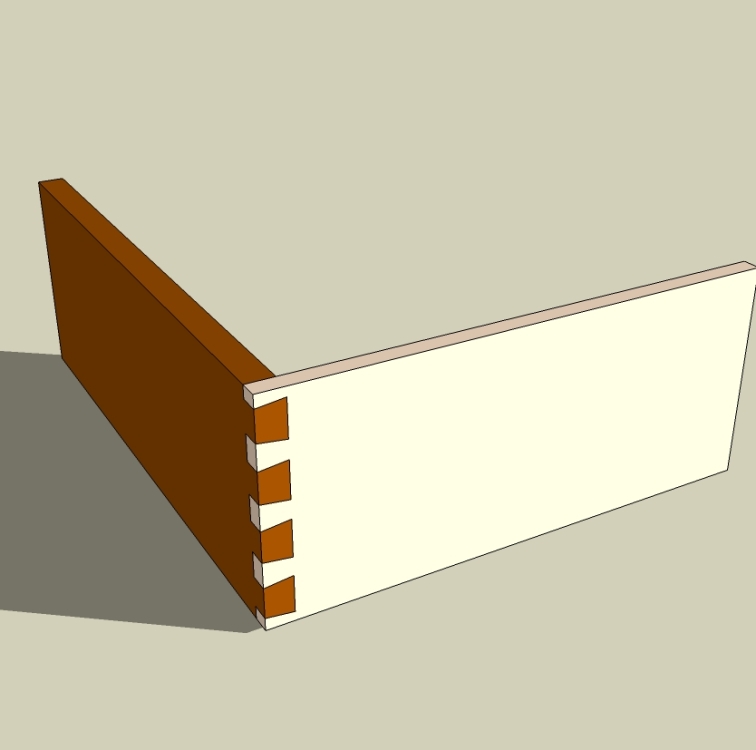
Thank you.
-
Hi Schreiber Bike
As woodworker and now a electron pusher I think the tutorial is great.My new web site may be of interest. There is still a long way to go before I get to the topic of actually dovetailing. The headings Toolsand **Techiniques ** that you can reach from the home page may be of interest to you.
Like yourself I'm interested in feedback especially in the areas that I have covered so far that you feel is not clear, and suggestions for improvments.
cheers
Alan. -
Alan,
Your website is a delight. The spare and clean style is worthy of your woodworking which is beautiful.
I look forward to spending some more time there. The SU models are very nice and clear. The wood marking technique is also very clever. I will have to try that.
I am a beginning woodworker and have practiced some dovetails, but have not done enough to be pleased with them yet. I hope to make a Shaker style workbench soon which will have a full suite of drawers. If I have enough confidence by then, I may use dovetails on some or all of them.
Since I first posted the tutorial, I have received some suggestions from Dave Richards which speed up the process of drawing dovetails considerably. When I get a chance, I will post a new tutorial which is an improvement on the one above.
Thank you, John
-
Hi John
Thanks for that. Marking the shoulder line is one of the keys to successful dovetailing. All the books and magazine articles I have ever read recommend that you mark the line in an anti clockwise direction, which doesnt work very well.Using the 'front edge' of the knife in this manner allows you to 'feel' for the knife line. In fact the blade just fits into the groove without much effort, so its actually difficult not to do it correctly.
I also think Sketchup is an ideal tool to get information across.
cheers
Alan
http://www.hand-cut-dovetails.com -
Hi John,
I am really interested in helping a beginner to dovetailing, master the topic.If you are up for it, post a model of the project in mind, either publically or privately and I will attempt to walk you through the project. I'm also happy designing the dovetails on the drawers and the full drawer constuction plus any other stuff you need help with.
cheers
Alan
http://www.hand-cut-dovetails.com -
If dovetails are the mark of a crafstman than half-blind dovetails are the mark of...

-
... half blind craftsmen?

This is one area of woodworking I have not tackeled yet. Hand cut or otherwise. Alan has tried to get me cutting some but time is just not on my side these days.
-
This thread certainly strengthens my belief that there should be a wood working sub forum.
I thought the tutorial was excelent, but I am kinda confused. It seems to start off like a tutorial on how to make dovetails in the workshop and then turns into a tutorial about how to do them in SU.
As far as doing them in SU I'd like to offer my own tutorial, if I may. I hope you find it usefull. It takes a slightly different approach.
By the way, Alan, I love your web site.
Cheers guys
(Gidon)
-
Gidon,
I appreciate your tut on DT's especially the 'intersect with model' function. To me, at least, its a pretty powerful function and I've been trying to use that more in my modeling so its nice to have your tut that uses it.side note, I checked out your 'display cabinet' thread and not only is that a beautiful cabinet you modeled but by selectively deconstructing it I gained some insight into building cabinets with inset doors. I like your use of an applied filler strip between the doors and an interior shelf on the bottom of the cabinet to stop the door. Thanks, I'll try to incorporate that into my next inset door project
-
Are you familiar with the 'Fine Woodworking' magazine blog that concentrates on how to use SketchUp in the woodshop? There are several dovetail posts in the blog:
http://blogs.taunton.com/n/blogs/blog.aspx?webtag=fw-designforum
(Click on the 'Archive' link, under 'Blog Entries' in the right-hand column, to find the dovetail posts.)
I don't recall mention of the site here, and only recently discovered it myself. Mr. Killen was having trouble with the teaching lab computers and their OpenGL drivers. He came to the Google SketchUp Help Group for assistance, and was able to get back on track. I'm glad he looked to the group for help, otherwise, I'd never known about the blog!
-
Hi Gidon
Thanks for the comments re the web page, all possible thanks to the help from Modelhead(Bruce). It is a slow process because I do the lot, in between all other things in life I enjoy. If you find anything that is not clear, please tell me so that I can improve it.I've saved your tutorial, especially liked the intersect with model that will speed things up considerably in my workflow.
TaffGoch. Enjoyed the link to Fine Woodworking and their blog regarding SketchUp.
I'm now writing for the 'British Woodworking' magazine, and eventually they will be providing downloadable sketchup models from their web site. Some of the images they published were created in Sketchup. I didn't think I would have been doing that this time last year.
cheers
Alan -
Here's another tutorial that's based on "intersect with model".
By the way Schreiber, which woodworking forum were you refering to?
(Gidon)
-
Very practical and truly 3 dimensional. You said to explode the legs before intersecting with model, so must each object that is going to be intersected with model be a component or a group? Iv also been having some issues with not being able to select a single line after the intersect but instead it selects the whole object. Is this due to not exploding before interesting?
-
@titmas said:
Is this due to not exploding before interesting?
That's exactly it Sean. Only if your parts are exploded will SU form the faces that should be there after clean-up. SU seems to 'borrow' the faces from the two parts in order to complete the new part.
In some cases it is necessary to copy the one part and keep one copy as a group while using the other copy to form the new part using intersect. That's what I did in the dovetail tut.
In the case of the leg, no copying was needed as the origional part is not an actual part of the table but rather a tool or template of sorts.
By the way, do you not like having your picture taken? You look so pissed off in your avatar
(Gidon)
-
Gidon,
thanks, now that i know how IWM works it makes it easier to do these cut away views for detailed construction sketches.
...and about that Avatar, that photo is about 2 years old back when i was hairy-er and meaner, now the beard is gone along with the mean guy persona(thanks to my girlfriend)but the photo is kind of a reminder.
-
I did not think you avatar was mean or mad at all. I thought you looked like you just woke up on the beach after an all nighter and was ready to surf.

-
Actually Eric, you don't know just how close you are with that one.

Its nice to see that 'hello kitty' is trying out for the football team. Or is he going to a halloween party as a 'Gladiator' extra? Either way that's just about the only kitten photo that doesnt make me want to puke from its sugary sweet cuteness. -
Actualy, the kitten is wearing that helmet in self defence. There's a killer hamster on the loose.
(Gidon)

-
I thought I'd add another little tutorial on a technique that has saved me countless hours of time and which is great for tweeking furniture parts.
I can't figure out how to insert a photo into the body of the text so I'll add them as attached files.
Sorry.Anyway, this tutorial deals with moving in edit mode as opposed to scaling.
(Gidon)
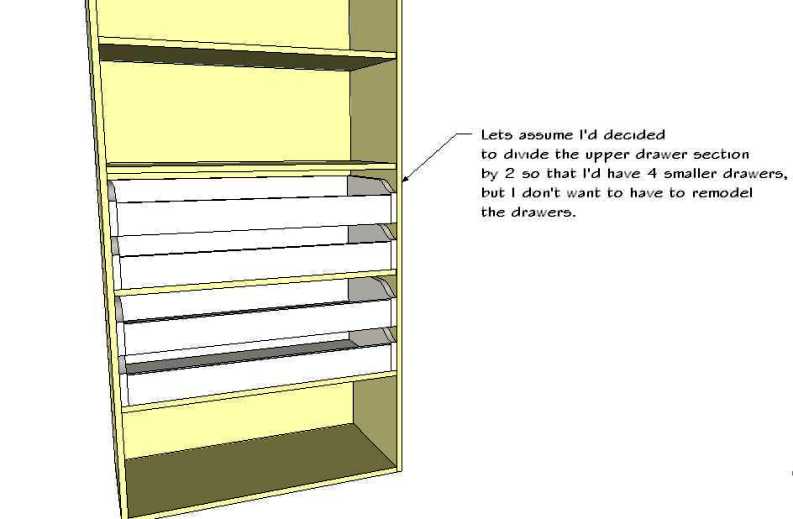
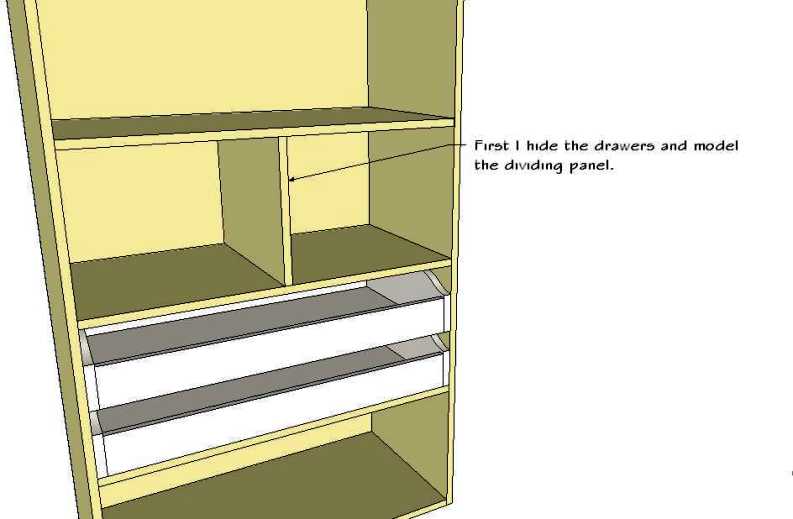
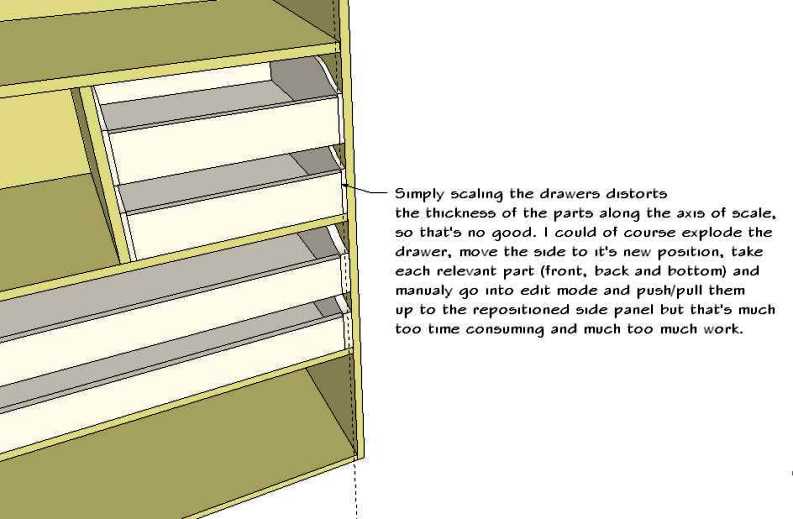
-
Move vs. Scale - continued.
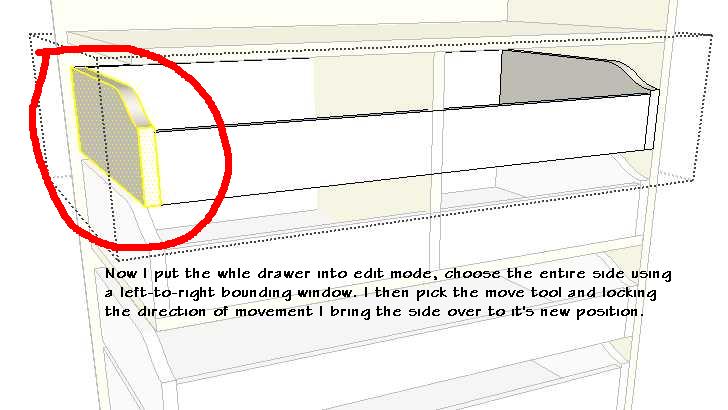
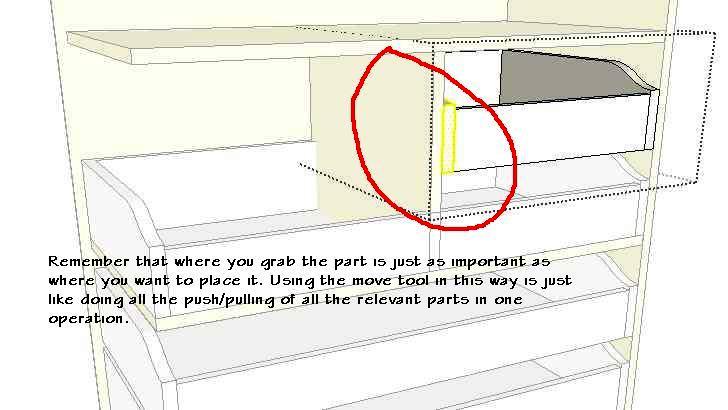
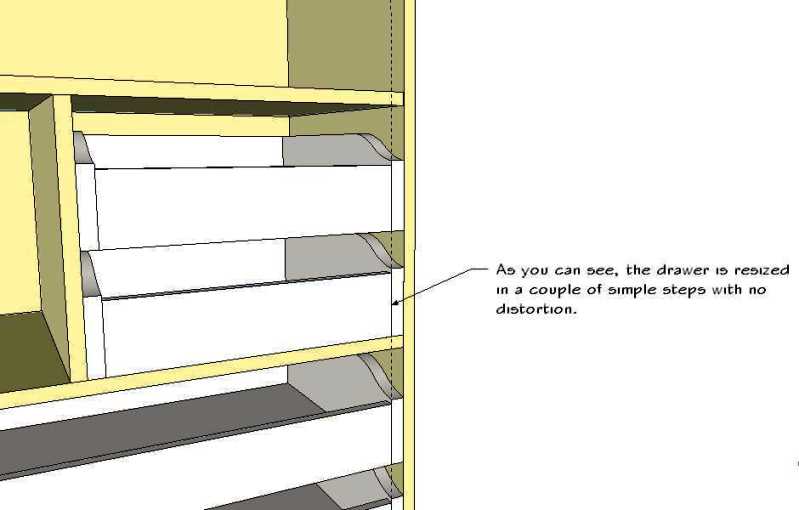
Sorry about the clumsy way I posted this. Like I said, I can't figure out how to insert the pictures into the body of the text.
Any way, I hope you find this usefull.(Gidon)
Advertisement


