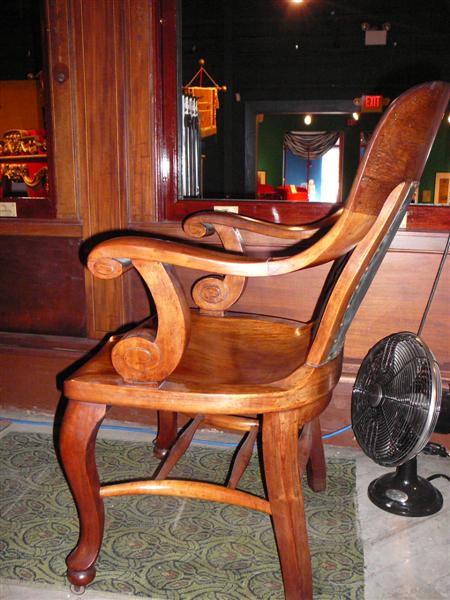
my latest woodworking commission involves building a set of chairs to for display in a local museum and fortunately for me, they have one of the original(1905) surviving chairs for use as a reference. before i begin making sawdust i want to model the chair in SU so i can use it as a source for plotting templates for some of the curved pieces in full scale. the chair is relatively simple in design but it does includes some volutes and cabriolet legs. im looking for some cabriolet leg components to use versus drawing them myself. im looking for a furniture library that has an assortment of different chair models. i guess i could also draw them myself if there was a tut on the process out there. anybody have any info on either? i attached a pic of the chair so you can see what im trying to achieve and can compare it with the finished chair, both digital and wooden.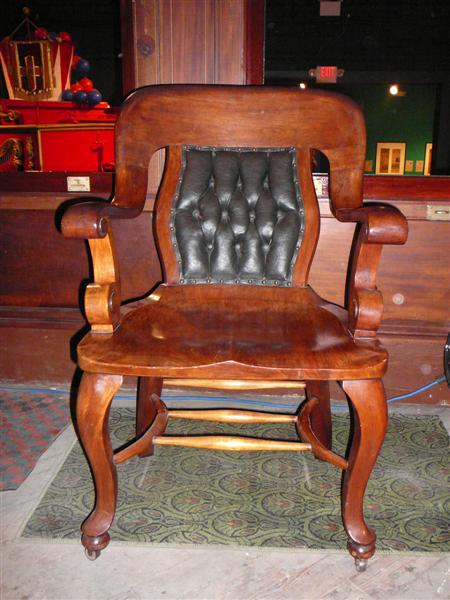
Latest posts made by titmas
-
WANTED: components for chair
-
RE: Wood choice
hey Boo,
when it comes to the finish and adhesive for the wood i have had much success with the epoxy from West Systemsthe finish is extremely durable and easy to apply and when used as an adhesive there is no issue with squeeze out because the finish and glue are the same product.
of course Teak, Mahogany, Ipe, Cypress, Cedar, Maro Macho and a few other exotic hardwoods will all hold up well under the elements without any finish other than a yearly coat of some type of exterior grade penetrating oil.
if your local lumber supplier cannot locate and supply the wood you want than you might want to check with Woodweb and search the forums and databases for suppliers.
as for screws, stainless steel, Hot Dipped Galvy, or ceramic will all hold up fine but if they are going to be seen in the final project that SS is the best choice.
-
RE: For the Birds...
thats a great list. my complaint with the materials list was the poor selection of wood species and your list fixes that. thanks.
should i extract them directly to the materials folder or is there a better way?
-
RE: Modeling for plywood construction
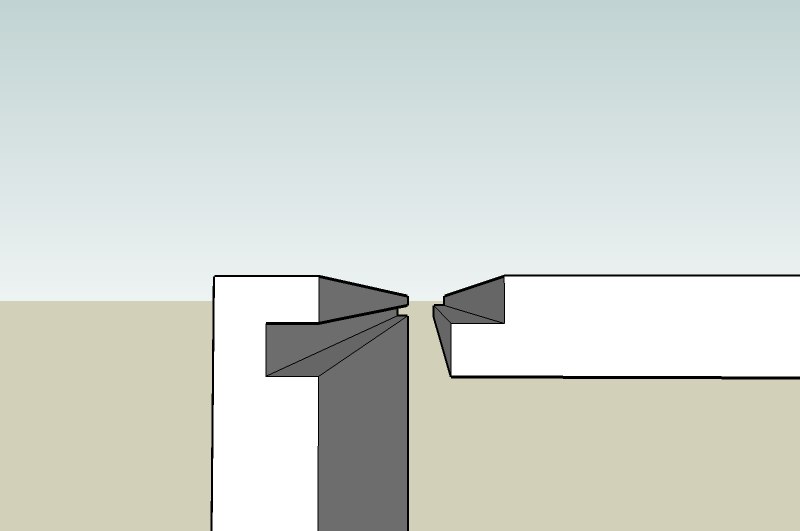
most of the cabinetry we build has faceframes, endpanels and counter tops that cover the outside of the box so its the inside of the cabinet that needs to be consistent. if you dado the top piece from the edge with the inside face towards the fence than the inconsistency will be on the outside of the cabinet where it will be covered by the countertop and endpanels.
this wont work for every application but with very little setup and 2 processes it produces a quick strong mechanical joint foe plywood boxes.
the amount of allowable tolerance for a plywood cabinet box (kitchen, bath, media unit etc.) is greater than for a furniture quality piece made from plywood. the plywood might have a noticeable size difference but for cabinet box construction it is an acceptable amount.
-
RE: Modeling for plywood construction
even though i have a set of undersized plywood router bits i prefer to cut a 3/8" rabit and set it into a 3/8" dado. we have a dedicated TS set up with a 3/8" dado cutter and use it more often than full width dados or dowels to join ply to ply.
-
RE: What sort of modeller are you?
@sawduster said:
Then I guess you wouldn't be interested in seeing the tool chest I just completed.
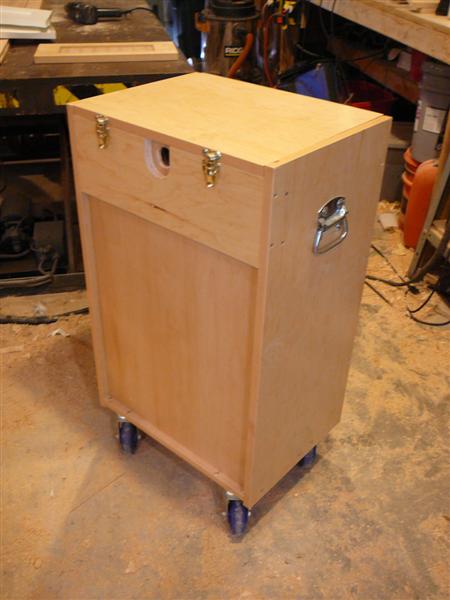
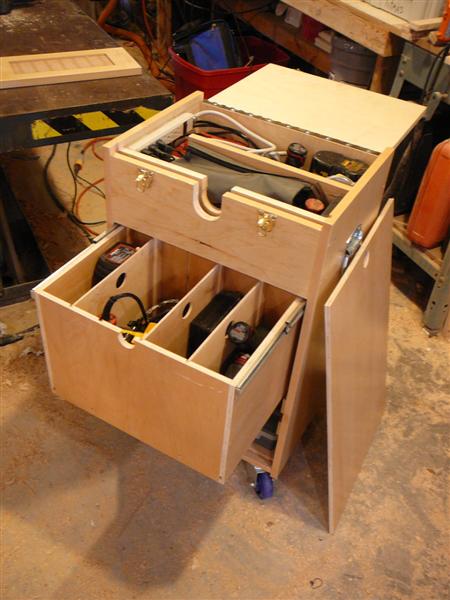
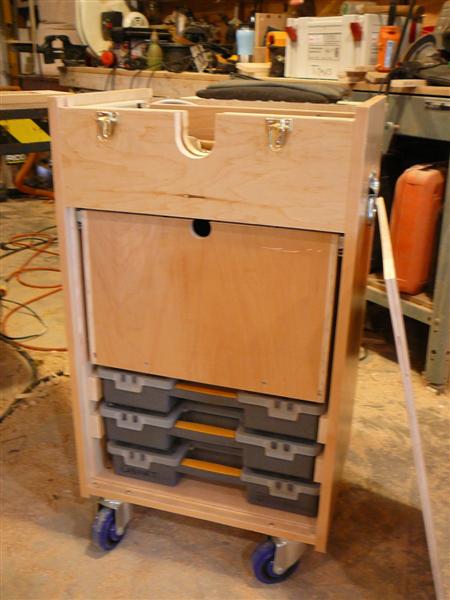
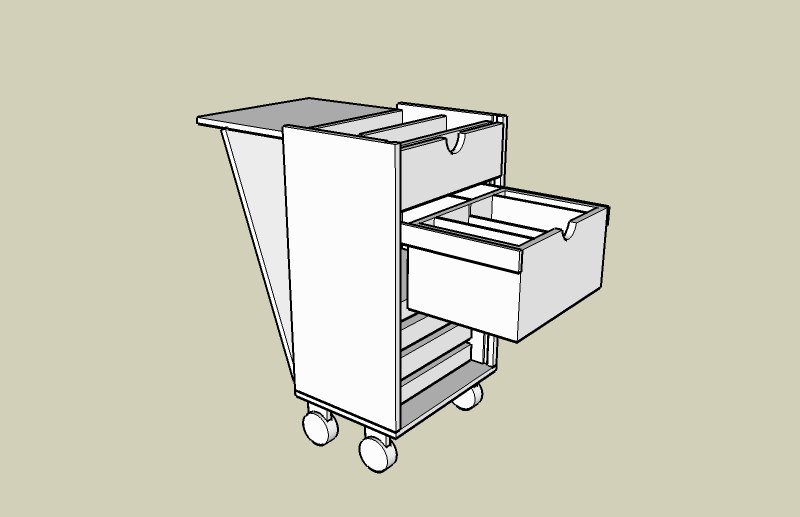
actually i would like to see the tool chest. im always interested in looking at shop made tools and jigs because each one is unique and built from a different perspective than mine are. what a coincidence, i just finished building a rolling tool chest for the job site and used SU to design it. it is a utility piece built for strength and function but with a few well designed aspects that make it work better than most store bought units i researched while designing it.
oak is a plentiful wood that is easy accessible and beautiful to look at. when used in moderation it can be real enjoyable, even to work with but when used excessively and without regard for smart design it can become very boring, heavy and even a strain on the eyes to look at. the house where i built the oak media cabinet was a good example of excess to the point of nausea. it had every cabinet made from oak all with the same style and trim profiles. the kitchen, baths, library, office, den, bedroom furniture and assorted tables were all made from oak with a clear polyurethane finish.
-
RE: Modeling for plywood construction
SchreiberBike,
ive found plywood from Canada and the US to be of a higher quality(read:overall consistent thickness) than plywood from China. and even further than that, different suppliers may have different quality standards.so what type of things do you build?
-
RE: Modeling for plywood construction
don't be ashamed about your love of all things American. i think its great when i find something on the web that has not given into the world wide community mentality.
-
RE: Modeling for plywood construction
interesting viewpoint, Hazza.
personally i am torn between the two different systems of measurements.
standard is ingrained in my brain from early childhood and for some types of measurements and functions its easier to compute than metric. ie, dividing 12 into whole numbers is easier than dividing 10 by the same number.
however metric provides much more precision,especially when dealing with measurements less than 1 inch.
in cabinet making most of the hardware is European made so its better for me to build my cabinets based on metric sizes so that the hardware functions as a system with the cabinet boxes and not as a separate item.
-
RE: Radius front cabinet design and construction
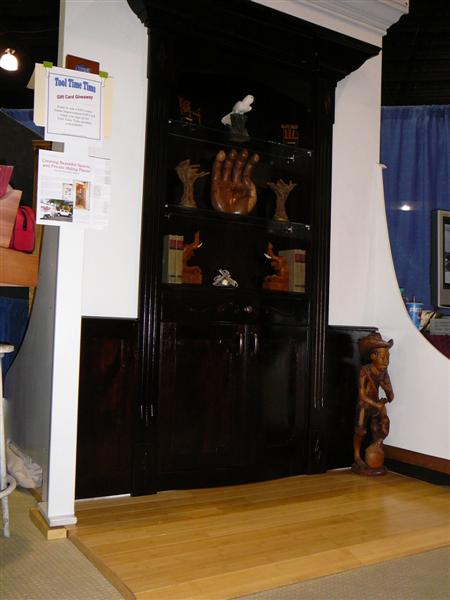
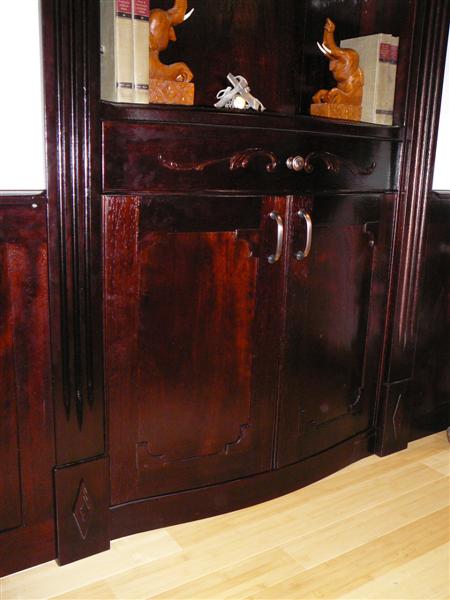
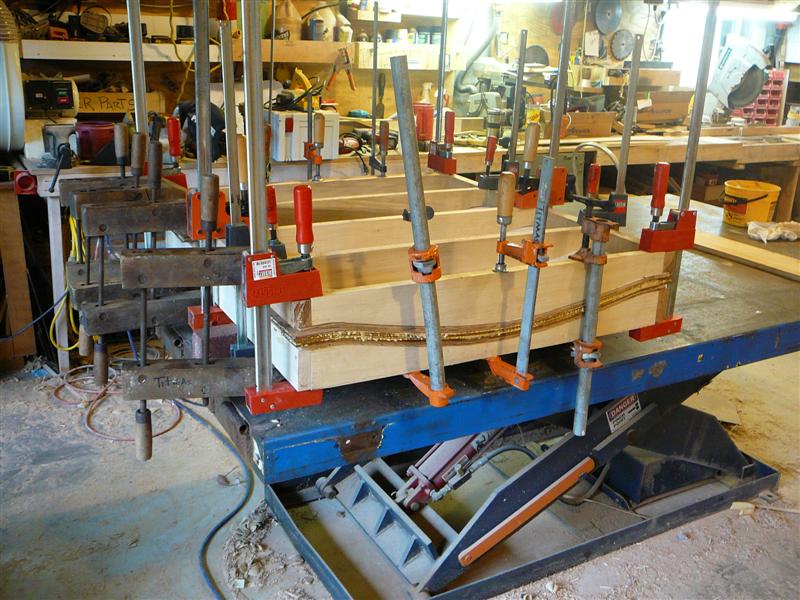
unfortunitaley the client backed out of this project, instead opting to go with a cheaper bid. since we did not want to waste all our efforts in the design of this secret door we decided to build it and use it as a display in our booth at the homwe show. i had some 1/8" strips of stock cut and sanded to be used as bent laminations for the curved parts. by making a large form to press up the parts, face frame, base molding, door rails, center panels and drawer front, i was able to make up all the curved parts at the same time ensuring that their curves would be in relation to each other. in hindsight i would of done it in smaller pressings to eliminate the speed at which it needed to be done but my time was limited.
the finish was a mahogany dye with a tinted lacquer and under the bright lights of the spray booth i did not realize just how dark i was making it by using too many coats of tinted lacquer. since the show i have stripped off the finish and will refinish it with a much lighter tone of dye, allowing the beauty of the wood to show through.
