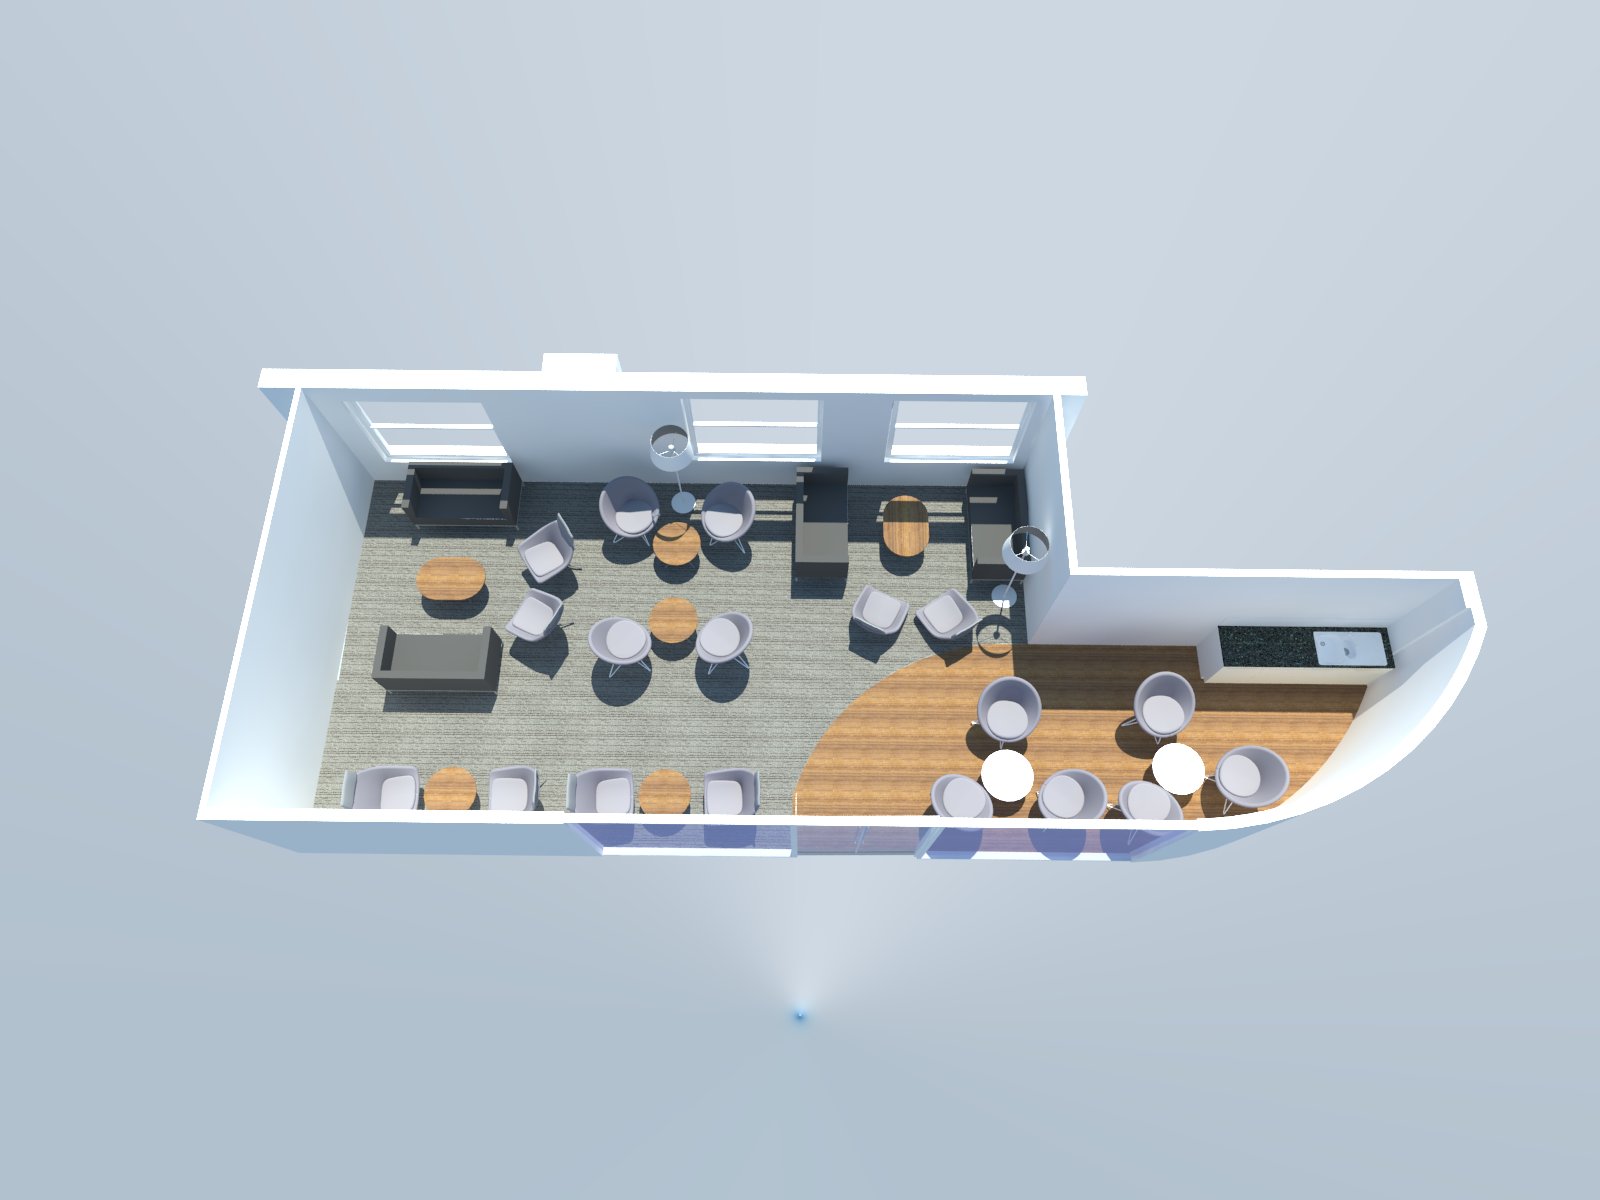
HELP! Blue Render Vray
-
Hi all,
does anyone know why my bird-eye views keep turning out blue? in vray?
any help gratefully received
Thanks Louise

-
Just a stab in the dark since this wouldn't be specific to Vray but It looks as if your white walls are reflecting the sky color. Change the color of the sky and you should change the color of the reflection.
-
tried changing the sky colour but has no effect! any other ideas?
-
Generally when I do renders I don't have the model floating in space as you have here. I draw a "set" with a floor, walls and ceiling. This helps to keep light in and allows me to control reflections on surfaces in my model. I do that for anything from a small piece of furniture to an entire house. Maybe give it a try.
-
one solution would be to turn off the sun/sky and rely only on GI (global illumination)
Go to your Vray Options:- Make sure "Default lights" is not checked in your "Global switches" settings
- In the "Environment" settings - click on the blue "M" next to "GI (skylight)" and when you bring up the texture options, change the type from "TexSky" to "None"
- Then adjust your "GI" number higher from the "1.0" value to something like 15.0 so you get enough light on your scene.
- if you have a lot of reflective surfaces, you might try changing your "Environment" --> "reflection" settings to no texture, and give it a neutral gray color instead of black.
-
you can also change the white balance for the physical camera to be a blueish color, which will cancel out the blue contribution from the texsky
-
There is 2 ways to approach this type of rendering.
-
Is to do as suggested above by Andy and just set your GI to a white color. This will essentially remove the casted shadows and just render the plan with a ambient light.
-
The other way, which makes for a real nice rendering is to place a ceiling plane on your model. Use a SketchUp 2-sided material in V-Ray and make the front face (should be facing into the plan) a white color and make the back face a material that is 100% transparent. Then you want to add some interior lights by using IES or spots and some planar lights at your window openings, and then render the view. Essentially, what happens is that V-Ray renders with no sun flooding into the room from the hole in the ceiling, but keeps it transparent because the face that is facing the camera is 100% clear.
Give it a try.
-
-
-
Or just remove the blueish color cast in post processing.
-
changing the GI colour seems to work, thanks all!!
-
@rspierenburg said:
Or just remove the blueish color cast in post processing.
I believe that is what TomDC just posted. However, that tutorial is more confusing than helpful imo. All you need to do is open up curves, select the gray dropper, and wherever you click, it will set that area as the neutral tone.
-
@rspierenburg said:
Or just remove the blueish color cast in post processing.
I believe that is essentially what the white balance for the physical camera does
-
@valerostudio said:
There is 2 ways to approach this type of rendering.
...
- The other way, which makes for a real nice rendering is to place a ceiling plane on your model. Use a SketchUp 2-sided material in V-Ray and make the front face (should be facing into the plan) a white color and make the back face a material that is 100% transparent. Then you want to add some interior lights by using IES or spots and some planar lights at your window openings, and then render the view. Essentially, what happens is that V-Ray renders with no sun flooding into the room from the hole in the ceiling, but keeps it transparent because the face that is facing the camera is 100% clear.
Give it a try.
Hello! It looks like you're interested in this conversation, but you don't have an account yet.
Getting fed up of having to scroll through the same posts each visit? When you register for an account, you'll always come back to exactly where you were before, and choose to be notified of new replies (either via email, or push notification). You'll also be able to save bookmarks and upvote posts to show your appreciation to other community members.
With your input, this post could be even better 💗
Register LoginAdvertisement


