[Ongoing-Tutorial] How to make a car using SDS/Artisan?
-
-
how do you make the windows so that they are colored differently??? thanks for this btw its awesome
-
@rappsnitches said:
how do you make the windows so that they are colored differently??? thanks for this btw its awesome
You select the paint tool, choose a color and then just clik on the surfaces you want to be colored.
-
But make sure you have 'Show Hidden' turned on.
-
I don't have the new artisan, i have the old one....do you know how to do it then?
-
@rappsnitches said:
I don't have the new artisan, i have the old one....do you know how to do it then?
The old one is as good as the new one for this tutorial. The new one has a few more tools but are not used here.
-
Where can i find show unhidden?
-
Sorry its just called 'Hidden Geometry' in the 'View' Menu. It will show all the hidden lines as dotted and you will be able to select each -piece- of face individually and paint them.
Rob
-
-
this is probably the best tutorial on line about SDSing cars - thanks so much marian!!! not to annoy you or anything, but if you could add a little part about making wheels, it would be awesome. I know you have so follow-me the cross section around a circle, but after that im not sure what i can do. Thanks in advance!!
-
You're welcome.

It depends on how detailed you want your wheel. For rather simple wheels you draw the cross section of the tire and use follow me like you said. If you can find a drawing or picture with the outline of a real tire and draw the shape from that then it will look even better. Also you could increase the segement count on the circle from 24 to 48 or 60. Most of the time you don't need the tread on the tire, you can just apply a texture, it's easier and effective. I don't normally make treads on my wheels I live them slick or with a few grooves.
Now the rims are a bit different. It depends a lot the design you want to make. On some push/pull could do most of the shape, on others you have to make separte componenets and rotate them in an array.There are a few useful tutorials on youtube for wheels showing slightly different ways of making them.http://www.youtube.com/results?search_query=google+sketchup+wheel+tutorial+&oq=sketchup+whee&aq=1m&aqi=g1g-m2&aql=&gs_l=youtube.3.1.0j0i5l2.8201.17987.0.20184.9.9.0.0.0.0.203.1390.0j8j1.9.0...0.0.FmrfE7xpm0E
-
I've started to model a car using Artisan but having some trouble with extrude. See the "Problem with extrude or not" discussion. I've been trying to model cars using several different programs but they're much too complex for me. Artisan has real promise for that application.
-
Hi Marian,
Ive just started to use Artisan and want to get back into modelling some made up cars. I started with the side view of a Citroen BX and have found myself at this stage after extruding and shaping.
[xxl-img:3gsbqibq]https://dl.dropbox.com/u/87395479/artisancar2.png[/xxl-img:3gsbqibq]
Moving forward with this model, do I undo the SDS and add the detail? or do it after its been SDS'ed? I can see I have a problem in the top corner of the window. Does my mesh look okay on the whole? Im finding it hard to add detail to the car. Any advice appreciated

I was thinking one approach could be SDS'ing the main shape of the car, then just intersecting shapes with the model and using more traditional SU methods to complete with detail? Just a bit unsure how to "finish off" an SDS'ed car.
Cheers,
Adam -
You do most details in low poly. It's easier and faster, plus you don't have to detail with huge poly count all the time you are modeling. I keep the low poly and SDS version separate, I mean once I'm satified that all the details are there and the they work well with SDS I save it as a different file and smooth all the geometry.I normally put and "S" at the end of the name of the files so I know what it is.
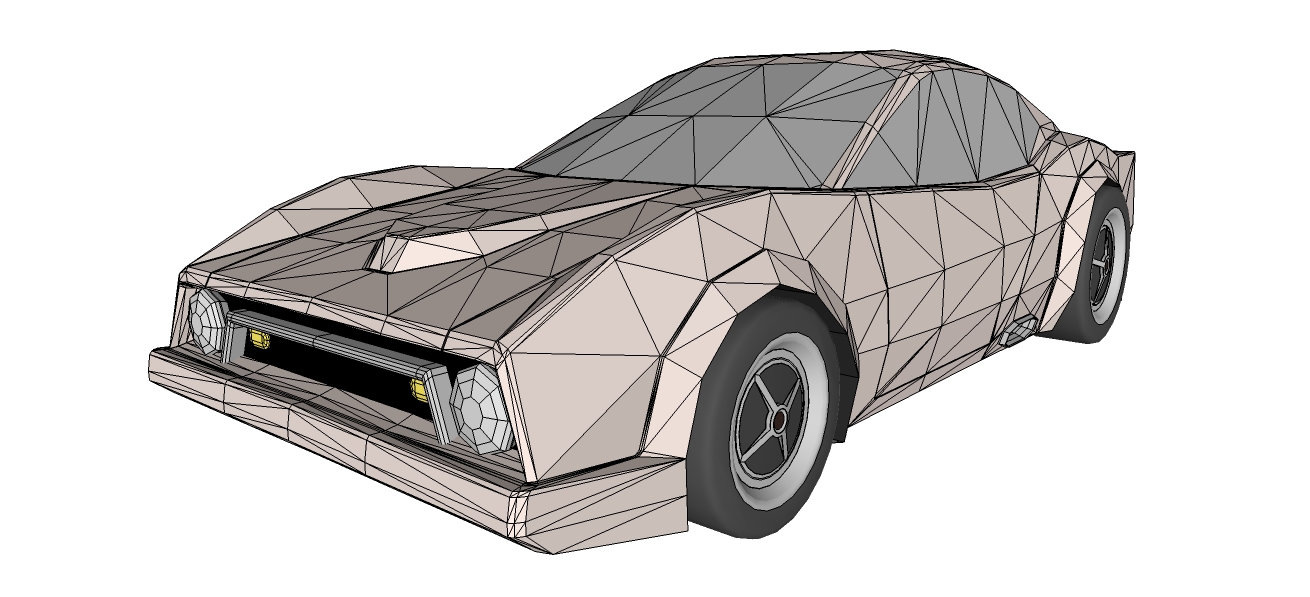
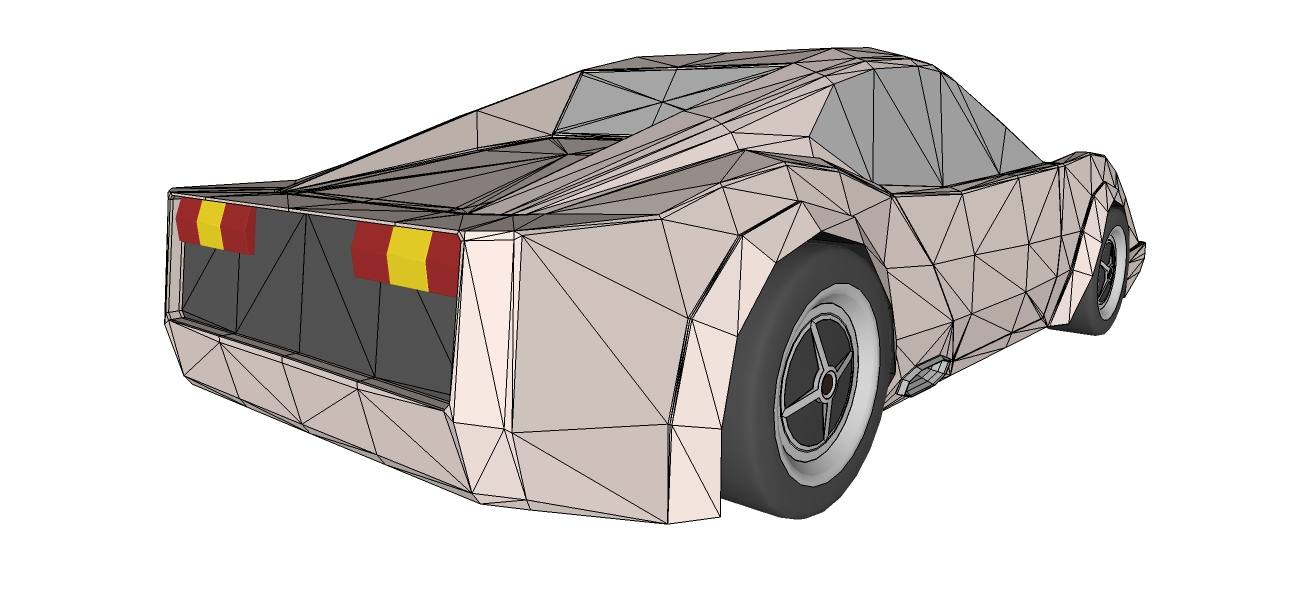
Your mesh looks ok. You should separate and group all the geometry you want it to be glass, do the same with the doors, hood and trunk. Just take a look at my model in this thread.
-
Thanks! Its all those little things that help alot.
-
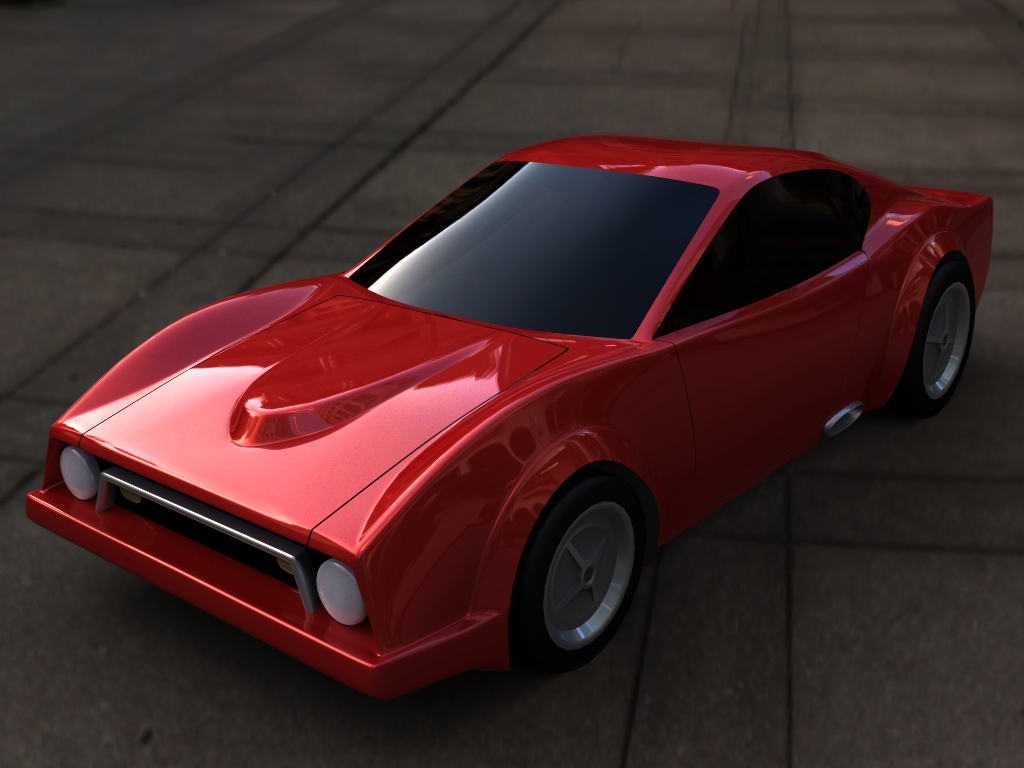
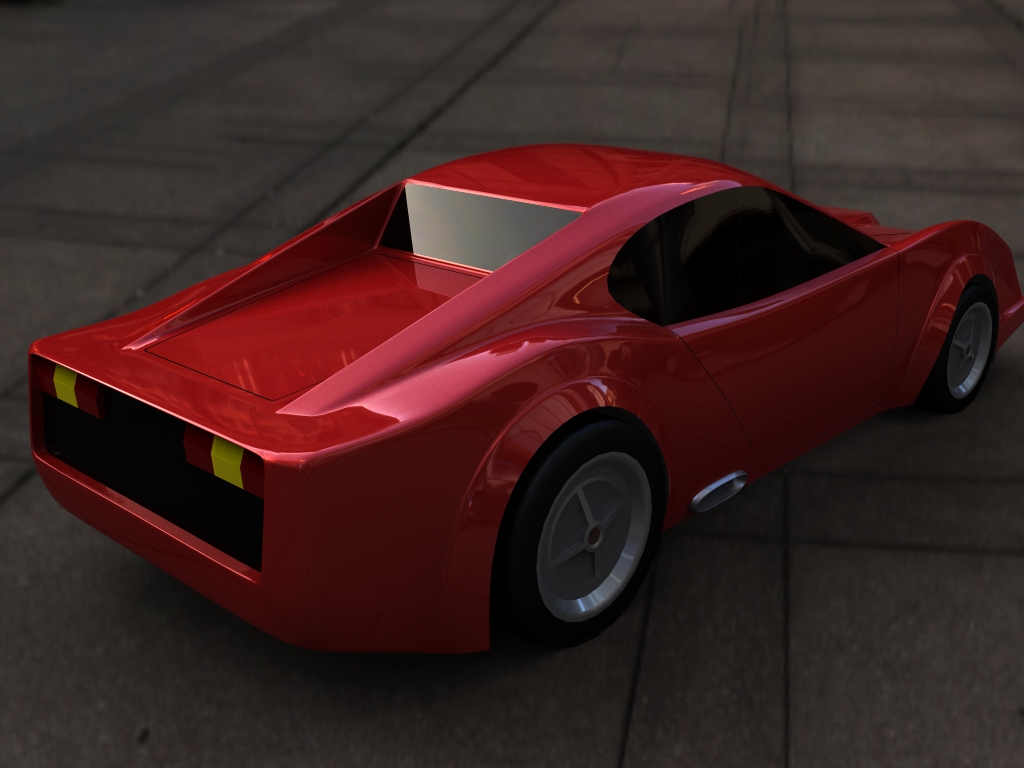
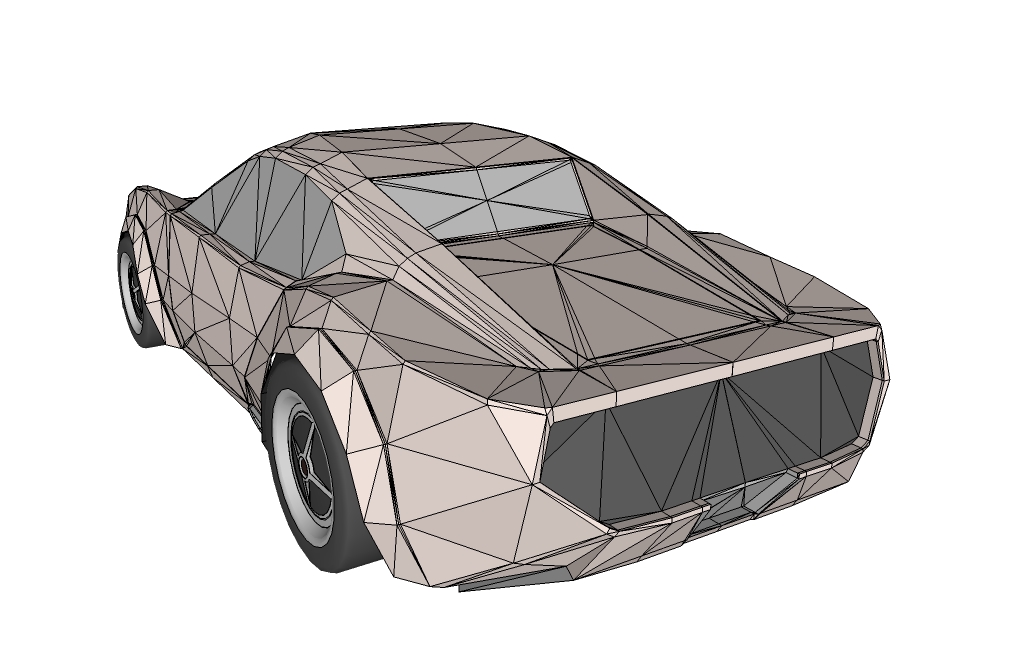
Here's also the Low poly and sds version of my Flying car model.
SDS version

3D Warehouse
3D Warehouse is a website of searchable, pre-made 3D models that works seamlessly with SketchUp.
(3dwarehouse.sketchup.com)
Low poly version
3D Warehouse
3D Warehouse is a website of searchable, pre-made 3D models that works seamlessly with SketchUp.
(3dwarehouse.sketchup.com)

Hello! It looks like you're interested in this conversation, but you don't have an account yet.
Getting fed up of having to scroll through the same posts each visit? When you register for an account, you'll always come back to exactly where you were before, and choose to be notified of new replies (either via email, or push notification). You'll also be able to save bookmarks and upvote posts to show your appreciation to other community members.
With your input, this post could be even better 💗
Register Login


Advertisement