HELP Fredo!!! Can't skin
-
Going nuts!

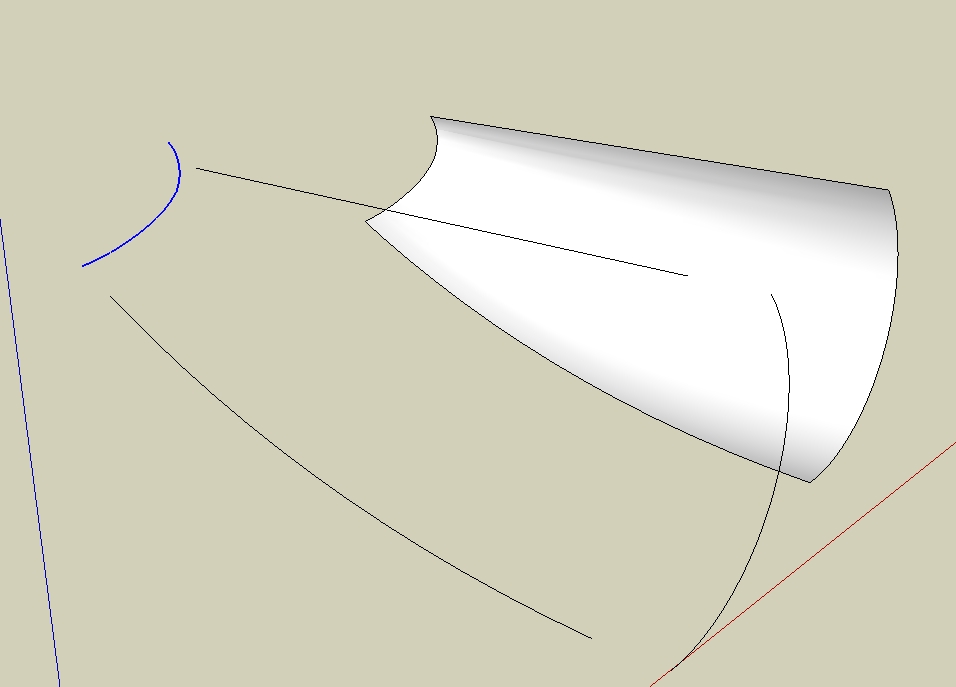
I simply cannot get these skins to form with Curviloft.
I got a few others, but not these 2. (The small one in the middle I got finally)No matter how I select the edges, or which tool I use, I always get either a gross distorted shape, or nothing, or usually the cursor just says "Transition" and nothing happens after that. Well the edges turn all sorts of colors, then nothing.
I need to know HOW to get these skins, as I have a bunch more to do with the same general shape.
So, if you can please explain how, rather than just do them for me.
-
You've open edges. Use Thomthom's Edge Tool to inspect
-
@unknownuser said:
You've open edges. Use Thomthom's Edge Tool to inspect
I shuda known that when Weld didn't work.

Many thanks.
-
We're all imperfect. Have you tried the Tgi3D Amorph plugin. It creates smooth meshes quickly. Check it out it's free for 30days.
-
When you get to my age (66) two things start to go..... Memory and .... Can't remember the second.

Anyway, the curves formed after I fixed the gaps. Truth be told, the 3 curves in that drawing I posted above are only the 5th to 7th curves I've done, including the twisted duct in another post. I'm still at the bottom of the learning curve.
As for a mesh tool, I think Curviloft does me just fine. In fact it creates too fine a mesh, and I spend a fair bit of time reducing lines. But that is still way faster than my old way of tweaking a manual mesh.
-
@jgb said:
As for a mesh tool, I think Curviloft does me just fine. In fact it creates too fine a mesh, and I spend a fair bit of time reducing lines. But that is still way faster than my old way of tweaking a manual mesh.
The density of the mesh is primarily driven by:
- the number of vertices on the contour (Curviloft respect all of them)
- the sampling factor you may apply (usually it is to get a more dense mesh)
It may be worth working out the contours to minimize the number of vertices and then perform the Skinning operation.
Fredo
-
Hi jgb,
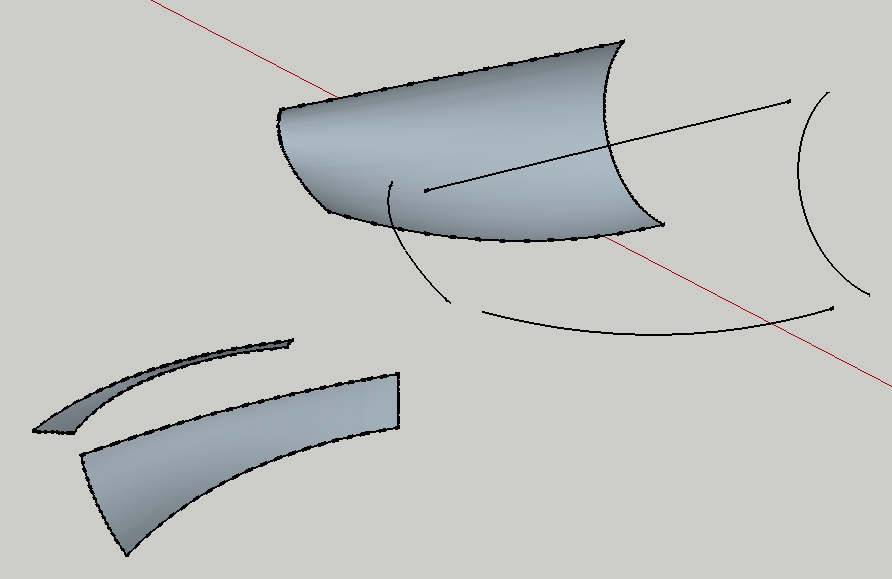
I took a copy of both arcs and welded it. Erased the old ons and moved back the welded arcs. Then i used Fredos "Skinning of shapes".
As Rich mentioned there were open edges and divided arcs.Charly
-
@unknownuser said:
@jgb said:
As for a mesh tool, I think Curviloft does me just fine. In fact it creates too fine a mesh, and I spend a fair bit of time reducing lines. But that is still way faster than my old way of tweaking a manual mesh.
The density of the mesh is primarily driven by:
- the number of vertices on the contour (Curviloft respect all of them)
- the sampling factor you may apply (usually it is to get a more dense mesh)
It may be worth working out the contours to minimize the number of vertices and then perform the Skinning operation.
Fredo
Thanks Fredo, After I first played with Curviloft (CL) I realized it followed all my verticies, but added more so I now create my initial control curves with a reduced segment count that looks crappy raw, but nice and smooth after CL does its magic. However, CL introduces a significantly higher vertex count in the mesh, sometimes dividing a controlling segment into 4 or 5 bits, with some very tiny. It is those very small segments that I have to eliminate, yet still keep a smooth mesh. But even so, that is far less work than tweaking a manual mesh.
In my 3 problems above (Cargo door fairings for my big freighter airplane), I created a segment size of about 24 inches on average, figuring on CL dividing those segments in 2 or 3, but I got quite a few segments that were less than 1 inch. At the scale of my model (308 feet long), that was way too fine.
Is there any way within CL's control parameters to adjust the "sampling factor"? I would like CL to divide a control segment in 2 or 3 vertices as a norm. Then I can control the smoothness with my initial arc and spline segment count.
Also, how does the "angle value" figure into the control? Mine is set at 40 deg, but I have not played with it yet.
And, while I still have your attention,
 is there any way to default the start location of the popup control toolbar? It always starts at top left, but in my case that area is hidden by my Components Window. Then I have to temporarily move the Comp Window so I can move the CL toolbar down to the lower left of screen. I would prefer that as the default start position.
Charly2008.
Thanks, but as I inferred before, when I was made aware of the gaps by Rich, I fixed them and had no problem forming the curves, exactly as you did. Now I am more careful in creating my control curves and have done a few far more complex skins since without problems.
Hello! It looks like you're interested in this conversation, but you don't have an account yet.
Getting fed up of having to scroll through the same posts each visit? When you register for an account, you'll always come back to exactly where you were before, and choose to be notified of new replies (either via email, or push notification). You'll also be able to save bookmarks and upvote posts to show your appreciation to other community members.
With your input, this post could be even better 💗
Register Login


Advertisement