Drawing a cap for an Aerosol can? [Curviloft / Extrude tools
-
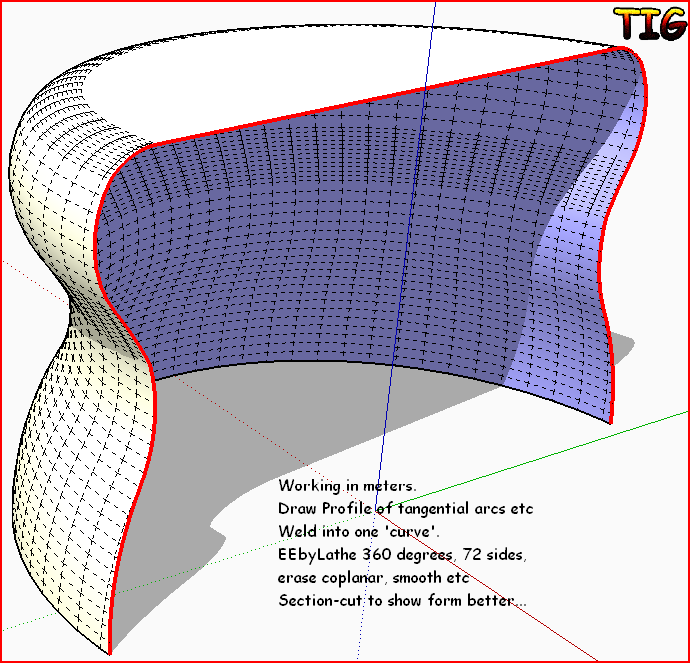
First I suggest that you 'scale' your model x1000 [draw a line off to one side that is exactly 100mm long, use the Tapemeasure tool and pick its ends, then type 100m - accept when asked to scale everything].
Change your Model Info > Units to 'meters' [with no unit suffix displayed, 0.0001 - no snap-length].
Now carry on modeling... inputting units as if they were still 'mm'.
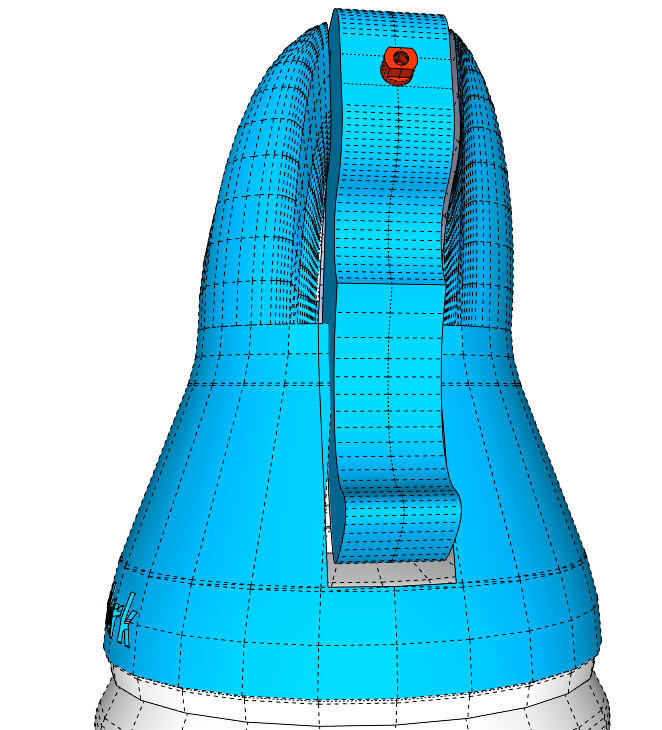
This will now let you make very small faces - SUp hates faces <~0.1mm and will often fail...
Now you should be able to use FollowMe, EEby... and CurviLoft tools with more success.
Make the can, top, lid, button etc as separate groups [much as it'd be manufactured] - this ensures that the geometry doesn't stick together unexpectedly. You can always explode two parts and regroup then later - like the lid+grip that will need to become one part eventually.
Much of it is simple 'FollowMe around a circle'. The odd parts like the 'grip' can be made using 2 or 3 lofted profiles - experiment - if it's grouped you can always move it to one side and try an alternative idea...
When you are finished you need to scale everything back down and change unites to mm again - any small faces will survive - it's just making very small faces that SUp and OpenGL trip up on... -
Here's a quick example for the initial lid form without grip or button
-
Mr Carter,
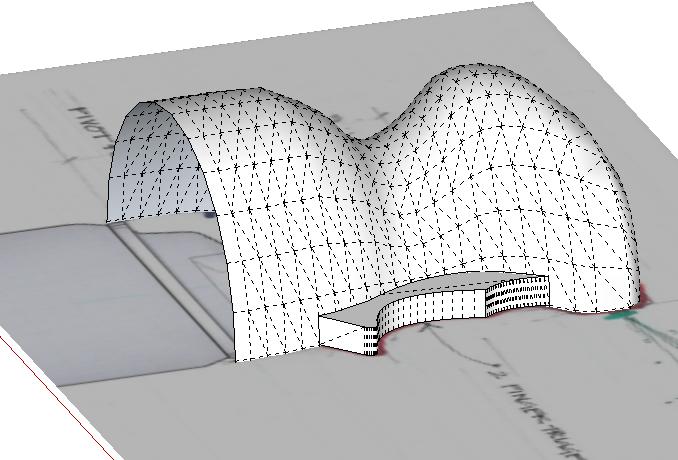
Attached is an attempt at your cap, which without a front profile i took some liberties. To create i made a circle and ctrl+push/pull'ed it numerous times. With this 'Ringed' cylinder i used the scale tool on each ring to position the rings to the side profile.
Yes it rough but it is only for explanining that sometimes rubies aren't needed to rough out a model. With the overall cap designed afterwards you can go about the tweaking process.
Do you have more pictures to go on?
How's the tiling business?

-
With Rich's 'grip' you could use Fredo's RoundCorners to 3d-fillet the outer arrises...
-
Thanks Ros, TIG and Rich, I actually used the product design 'out of the box' template from Google and it seemed to work OK but i see what you're saying about small faces.
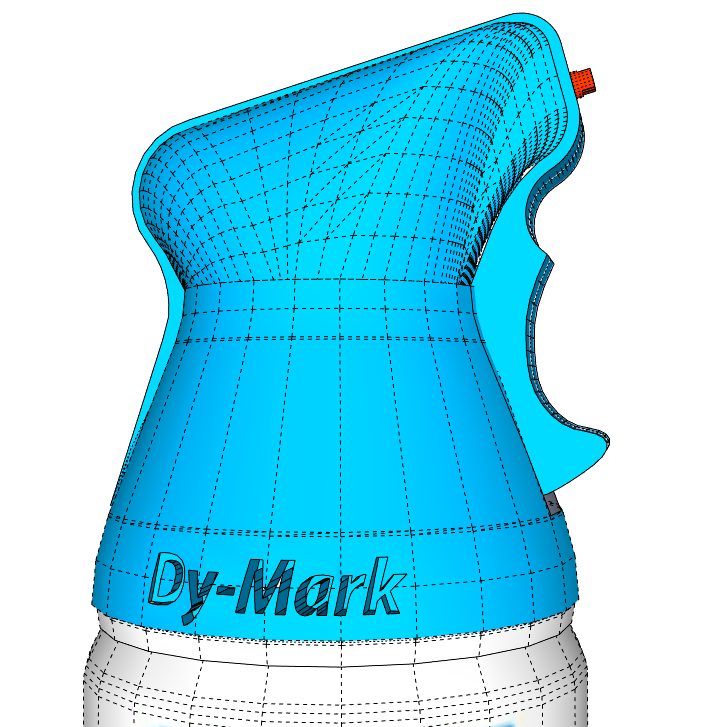
Firstly, apologies for not providing an alternative view; had it in my mind but yet to sketch it. Here's what I've come up with to date.I need to play a little more with the top of the nozzle as only the lower part of it will be symmetrical.
Haven't got my head around EEBy yet; so many to chose from its hard to know what's what. TIG, is there a help file?Rich, Tiling business is good I expect. once a tiler, you'll always tile.....

-
Nice work Andrew.
-
@dave r said:
Nice work Andrew.
Indeed! Andrew it might look even better if you eliminated the hard 90 degree edges on the trigger & the related ridge with a fillet.
-
Well, I was way off the mark on first attempt...

But this is a great challenge and you definitely nailed it. I gave it another go today to see how EEbyR and Curviloft would handle some shapes. Here's the result(s)...
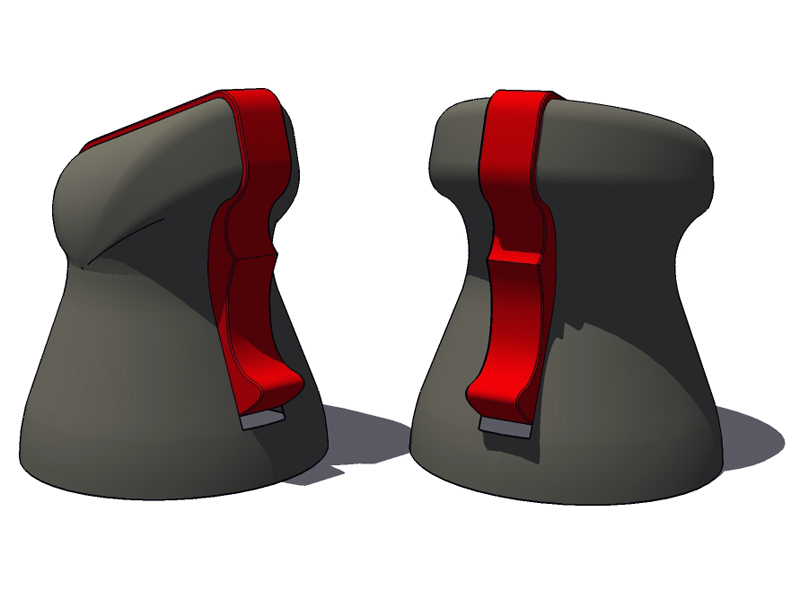
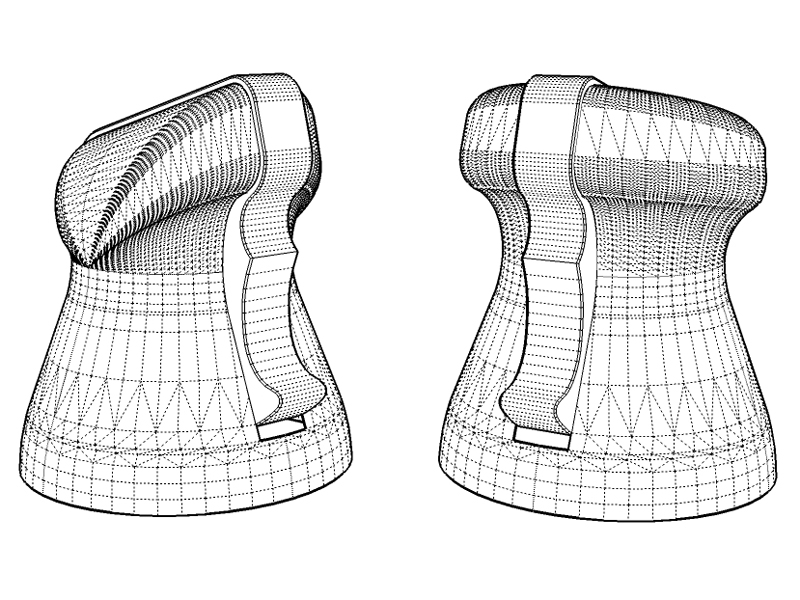
Andrew, do you use SDS?
-
Thanks guys, getting used to Curviloft and EEBy....
@ Ross, fillet was my next step actually, I'll give it a go!
@ Rich, I'm keen to know how you set up your rails to get the nose of the cap to me more uniform; that's the look I'm after! Can you post the skippy so i can look at it?

@ Dave, thanks for the advice and comment!!
Edit - SDS; do have it but nope don't really use it much... have played a little though... I though this would be more a symmetrical build?
Thanks everyone.
-
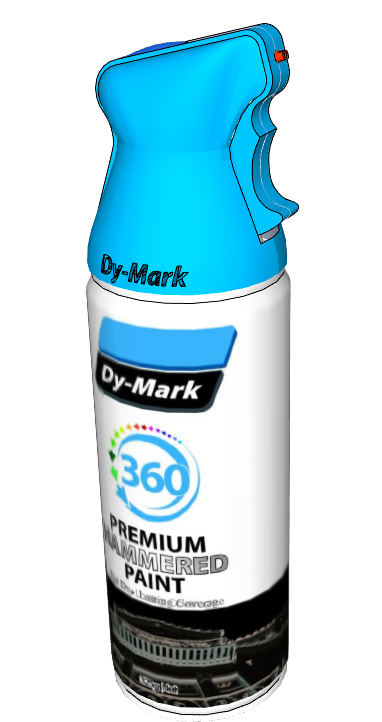
Another thing; mapping an image onto curved surfaces... I recall seeing somewhere here a technique of positioning the image on 4 sides of a cylinder to map correctly.
the way I've done it here is fudged the location front and back, selected the image and edited the cap group and painted each arc segment..... efficient?
-
@unknownuser said:
Can you post the skippy so i can look at it?
Why don't i read posts more carefully?
@unknownuser said:
SDS; do have it but nope don't really use it much... have played a little though... I though this would be more a symmetrical build?
Try running 1 iteration of SDS on the SprayCan while you are INSIDE the group and have the geometry triple clicked. It'll smooth that can out and you'll have a super smooth mesh. Afterwards you can use Thomthom's CleanUp script to reduces the faces but keep the details.
@unknownuser said:
mapping an image onto curved surfaces... I recall seeing somewhere here a technique of positioning the image on 4 sides of a cylinder to map correctly.
the way I've done it here is fudged the location front and back, selected the image and edited the cap group and painted each arc segment..... efficient?This 4 sided technique doesn't ring a bell? And your technique of Alt + is the correct workflow. Though Whaat's UV Tool can map cyclinders easily with a right click. But you well aware of this script. I did notice that when i checked your model that using that texture with Whaat's Tool screwed it up but i presumed it was a scaling issue?
As you can see i'm of no help.....again

-
OK ta. I'll try Whaat's UV tool next time ...
LEGEND!
Hello! It looks like you're interested in this conversation, but you don't have an account yet.
Getting fed up of having to scroll through the same posts each visit? When you register for an account, you'll always come back to exactly where you were before, and choose to be notified of new replies (either via email, or push notification). You'll also be able to save bookmarks and upvote posts to show your appreciation to other community members.
With your input, this post could be even better 💗
Register Login


Advertisement