Depth Maps from SU
-
It should work with any version of Photoshop that has a Channels palette...which would be all of them. I think it might work on the GIMP and related software like Cinepaint, as well, since I believe there is multi-channel support there too. But I don't think the watered-down Photoshop copies, like Photodeluxe and so forth, can use it.
poster-Lewis Wadsworth
-
Sorry, I just meant with regard to PS CS' depth of field lens blur filter.
Jackson
-
I'm sort of old school Photoshop...Gausian Blur forever! But I also use this depth mask with adjustment layers, principally Hue/Saturation and Levels, to create the kind of "atmospheric perspective" fading effect that I used to do with watercolors or tempera, in the old analog days of painting.
poster-Lewis Wadsworth
-
Isn't the EPIX format for Piranesi basically a depth map export too? Haven't tried it myself, but I thought that one of the files exported looked similar to what you have achieved.
Kelly
poster-kdjanz
-
@kdjanz said:
Isn't the EPIX format for Piranesi basically a depth map export too? Haven't tried it myself, but I thought that one of the files exported looked similar to what you have achieved.
Kelly
I think you are correct...the EPIX format includes a z-pixel which indicates depth. Photoshop is much more common than Piranesi, though, so this hopefully will help people with PS licenses achieve depth-based manipulations with 2D exports from SU6. The third party renderers and modelers that I have used...Max, VRay, and Blender...will happily generate a true depth map, though, that can be used in conjunction with photorealistic renders from those packages.
poster-Lewis Wadsworth
-
I was writing up a tutorial on this, as Kris requested, and I noticed (in the file I made to demonstrate this effect) a kind of bug I hadn't seen in previous renderings using this techique.
Look at the original image here, direct 2D export (originally a TIFF) from SU6:
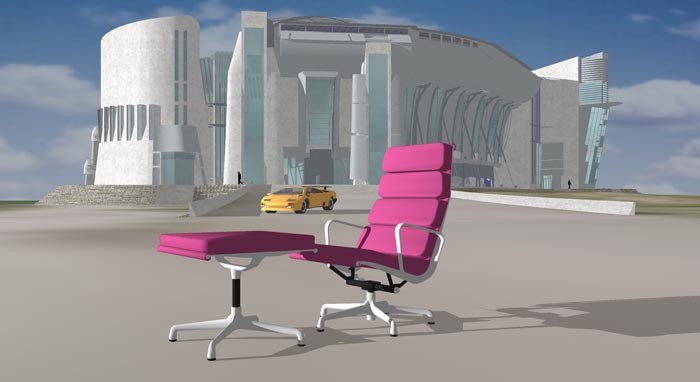
Now look at this screenshot of the depth mask mode:
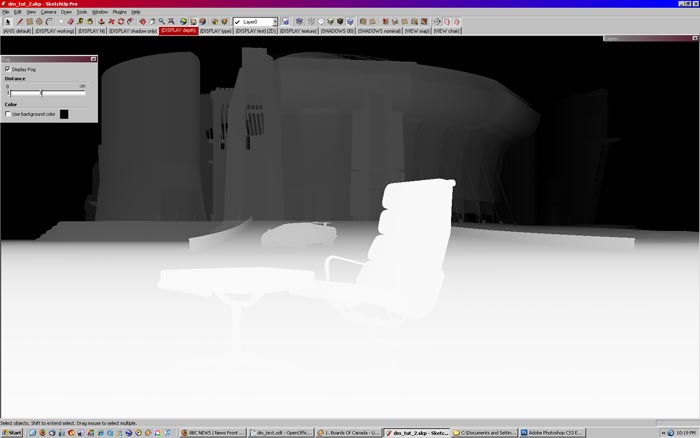
This is what the depth mask looks like when exported-2D:
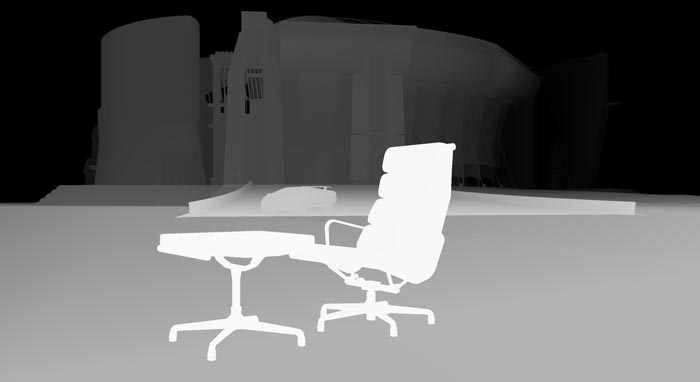
Obviously the terrain that the chair is sitting on is not showing the proper "depth" shading: it should start out white at the chair, and then shade to grey as it approaches the ramp that the car is sitting on. But it starts a darker grey than the ramp, and stays that way.
It doesn't really impact the final result, where I used the lens blur filter in Photoshop and the depth mask as the target:
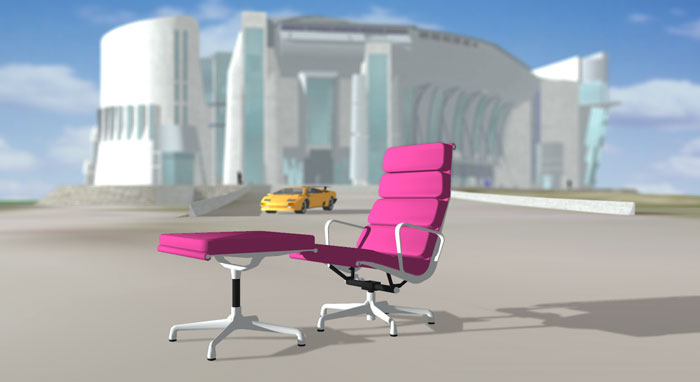
except that the foreground chair shadow and the terrain textures are seemingly blurred more than they reasonably should be.
Jackson (or anyone else trying this), while you're playing with this technique, could you keep track of where this kind of error in 2D export occurs? Please let me know. I have several other models where this does not occur, and the depth mask exports to bitmap exactly as it appears on screen.
--Lewis
poster-Lewis Wadsworth
-
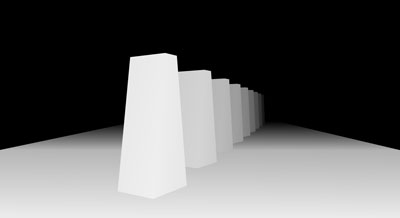
I've figured out that if you really want to see how a fog-derived Depth Mask is really going to Export 2D, turn off hardware acceleration under Preferences. Big planes orientated near the horizontal seem to be subject to some odd streaking and abrupt shading changes that do not effect vertical surfaces. It's nothing that couldn't be corrected in Photoshop, but it does make this a little less acceptable a substitute for true Depth Map support in SketchUp. Oh well. Should I still write up a tutorial?
http://www.sketchucation.com/scf/download.php?id=1501poster-Lewis Wadsworth
-
yes by all means because I am just barely following you...
but as I see it... your target has the car included and that's throwing off the map... is the car actually inside your target mask?
-
I did do an export to EPIX and then changed the extension of the file to TIF. On the Mac, the file opened in Preview to show that there were 3 images inside. The first was the visible scene as in SU, the second was the grayscale depth map and the third was pure white - don't know what that was about. But I could then export the second image for my own use without ever going near Piranesi.
Just thought that might be useful to you.
Kelly
poster-kdjanz
-
Photoshop Elements has a plugin that enables many Photoshop features, like Channels http://hiddenelements.com/
poster-gata
-
@kdjanz said:
I did do an export to EPIX and then changed the extension of the file to TIF. On the Mac, the file opened in Preview to show that there were 3 images inside. The first was the visible scene as in SU, the second was the grayscale depth map and the third was pure white - don't know what that was about. But I could then export the second image for my own use without ever going near Piranesi.
Just thought that might be useful to you.
Kelly
EPix is supposed to be an extension to TIFF with two additional channels. I can force it to open in Photoshop, but all I find are the normal 3 RGB channels, unfortunately. What is Preview? I assume it is a Mac only program.
--Lewis
poster-Lewis Wadsworth
-
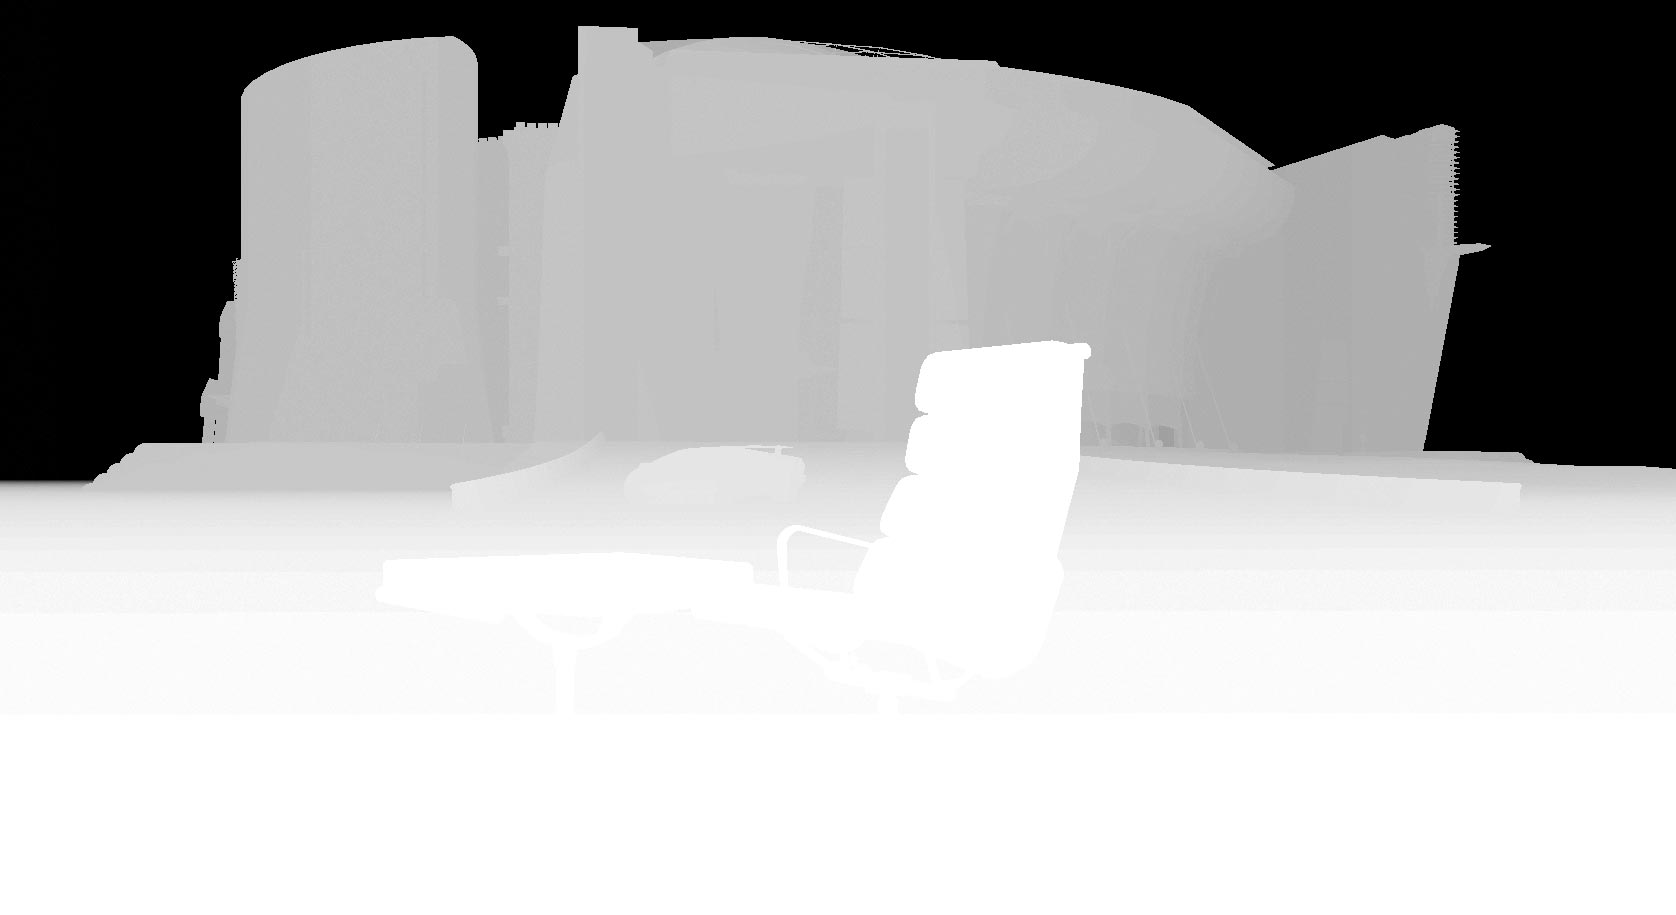
I actually have a license to Piranesi 3 for PC. I just happen to really dislike that application, enough that I never bothered to upgrade to more recent versions. But it is possible to export the depth mask only from Piranesi as a TIF or some other format. It needs to be adjusted slightly, because Piranesi makes nearer objects darker as opposed to lighter, and background in SU becomes some strange blood-red color in Piranesi's depth mask that needs to be selected and filled with white in Photoshop before it will work properly with anything in Photoshop.
Here is the adjusted Piranesi-generated mask:
and here it is applied in Photoshop using the lens blur filter:
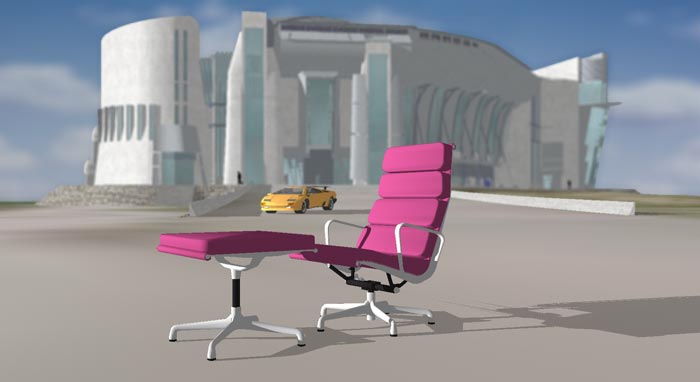
There are actually some buggy bits in the Piranesi depth mask as well...striations along the ground plane, and fringing of some kind along the roofline of the background building. Plus, of course, SketchUp's Epix exporter doesn't allow for antialiasing, which means that the depth mask produced from Piranesi has the same prevalent jaggies as the RGB image contained int the Epix file. In other words, with the exception of the problem with horizontal planes a depth mask produced using SketchUp's Fog, Styles, and Shadow controls is somewhat higher quality than one produced using Epix export from SketchUp via Piranesi.
EDIT: I discovered that if you switch Piranesi's View menu > Depth and thenexport a "depth" EPix channel as some normal bitmap (like a TIF)--as opposed to doing that while View > RGB--you end up with a higher quality depth mask that merely needs to be inverted in PS to work properly with Lens Blur and similar techniques in Photoshop. You can combine that Piranesi-generated depth mask with a straight-from-SU6 2D export at the same resolution (and with antialiasing turned on) to get a nearly ideal depth mask situation.
EDIT2: Okay, is anyone reading this and getting quite the same headache I am getting writing it? I think I'm going to call it a day and do something NOT involving depth masks and SketchUp for a while. I'll write up that tutorial tomorrow night.
poster-Lewis Wadsworth
-
Lewis,
Sorry, I've been offline this weekend (I almost always am).
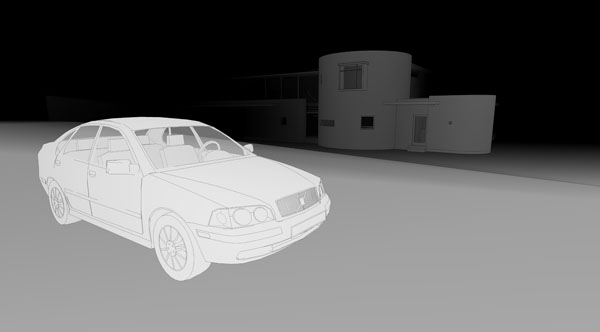
Yep, I see what you mean about the "depth map" exports- I got similar results. Bizarrely, when I exported now (with edges off) edges still show up in the exported jpg which I swear didn't occur last week.
Either way, neither of the bugs seem to affect the results enough to worry too much (although highly textured ground planes might show up the errors more dramatically). I've always found depth maps to be more of an art than a science so I'm not too worried about these glitches.
Jackson
-
@unknownuser said:
Lewis,
Sorry, I've been offline this weekend (I almost always am).
Yep, I see what you mean about the "depth map" exports- I got similar results. Bizarrely, when I exported now (with edges off) edges still show up in the exported jpg which I swear didn't occur last week.
Either way, neither of the bugs seem to affect the results enough to worry too much (although highly textured ground planes might show up the errors more dramatically). I've always found depth maps to be more of an art than a science so I'm not too worried about these glitches.
Jackson
I hadn't seen the edges bug, Jackson, but some tests I did yesterday seemed to implay that the "ground plane" problem doesn't really impact the use of the mask too much. I wish I could understand why it happens, though, since it is one of the few instances I have seen in SU where What You See Is NOT What You Get...the depth mask looks perfect on the screen. The ground plane problem doesn't seem to turn up if your ground plane is not particularly flat, or if the scale of the project is quite small, in any case. I'll write up the tutorial with some caveats about this.
I am curious to know though if all Mac users can really extract a true (or potentially true) depth mask from EPix exported files without owning a license to Piranesi. Could someone on a Mac check this? (See kdjanz' post above, first, about how he did that.)
poster-Lewis Wadsworth
-
I should've said that the ground plane in my example was built geometry not SU's own ground plane. So it's not even a ground plane bug- it seems to be something to do with either orientation or angle of view relative to a viewed plane. Weird.
Jackson
-
Come on, guys, if you don't stop this, I'll move ya'all to the post processing how to forum!

Seriously speaking - don't you think if you elaborate this thread well enough, it should move there?
-
It wouldn't bother me to move it to post-processing. Jackson, do you mind?
(You're right, incidentally, we should call the bug the "horizontal plane error"...that's more accurate since I don't use SU's ground plane either.)
poster-Lewis Wadsworth
-
Moved.
Jackson
-
Hi Lewis, you are a busy guy.
I get both "the edges bug" and "horizontal plane error".
I tried this depth map thing a while ago and immediately I encountered the above problems.
Then I figured this cannot be done, but look at what you guys accomplished here...
I downloaded and used Lewis's style setting but got the same problem.
It could be my videocard problem (I use GeForce though).
There might be some workarounds for "horizontal plane error", but those edges are very difficult to get rid of.BTW I found a nice tutorial of how those depth map should be applied to the original image.
This should save some of Lewis's time.
http://photography-on-the.net/forum/showthread.php?t=102294Did you ever find a setting to get rid of edges, jackson?
poster-takesh h
-
Takesh,
I must admit I've been too busy with boring stuff to have another go at doing these depth maps- I keep meaning to create a Style which incorporates the right settings. I didn't worry too much about the lines as it didn't have much of an effect on the blurring (as it bled over the lines anyway). I'll try to have another go at this this week.
Regards,
Hello! It looks like you're interested in this conversation, but you don't have an account yet.
Getting fed up of having to scroll through the same posts each visit? When you register for an account, you'll always come back to exactly where you were before, and choose to be notified of new replies (either via email, or push notification). You'll also be able to save bookmarks and upvote posts to show your appreciation to other community members.
With your input, this post could be even better 💗
Register LoginAdvertisement


