Issue with Curviloft
-
Hello!
Curviloft is awesome! I am trying to use it for this task:
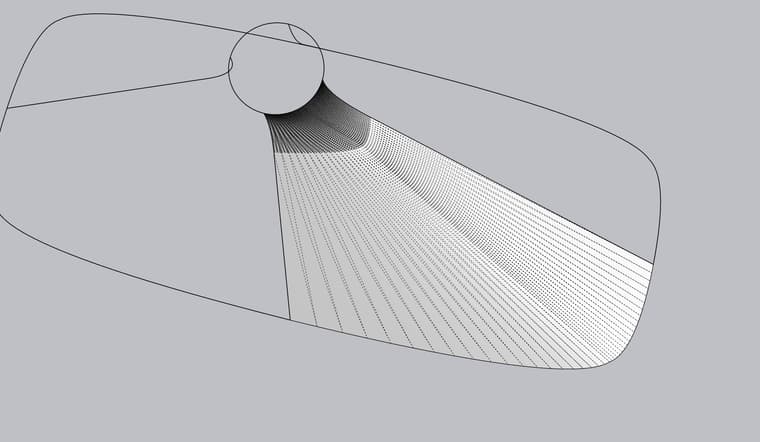
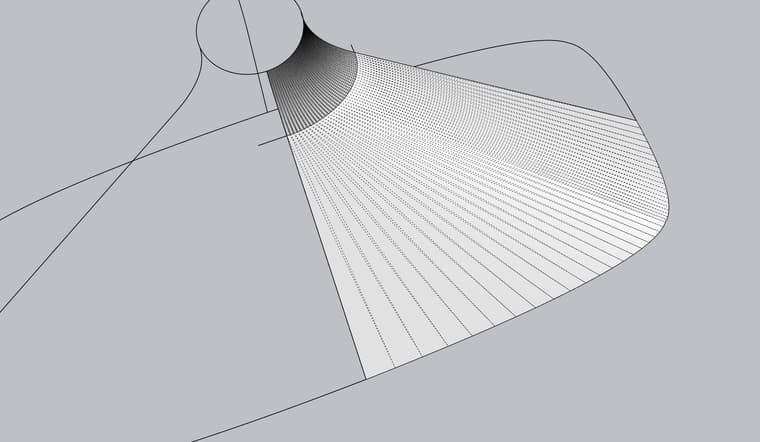
I want to loft this -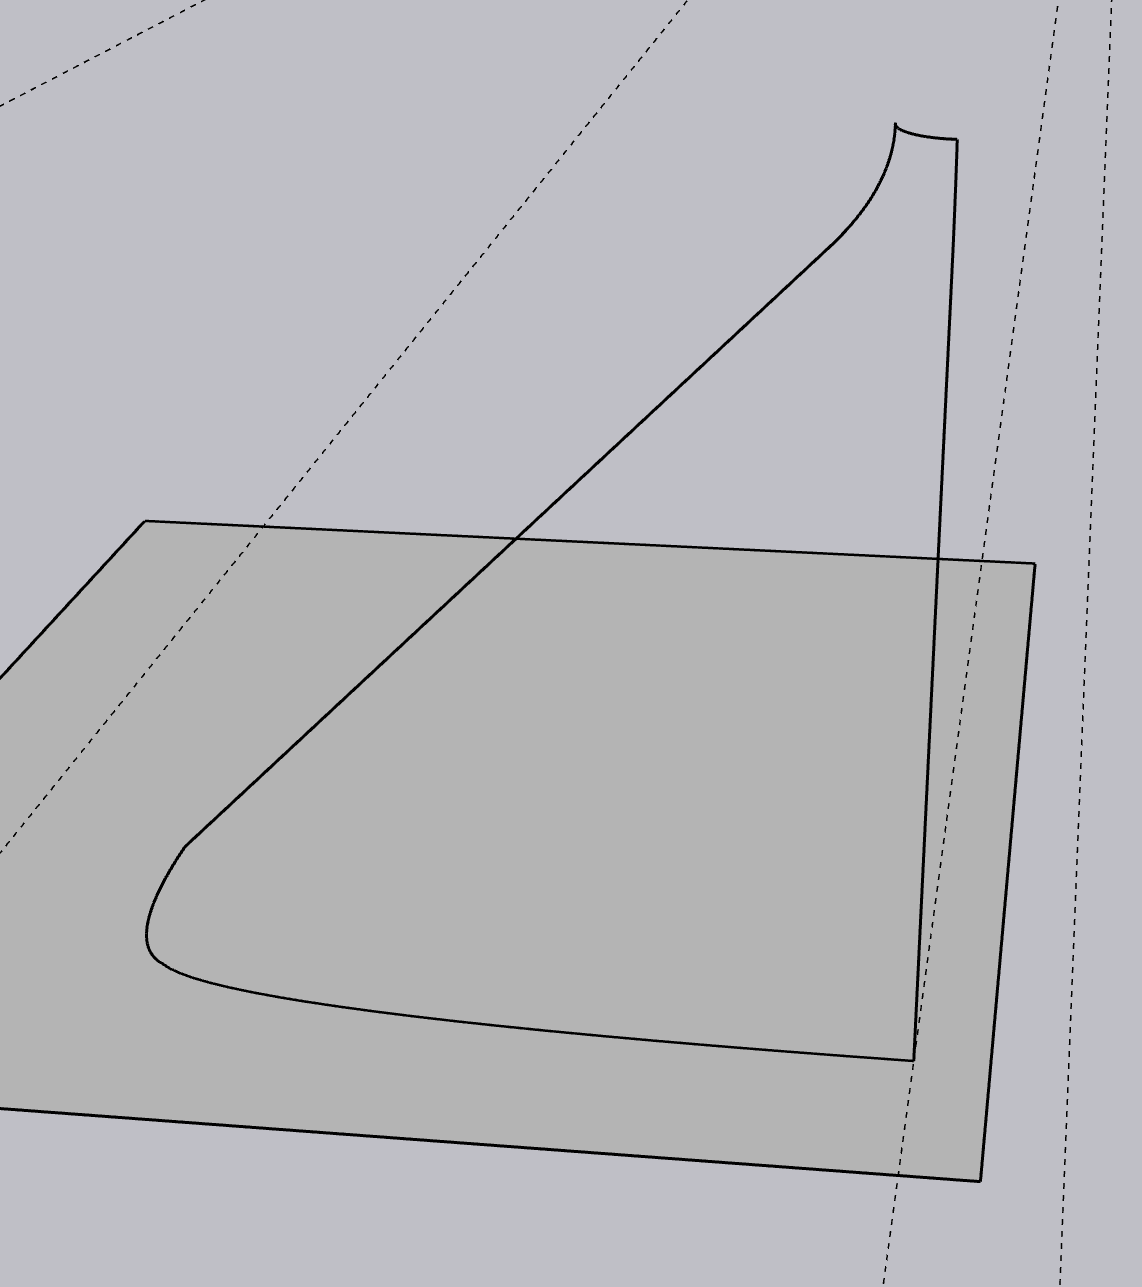
Into this -
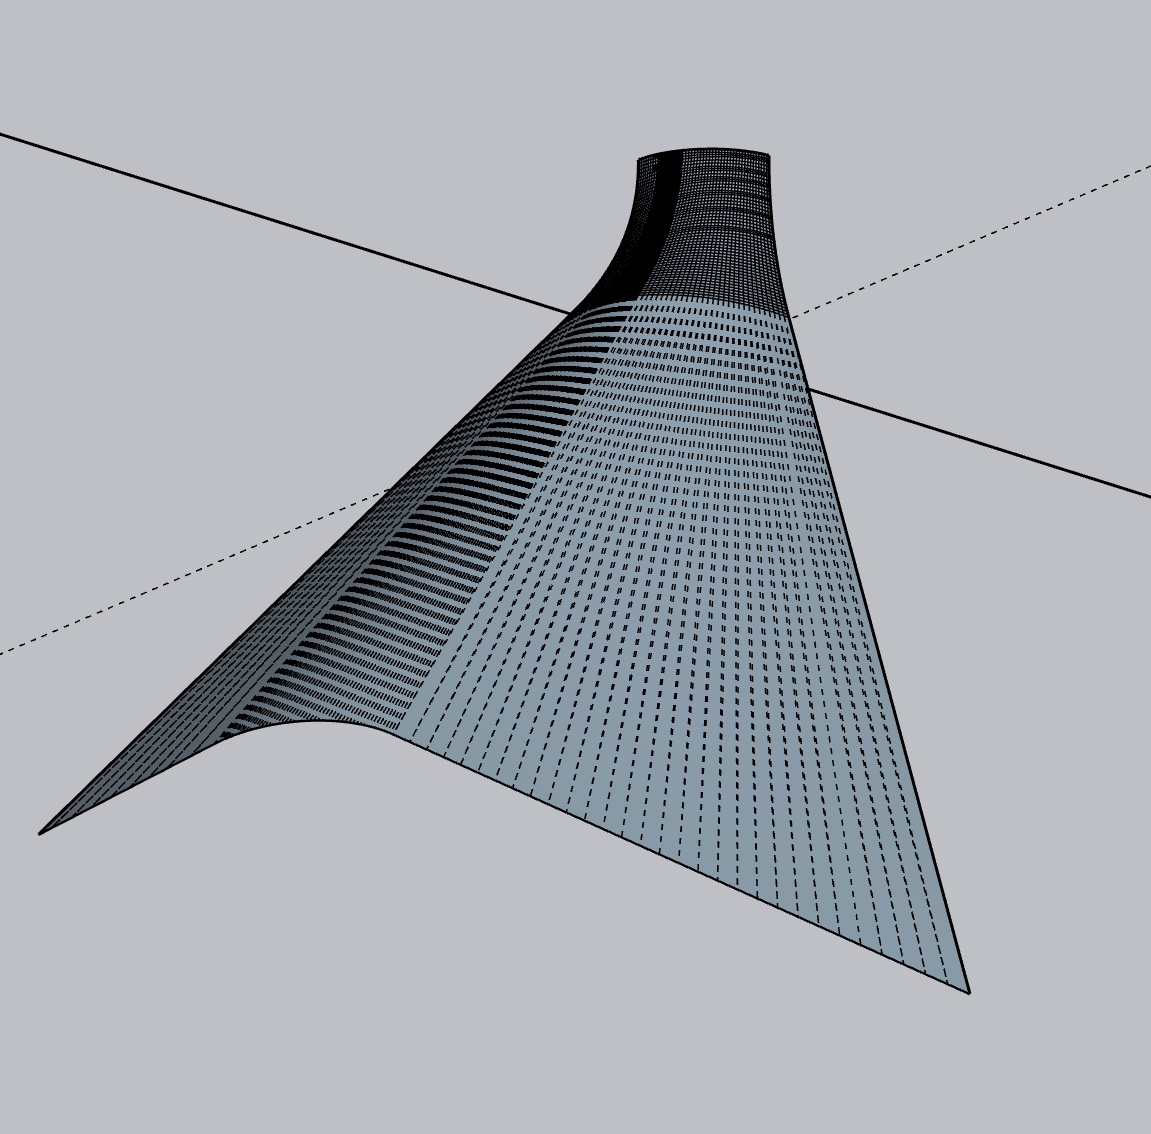
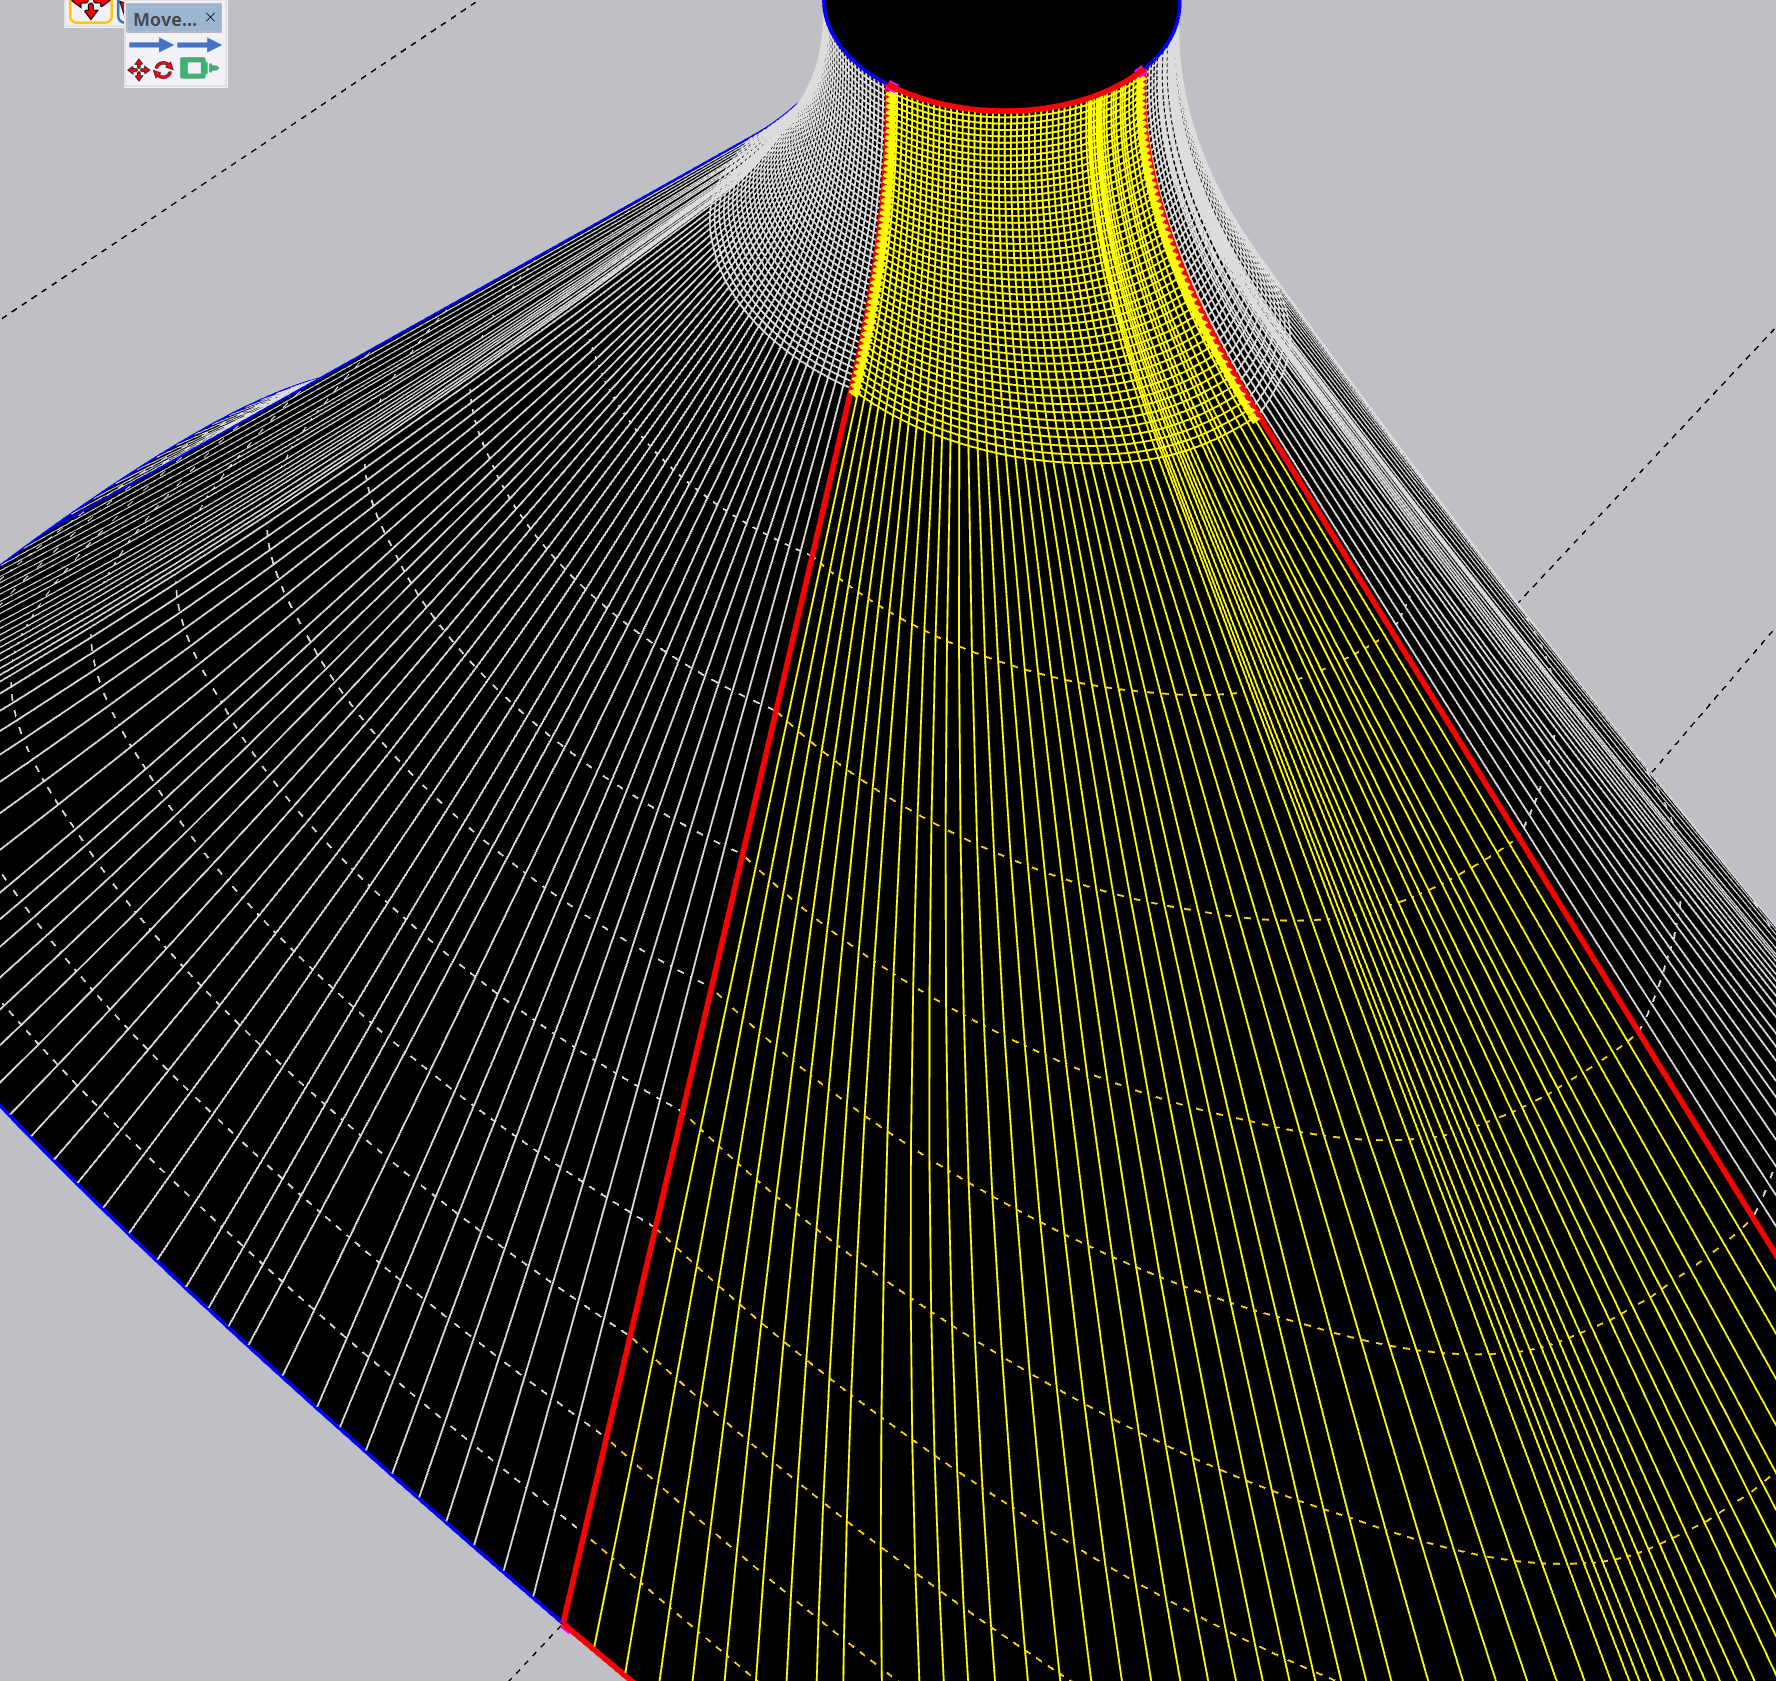
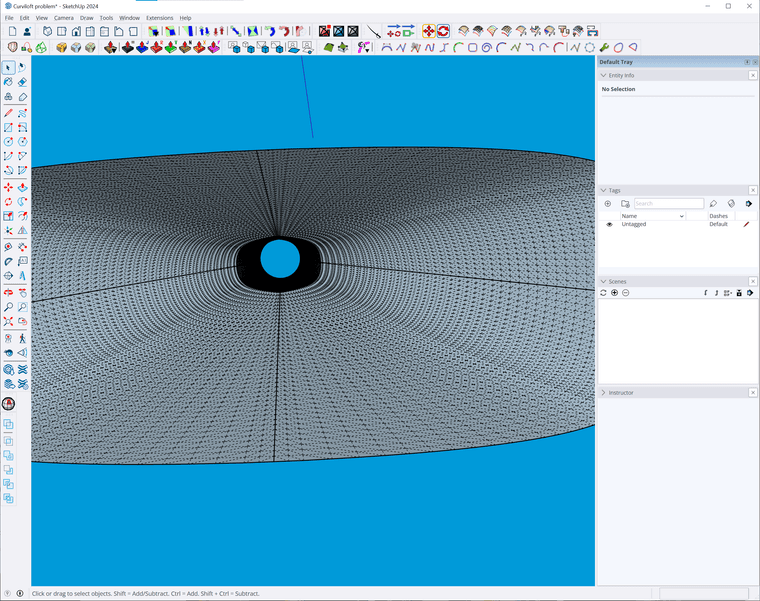
So far, so good. But the precise shape is important. The result has this deformations (copied into 4 corners):
In all 4 corners where the quarter portion is connected, there is a curl inward. The transition is from a perfect circle to a rounded rectangle with all angles bulging outward, there is no inward crease in the base shape:
It still happens, whether I do it in quarters, or halves, or the whole shape at once. See the creases going inward where the quadrants meet. I have tried every combination of settings in the curviloft options. What am I doing wrong? Anyone know how to get a basic loft that follows the geometry, without adding the inflection inward?
Thanks!
-
Easier investigate if you share the SKP file.
-
I thi nk extrusion tools might be better for this instance. I end up trying both as they can return distinctly different results but usually one OR the other will do the job.
I have seen this issue many times.
ALso, do all the arcs have the same number of segments or multiples thereof?
-
Thanks for the replies.
I made sure that the arcs have the same number of segments (40).I tried Extrusion Tools, it had the opposite problem. The seam bulged outward instead of curling inward.
-
Try changing the order of extruding profiles/arcs, you can get quite different results. Also, either the same number of facets or multiples thereof rather than different numbers all over the place. Much cleaner results whichever tool you are using.
-
@Mike-Amos thanks Mike!
What do you mean by changing the order? Do you mean selecting them in a different order before execution?
I have been using the skin function with the whole shape selected before pressing the button.
-
Correct, if part of the arc is a more or less straight line, it will 'inform' on the final result. You can break the arc too with the more or less straight part seperate and it WILL still extrude as long as it was part of an arc (Glued) previously.
-
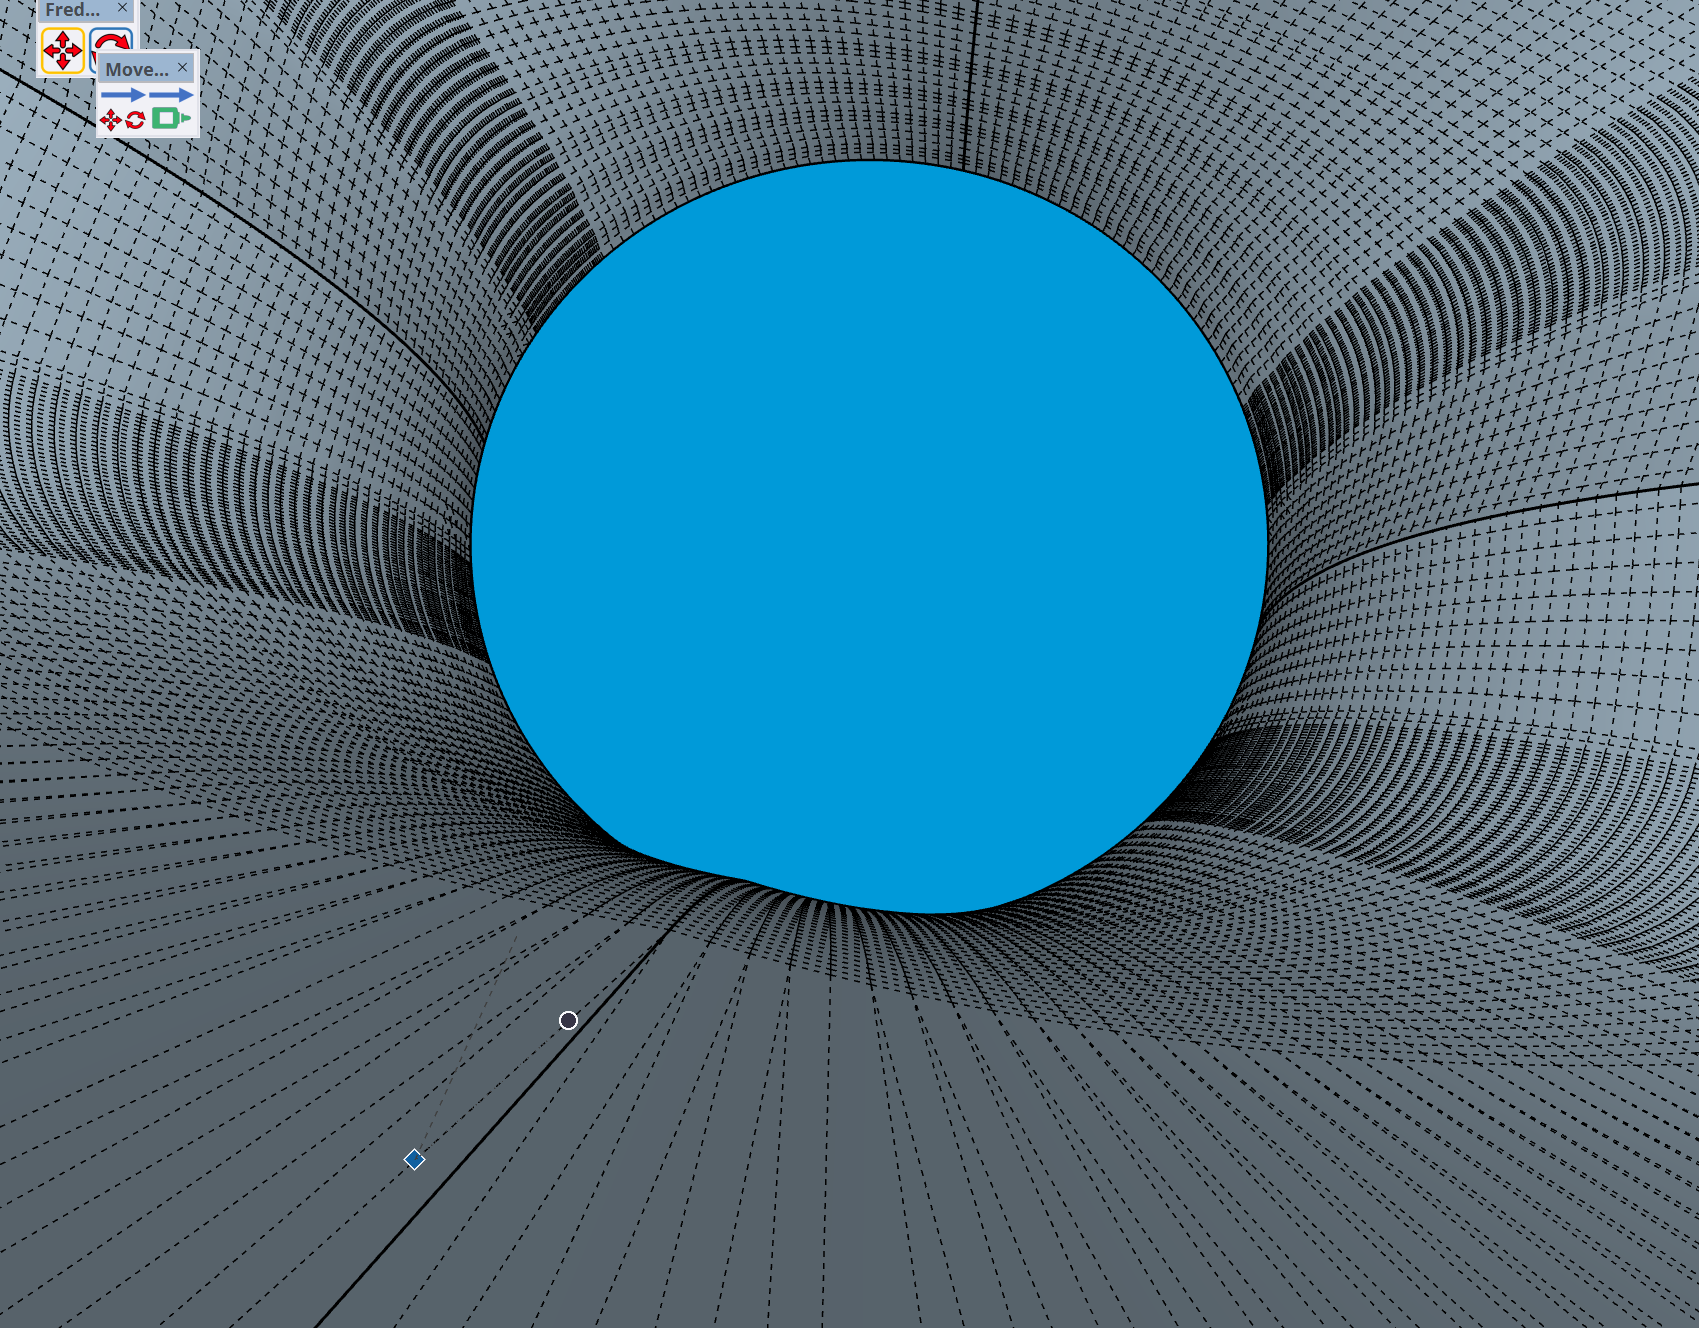
First I just extruded the base vertically. Second attempt I added a step.
Copied the top arc and placed it as seen in the second image, scaled to fit and extruded. I think this is the money shot.
-
Thanks a ton Mike, this looks to be the best so far. Did you use extrusion tools, or curviloft?
Can you send me the skp with your steps, so I can check if I'm doing it right?A bit of context, if you care: The objective is to have the flare rate expand at equal rates from circle to superellipse, as the transition is for the expansion of a high pressure wavefront for a very loud horn speaker. It seems nitpicky, but the ideal is a totally gradual progression in all the expansions: from top to bottom, smaller to bigger, circle to superellipse/rectangle. The superellipse is so that the speaker's output has narrow vertical and wide horizontal coverage for the audience.
Especially in the high pressure upper area, any tiny divergence in even expansion of energy is visible in a frequency response graph, so it's very good that any tiny divergence is happening after the mid-ring which is down the horn throat a ways, and the upper area is still very even propagation from circle to scaled circle.
What you produced is very close, except the ideal shape for the mid-ring would not just be the scaled circle, but would also be a halfway shape-merge to the superellipse below. But I think what you made is good enough for rock n roll, considering most of the work I've seen in this area has a much lower poly count, or is made out of heavily sanded plywood in the end
")
I have a couple more ideas to try that are inspired by your tips, and I might give this a shot in Blender to see how it handles the problem. Much appreciated.
-
Thanks again for all the help.
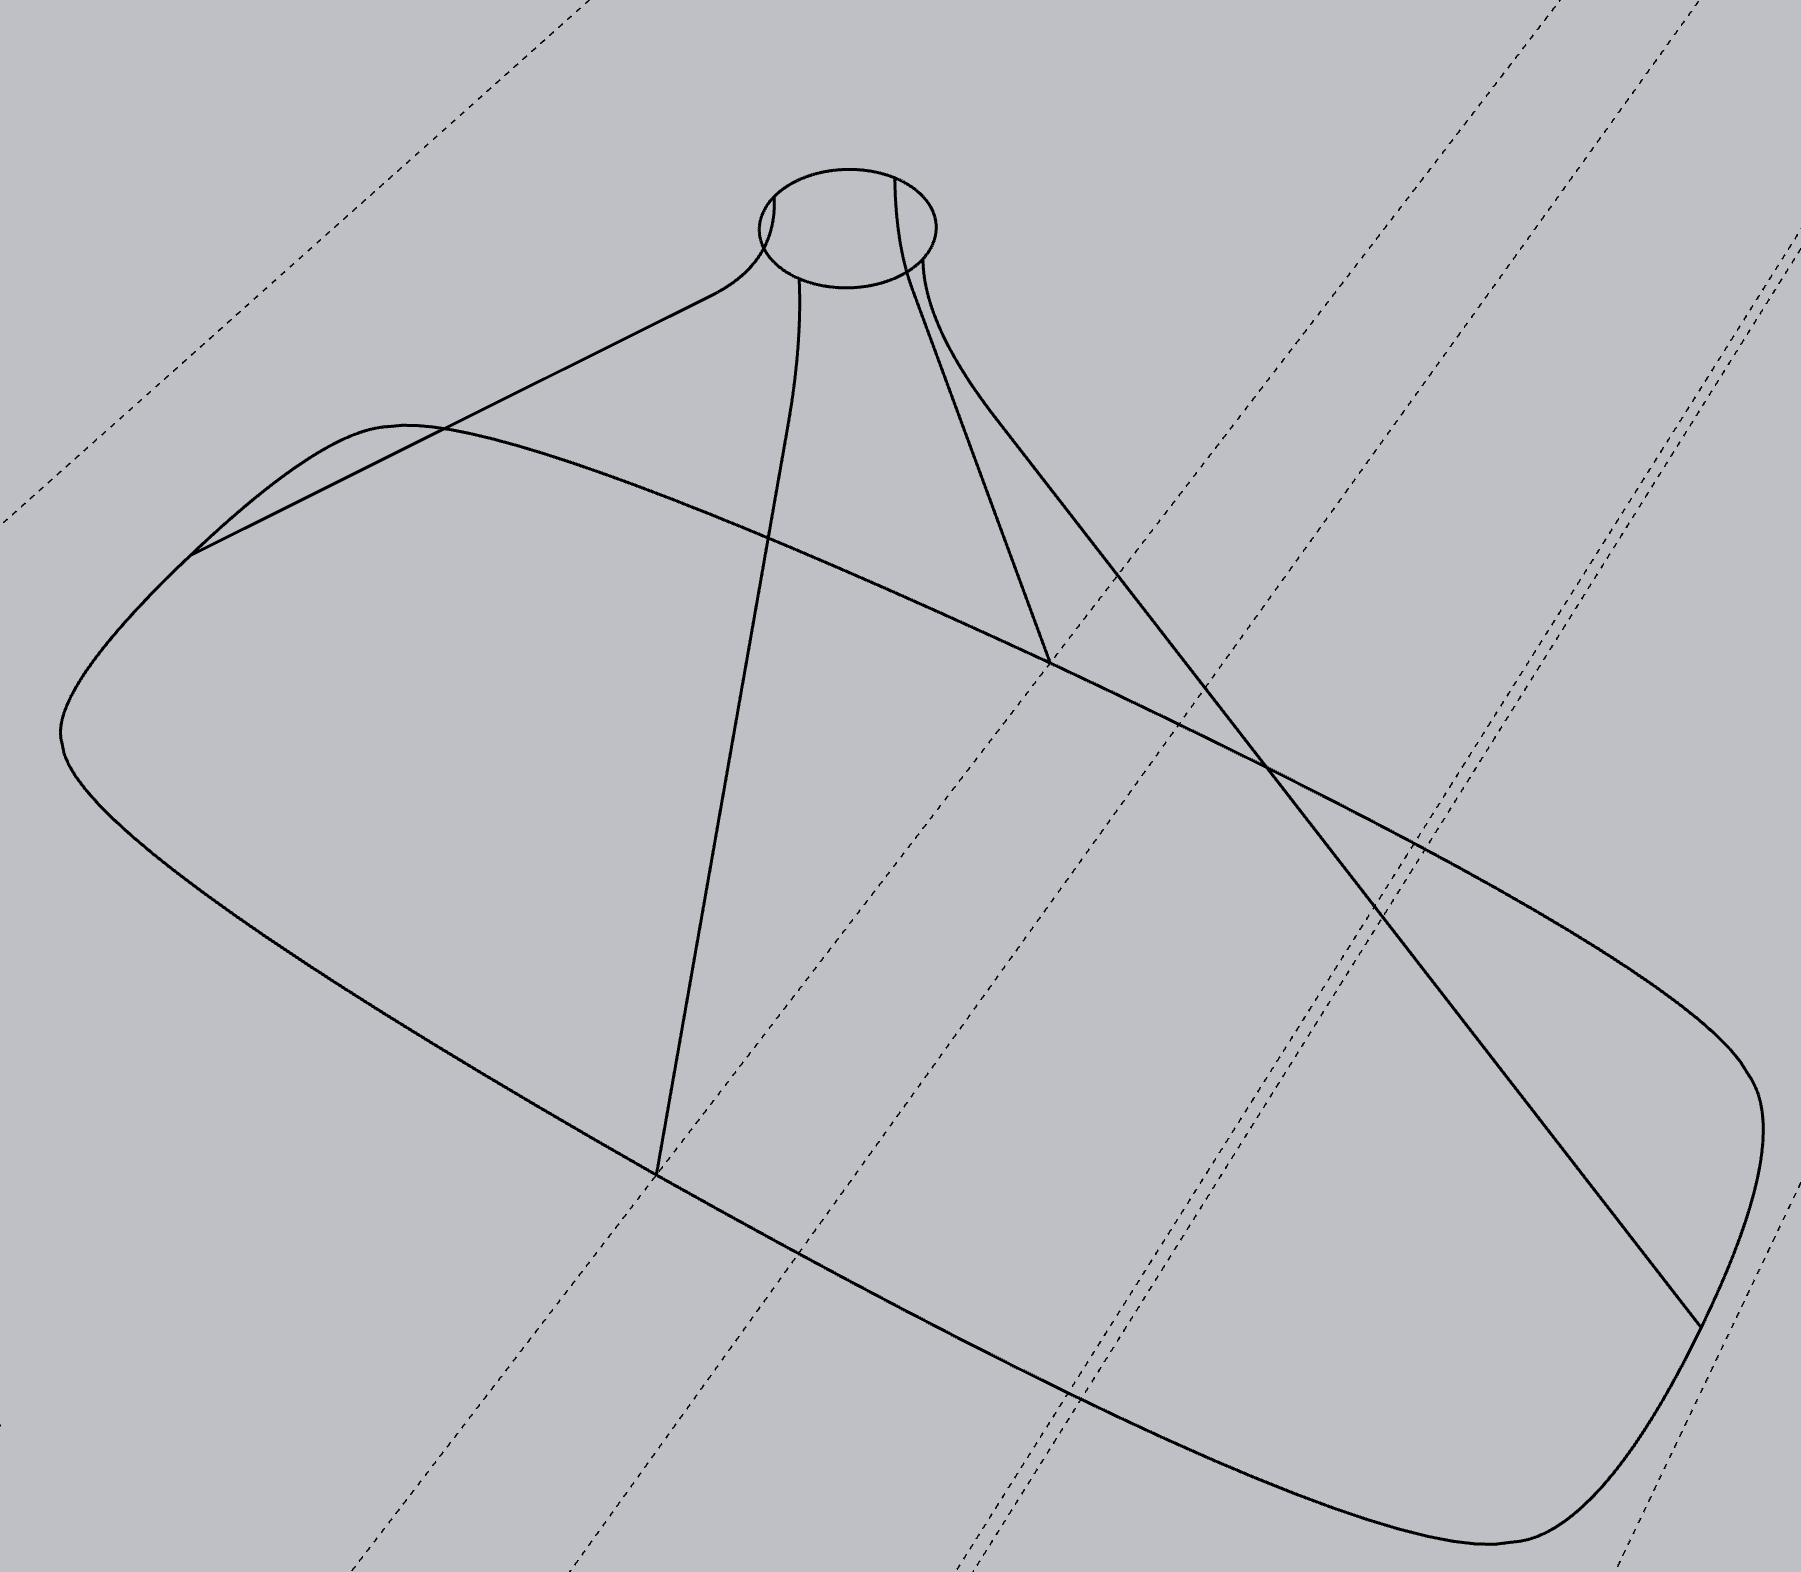
I think I've figured the workaround for Extension Tools "extrude edges by rails"The trick to getting rid of artefacts at junctions seems to be:
-
With the top and bottom quarter-pie profiles, go to the end of each curve. Make sure the final segment is parallel to x or y axis. In other words, counter the default sketchup behaviour to place equal sized segments for a circle, with segments adjacent to axes at an angle. Make the end segments of profile curves are squared off instead.
-
Divide the long sections of the rails into many segments (I used 40).
Result:
-
-
Hello! It looks like you're interested in this conversation, but you don't have an account yet.
Getting fed up of having to scroll through the same posts each visit? When you register for an account, you'll always come back to exactly where you were before, and choose to be notified of new replies (either via email, or push notification). You'll also be able to save bookmarks and upvote posts to show your appreciation to other community members.
With your input, this post could be even better 💗
Register Login


Advertisement