sketchucation logo sketchucation
    • Login
    ℹ️ Licensed Extensions | FredoBatch, ElevationProfile, FredoSketch, LayOps, MatSim and Pic2Shape will require license from Sept 1st More Info

    The Nadesico A

    Scheduled Pinned Locked Moved WIP
    194 Posts 10 Posters 48.8k Views 10 Watching
    Loading More Posts
    • Oldest to Newest
    • Newest to Oldest
    • Most Votes
    Reply
    • Reply as topic
    Log in to reply
    This topic has been deleted. Only users with topic management privileges can see it.
    • Bryan KB Offline
      Bryan K
      last edited by

      Thanks tuna!

      LOL, yeah I had the same problem when I started watching the show. πŸ˜†

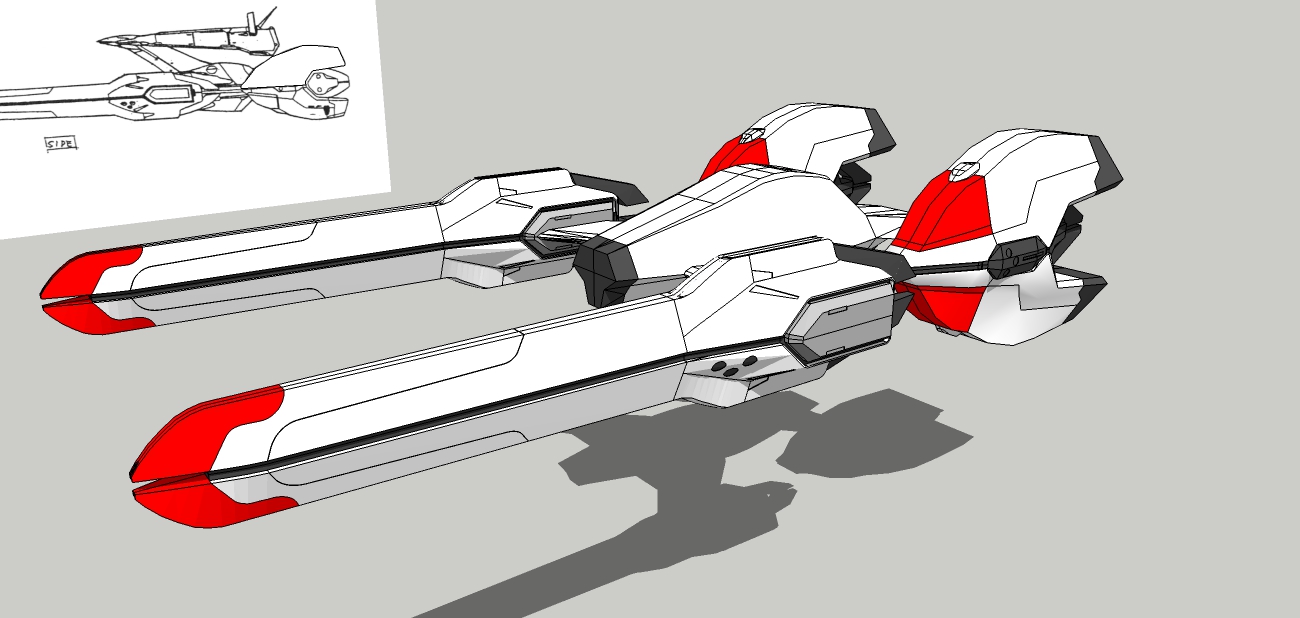
      More engine pod updates.


      Nadesico A83.jpg


      Nadesico A84.jpg

      See my portfolio at https://delphiscousin.blogspot.com/

      1 Reply Last reply Reply Quote 0
      • Bryan KB Offline
        Bryan K
        last edited by

        Correctly positioned the engine pods. Made basic pod struts as component, then used strut for equal placement.


        Nadesico A85.jpg


        Nadesico A86.jpg


        Nadesico A87.jpg

        See my portfolio at https://delphiscousin.blogspot.com/

        1 Reply Last reply Reply Quote 0
        • Bryan KB Offline
          Bryan K
          last edited by

          Geometry clean up to make the surface flat for the side pod thing to come.


          Nadesico A93.jpg


          Nadesico A94.jpg

          See my portfolio at https://delphiscousin.blogspot.com/

          1 Reply Last reply Reply Quote 0
          • tuna1957T Offline
            tuna1957
            last edited by

            Looks like good progress πŸ‘

            1 Reply Last reply Reply Quote 0
            • Bryan KB Offline
              Bryan K
              last edited by

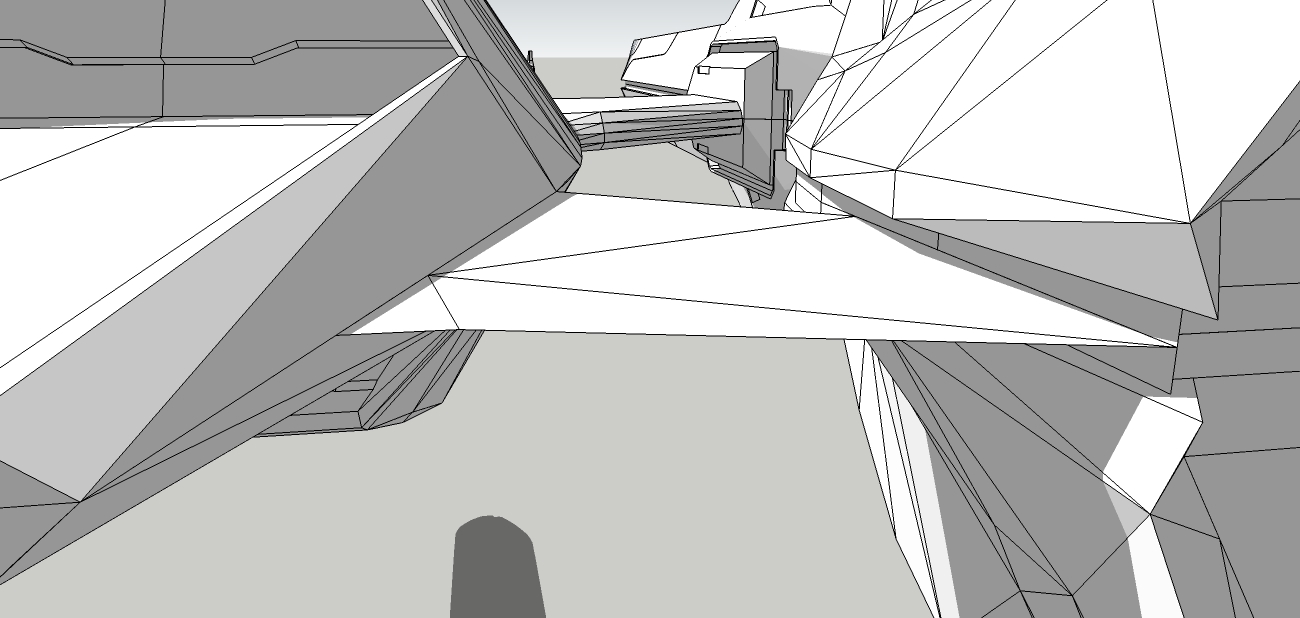
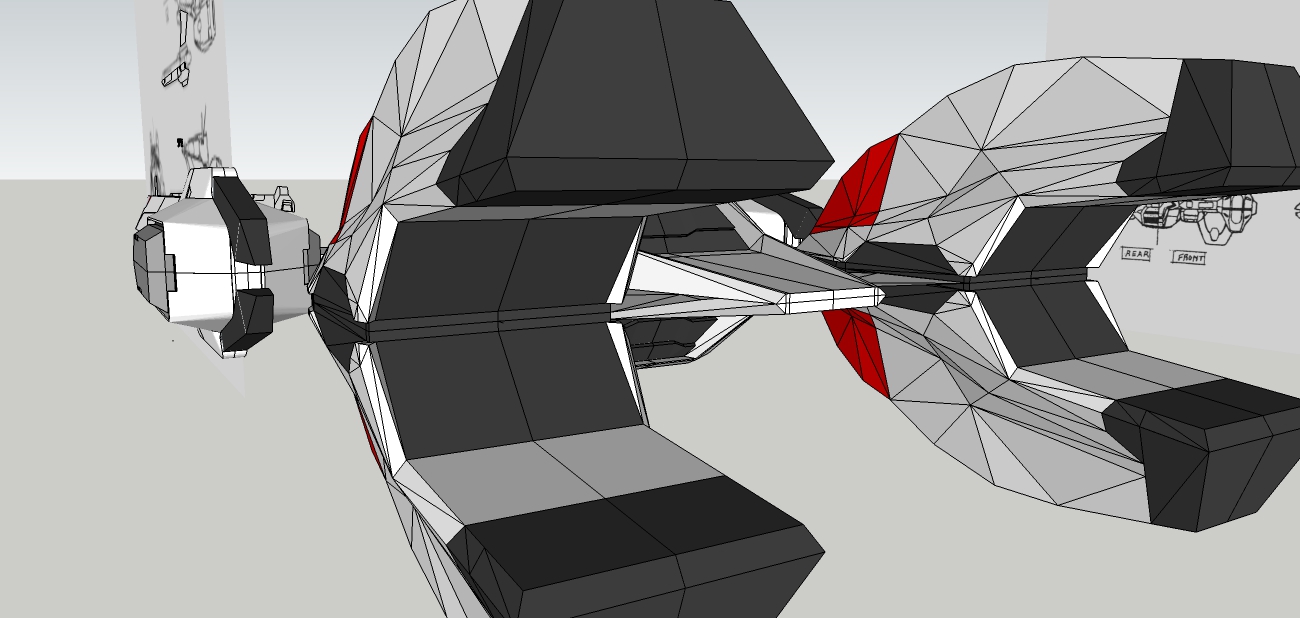
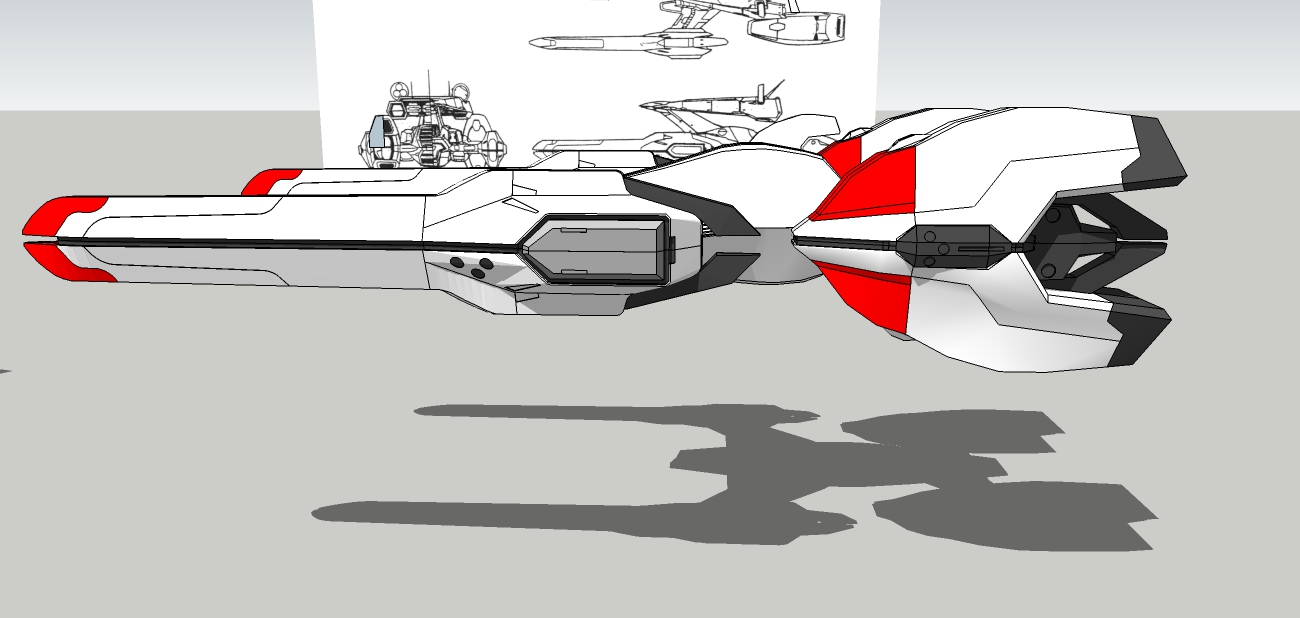
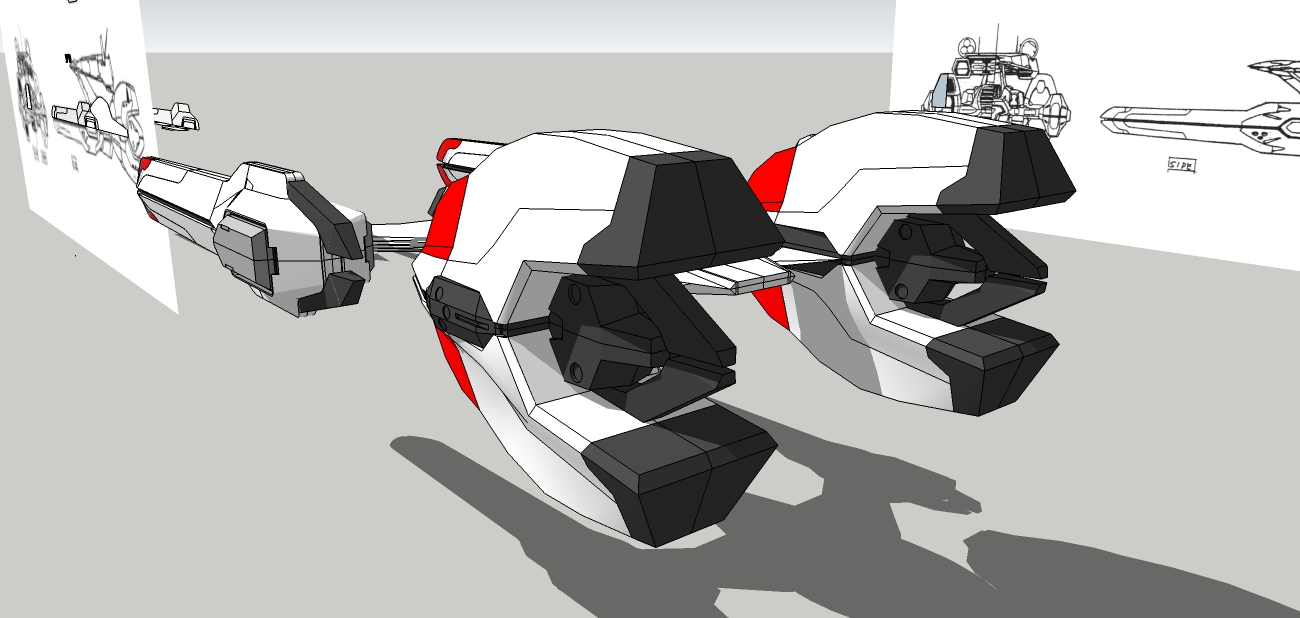
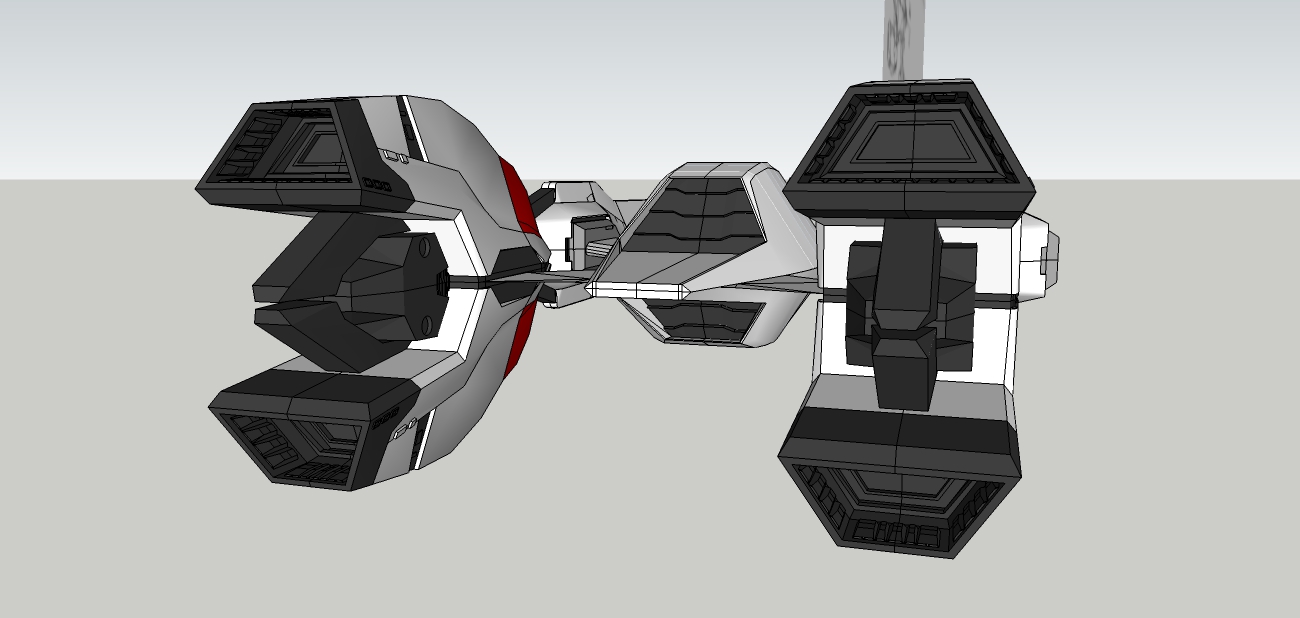
              Overview time again!


              Nadesico A99.jpg


              Nadesico A100.jpg

              See my portfolio at https://delphiscousin.blogspot.com/

              1 Reply Last reply Reply Quote 0
              • Bryan KB Offline
                Bryan K
                last edited by

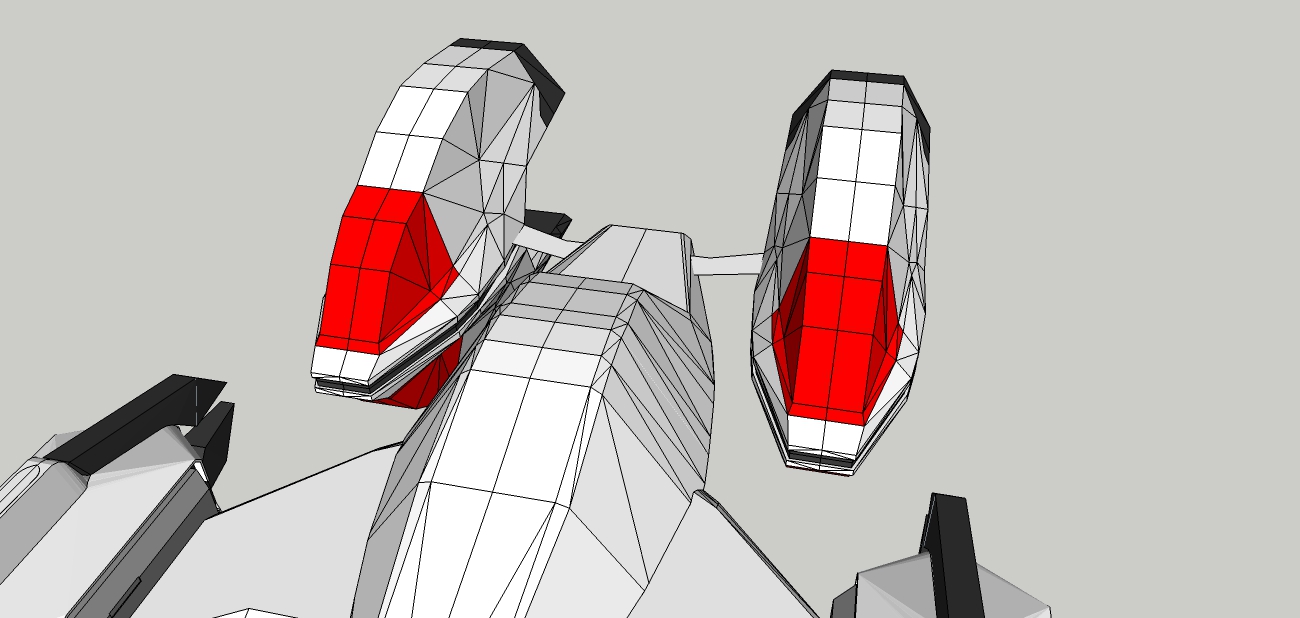
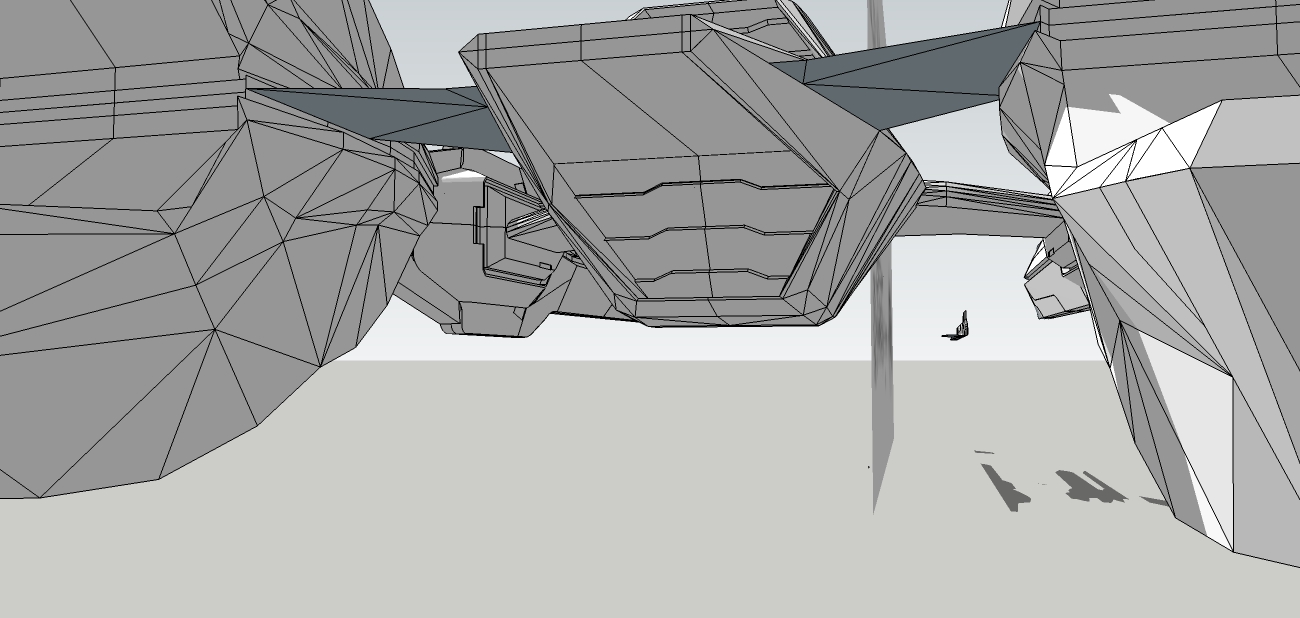
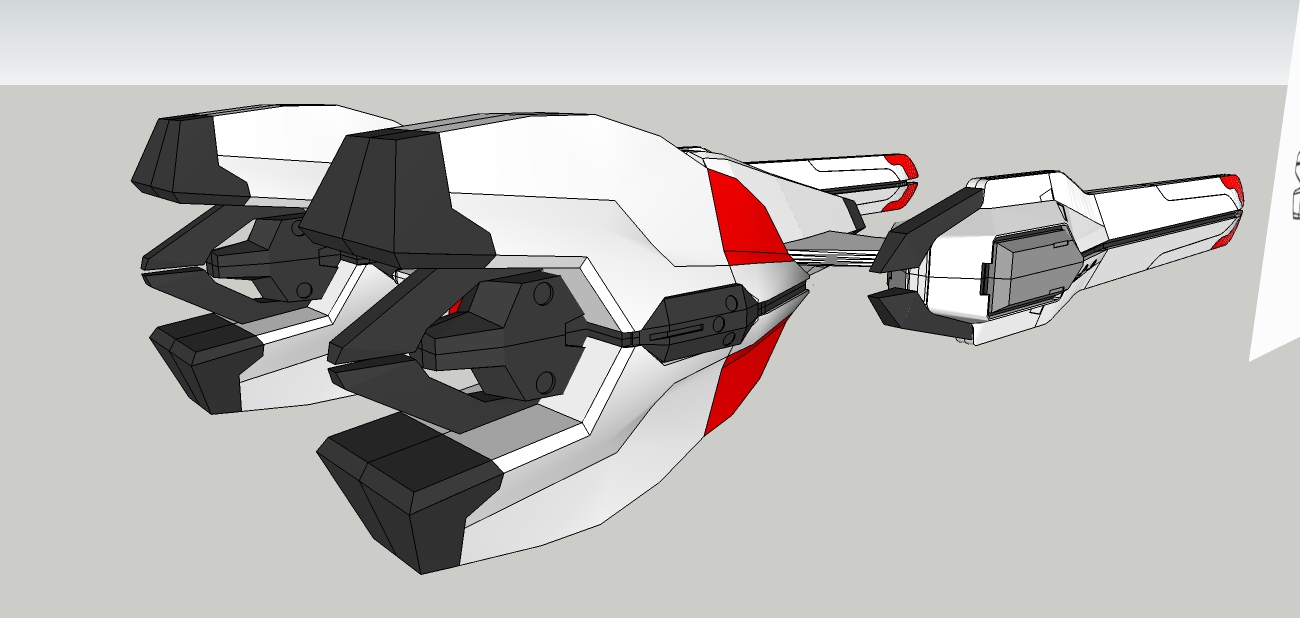
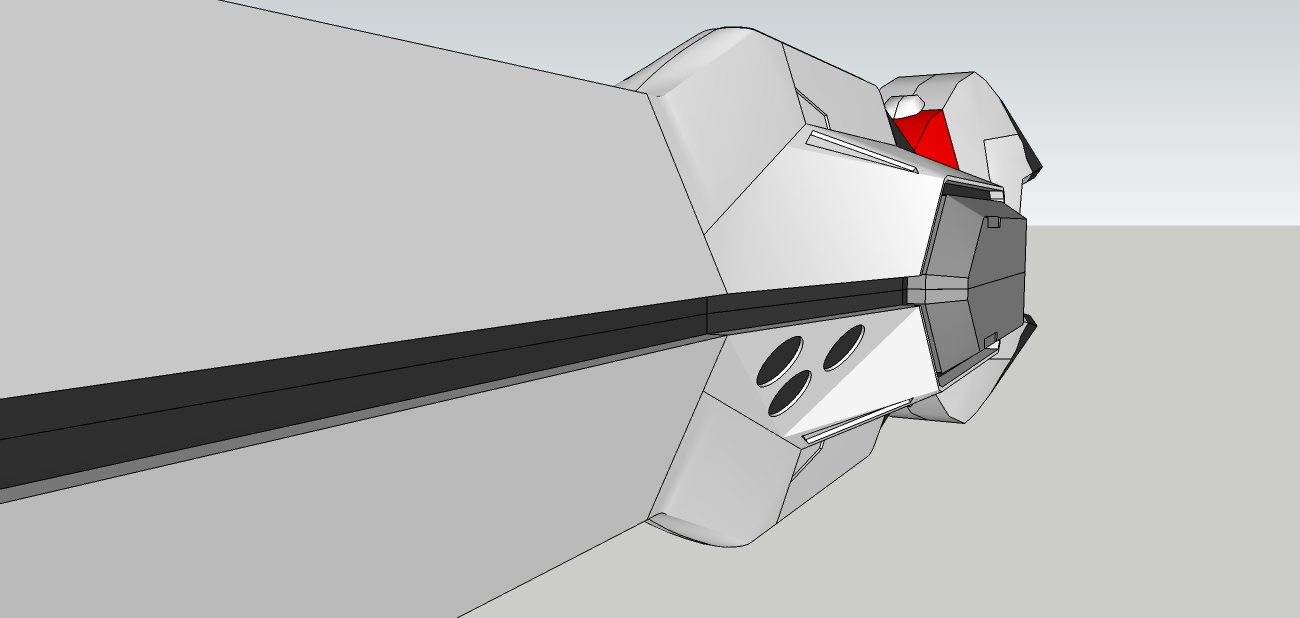
                Rear engine pod rough-in (block out) almost done.

                Note the other geometry changes again on pods.


                Nadesico A89.jpg


                Nadesico A90.jpg


                Nadesico A91.jpg


                Nadesico A92.jpg

                See my portfolio at https://delphiscousin.blogspot.com/

                1 Reply Last reply Reply Quote 0
                • Bryan KB Offline
                  Bryan K
                  last edited by

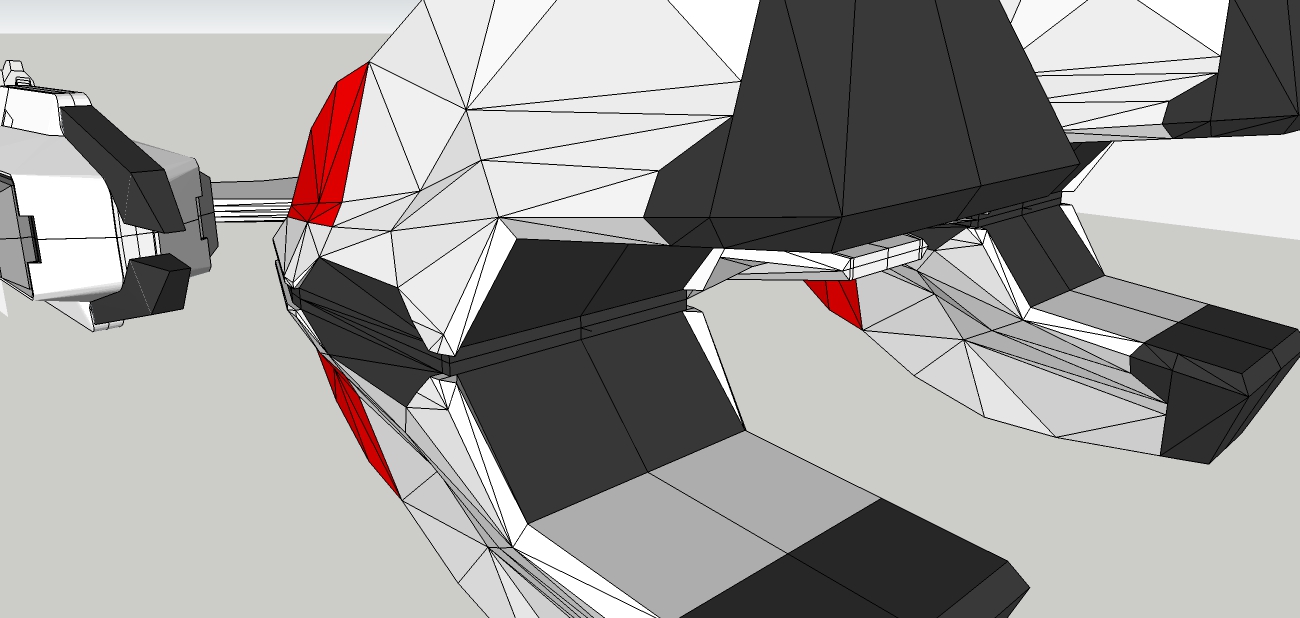
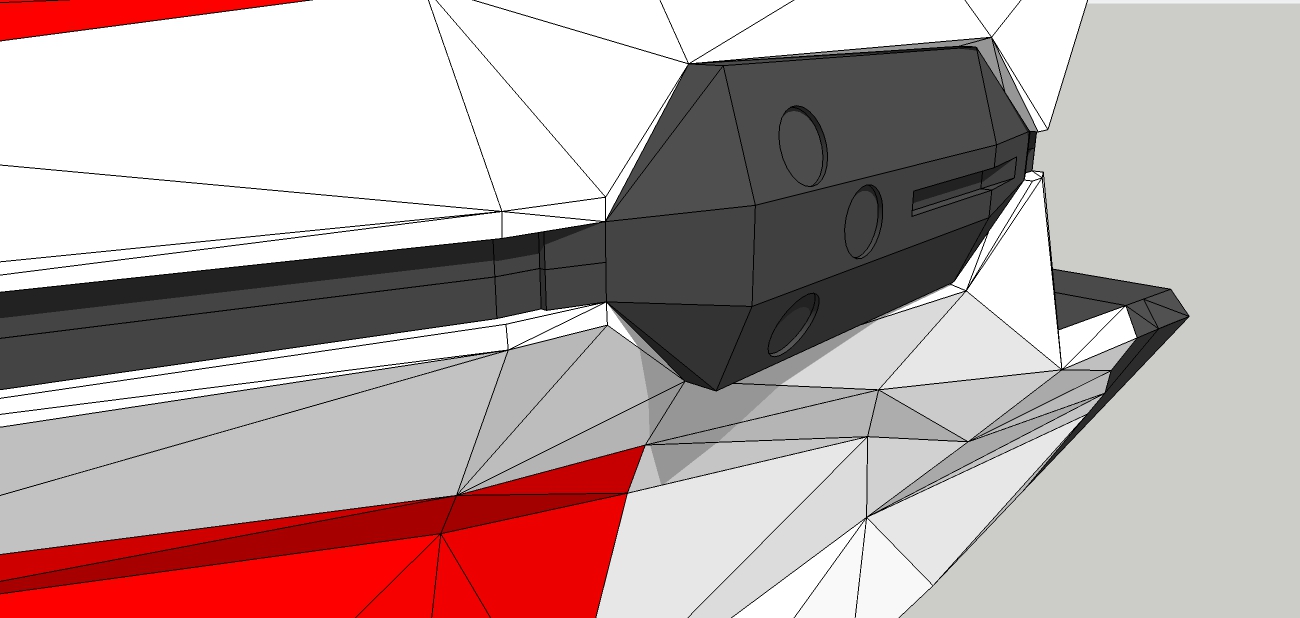
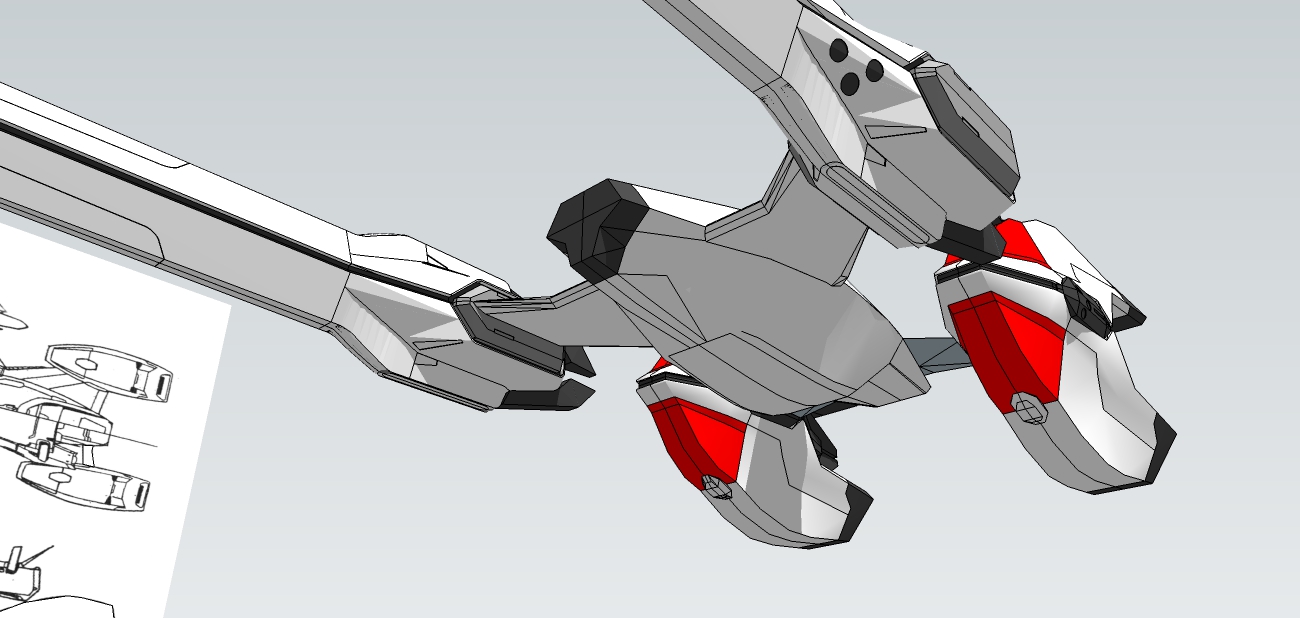
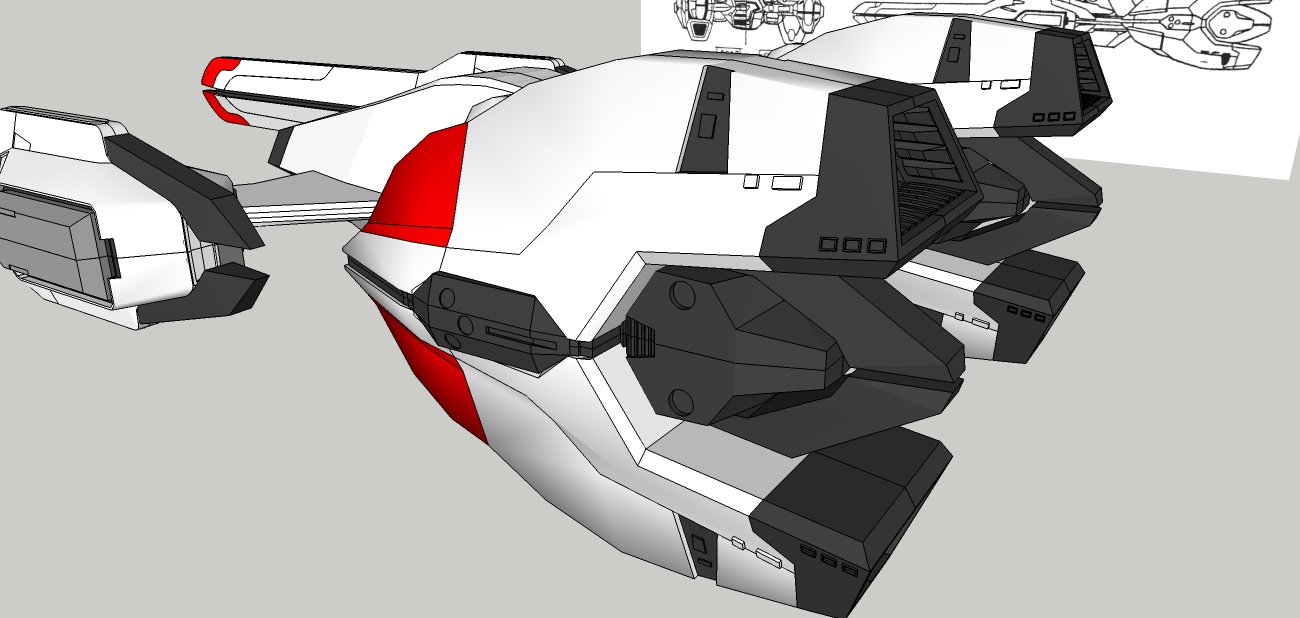
                  Rear engine side pods created. Pure fiddly work here. Had to create the faces line by line. I stared with the inner face on the engine pod itself and worked my way out. After many false starts. πŸ˜†

                  Then made into component and copied, then flipped for the other side.

                  Again, note the very slight geometry changes on the rest of the pod.


                  Nadesico A95.jpg


                  Nadesico A96.jpg


                  Nadesico A97.jpg


                  Nadesico A98.jpg

                  See my portfolio at https://delphiscousin.blogspot.com/

                  1 Reply Last reply Reply Quote 0
                  • Mike AmosM Offline
                    Mike Amos
                    last edited by

                    Very sharp mate, looking forward to some renders. πŸ‘

                    1 Reply Last reply Reply Quote 0
                    • Bryan KB Offline
                      Bryan K
                      last edited by

                      Thanks as always Mike!
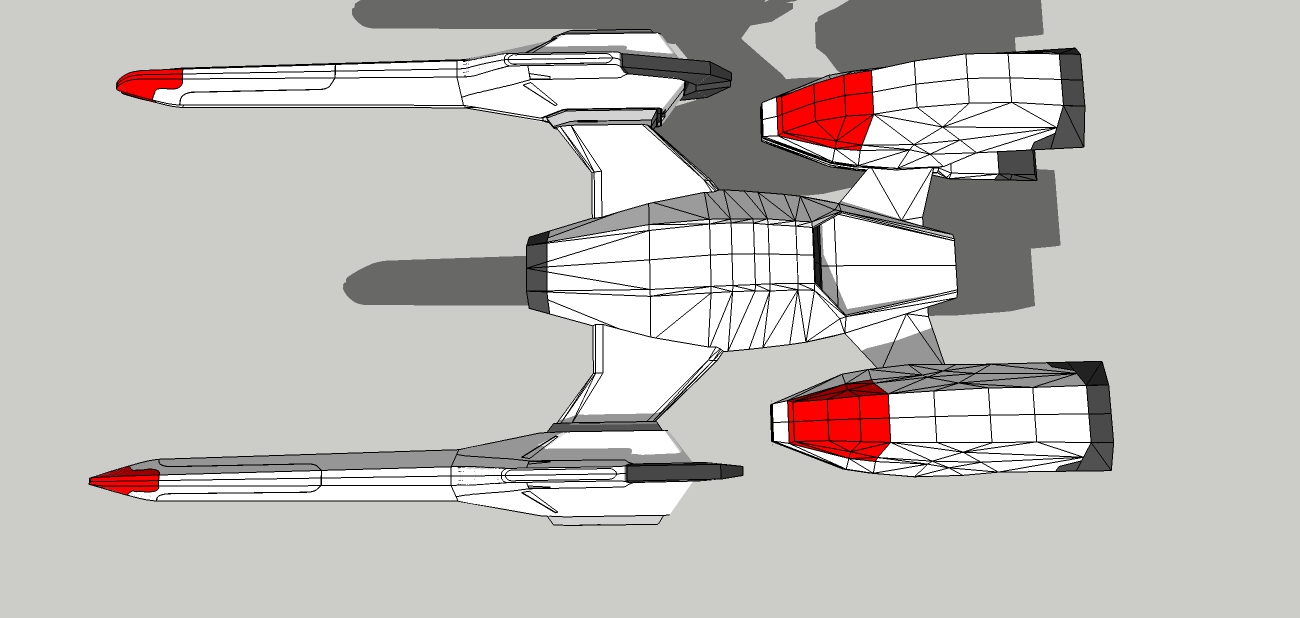
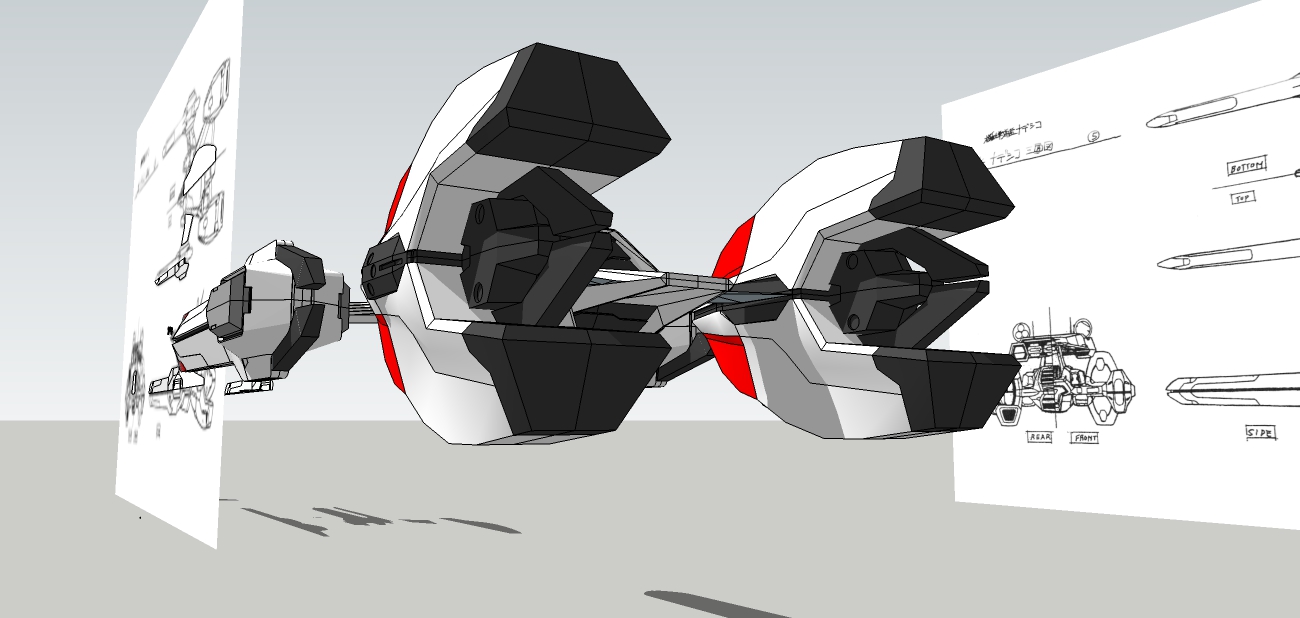
 πŸ‘

                      See my portfolio at https://delphiscousin.blogspot.com/

                      1 Reply Last reply Reply Quote 0
                      • Bryan KB Offline
                        Bryan K
                        last edited by

                        2 more views.


                        Nadesico A105.jpg


                        Nadesico A106.jpg

                        See my portfolio at https://delphiscousin.blogspot.com/

                        1 Reply Last reply Reply Quote 0
                        • Bryan KB Offline
                          Bryan K
                          last edited by

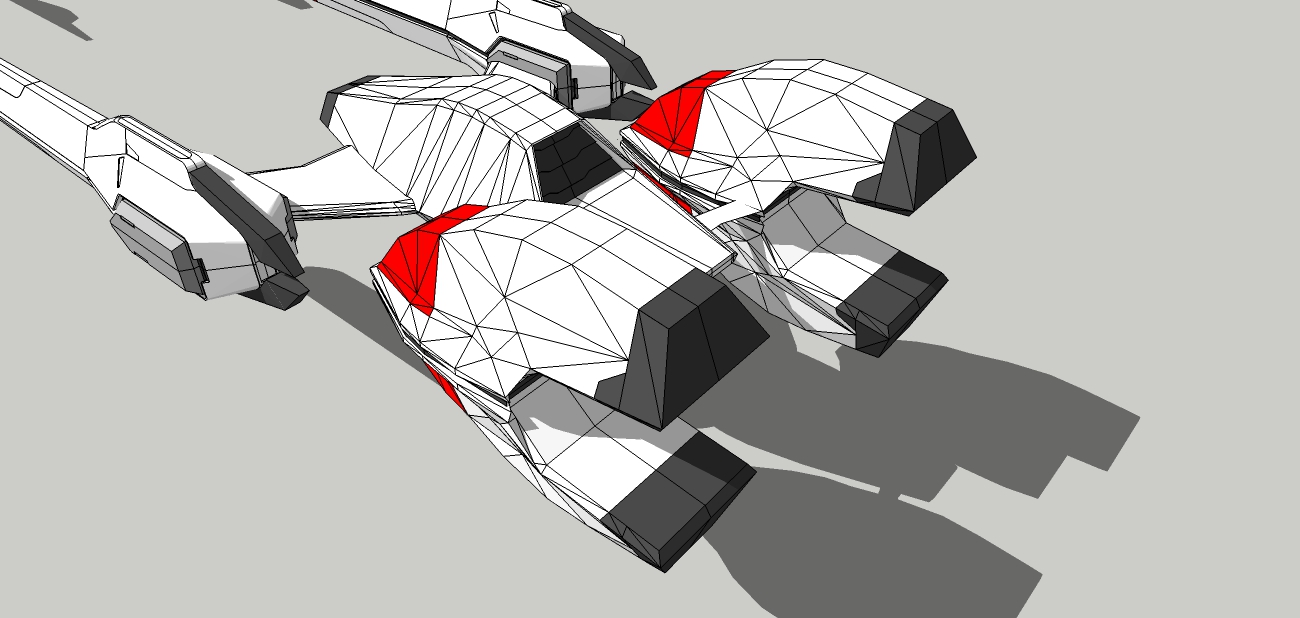
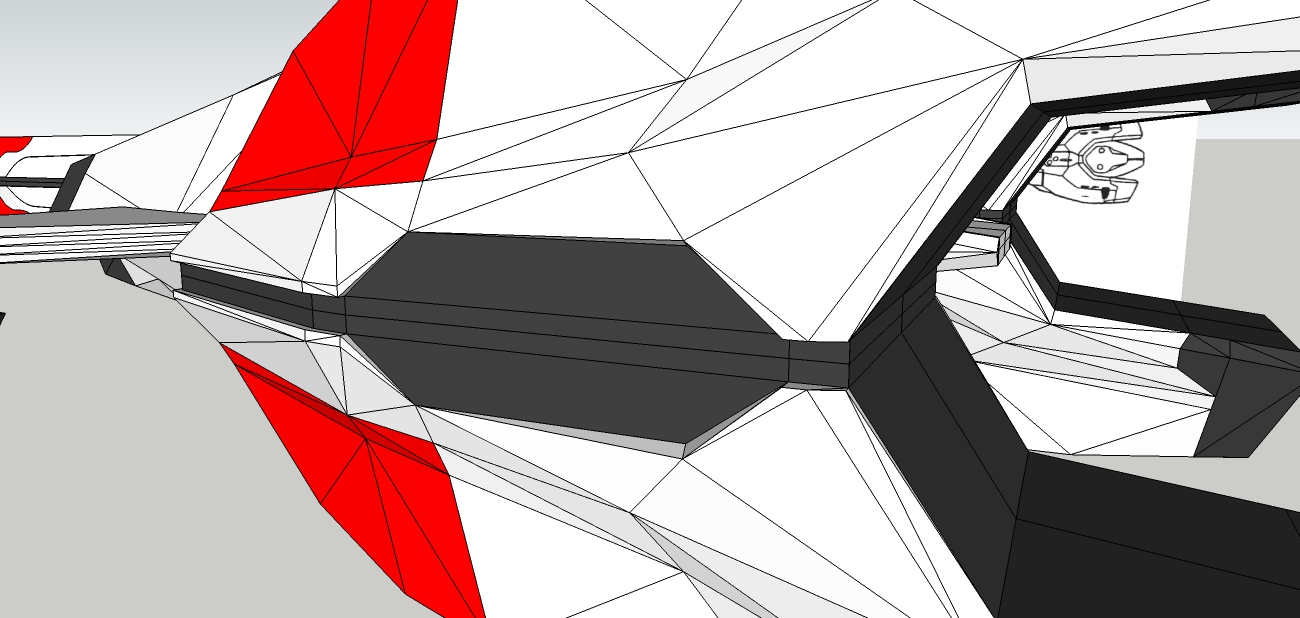
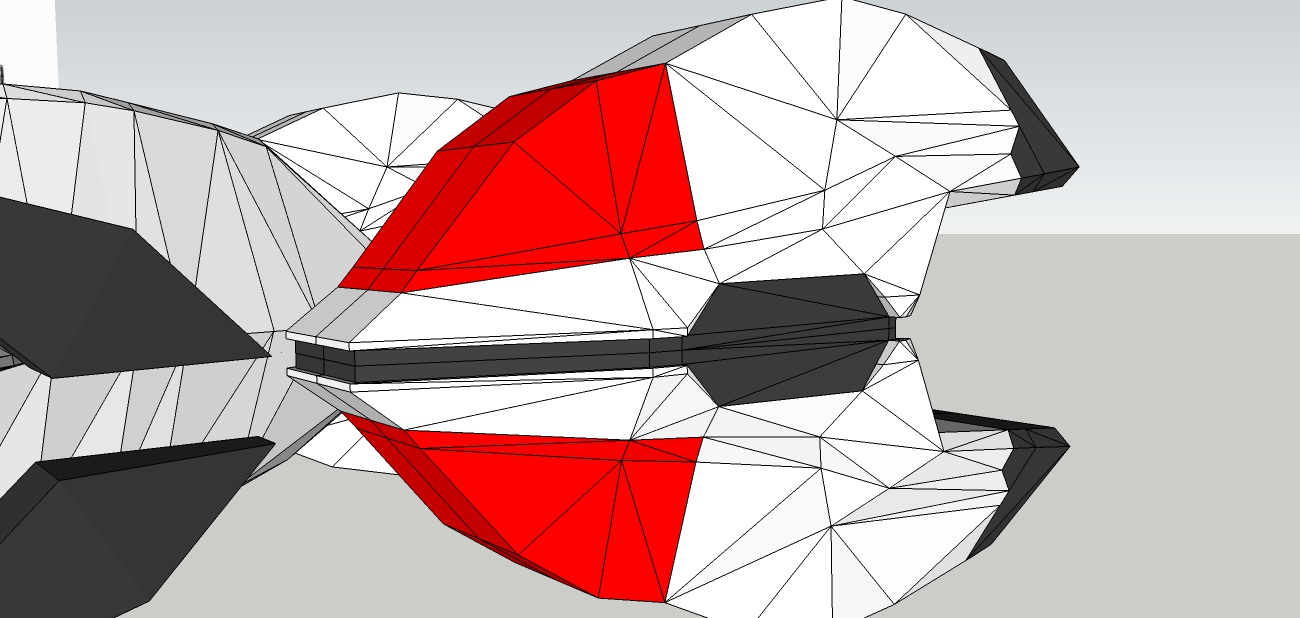
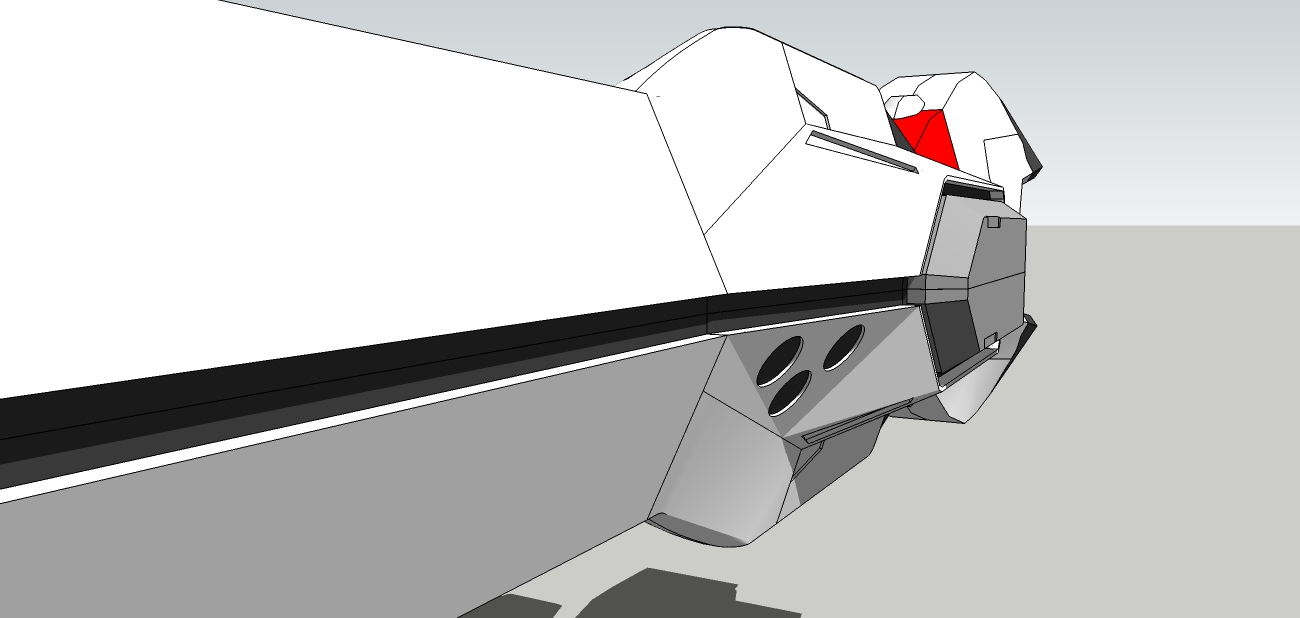
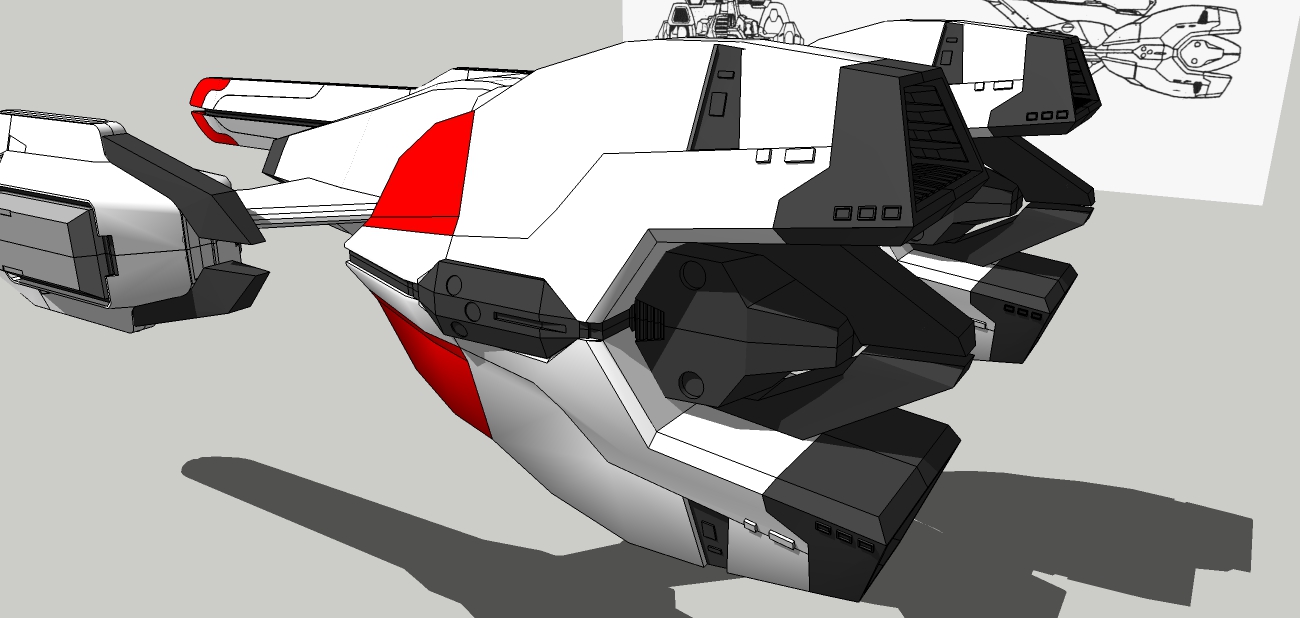
                          Rear engine pods block-out completed. Also testing smoothing using Erase+ctrl on lines. Did not change geometry at this stage.

                          Not committed to this smoothing just yet. Just testing. It might be good for some places where Curviloft might not be needed.

                          Man did I have to fiddle with those rear hook things. Total different shape than the front ones.


                          Nadesico A101.jpg


                          Nadesico A102.jpg


                          Nadesico A103.jpg


                          Nadesico A104.jpg

                          See my portfolio at https://delphiscousin.blogspot.com/

                          1 Reply Last reply Reply Quote 0
                          • tuna1957T Offline
                            tuna1957
                            last edited by

                            Nice πŸ‘ now I’ll go quietly wait in my corner for the renders πŸ˜†

                            1 Reply Last reply Reply Quote 0
                            • Bryan KB Offline
                              Bryan K
                              last edited by

                              @tuna1957 said:

                              Nice πŸ‘ now I’ll go quietly wait in my corner for the renders πŸ˜†

                              Thanks!

                              ...but your children may be grown by the time I finish this one. πŸ˜†

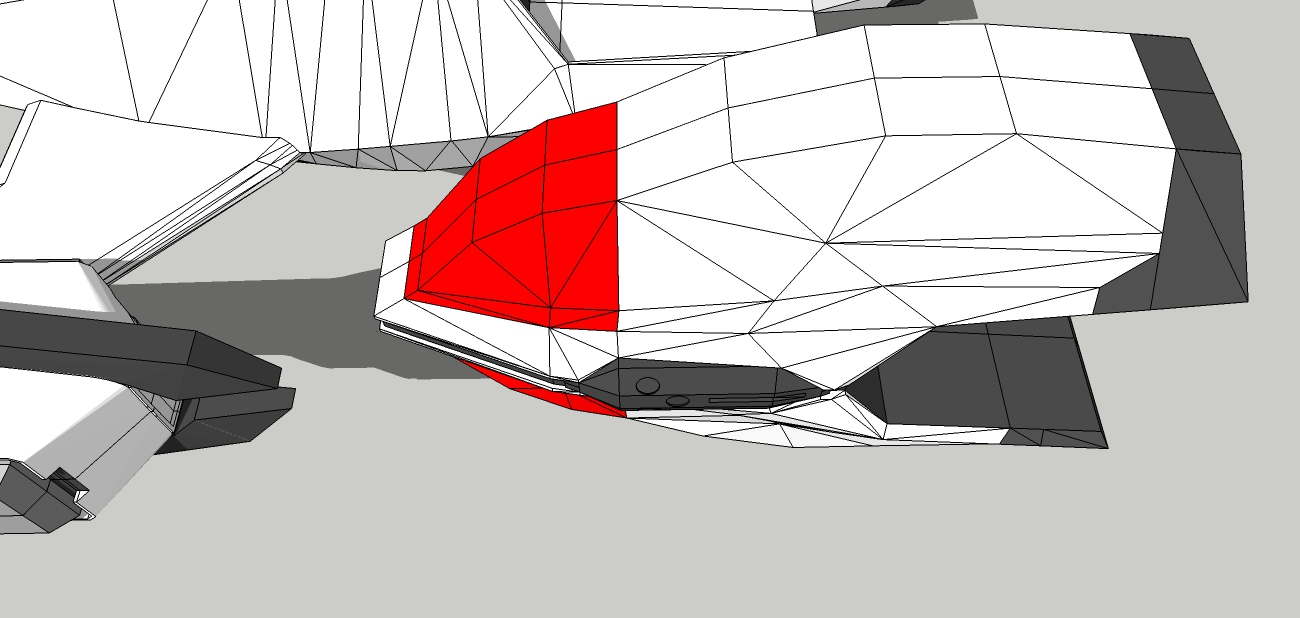
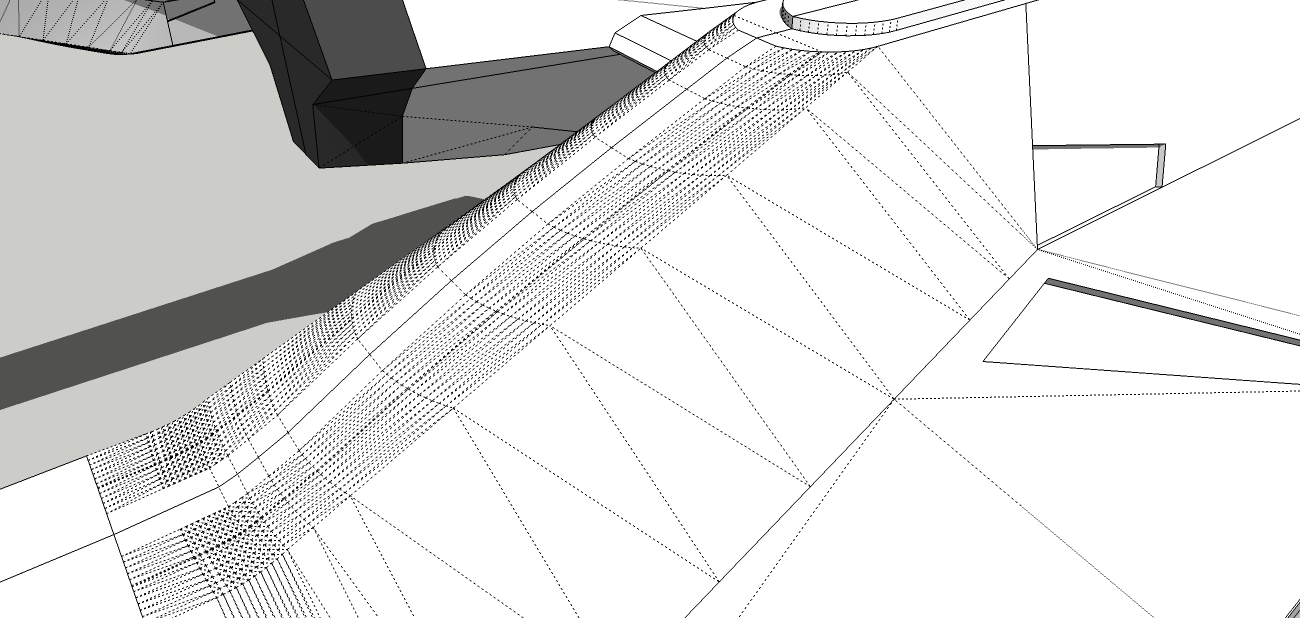
                              I was doing some other preliminary smoothing tests and, man, have I got trouble. Curviloft worked great on the nose of the front nacelles, but another section toward the rear of the front nacelles are going to require complete rebuilds.

                              No problem though. I'm really learning new things on this one. πŸ‘ It's also the cleanest complex build I've done to date. Minimal stray line to hunt down and erase, that sort of thing.

                              See my portfolio at https://delphiscousin.blogspot.com/

                              1 Reply Last reply Reply Quote 0
                              • Bryan KB Offline
                                Bryan K
                                last edited by

                                Damn. I am really excited about this model. I want to keep working on it non-stop.

                                Nope. Got to call it a night. 😎

                                See my portfolio at https://delphiscousin.blogspot.com/

                                1 Reply Last reply Reply Quote 0
                                • L Offline
                                  L i am
                                  last edited by

                                  Epic Bryan, I know about not being able to put it down πŸ˜‰ Have you saved it to an external thumb drive?

                                  1 Reply Last reply Reply Quote 0
                                  • Bryan KB Offline
                                    Bryan K
                                    last edited by

                                    Thanks L i am. πŸ‘

                                    I do indeed have an external backup store on my desk. I also used Google Drive.

                                    See my portfolio at https://delphiscousin.blogspot.com/

                                    1 Reply Last reply Reply Quote 0
                                    • Bryan KB Offline
                                      Bryan K
                                      last edited by

                                      HA! Did I get lucky!

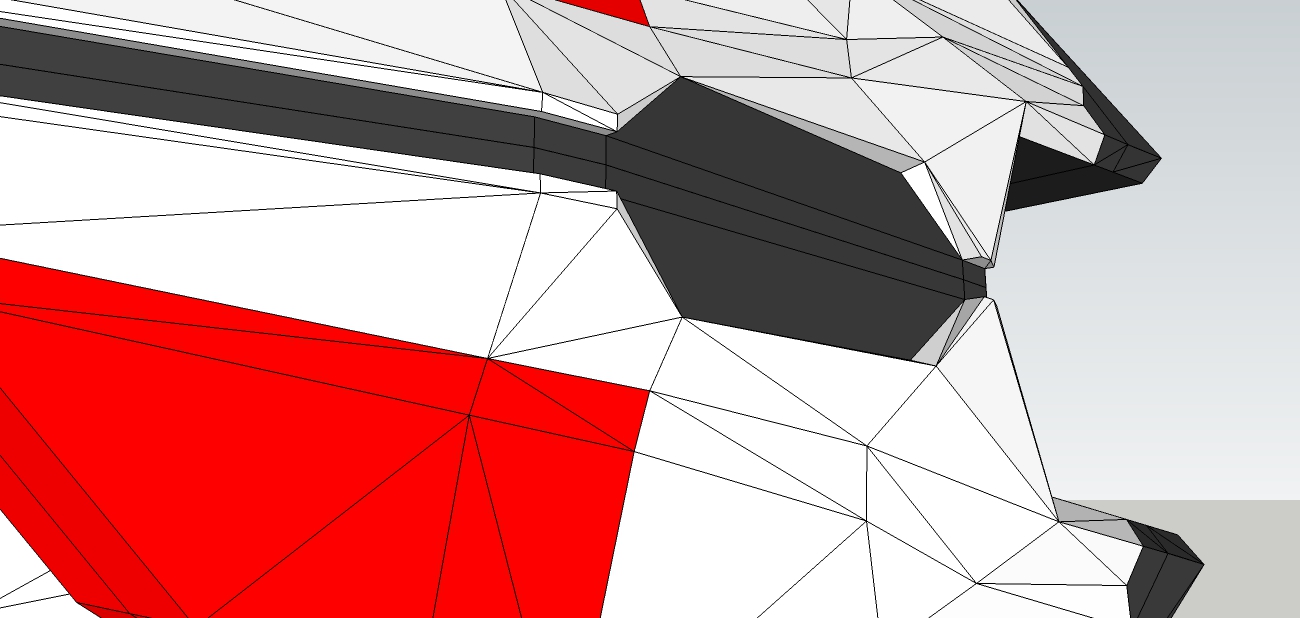
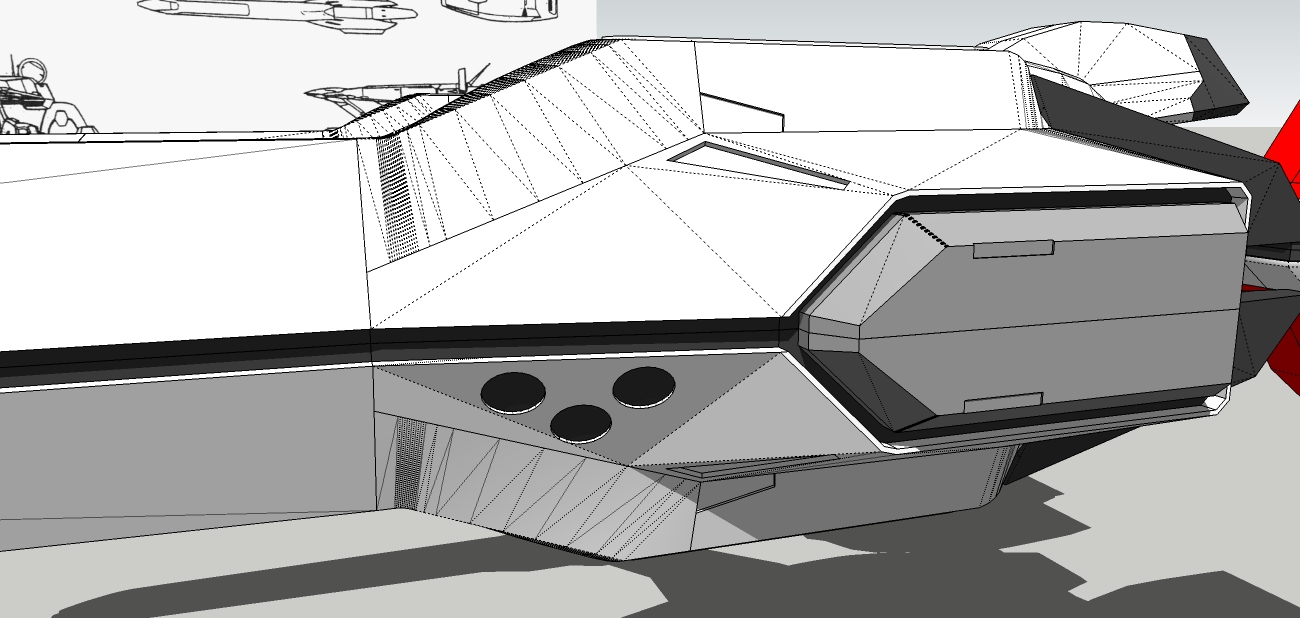
                                      So a combination of Curviloft for some areas and Erase+ctrl for larger flat areas seems to do the trick. I rebuilt the problem sections far faster than I anticipated. Far faster and they look soooo much better!

                                      Thanks to the changes I was able to make the large black holes on the lower section flat and make a clean Push/Pull indent as well. Also able to straighten out a lot of other areas that were kind of jagged. OK, they were very jagged.

                                      Well huh. I'm already halfway through clean up far faster than I would have thought!


                                      Nadesico A107.jpg


                                      Nadesico A108.jpg


                                      Nadesico A109.jpg


                                      Nadesico A110.jpg

                                      See my portfolio at https://delphiscousin.blogspot.com/

                                      1 Reply Last reply Reply Quote 0
                                      • Bryan KB Offline
                                        Bryan K
                                        last edited by

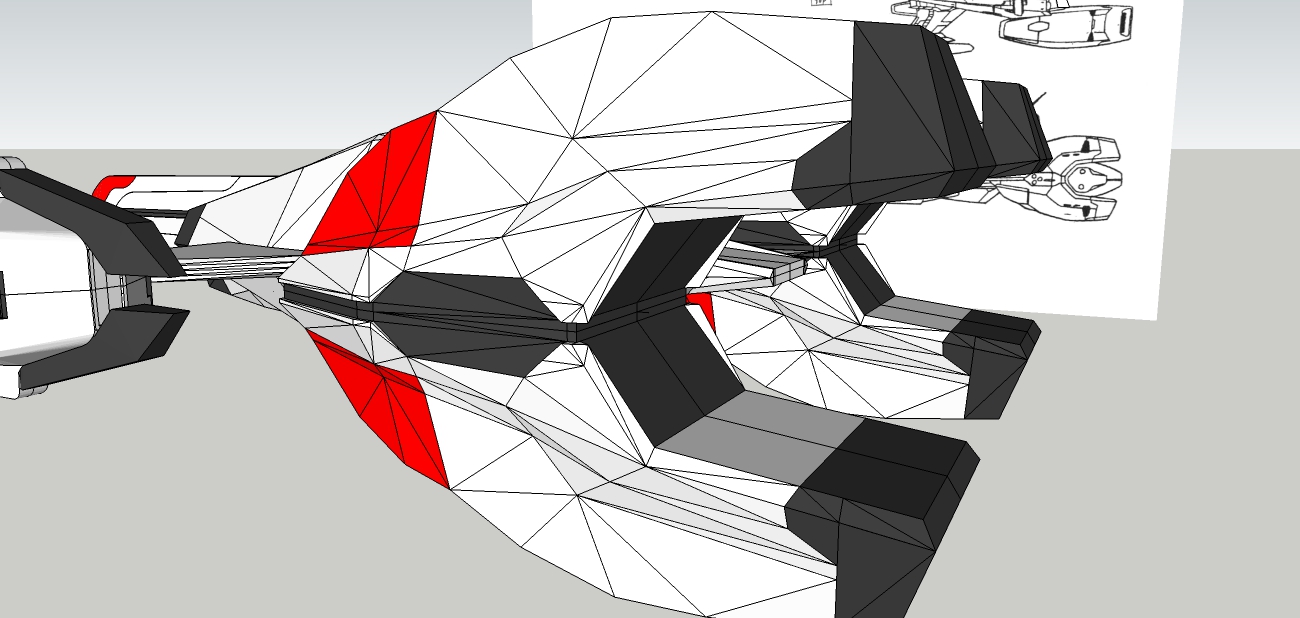
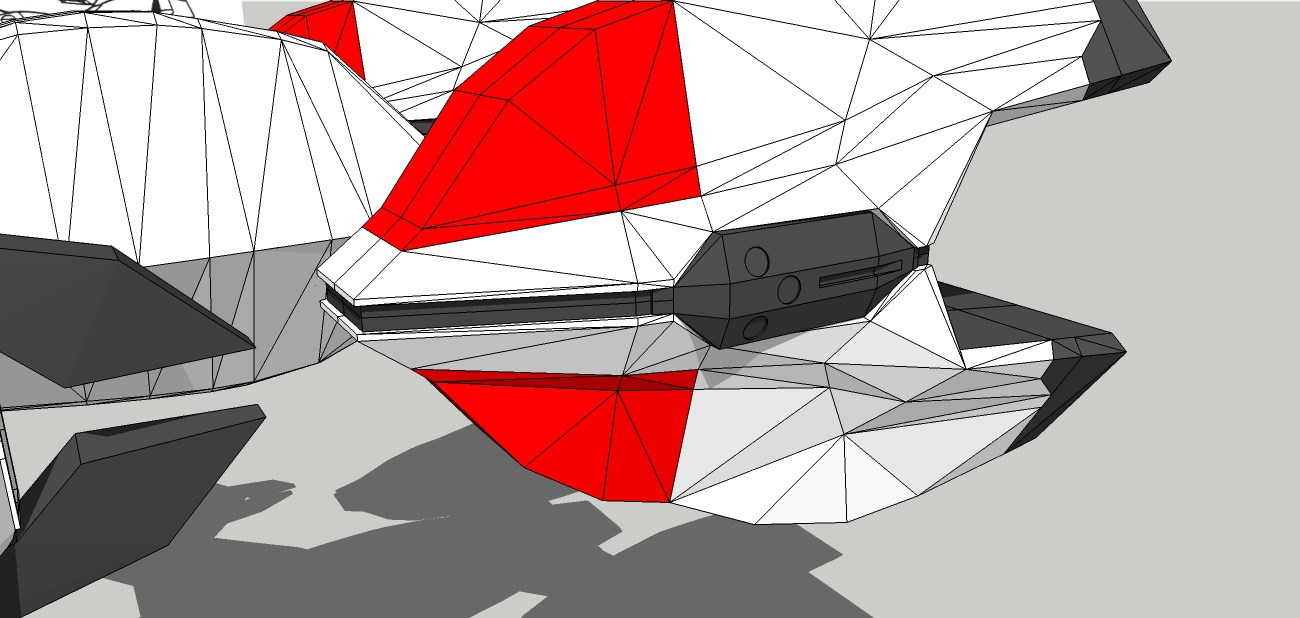
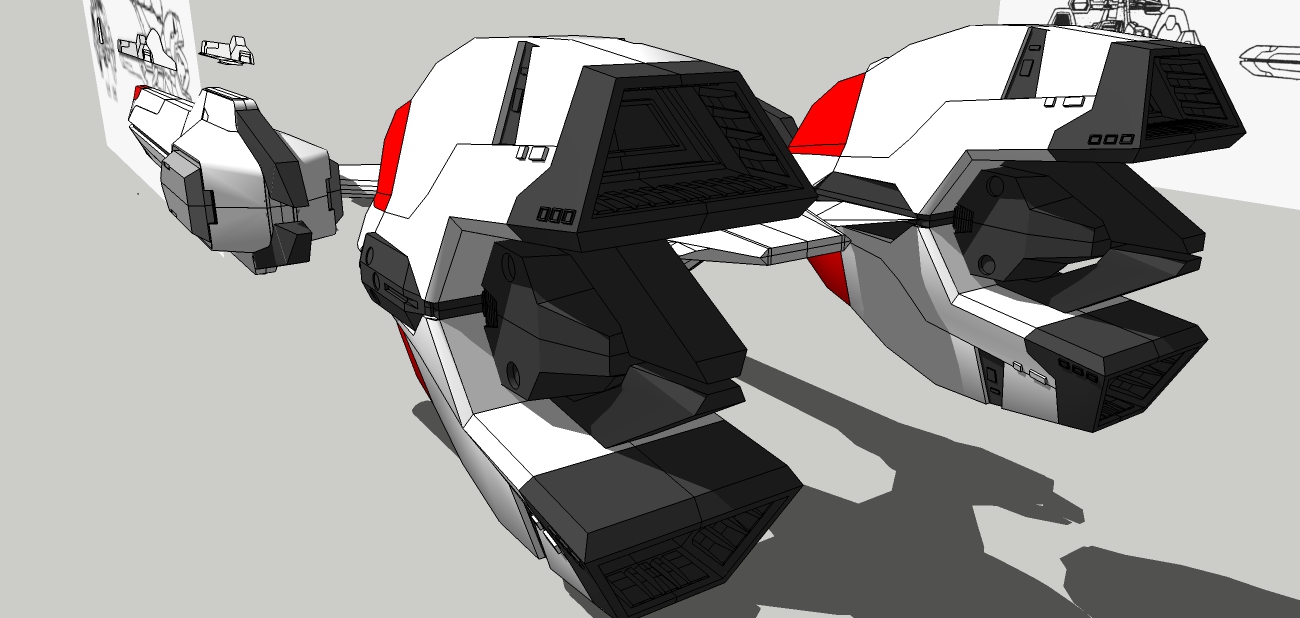
                                        Partially complete detailing rear engine pods. I'm happy with them so I started detailing but will stop here for now and move on to the next sections.

                                        Mostly just blocks with some very basic angle shaping and some Joint Push/Pull to help with the weird angles. So MANY weird angles on this thing.

                                        Then Tools on Surface for some of the other blocks.

                                        Also widened the rear center thingies and change the geometry just a tiny bit to better match my references.


                                        Nadesico A111.jpg


                                        Nadesico A112.jpg


                                        Nadesico A113.jpg


                                        Nadesico A114.jpg

                                        See my portfolio at https://delphiscousin.blogspot.com/

                                        1 Reply Last reply Reply Quote 0
                                        • Mike AmosM Offline
                                          Mike Amos
                                          last edited by

                                          πŸ˜„ πŸ‘

                                          1 Reply Last reply Reply Quote 0
                                          • Bryan KB Offline
                                            Bryan K
                                            last edited by

                                            @mike amos said:

                                            πŸ™‚ πŸ‘

                                            Thanks!

                                            It's getting there!

                                            See my portfolio at https://delphiscousin.blogspot.com/

                                            1 Reply Last reply Reply Quote 0
                                            • 1
                                            • 2
                                            • 5
                                            • 6
                                            • 7
                                            • 8
                                            • 9
                                            • 10
                                            • 7 / 10
                                            • First post
                                              Last post
                                            Buy SketchPlus
                                            Buy SUbD
                                            Buy WrapR
                                            Buy eBook
                                            Buy Modelur
                                            Buy Vertex Tools
                                            Buy SketchCuisine
                                            Buy FormFonts

                                            Advertisement