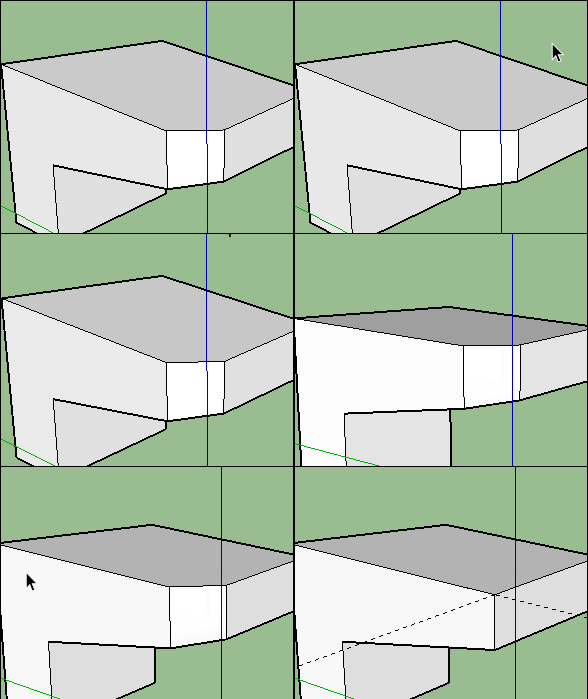
How to remove a chamfer on a box?
-
Our ways are the same pilou.. "Thinking outside of the box" got its exact meaning..

-
Sure, maybe there is more tricky for draw easily this rectangle with less clicks!

What is your method ? -
@pilou said:
For this special box case with any 4 chamfers (fillets) with only native tools (a big effort from my part!

- 4 guides lines on any of the original box = 4 clicks
- Draw Oriented Rectangle (second icon of Rectangle Tools) with 3 of intersctions above = 3 Clicks
Push Pull this new rectangle = 1 click
Total = 7 Clicks for an original new oriented box without chamfers(fillets)!

[attachment=0:1oo1awgy]<!-- ia0 -->GIF_erase_chamfer.gif<!-- ia0 -->[/attachment:1oo1awgy]
Just now erase the original chamfered box!

OK. But now try it with the file I provided. A simple pushpull extrude won't get it because the sides are NOT parallel.
Here's the link again...
FILE:
https://altuit.cloud/web/3Dnew/chamfer.skp -
@unknownuser said:
the sides are NOT parallel.
Yes so that is not a general box but a polyedra!

So a new mini challenge!
-
I tried with the shared rectangle with pen tool, as i said above, ı draw a rectangle that is paralel to the edges, made it fit with push pull tool and there was one edge not fit, selecting edge and moving with move tool solved that..
-
Here is my method (I'm not good at making GIFs):
- Select all the main or big faces
- Copy
- Select everything
- Delete
- Paste in place
- Offset, offset, offset on the outside, all of them
- Clean up with CleanUp
- Select all- intersect with selection
- Select those big faces again
- Copy
- Select all
- Delete
- Paste in place.
Seems complicated, but it isn't.
-
The icon "F" of the Join Push Pull Interactive by Fredo makes the trick
for 2 faces around a chamfer!
A sort of smart Push Pull!

So all faces in addition to the 2 faces
around the chamfer can have any orientations!Maybe 2 Guides lines are necessary for the intersection!
because seems interferences don't works inside the plugin itself!Alas it's only 2 faces by 2 faces!


-
@pilou said:
The icon "F" of the Join Push Pull Interactive by Fredo makes the trick
for 2 faces around a chamfer!
A sort of smart Push Pull!

So all faces in addition to the 2 faces
around the chamfer can have any orientations!Maybe 2 Guides lines are necessary for the intersection!
because seems interferences don't works inside the plugin itself!Alas it's only 2 faces by 2 faces!

[attachment=0:x9keu75d]<!-- ia0 -->GIF_iconef.gif<!-- ia0 -->[/attachment:x9keu75d]
Brilliant! Once again, creative thinking by the French! And the solution I was hoping for by posting this challenge. Much appreciated

-
@kimi kimi said:
Here is my method (I'm not good at making GIFs):
- Select all the main or big faces
- Copy
- Select everything
- Delete
- Paste in place
- Offset, offset, offset on the outside, all of them
- Clean up with CleanUp
- Select all- intersect with selection
- Select those big faces again
- Copy
- Select all
- Delete
- Paste in place.
Seems complicated, but it isn't.
Another fine fine solution. Thanks for your help!
-
I usually do the following:
1 - select all;
2 - remove big faces from selection;
3 - group and delete group;
4 - use tak2hata extend trim faces plugin;
5 - then cleanup plugin if needed for merge faces and repair edges.Step 4 is the one that needs getting used to.
-
When you say
@unknownuser said:
2 - remove big faces from selection;
it's not more little faces so the chamfer(s) ?
No clean up necessary!Cool but again it's face by face!

Here zoom is needing for more precision to click the face + segment!


-
@pilou said:
When you say
@unknownuser said:
2 - remove big faces from selection;
it's not more little faces so the chamfer(s) ?
No clean up necessary!Cool but again it's face by face!

Here zoom is needing for more precision to click the face + segment!

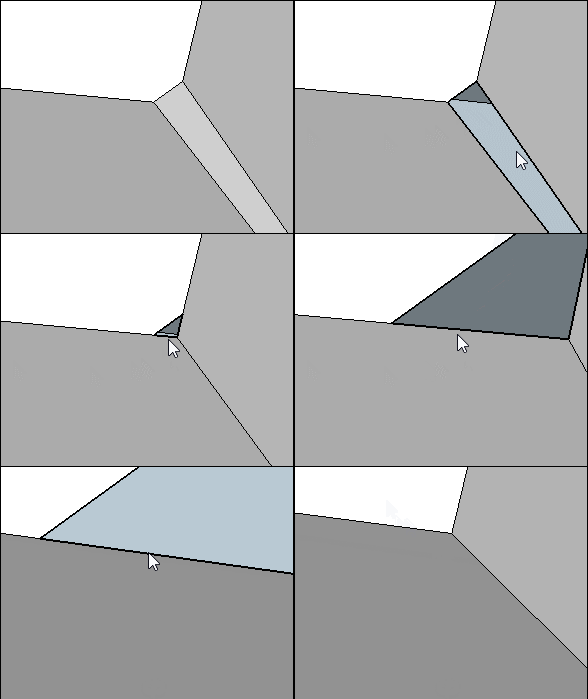
[attachment=0:2ikvu9kh]<!-- ia0 -->GIF_extend.gif<!-- ia0 -->[/attachment:2ikvu9kh]sorry I fotgot about the generate faces plugin. I use the one from tools on surface.
And I really meant rwmove big faces from selection. They are easier to pick and if you remove them when you create the group, it becomes composed pnly of all small faces. Then, When you delete the group you delete only the small faces and keep the big ones.
@jql said:
I usually do the following:
1 - select all;
2 - remove big faces from selection;
3 - group and delete group;
4 - use tak2hata extend trim faces plugin;
5 - then cleanup plugin if needed for merge faces and repair edges.Step 4 is the one that needs getting used to.
so, after review, I still thin the fastest method is:
1 - select all;
2 - remove big faces from selection;
3 - group and delete group;
4 - use tak2hata extend trim faces plugin;
5 - Generate faces using a plugin (tools on surface is my choice)
6 - then cleanup plugin if needed for merge faces and repair edges.It does require manual work, but all do until now, and this is the easiest I know, and I tried a lot.
-
@jql said:
@pilou said:
When you say
@unknownuser said:
2 - remove big faces from selection;
it's not more little faces so the chamfer(s) ?
No clean up necessary!Cool but again it's face by face!

Here zoom is needing for more precision to click the face + segment!

[attachment=0:3jt9ho9s]<!-- ia0 -->GIF_extend.gif<!-- ia0 -->[/attachment:3jt9ho9s]sorry I fotgot about the generate faces plugin. I use the one from tools on surface.
And I really meant rwmove big faces from selection. They are easier to pick and if you remove them when you create the group, it becomes composed pnly of all small faces. Then, When you delete the group you delete only the small faces and keep the big ones.
@jql said:
I usually do the following:
1 - select all;
2 - remove big faces from selection;
3 - group and delete group;
4 - use tak2hata extend trim faces plugin;
5 - then cleanup plugin if needed for merge faces and repair edges.Step 4 is the one that needs getting used to.
so, after review, I still thin the fastest method is:
1 - select all;
2 - remove big faces from selection;
3 - group and delete group;
4 - use tak2hata extend trim faces plugin;
5 - Generate faces using a plugin (tools on surface is my choice)
6 - then cleanup plugin if needed for merge faces and repair edges.It does require manual work, but all do until now, and this is the easiest I know, and I tried a lot.
Interesting. This looks like a good strategy for removing both fillets and chamfers from more complex shapes. My favorite so far!
-
@unknownuser said:
1 - select all;
2 - remove big faces from selection;
3 - group and delete group;
4 - use tak2hata extend trim faces plugin;
5 - Generate faces using a plugin (tools on surface is my choice)
6 - then cleanup plugin if needed for merge faces and repair edges.A little video of these 6 steps will be fine!
I am a little losted in the fog!
-
Frenchy,
One of the reasons why I really enjoy using SU... the community. I figured by posting this simple challenge, I might be able to learn some new stuff-- and I certainly have! This is a really great workflow by JQL (thanks!) and here's a video of how it works.
-
A little more enlighting!

-
@pilou said:
A little more enlighting!

yes, video is better thqn talk, however there are a lot of steps in the video that could be faster.
I'll try making a little gif after holidays
Advertisement


