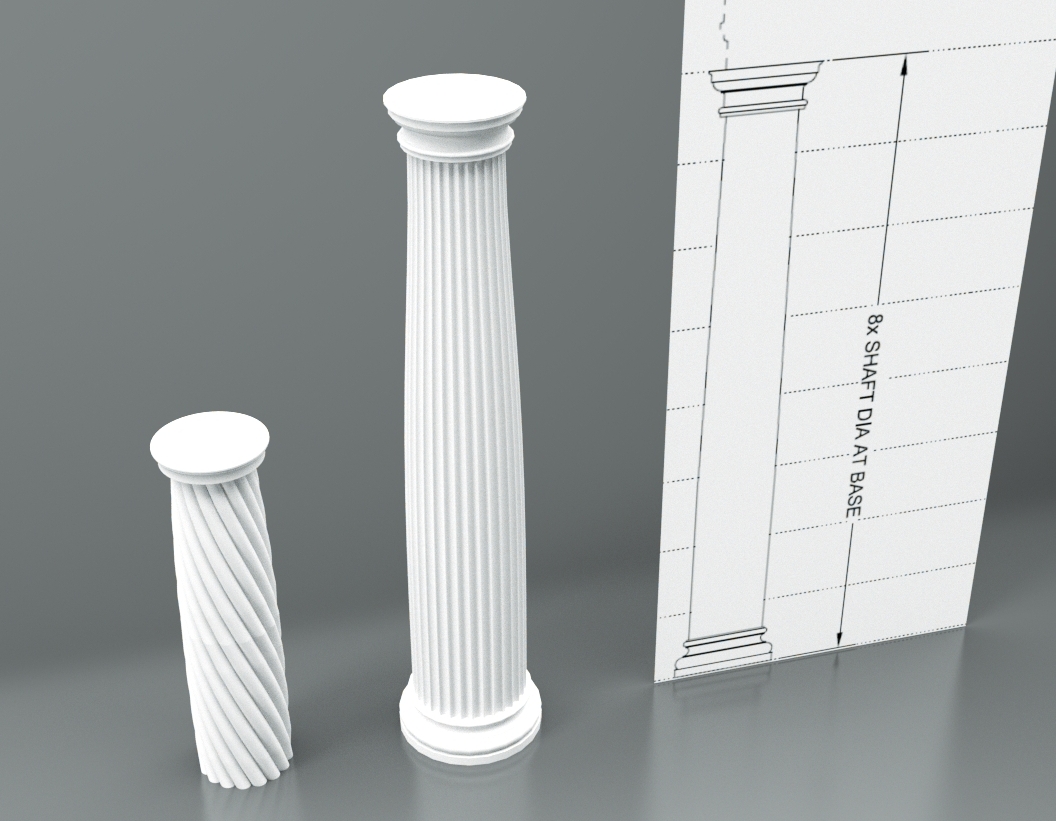
Spiral Doric Column
-
Just like to point out that the default for Move is M, not T.
And you don't need to use ctrl with follow me. -
Chipp you're perfect educator. Keep them coming!
-
@box said:
Just like to point out that the default for Move is M, not T.
And you don't need to use ctrl with follow me.I set my default to T so it will match some of my other programs. Thanks for the tip on follow me...I seem to remember in previous versions you had to press the CTRL key in order for Follow-Me to work if you previously had selected the path.
-
I only mentioned the M versus T for users who may be watching your tutorial. T will bring up the tape measure by default and I can see beginners getting confused.
-
@jim4366 said:
...where to get the "set center point" tool?...
Hi, here you can find it:
http://sketchucation.com/forums/viewtopic.php?f=323%26amp;t=11081
It will add the entry "Add Centerpoint" in the Extension´s menu (no icon bar) -
Fun little study. I have actually had all of these plugins in my arsenal for years, but sometimes you just forget to use em. Thanks for the tut. -
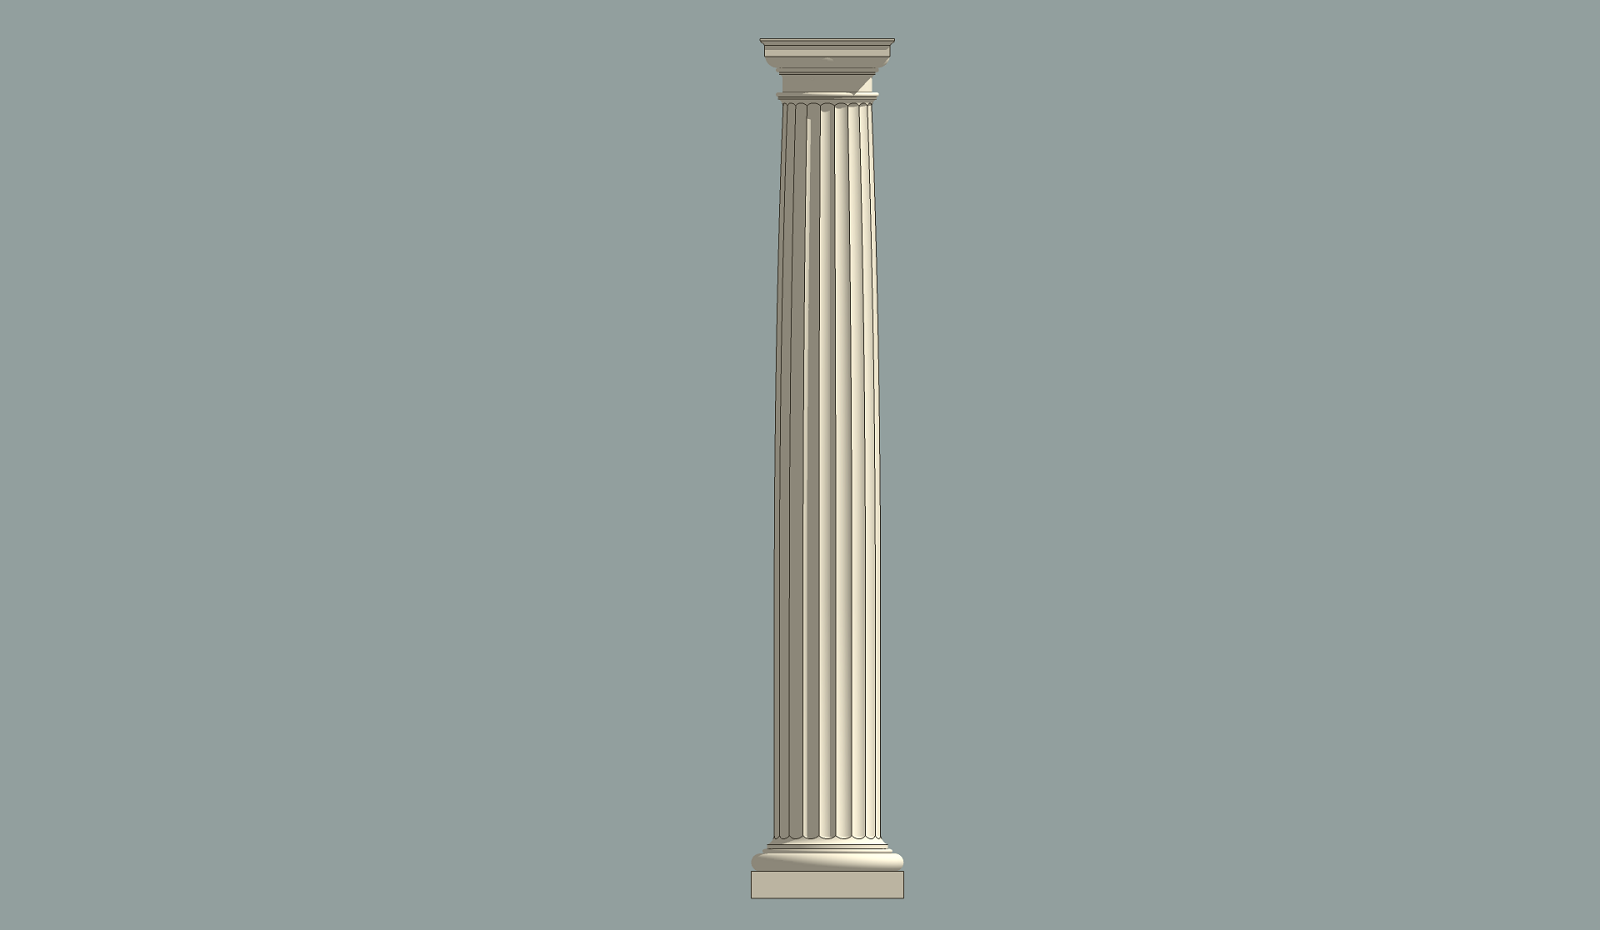
Nice job. Thanks for the line up on plugins! The other day just tried doing a basic tuscsan column (not the first time)and entasis by brute force. I should have used FFD.
-
@pbacot said:
Nice job. Thanks for the line up on plugins! The other day just tried doing a basic tuscsan column (not the first time)and entasis by brute force. I should have used FFD.
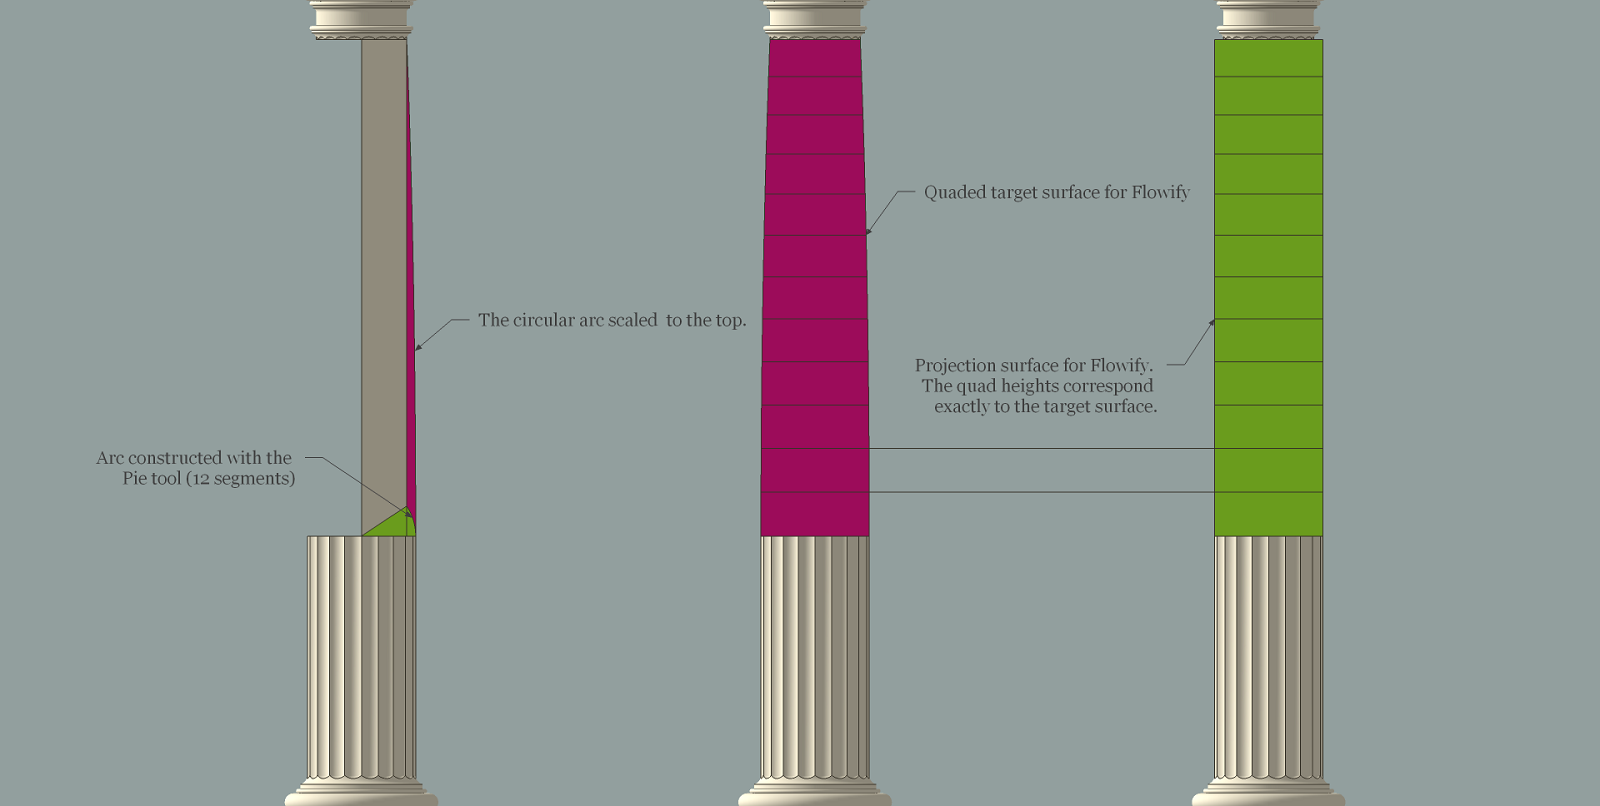
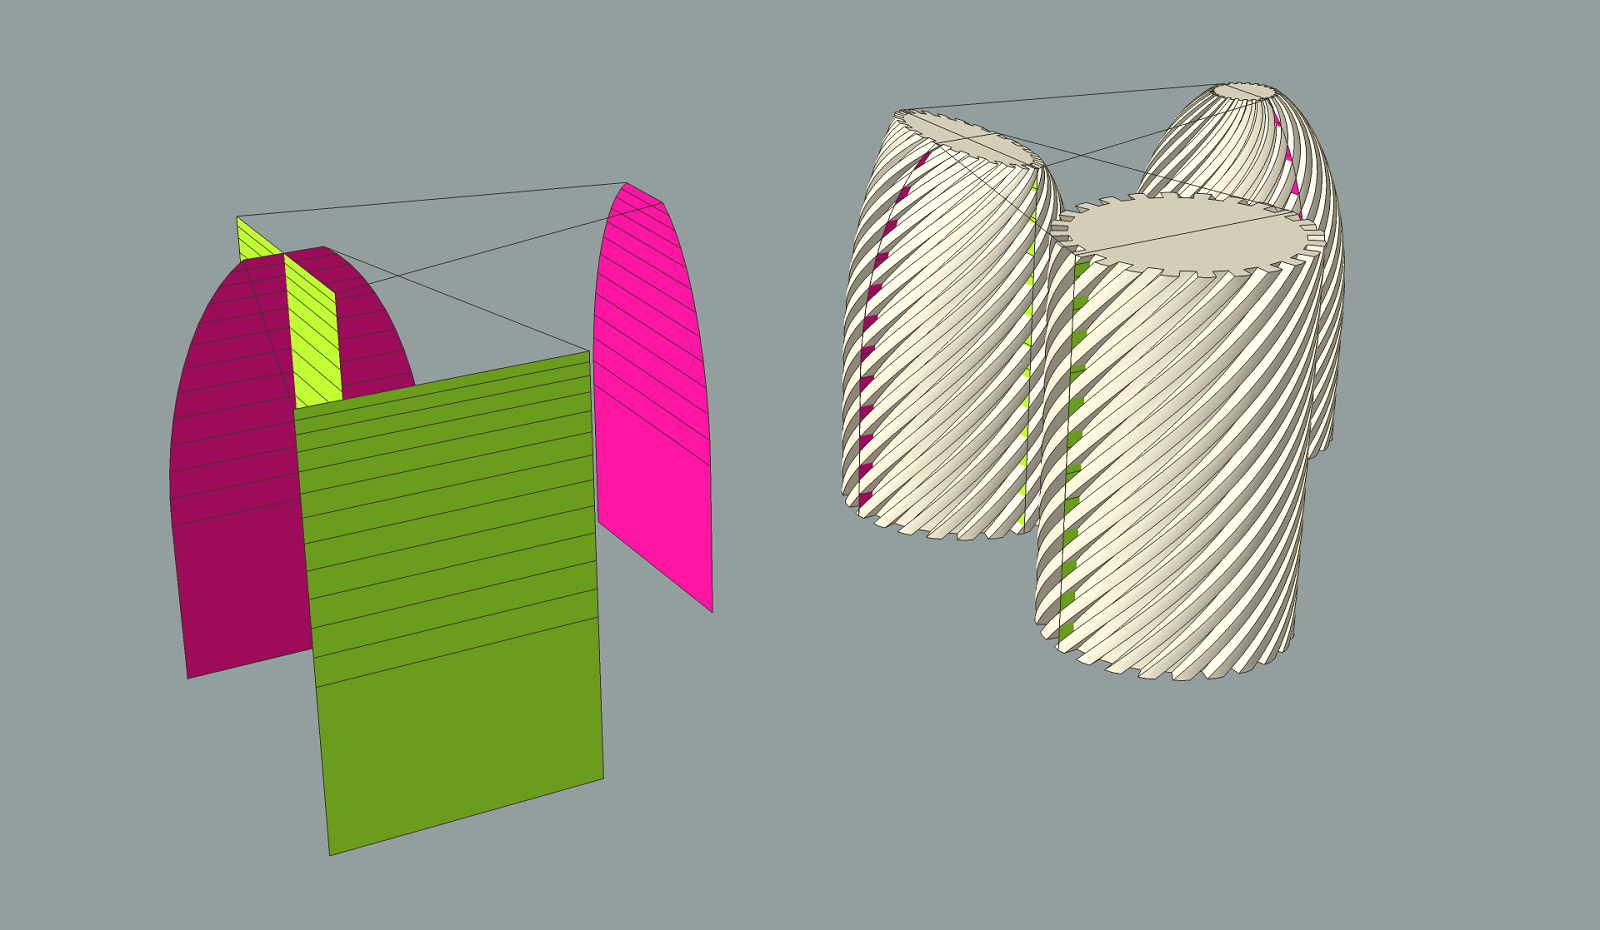
It's actually quite straight forward to construct a "canonical" entasis in Sketchup for any type of column - smooth or fluted. Canonical here means the recipe engraved in a wall at the temple of Apollo at Didyma (Turkey) some 2500 years ago. The method below is not exactly as described at the Temple of Apollo, but it's very, very close in practice.
Set out an arc with the Pie tool (as in the first image below). Scale this arc all the way to the top. The resulting elliptical curve is the shape of the entasis. The shaft is usually straight the first third of the height and the entasis is only applied to the top two thirds.
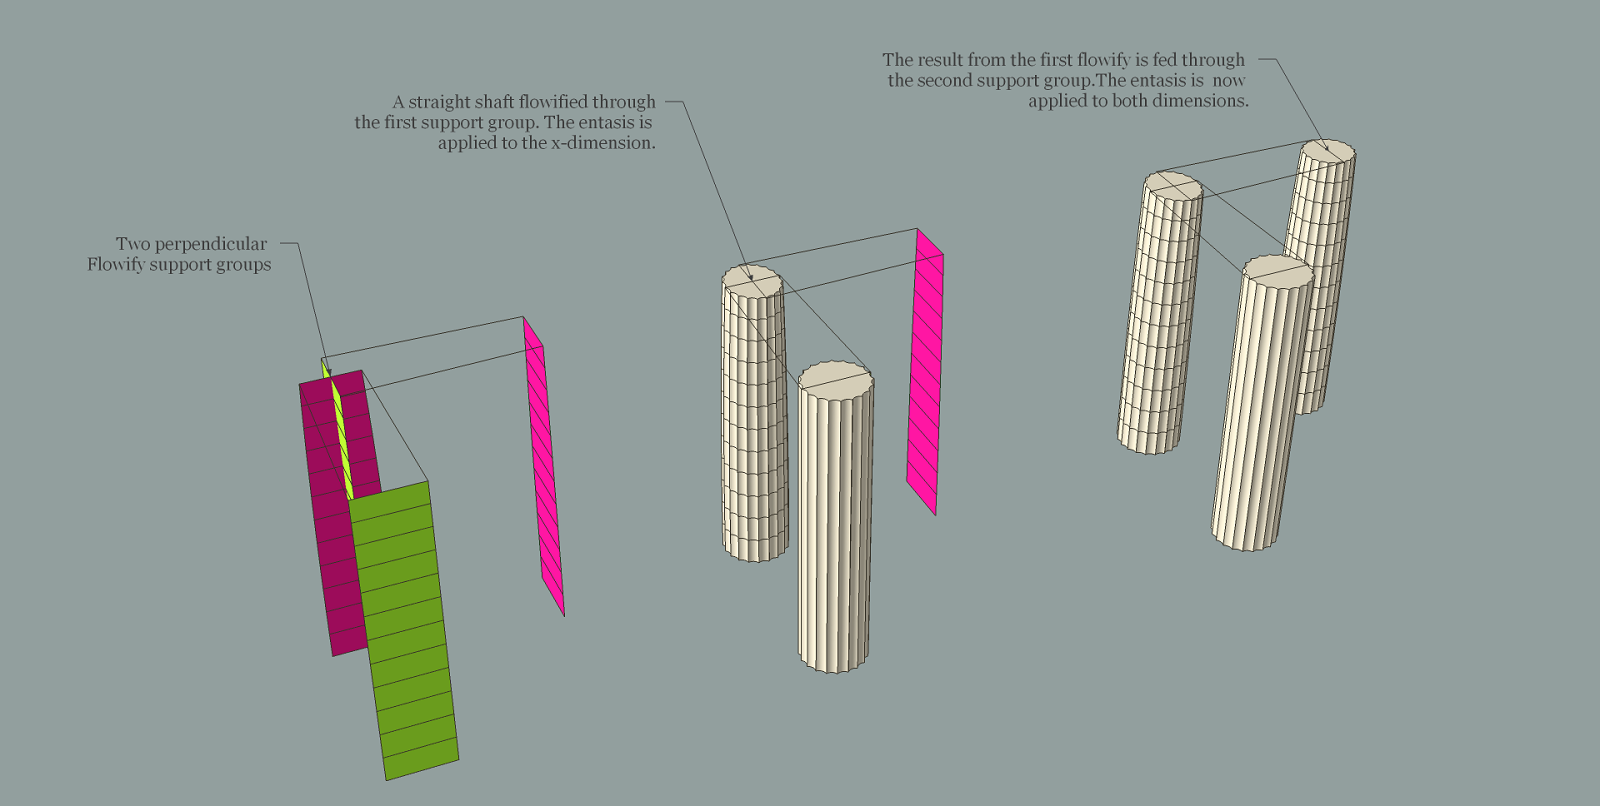
To construct an entasis on a fluted column it's possible to use Flowify twice. From the entasis curve, construct a quaded target surface. Construct a projection surface with the full width of the shaft and every quad with the exact same height as the corresponding quad on the target surface.
Connect and group the surfaces into a Flowify support group. Make a copy of the group and rotate it 90 degrees and place it as in the second image below. Flowify a fluted column through the first support group. Flowify the result through the second support group. The entasis is now applied to both the x and y-dimension. Merge the entasis part into the full column.
-
Much closer to original

-
@caul said:
It's actually quite straight forward to construct a "canonical" entasis in Sketchup for any type of column - smooth or fluted. <snip>
I've done two different tutorials on Flowify and even I had a hard time following this, but it is an ingenious use of the tool!
-
Do mine eyes deceive me or is there no spiral.
-
@chippwalters said:
@caul said:
It's actually quite straight forward to construct a "canonical" entasis in Sketchup for any type of column - smooth or fluted. <snip>
I've done two different tutorials on Flowify and even I had a hard time following this, but it is an ingenious use of the tool!
I've added a highly exaggerated example file to show the basic principle.
Hello! It looks like you're interested in this conversation, but you don't have an account yet.
Getting fed up of having to scroll through the same posts each visit? When you register for an account, you'll always come back to exactly where you were before, and choose to be notified of new replies (either via email, or push notification). You'll also be able to save bookmarks and upvote posts to show your appreciation to other community members.
With your input, this post could be even better 💗
Register Login


Advertisement