sketchucation logo sketchucation
    • Login
    ℹ️ Licensed Extensions | FredoBatch, ElevationProfile, FredoSketch, LayOps, MatSim and Pic2Shape will require license from Sept 1st More Info

    Spiral Doric Column

    Scheduled Pinned Locked Moved SketchUp Tutorials
    sketchup
    15 Posts 8 Posters 12.1k Views 8 Watching
    Loading More Posts
    • Oldest to Newest
    • Newest to Oldest
    • Most Votes
    Reply
    • Reply as topic
    Log in to reply
    This topic has been deleted. Only users with topic management privileges can see it.
    • R Offline
      rv1974
      last edited by

      Chipp you're perfect educator. Keep them coming!

      1 Reply Last reply Reply Quote 0
      • chippwaltersC Offline
        chippwalters
        last edited by

        @box said:

        Just like to point out that the default for Move is M, not T.
        And you don't need to use ctrl with follow me.

        I set my default to T so it will match some of my other programs. Thanks for the tip on follow me...I seem to remember in previous versions you had to press the CTRL key in order for Follow-Me to work if you previously had selected the path.

        Currently working with Cross-Reality technologies

        1 Reply Last reply Reply Quote 0
        • BoxB Online
          Box
          last edited by

          I only mentioned the M versus T for users who may be watching your tutorial. T will bring up the tape measure by default and I can see beginners getting confused.

          1 Reply Last reply Reply Quote 0
          • HornOxxH Offline
            HornOxx
            last edited by

            @jim4366 said:

            ...where to get the "set center point" tool?...

            Hi, here you can find it:
            http://sketchucation.com/forums/viewtopic.php?f=323%26amp;t=11081
            It will add the entry "Add Centerpoint" in the Extension´s menu (no icon bar)

            never trust a skinny cook

            1 Reply Last reply Reply Quote 0
            • david_hD Offline
              david_h
              last edited by

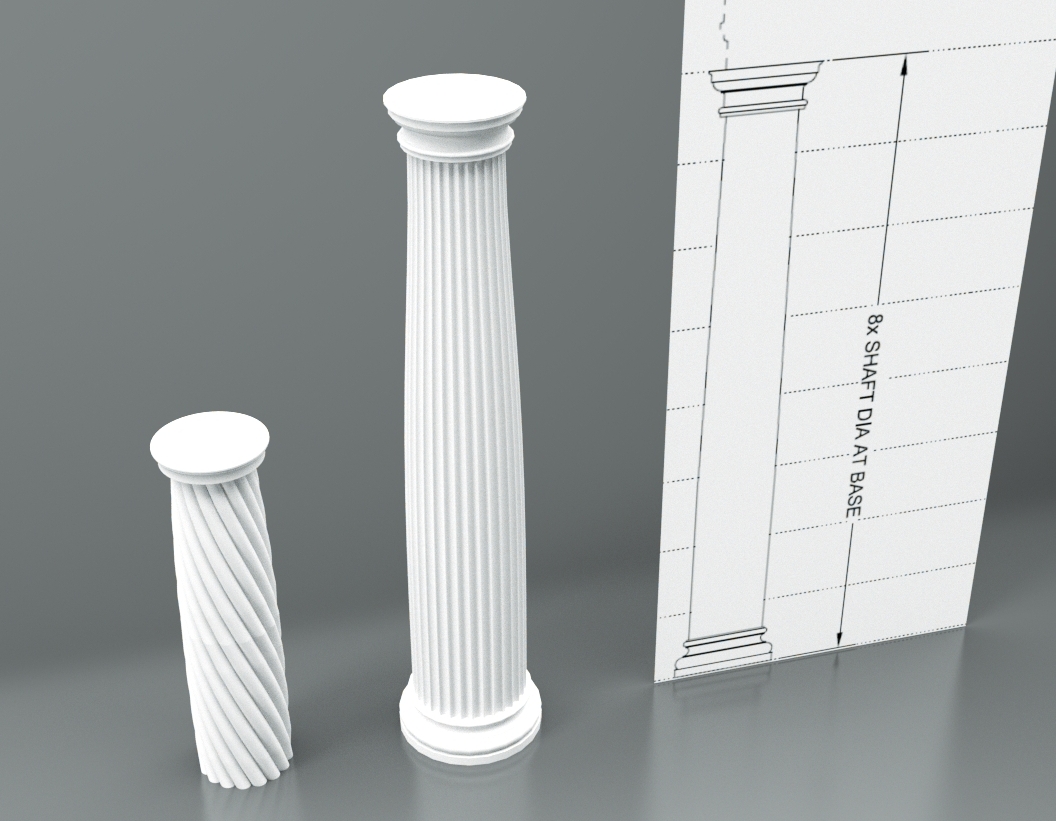
              doric.jpg
              Fun little study. I have actually had all of these plugins in my arsenal for years, but sometimes you just forget to use em. Thanks for the tut.

              If I make it look easy...It is probably easy

              1 Reply Last reply Reply Quote 0
              • pbacotP Offline
                pbacot
                last edited by

                Nice job. Thanks for the line up on plugins! The other day just tried doing a basic tuscsan column (not the first time)and entasis by brute force. I should have used FFD.

                MacOSX MojaveSketchUp Pro v19 Twilight v2 Thea v3 PowerCADD

                1 Reply Last reply Reply Quote 0
                • C Offline
                  CAUL
                  last edited by

                  @pbacot said:

                  Nice job. Thanks for the line up on plugins! The other day just tried doing a basic tuscsan column (not the first time)and entasis by brute force. I should have used FFD.

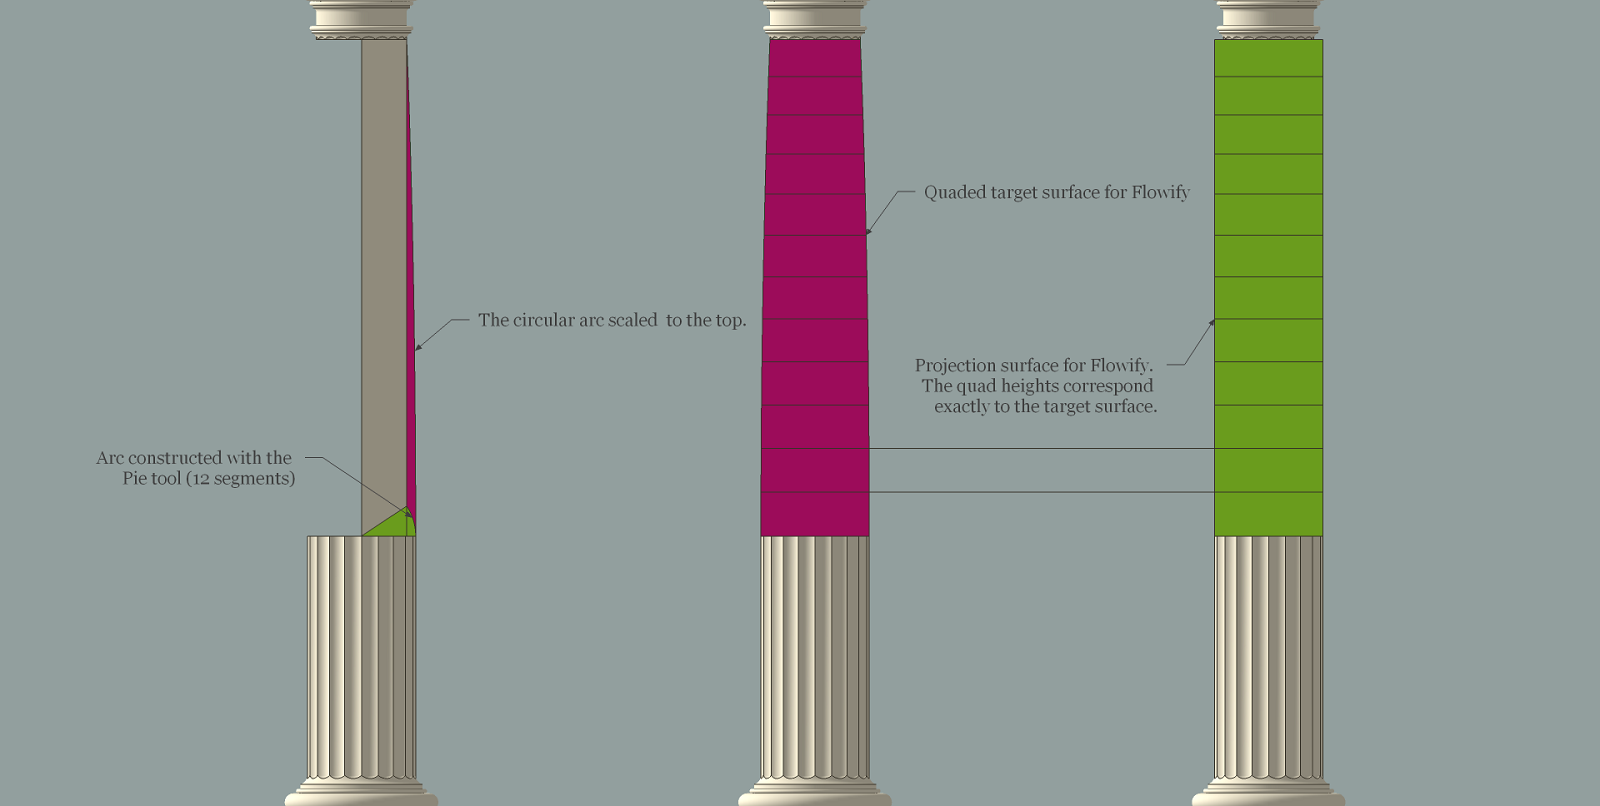
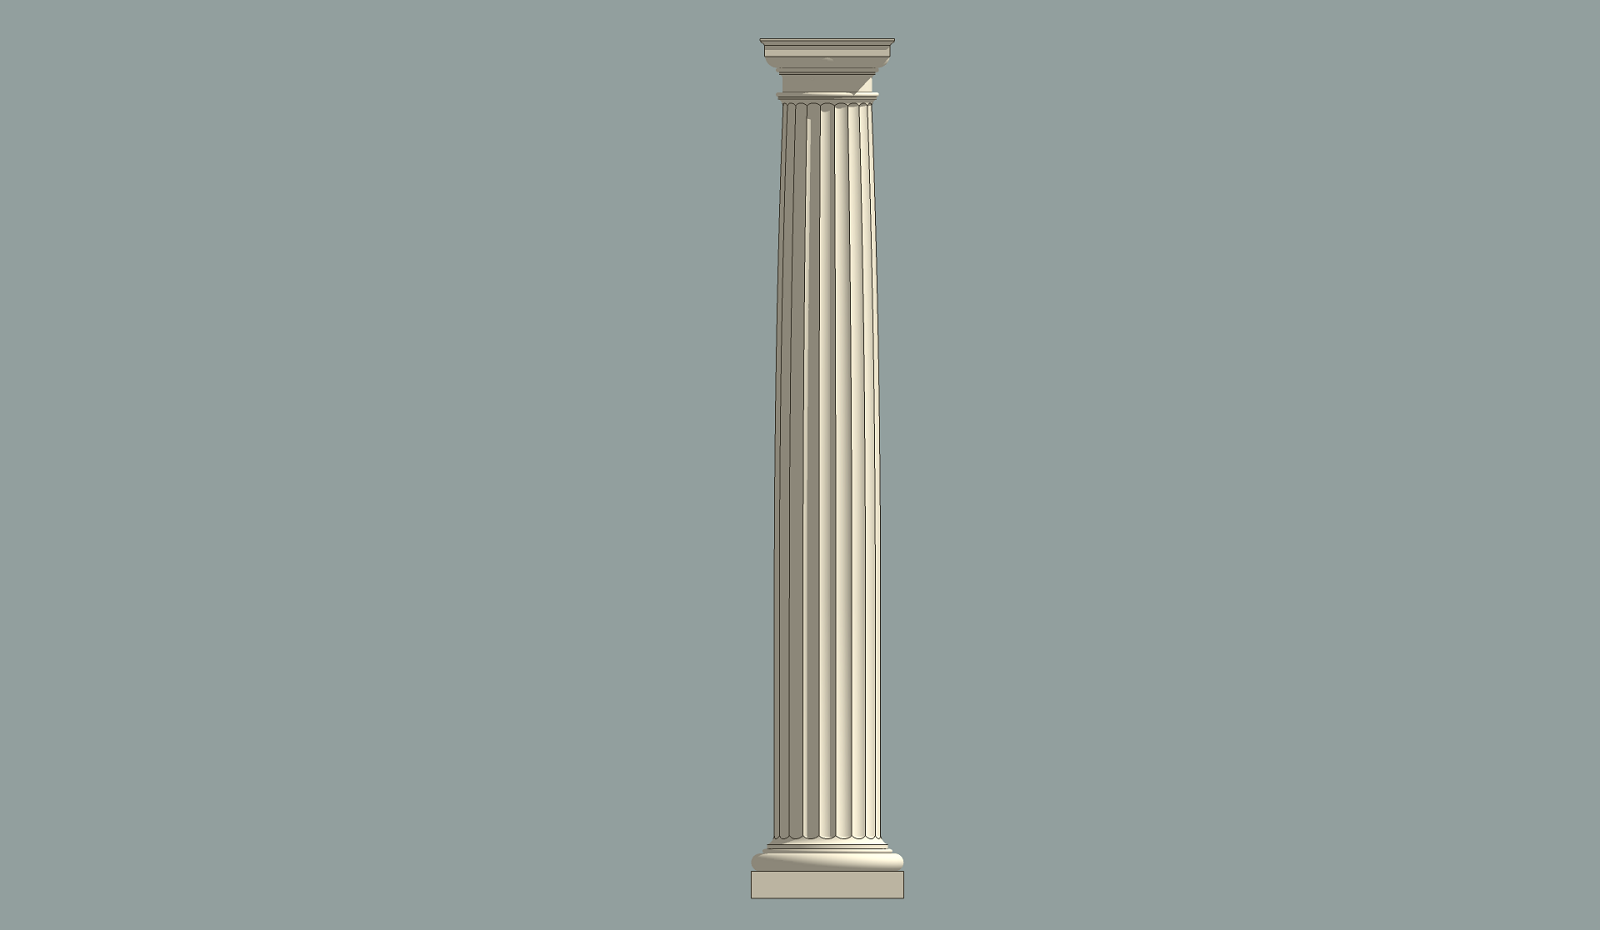
                  It's actually quite straight forward to construct a "canonical" entasis in Sketchup for any type of column - smooth or fluted. Canonical here means the recipe engraved in a wall at the temple of Apollo at Didyma (Turkey) some 2500 years ago. The method below is not exactly as described at the Temple of Apollo, but it's very, very close in practice.

                  Set out an arc with the Pie tool (as in the first image below). Scale this arc all the way to the top. The resulting elliptical curve is the shape of the entasis. The shaft is usually straight the first third of the height and the entasis is only applied to the top two thirds.

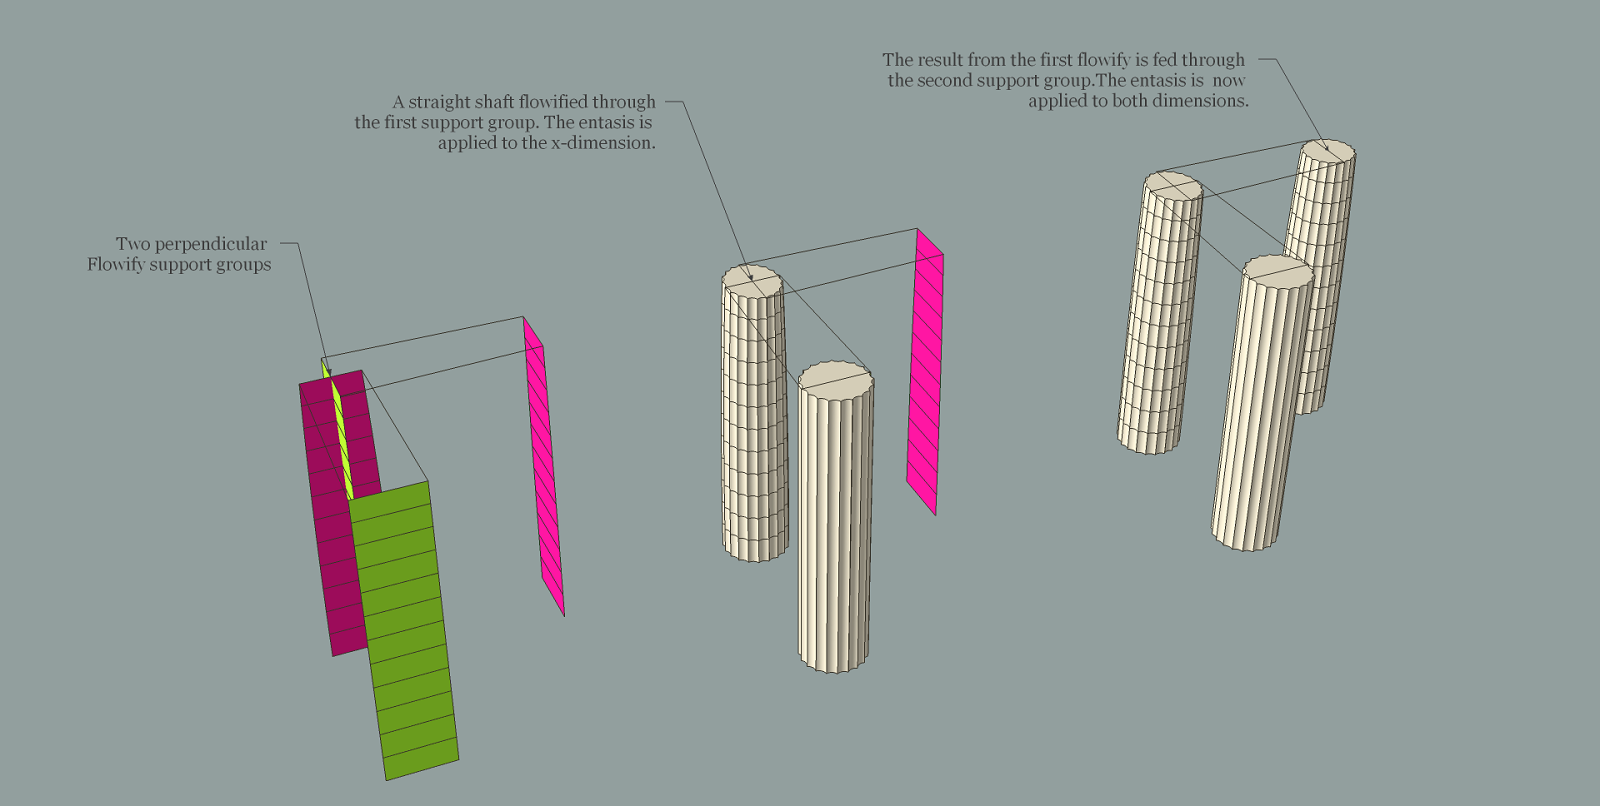
                  To construct an entasis on a fluted column it's possible to use Flowify twice. From the entasis curve, construct a quaded target surface. Construct a projection surface with the full width of the shaft and every quad with the exact same height as the corresponding quad on the target surface.

                  Connect and group the surfaces into a Flowify support group. Make a copy of the group and rotate it 90 degrees and place it as in the second image below. Flowify a fluted column through the first support group. Flowify the result through the second support group. The entasis is now applied to both the x and y-dimension. Merge the entasis part into the full column.
                  entasis.png


                  flowify.png


                  doric.png

                  1 Reply Last reply Reply Quote 0
                  • R Offline
                    rv1974
                    last edited by

                    Much closer to original 👍

                    1 Reply Last reply Reply Quote 0
                    • chippwaltersC Offline
                      chippwalters
                      last edited by

                      @caul said:

                      It's actually quite straight forward to construct a "canonical" entasis in Sketchup for any type of column - smooth or fluted. <snip>

                      I've done two different tutorials on Flowify and even I had a hard time following this, but it is an ingenious use of the tool!

                      Currently working with Cross-Reality technologies

                      1 Reply Last reply Reply Quote 0
                      • BoxB Online
                        Box
                        last edited by

                        Do mine eyes deceive me or is there no spiral.

                        1 Reply Last reply Reply Quote 0
                        • C Offline
                          CAUL
                          last edited by

                          @chippwalters said:

                          @caul said:

                          It's actually quite straight forward to construct a "canonical" entasis in Sketchup for any type of column - smooth or fluted. <snip>

                          I've done two different tutorials on Flowify and even I had a hard time following this, but it is an ingenious use of the tool!

                          I've added a highly exaggerated example file to show the basic principle.
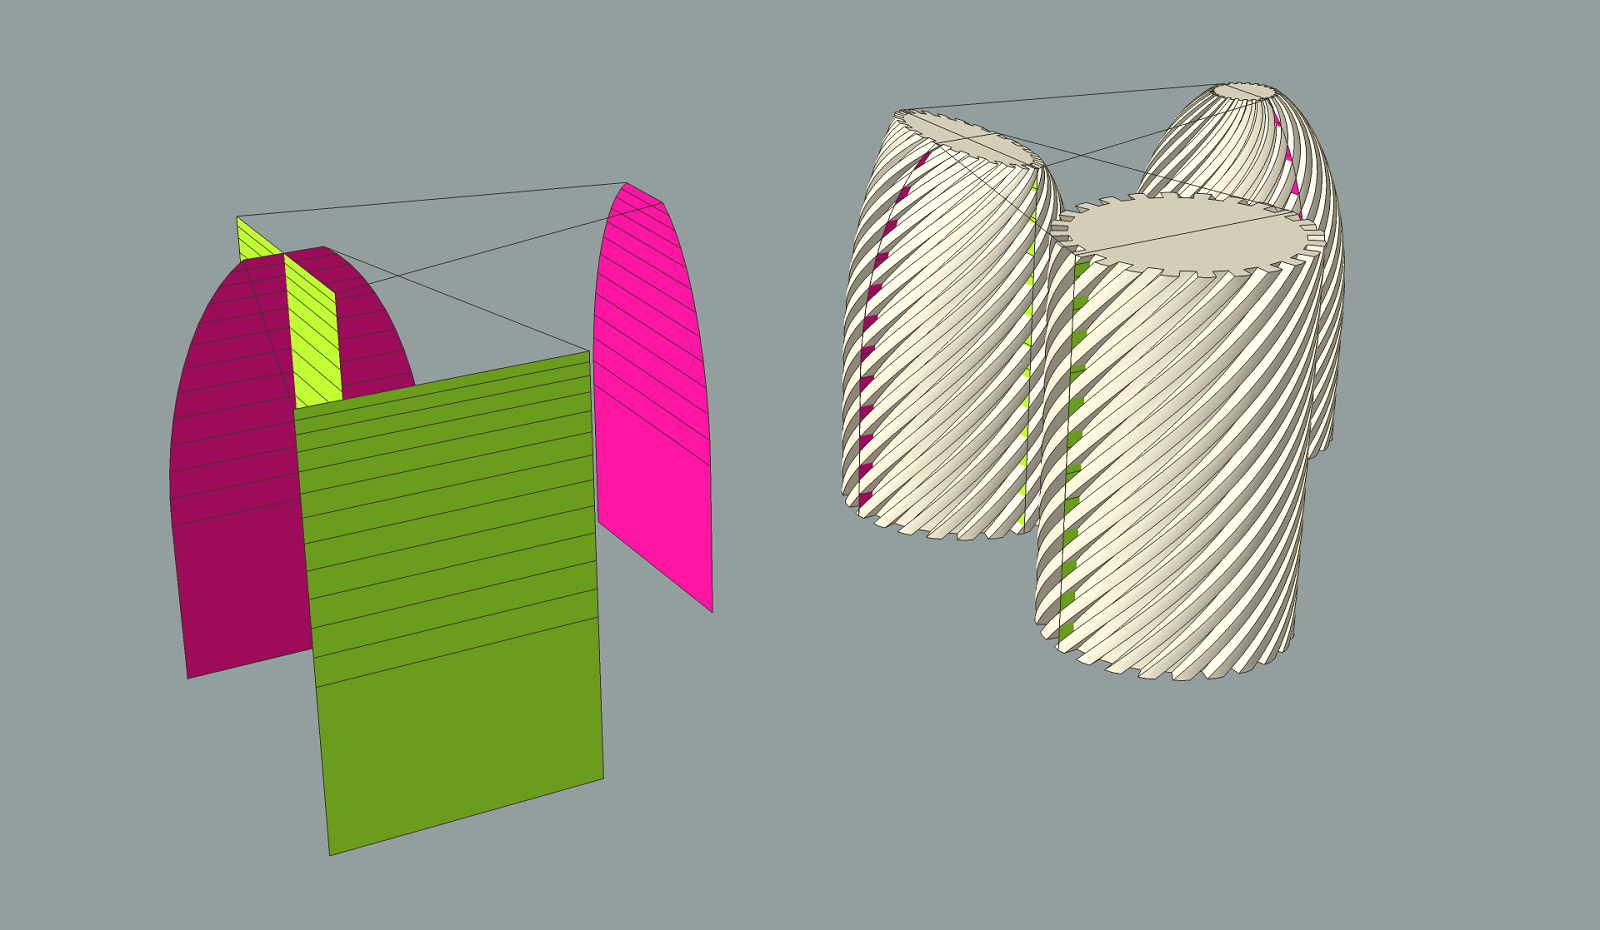

                          entasisII.png


                          entasis(skp8).zip

                          1 Reply Last reply Reply Quote 0
                          • 1 / 1
                          • First post
                            Last post
                          Buy SketchPlus
                          Buy SUbD
                          Buy WrapR
                          Buy eBook
                          Buy Modelur
                          Buy Vertex Tools
                          Buy SketchCuisine
                          Buy FormFonts

                          Advertisement