Medeek Wall Plugin
-
Request:
I know current window module is just for generic representation......but if possible.....could an option to specify number of units be implemented?Medeek Wall.....Draw Window........Picture.....Number of Units (4)
I realize dividing a picture unit into 4 units negates the picture aspect....but just for demonstration purposes that is what I did. (& I edited unit text too)See image below
-
I will need to give the window module some more thought, it is very limited at the moment, only some very basic window types. Also the ability to customize the callout would be useful I think.
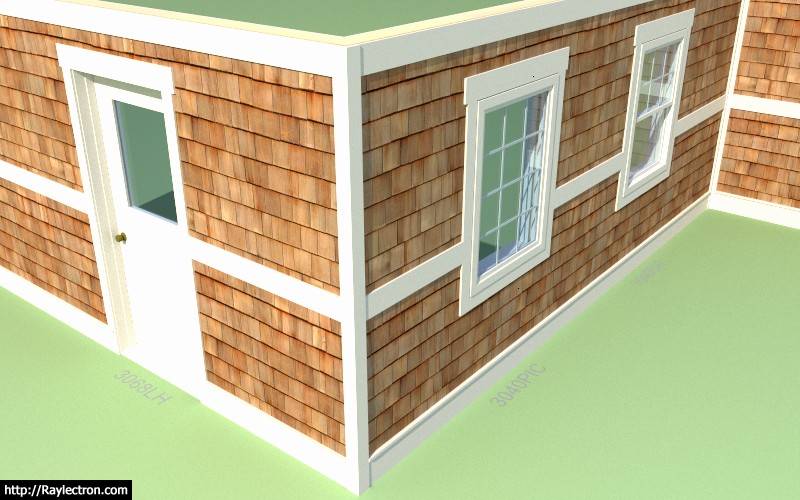
Testing the wall presets with the new trim features. The example below shows the water table terminated at the corners, compare to the previous example.
-
Version 0.8.4 - 07.05.2018
- Added frieze and skirt board options to the exterior trim module.
- Added an optional drip cap to the skirt board (dimensions can be set in the global settings).
- Similar to the band board the skirt and frieze can cut through the corner trim.
- Each wall panel now has a name assigned to it, which can be edited in the wall edit menu.
- LVL beam depths now include 22" and 24" beam sizes. LVL edge texture has been updated.
After much discussion and thought regarding my current marketing strategy for this plugin I've come to the following conclusions:
1.) The amount of work required to make this plugin reach its full potential is significant. Each of the sub-modules is literally a plugin in and of itself (ie. Windows/Doors, Estimating, Engineering, Beams etc...) If I keep going this plugin will be much more than just a plugin, it will be piece of software that begins to rival other design packages like Chief Architect and perhaps even Revit.
2.) Based on my previous experience with my other plugins the renewal rate on these plugins is quite low which is slowly pushing me towards some sort of subscription based licensing. However, I find this licensing model very distasteful so that prevents me from adopting this type of model at the present. Even if I where to go this route all of the existing customers would be grandfathered in with a permanent license.
3.) Compared to other design software out there my pricing is very low. To some degree this is actually hurting sales since the price is too low for many design professionals. What I mean specifically is that they look at this price and they have a hard time taking it serious, "It must just be TOY at that price". At the same time the casual/DIY user probably finds the current price a bit too high for their liking. So I am currently in a sweet spot where the plugin will not be purchased by either market.
4.) In order to keep pursuing this plugin (and others) with the amount of intensity and effort that I am currently expending I need to focus on the professional market.
In approximately 10 days I will be raising the price of the plugin to bring it more in line with other professional plugins like ConDoc Tools and others. I haven't settled on the new price but it will be at least double what it is now. The LT version will also probably see a slight increase however I would like to try to keep it accessible to the casual user and DIYer market.
-
Version 0.8.4b - 07.05.2018
- Fixed the door handing for in-swing doors.
- Callout for in-swing doors moved to interior side of wall.
-
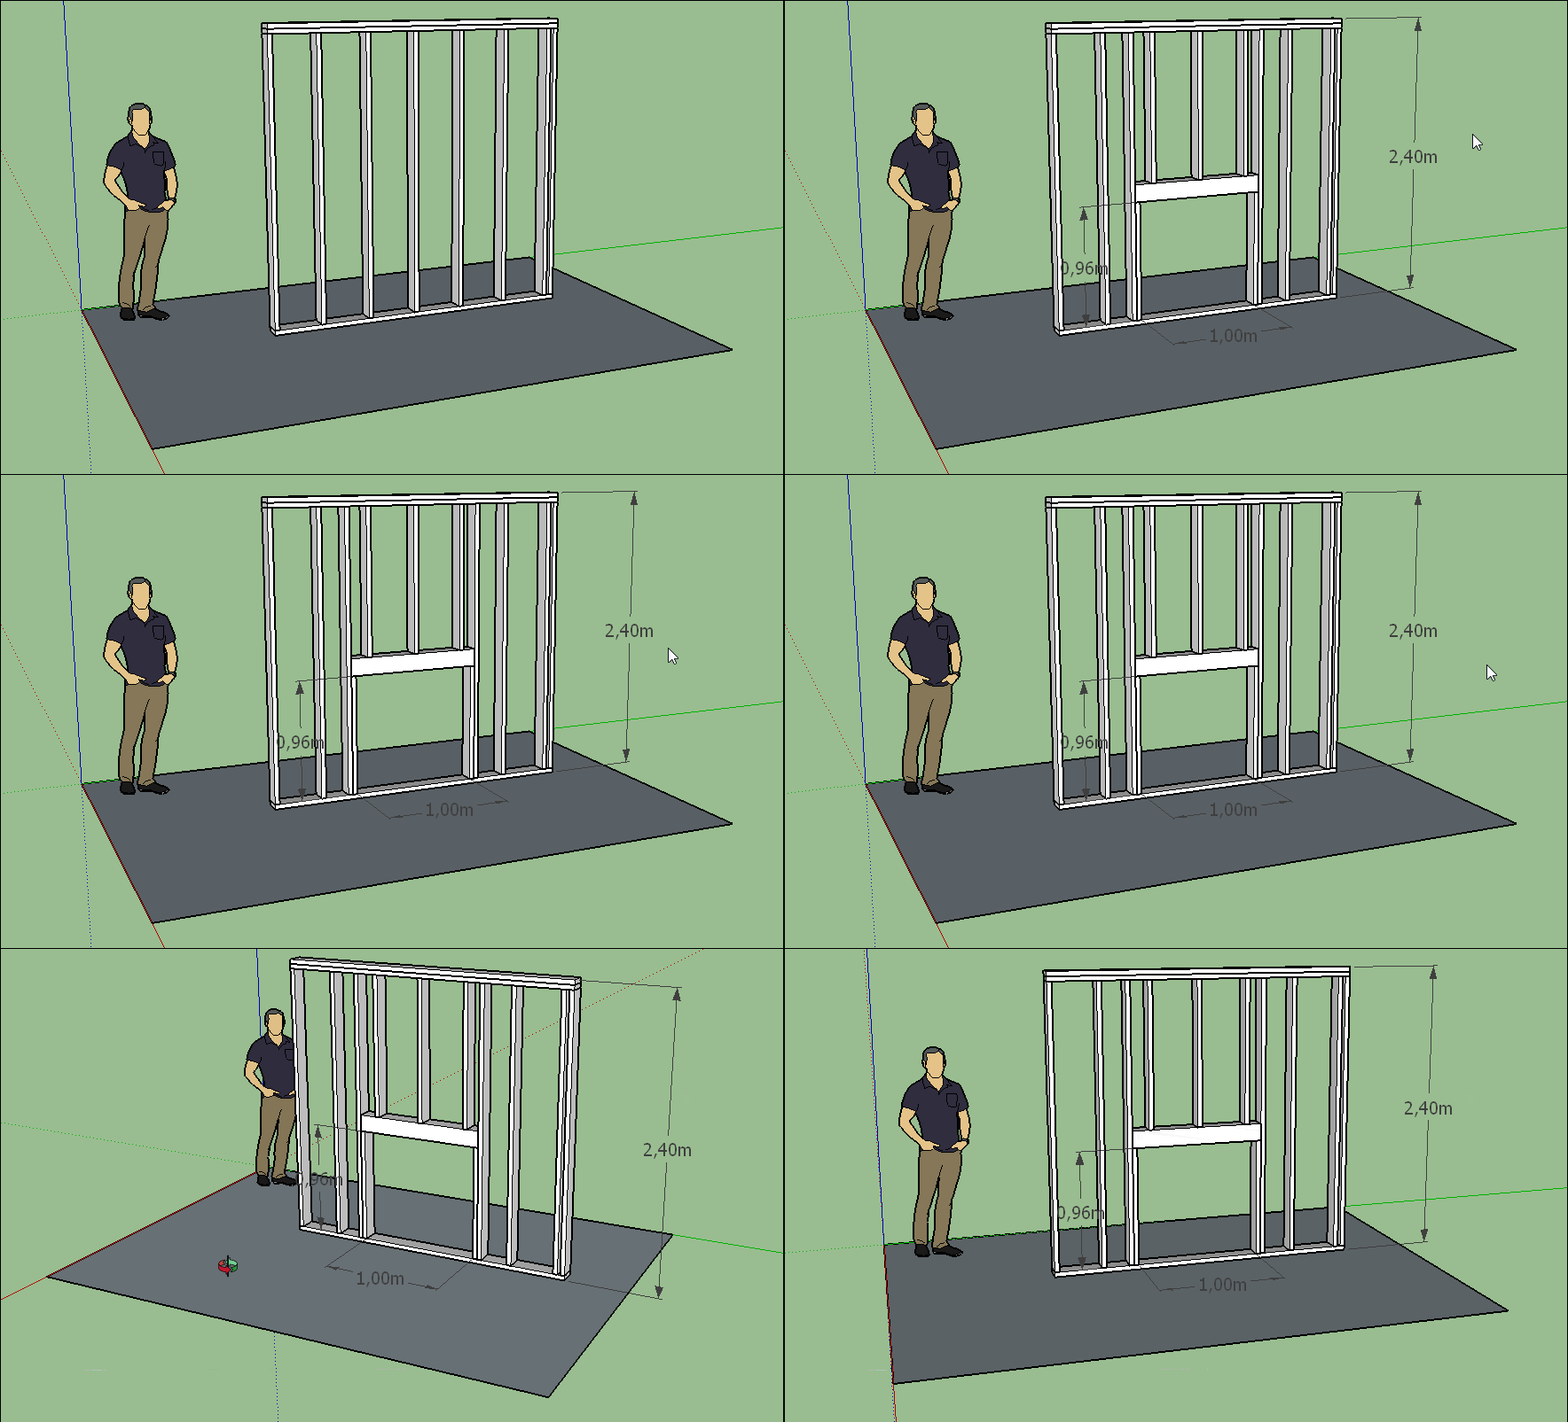
Seems Windows in Trial version are built by default at 0 Z altitude! (+ 0.04m thickness of bottom frame)
Does this normal ?
Click Image for animation!
-
@pilou said:
Seems Windows in Trial version are built by default at 0 Z altitude! (+ 0.04m thickness of bottom frame)
Does this normal ?YES:
In USA 97.125" wall ht. is a typical wall ht. using pre-cut wall studs. (pre-cut stud 92.625" + plates 1.5" + 1.5" + 1.5" = 97.125")
I have heard a number of reasons over the years, but mainly it is to get a finished ceiling ht. of ~ ± 96" or 8'-0" after install of drywall(or plaster) & flooring.C
EDIT:
Re-reading your post Pilou.....thought you were asking about over all wall ht.
Now wondering if you mean the window rough opening header ht? -
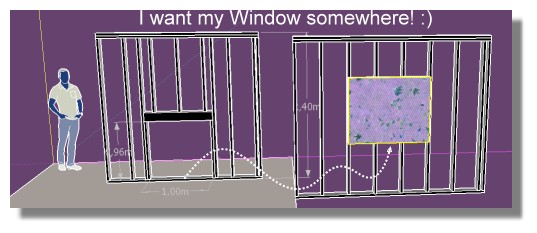
I want just draw my window on maybe something like 0.90 m or more from bottom!

-
Ok seems I must "Edit" Opening or Move Opening!
But curious there is "horizontal" movement, not only vertically one!

Or Bugsplash! -
The extra inch is helpful when hanging sheet rock--two 4' high boards.
-
The horizontal trim elements (frieze, band, skirt) are now interacting with the exterior window and door trim as one would expect:
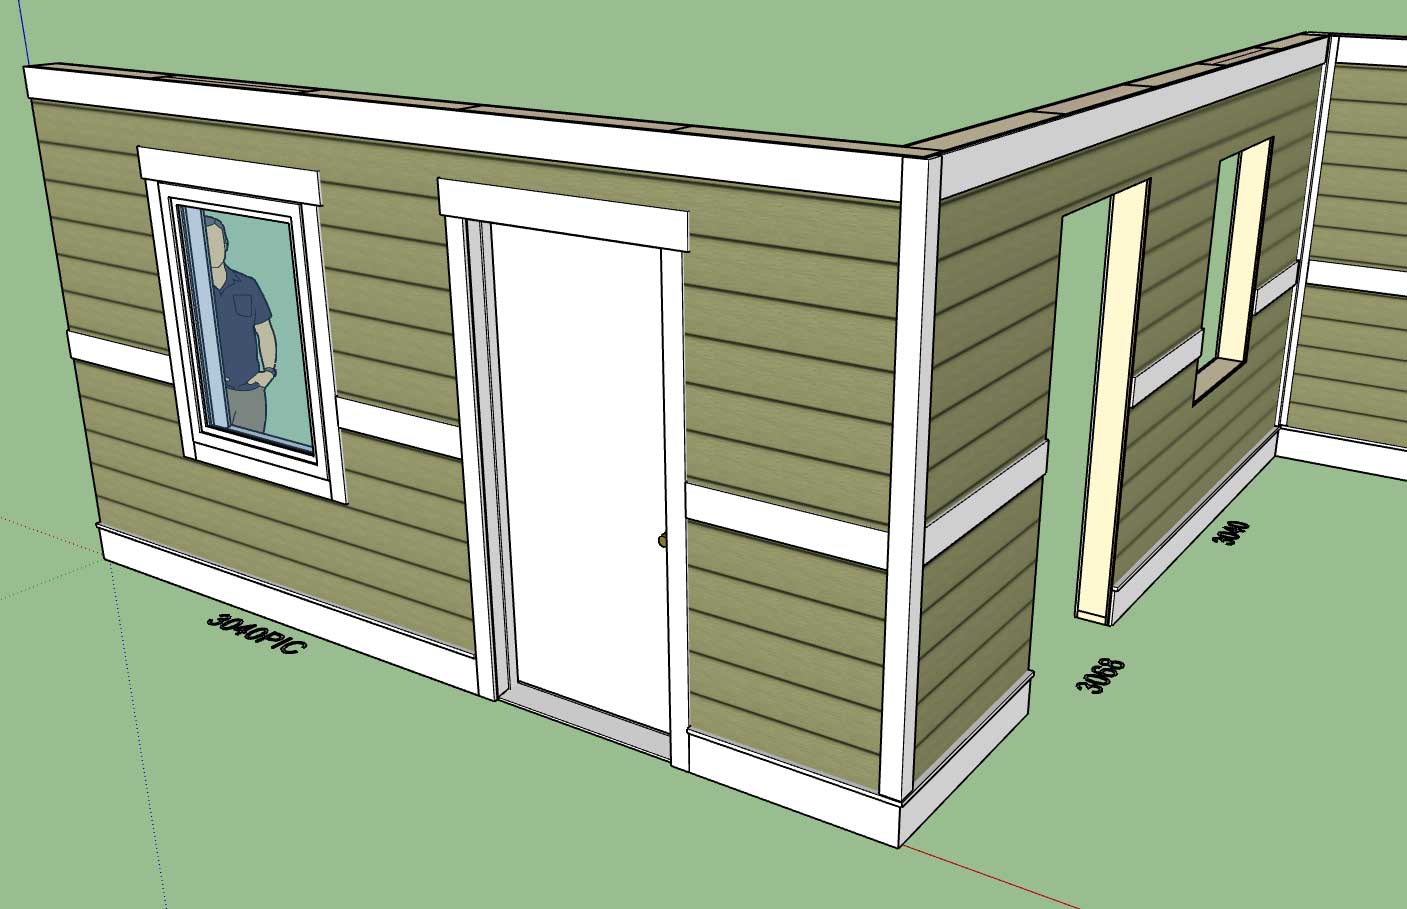
When no trim is installed (wall to the right) the band board is cut at the opening(s) flush with the sheathing and cladding. When trim is installed the band board and skirt terminate at the edge of the window/door trim.
Little details really, but the devil is in the details.
Reminds me of the days working construction for a general contractor in Utah some 20 years ago. I was installing faux log siding on a high end residence and if our pieces butted up with a gap anymore than 1/32" he would make us pull it off and redo it (especially on the front of the house).
-
Between versions must do uninstall the previous or install just the new over the previous ?
-
@pilou said:
Between versions must do uninstall the previous or install just the new over the previous ?
Please uninstall first, I think this is the safe bet, I've seen issues with installing over top of previous versions.
-
Today was one of those days where I got seriously pulled sideways, so rather than jump back into the larger important items I put out a few small fires and some low hanging fruit, kind of needed a break anyways after working straight through the 4th.
Flat two and four panel doors, single and double options:
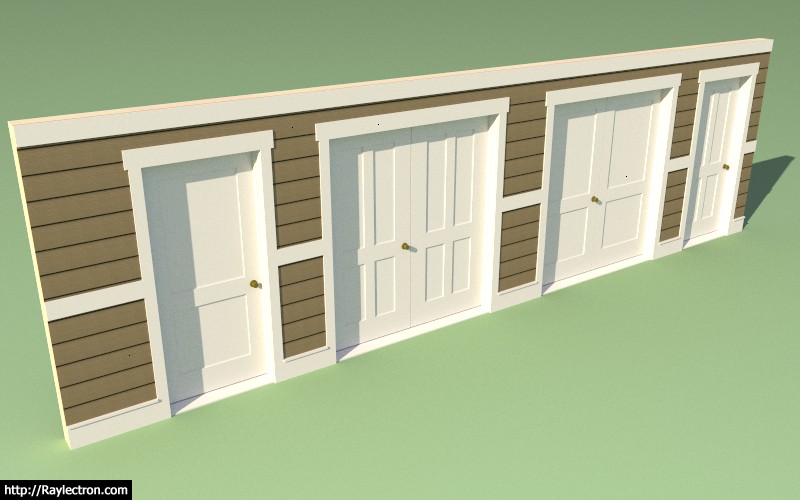
A slightly more contemporary look versus the more traditional six panel doors.
-
Version 0.8.4c - 07.07.2018
- Horizontal trim elements terminate at window and door trim.
- Added the following door types: flat four panel, flat two panel (single and double).
-
@medeek said:
@pilou said:
Between versions must do uninstall the previous or install just the new over the previous ?
Please uninstall first, I think this is the safe bet, I've seen issues with installing over top of previous versions.
And re-start Sketchup after installing extension. (Seems necessary......perhaps no?)
-
@charlie__v said:
@medeek said:
@pilou said:
Between versions must do uninstall the previous or install just the new over the previous ?
Please uninstall first, I think this is the safe bet, I've seen issues with installing over top of previous versions.
And re-start Sketchup after installing extension. (Seems necessary......perhaps no?)
If you entered your serial number for the first time then yes a restart of SketchUp is required.
-
Had a question on door hardware this morning.
I should point out that within the door install menu (and door edit menu) the user can pick between seven different styles of door hardware. Currently only Style1, Style2 and Style3 are active which means that the component (.skp) file exists in the components sub-folder.
If you want to add more hardware components, just name them (Style4, Style5, Style6 or Style7) and place them in the "components" sub-folder.
At some point I will probably move the door hardware into the "library" sub-folder and provide a better system for selecting and adding additional hardware within the global settings. The current system is limited and rather primitive.
Note that Style2 is a lever handle while Style1 is a typical doorknob. Style3 is a doorknob/deadbolt combo.
-
Just for curiosity sake I gave crown molding some more thought this morning and it quickly became apparent to me that interior trim is far more complicated than I originally thought.
The problem arises when you have a long ext. or int. wall that is adjacent to multiple rooms, where multiple walls tee into this wall. Some of these rooms may have crown molding and some may not.
To make this completely parametric would require some very serious logic.
Another option would be to decouple the crown molding from the wall panels and just make a separate tool for this function.
Option C would be just to leave this venue to other plugins like Profile Builder. The problem with this option is that with baseboard and chair rail the door and window openings would have to be manually removed.
For now I don't have an optimal solution for interior trim, I will need to give this some more thought.
-
Plugin utilization breakdown:
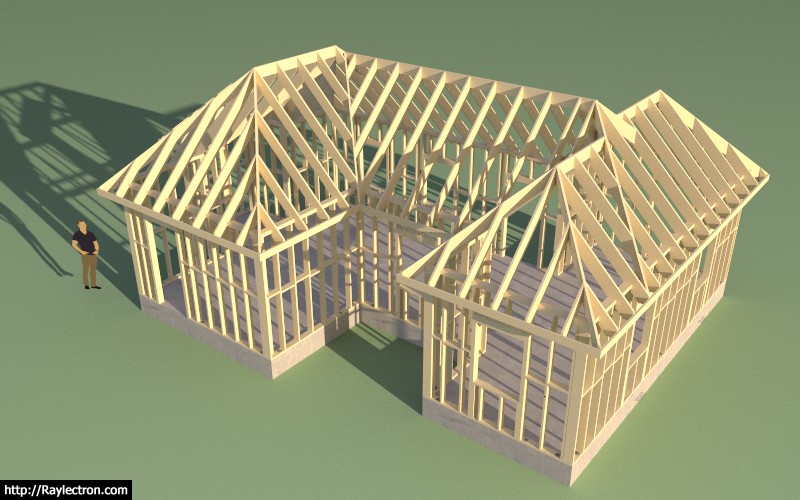
Foundation Plugin: Not parametric, slab on grade foundation, less than a minute
Wall Plugin: Fully parametric, exterior walls only with some doors and windows, about a minute
Truss Plugin: Rafter roof not parametric and required manual editing to complete this roof framing, approximately 30-45 minutes of trimming members with the trim tool (Truss Plugin).
Based on this test the area I am falling down in most is the roof. I need to be able to automatically create complex roofs and also have them fully parametric, this has always been the holy grail of the Truss Plugin and I have not yet achieved it.
In my mind the Wall Plugin has already surpassed the Truss Plugin in ability and functionality.
-
Cool assemby of 3 specialized plugins!

Advertisement


