WIP - A Parking Garage and some Workflow Insights
-
Hi Everyone
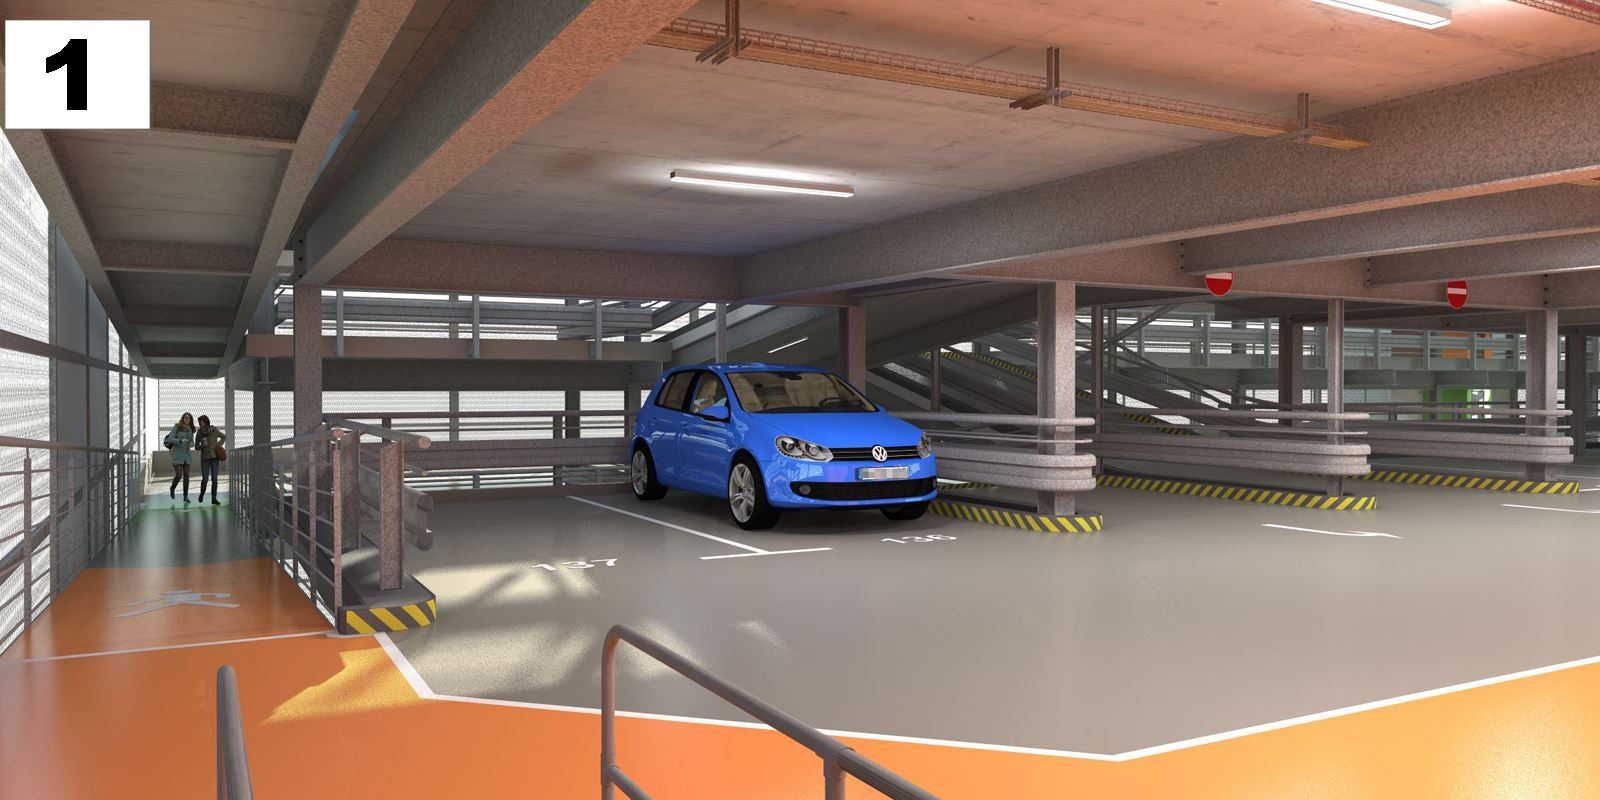
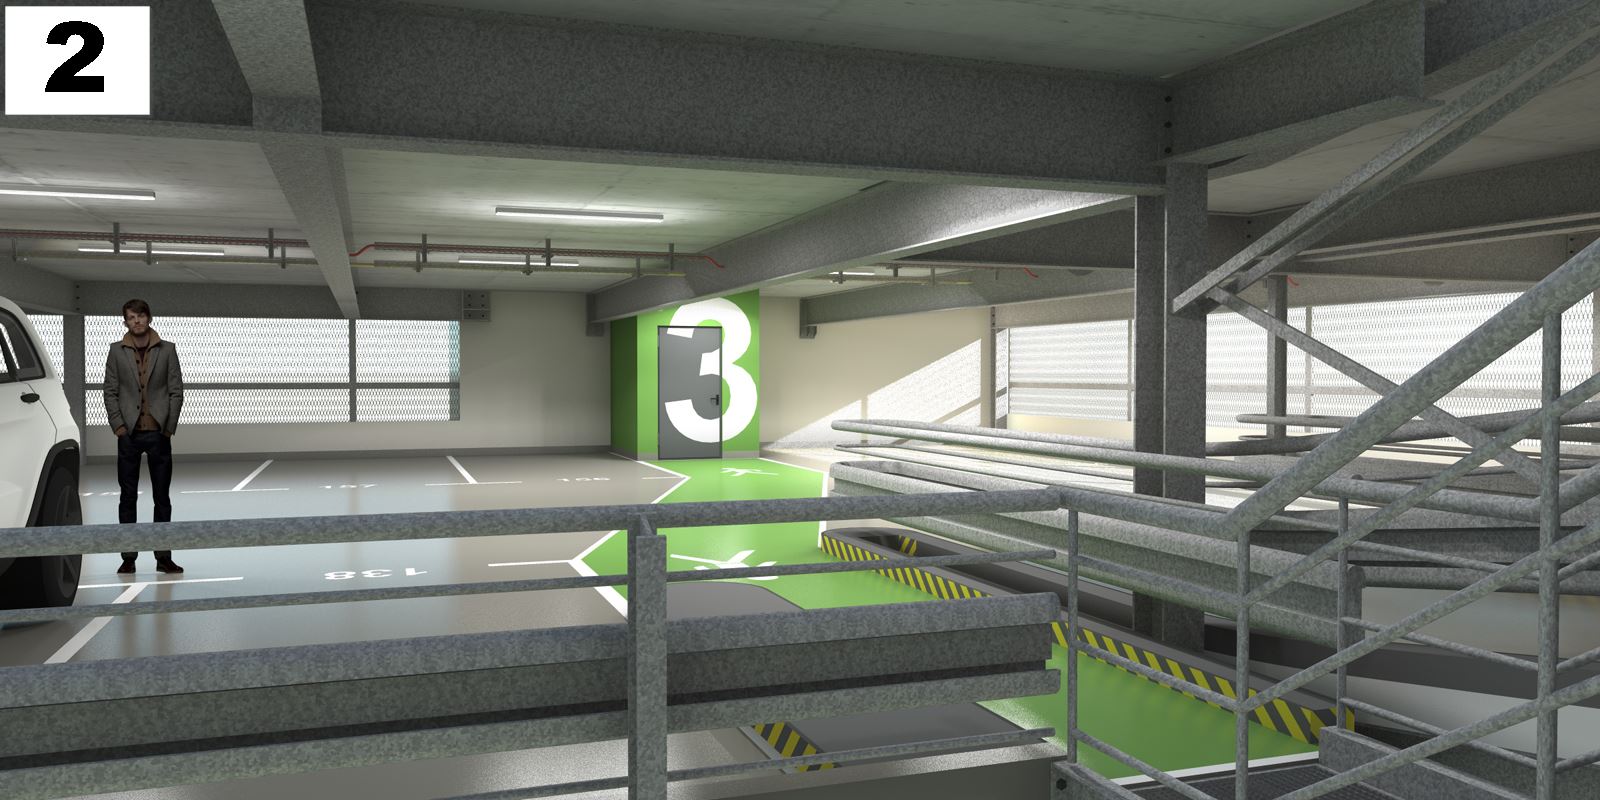
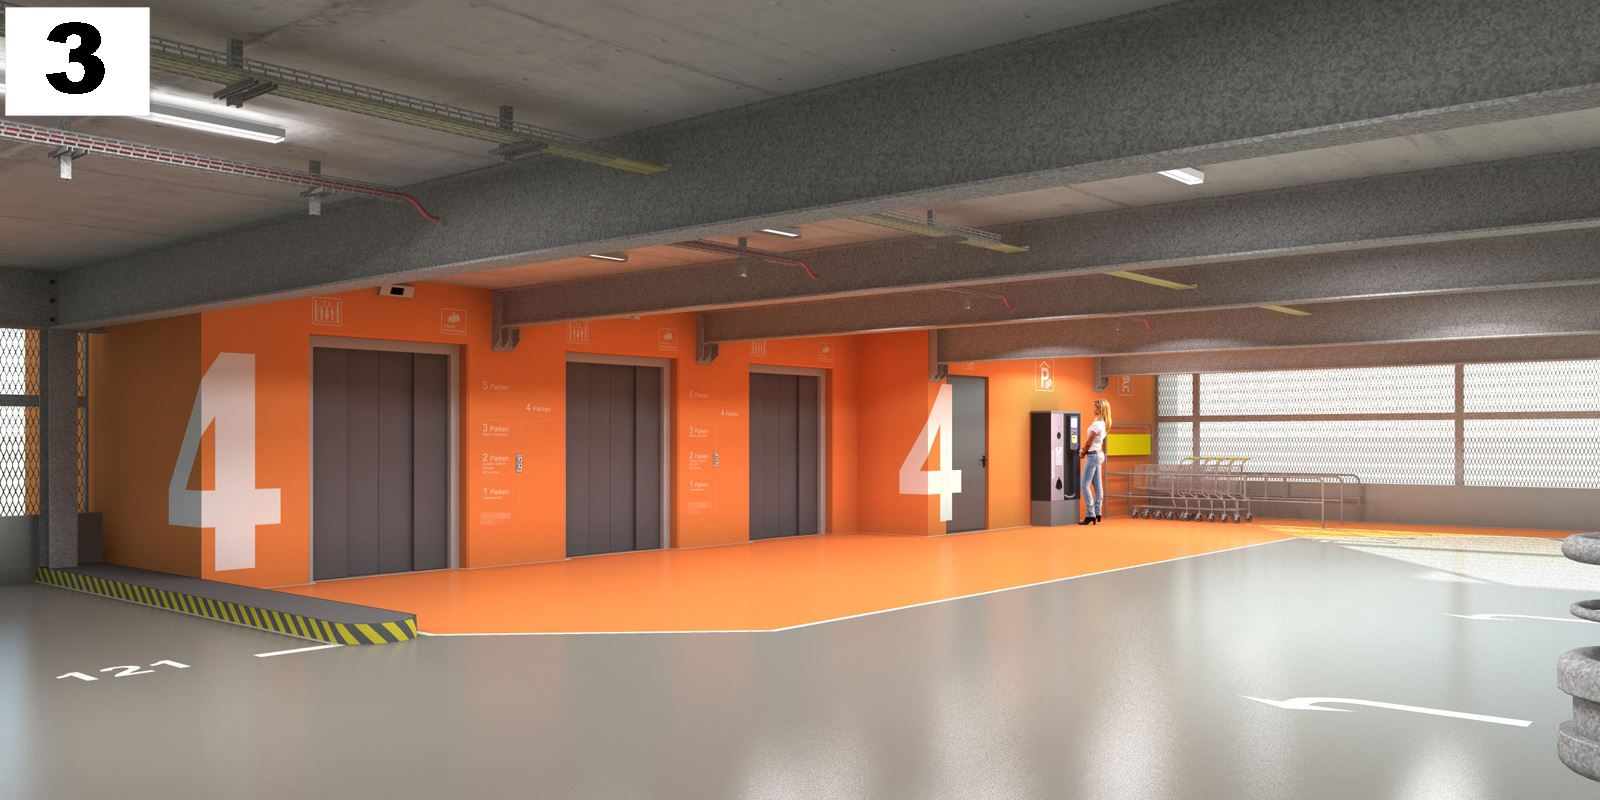
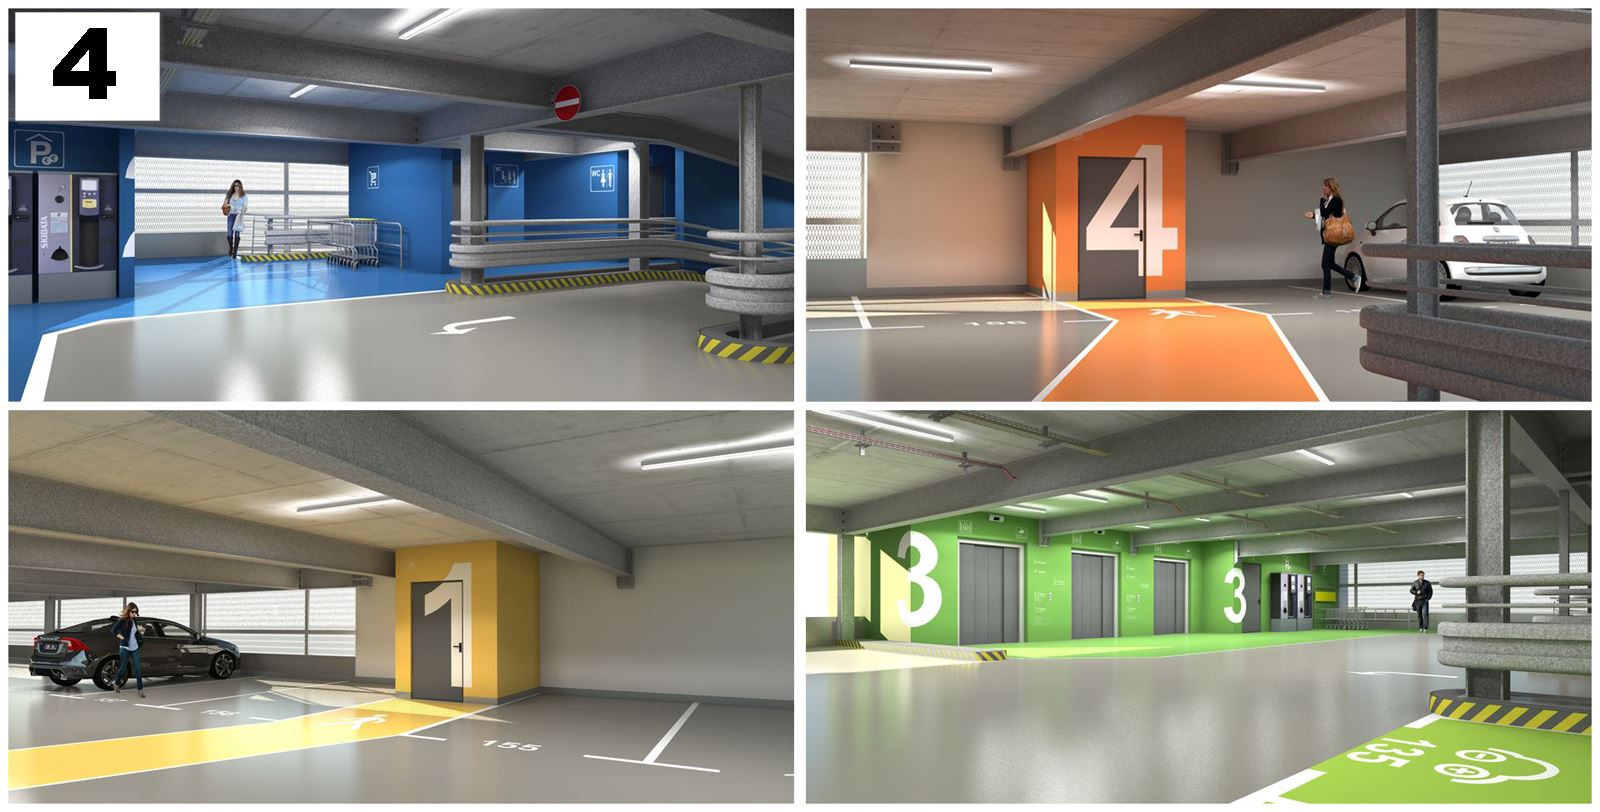
I would like to give you some impressions, some details and informations about a currently finished project and my therefor used workflow and I hope that all this will interest you and sorry for too much texting In addition to some rendered scenes (pic.1 to pic.4) I would point out some standard features of SketchUp, which are not new in deed but still worth being mentioned again and again I think simply because they are still great
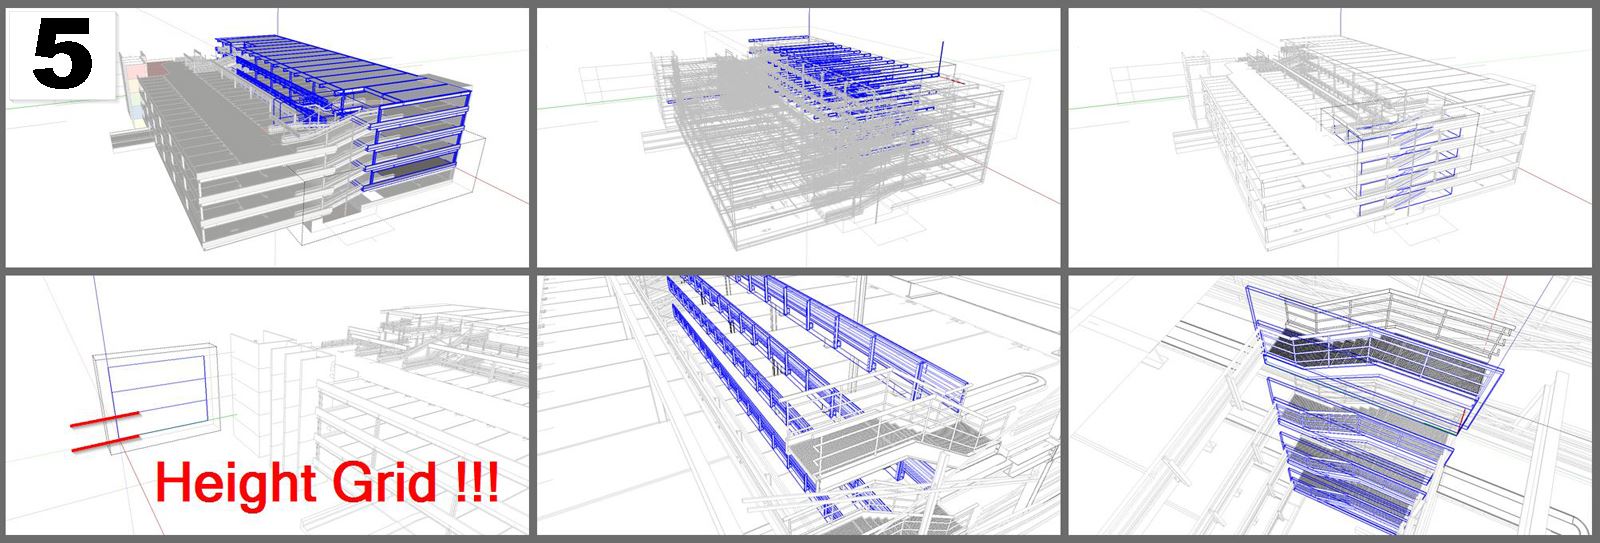
This project is a parking garage building, which is there 3 times. Each building consists of 2 "blocks", which are connected with driving ramps. Each storey level is a large "hypercomponent", which includes essentially all the detail sub-components that are repeated all over again such as steel frames, handrails, doors, pedestrian protection areas or parking marks, etc... (pic.5)
If you stack up such a "hypercomponent", you've almost finished half of a building here. For me it is always useful to use an external "height grid" which simplifies copying model entitys from one
storey to other storeys immensely without navigating to this actual detail point within the model
itself.So using SU´s components is still a big thing for my workflow which simplifies working on a model! (pic.5)
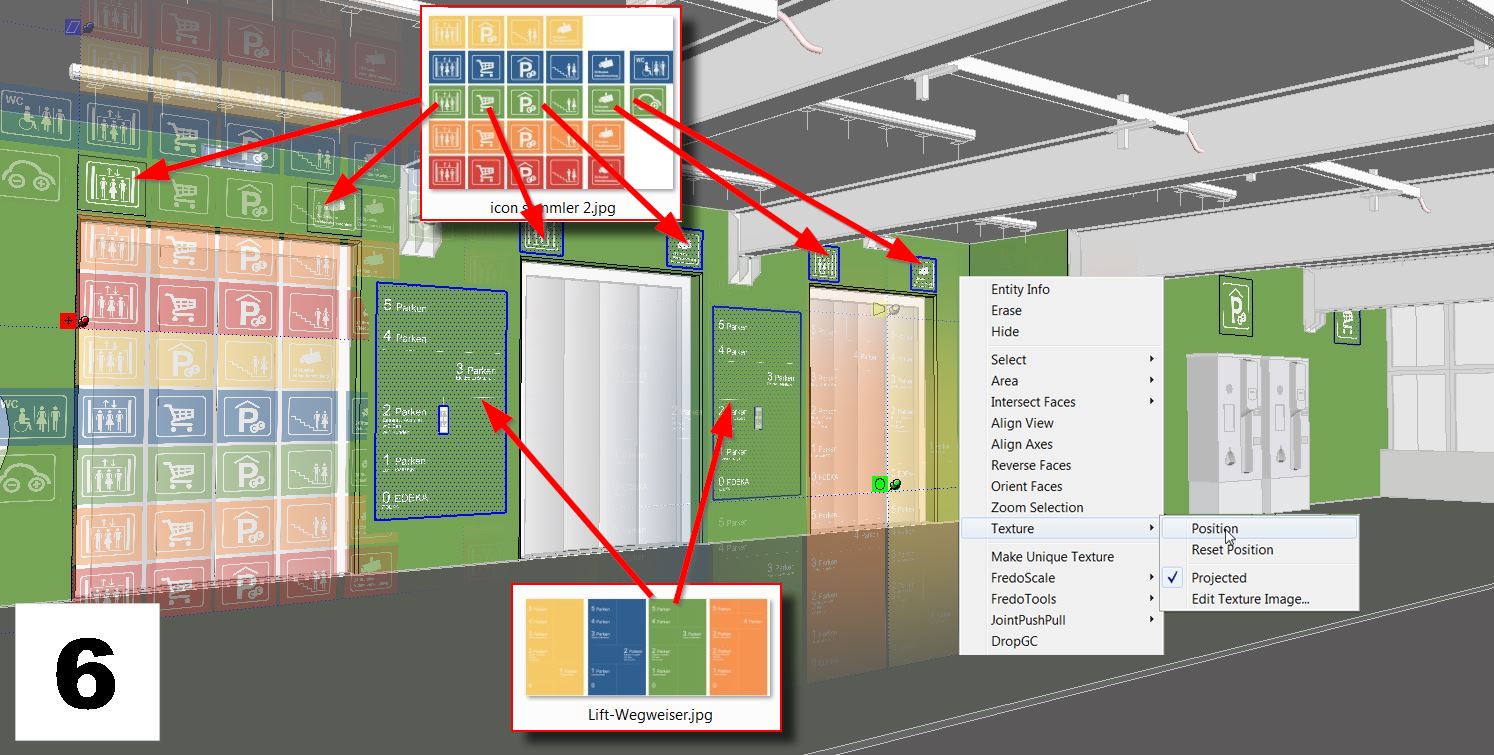
The texturing of the model is essentially a standard workflow. Because in this model are used a lot of signs, such as stairs, video surveillance, elevators, toilets etc., I did a lot of textures for each single sign and all these in all the required colors! - Very quickly I lost the overview here. Since I edited the signs in one AI sheet, I decided to export only one single texture, which includes all these needed signs. This one texture I had to move then to show the right sign to the right place which worked very simply and well here
This texture positioning feature is still a big native SU thing for me as well! (pic.6)To render any model, often is a strange thing - here you can experience some surprises, especially when the render time grows into infinity.
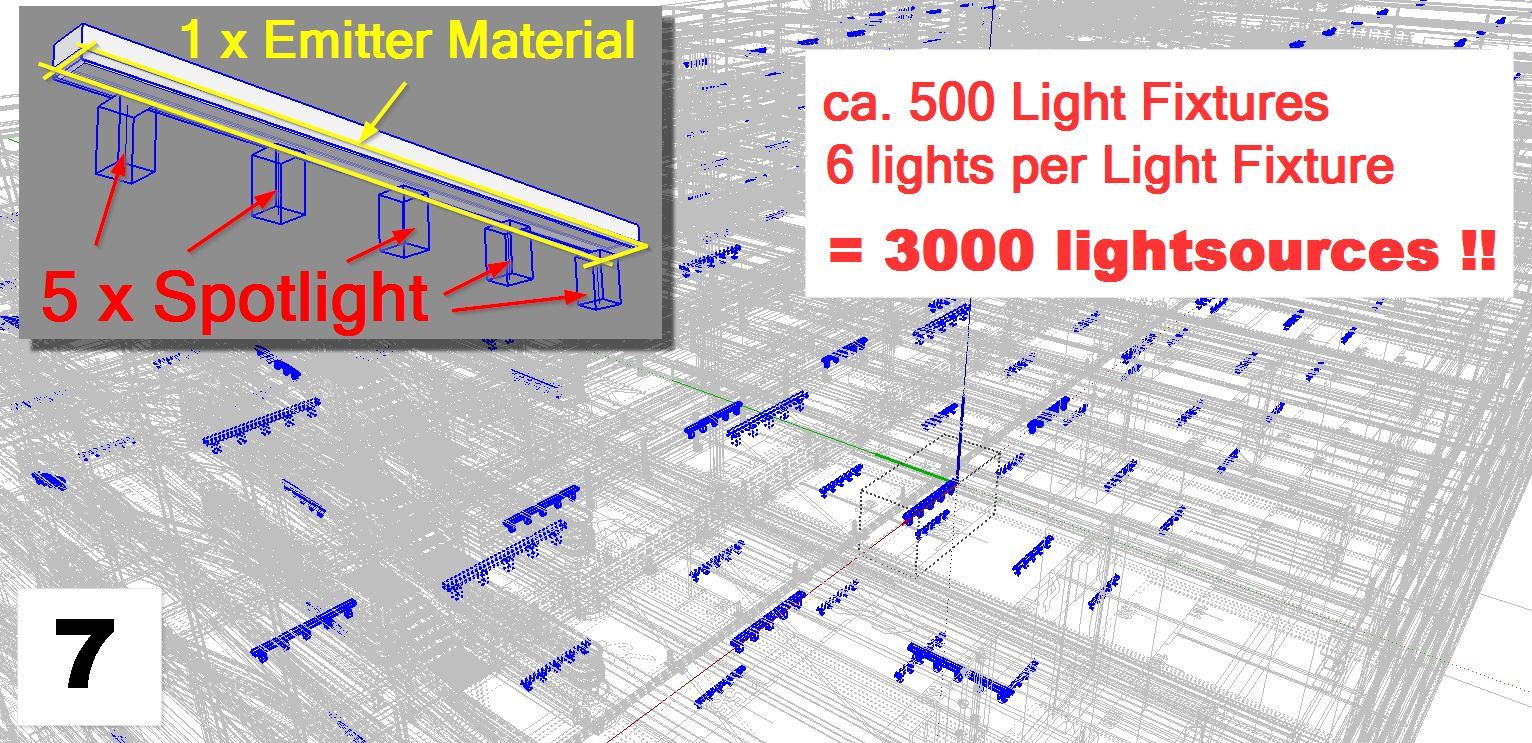
So my last hint at this point (pic.7) is to exclude all the light fixtures by hiding , which are not needed to render the current scene. After all, one model here contains about 500 light fixtures containing a total of about 3000 light sources. In one "worst case" scene I did a testing: when all light fixtures were enabled, the render lasted about 20(!!!) hours - aua! - but when I hid the unnecessary light fixtures, the render time reduced to about 4 hours for this particular scene which was ok for me since I used maximum quality settings and a high resolution here...Edit1:
I forgot to mention that at the end of this project I could render most scenes in about 1.5 to 2 hours because I additionally hid - like the light fixtures - all the geometry, which was not necessary for the corresponding render scene... Very unfortunate and a lot of waste of time that i got this idea only at the project´s end
-
Great job. Nice renders! I'll take a look at your notes for my reference. It looks like the height grid would be useful in small projects as well. Figure the heights by detail and calculation, then use it to keep the model correct. Good point about the lights.
-
Nice results and presentation!
-
Very impressive, nice clean renders

John -
Wow. Nice project. I like the color concept. Renderings are beautiful as well.
-
Yes Please add the color scheme and big numbers, helps it stick in your head when in a hurry. (after searching briefly for my car on the wrong level yesterday).
-
Great job.
BTW. You mention hiding elements, I have learned, (the hard way), that using layers to control visibility is much better. -
Gorgeous!
-
First, thank you all for your comments
@baz said:
Great job.
BTW. You mention hiding elements, I have learned, (the hard way), that using layers to control visibility is much better.Baz, you are right
Funny - In the >What's your beginners tip?< Contribution here in the forum I recommended beginners still in 2015 to avoid Layer 0 which was wrong, what I also "learned the hard way" - although I use SU since version 4, I never realized, that this visibility-thing works different is SU but allways by using Layer 0 
In this model case, only by switching off layers I could not achieve the desired reduction in geometry. Also within a needed floor plan layer, which I could not switch off, I additionally had to use "hide" for things, which were "behind" my scene camera. Fortunately the scenes tabs save these settings as well and the profit of render speed justified this effort quite surely here... -
This is amazing work.... love the floor level decals!
-
I know less than nothing about rendering, but I like the photos of your ambitious project. Now just add a bunch of tire marks, some trash and litter, maybe some graffiti and oil puddles, and it will be perfect

In No. 7, aren't there just five lights per fixture, or am I missing something? Yeah, I probably am, but I had to ask.
-
@hellnbak said:
I know less than nothing about rendering, but I like the photos of your ambitious project. Now just add a bunch of tire marks, some trash and litter, maybe some graffiti and oil puddles, and it will be perfect
In No. 7, aren't there just five lights per fixture, or am I missing something? Yeah, I probably am, but I had to ask.Thanks Hellnbak
to get it not so very clean I actually considered tire marks. At some point it will look as you describe and hopefully will be a new order then
Next to the 5 spot lights, there is an emitter material on a rectangle face, which is also a lightsource. -
@hornoxx said:
[ Next to the 5 spot lights, there is an emitter material on a rectangle face, which is also a lightsource.
yeah, every now and then I like to do something to remind myself how dumb I actually are.
-
Super cool!!
I love the color which makes these space recognizable,I think I will never lose myway when walking

-
This is really good work, level of detail in the SU model and the rendering. You mentioned the textures for the signs and I guess the parking space numbers you did your own with a photo editor?
Walt
-
Great presentation and colours, thanks for the tips as well.
Perhaps the numbers on the doors should favour the hinge side, to prevent them getting grubby around the handle area. Also, changing the floor colour part way down the ramp slope can cause issues for those with sight problems. -
@collage architecture said:
...I think I will never lose my way when walking
Thanks limshigan - hopefully, because that was precisely the intention - How many times have I been looking for my car, not remembering where I had parked it
In the meantime I am making a parking space photo with my mobile phone when I leave my car at the airport for example 
@mwm5053 said:
...you mentioned the textures for the signs and I guess the parking space numbers you did your own with a photo editor?...
Thank You Walt - Yes all icons / signs are self created with AI, which is easier than to make these with a photoeditor. After that I have imported the ai files in PS, adapted to the import settings (e.g., 400dpi, no antialiasing etc.) Finally I received the needed JPGs or PNGs this way.
I/we created these Icons for our own because to use others is linked to copyright issues often.
Only the parking space numbers and parking space lines are created as native SU geometry. These hover a hair width above the ground. To make everything a bit more detailed (such as the cabel channels under the ceiling or the headboards with screws at the steel frames for example) was very simple, since all steel frames are component instances. In sum, all this just pretends to be detailed but this was necessary to give the scenes a more "realistic" looking touch.@jga said:
...perhaps the numbers on the doors should favour the hinge side, to prevent them getting grubby around the handle area. Also, changing the floor colour part way down the ramp slope can cause issues for those with sight problems.
Thanks and great suggestions from You, JGA - the "grubby around the handle" thing is certainly correct - I will take that into consideration! Generally there is still very much confusion about the naming of the levels, which will mix up our suggested color coding here and there. If we are lucky, all the parking levels, which are connected by a pedestrian ramp, will have the same color coding - and if so, the pedestrian ramp will have this color also in completeness...
-
Nice did you do submittals?
-
@hornoxx said:
Edit1:
I forgot to mention that at the end of this project I could render most scenes in about 1.5 to 2 hours because I additionally hid - like the light fixtures - all the geometry, which was not necessary for the corresponding render scene... Very unfortunate and a lot of waste of time that i got this idea only at the project´s endAlways good to find this out. Always sad to discover at the end of one project. But, always great to know before the beginning of a new one.
Still made me giggle though.
-
A very well thought-out work and important findings....
In rendering programs, I would like to have an option to automatically hide geometry outside the camera field of view or objects completely hidden by geometry in the foreground. This is especially useful for camera panning in motion simulations, etc., as the constellation of objects is constantly changing. Of course, this is not possible when objects outside the field of view are required for reflections or shadows.
Hello! It looks like you're interested in this conversation, but you don't have an account yet.
Getting fed up of having to scroll through the same posts each visit? When you register for an account, you'll always come back to exactly where you were before, and choose to be notified of new replies (either via email, or push notification). You'll also be able to save bookmarks and upvote posts to show your appreciation to other community members.
With your input, this post could be even better 💗
Register Login


Advertisement